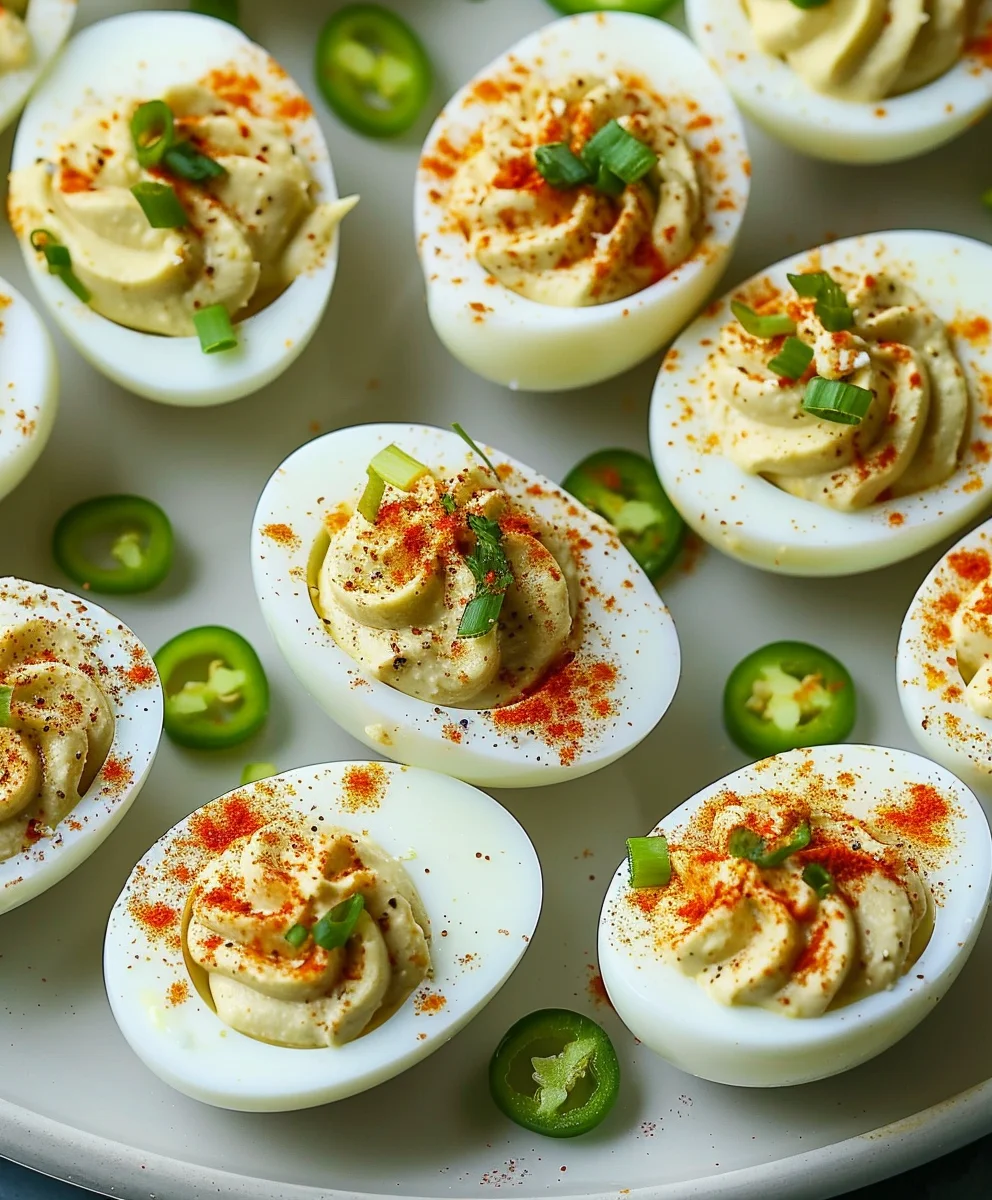
Mexican Deviled Eggs Recipe – are you ready to transform a classic party appetizer into an absolute flavor fiesta?
Prepare yourself for an explosion of zesty, spicy, and utterly delicious flavors that will have your guests asking for the recipe before they’ve even finished their first bite.
This isn’t just your grandma’s deviled egg; it’s a vibrant culinary journey inspired by the rich and diverse palate of Mexico. While the traditional deviled egg has European roots, our version lovingly embraces the bold spirit of Mexican cuisine, infusing it with ingredients like jalapeño, cilantro, and a touch of lime for a bright, irresistible kick. People adore this dish not only for its familiar creamy texture but also for the unexpected yet perfectly balanced blend of heat and freshness that makes this Mexican Deviled Eggs Recipe truly unforgettable.
It’s incredibly easy to make, visually stunning, and delivers a surprising punch of flavor that makes it a perfect addition to any gathering, from casual barbecues to elegant soirées. Get ready to impress!

Ingredients:
- 12 large eggs: I always opt for large eggs for a satisfying bite. Fresher eggs can sometimes be a bit trickier to peel, so if you have eggs that are a few days old, they might actually be a blessing in disguise for this recipe!
- ½ cup good quality mayonnaise: This is the creamy backbone of our deviled eggs. I prefer a full-fat, classic mayonnaise for the richest flavor and silkiest texture. You can experiment with light versions, but you might miss some of that lusciousness.
- 1 ripe avocado: Choose an avocado that yields gently to pressure but isn’t mushy. Hass avocados are usually my go-to for their creamy texture and rich flavor, perfect for complementing the eggs.
- 2 tablespoons finely minced red onion: Red onion adds a fantastic, pungent bite and a beautiful pop of color. Mince it as finely as you possibly can so it disperses evenly throughout the filling without overpowering any single bite.
- 1-2 tablespoons finely minced fresh jalapeño: This is where our “Mexican” twist really shines. For a milder kick, remove the seeds and white membrane completely. For more heat, leave a few seeds in! Always wash your hands thoroughly after handling.
- 2 tablespoons fresh cilantro, finely chopped: Fresh herbs are non-negotiable for vibrant flavor. Cilantro brings that quintessential fresh, herbaceous note that beautifully complements Mexican-inspired dishes.
- 1 tablespoon fresh lime juice: Not only does this brighten all the flavors, but it also helps to prevent the avocado from browning. Freshly squeezed is absolutely essential here; bottled just won’t do for that zingy pop.
- 1 teaspoon ground cumin: Cumin adds a warm, earthy, slightly smoky depth that is fundamental to Mexican cuisine. It really ties all the savory elements together.
- ½ teaspoon chili powder: I use a good quality, mild chili powder blend, not cayenne pepper. This provides a gentle warmth and a complex flavor profile without being overly spicy. Adjust to your preference!
- ¼ teaspoon smoked paprika: This adds another layer of subtle smokiness and a lovely reddish hue to our filling. It’s a small detail that makes a big difference.
- Salt and freshly ground black pepper to taste: Start with a pinch of salt and pepper and adjust as you go. Remember, you can always add more, but you can’t take it away!
- Optional garnishes:
- Extra finely chopped fresh cilantro
- A sprinkle of chili powder or smoked paprika
- Thin slices of fresh jalapeño or serrano pepper
- Crumbled cotija cheese: Adds a salty, crumbly texture that is truly delightful.
- A dash of your favorite hot sauce: For those who love an extra kick!
Perfecting the Hard-Boiled Eggs: The Foundation of Any Great Deviled Egg
The success of your Mexican Deviled Eggs hinges significantly on perfectly cooked and easily peelable hard-boiled eggs. This process, while seemingly simple, has a few critical steps that I’ve refined over years to ensure consistently beautiful results. I find that starting with eggs that are a few days old, rather than super fresh, tends to yield easier peeling. However, my method below works wonderfully even with fresher eggs.
-
Prepping the Eggs for Their Bath
First, carefully place your 12 large eggs in a single layer at the bottom of a large saucepan or pot. You want them to have enough room so they don’t crack against each other as the water boils. I always use a pot that allows the eggs to sit snugly in one layer without being too crowded. Gently does it here; no one wants a cracked egg before the cooking even begins!
-
The Cold Water Start Method
Now, fill the pot with cold tap water, ensuring that the water covers the eggs by at least one inch. This cold water start is my preferred method because it allows the eggs to heat up gradually with the water, which helps prevent cracking. I also like to add a pinch of salt to the water, which some believe can help prevent the whites from oozing out if an egg does crack, and a splash of white vinegar, which can help soften the eggshell, potentially aiding in easier peeling.
-
Bringing to a Gentle Boil
Place the pot on your stovetop over high heat. Bring the water to a rapid, rolling boil. As soon as the water reaches this point – you’ll see large, active bubbles breaking the surface – immediately turn off the heat. Do NOT let the eggs continue to boil vigorously, as this can lead to rubbery whites and that unappealing greenish ring around the yolk.
-
The Covered Rest Period
Once the heat is off, cover the pot tightly with a lid. Let the eggs sit undisturbed in the hot water for precisely 12-14 minutes. For large eggs, 12 minutes will give you a firm, fully cooked yolk that’s still creamy, while 14 minutes ensures a very firm yolk, which some prefer for deviled eggs. I usually aim for 12.5 minutes myself for that perfect balance.
-
The Crucial Ice Bath: Stop the Cooking!
As soon as your timer goes off, it’s critical to stop the cooking process immediately. Prepare a large bowl filled with ice water – I mean, plenty of ice! Using a slotted spoon, carefully transfer the hot eggs from the pot directly into the ice bath. Let them chill there for at least 10-15 minutes, or until they are completely cool to the touch. This rapid cooling not only stops the cooking, preventing that dreaded green sulfurous ring around the yolk, but it also causes the egg whites to contract, separating them from the shell membrane, which is key for easier peeling.
-
Peeling with Precision
Once the eggs are thoroughly chilled, it’s time to peel. I like to crack each egg gently all over by tapping it on a hard surface, like my countertop, or by gently rolling it between my palms. Then, starting from the larger end of the egg (where the air pocket usually is), carefully peel away the shell under cool running water. The water helps to wash away small bits of shell and gets under the membrane, making the peeling process much smoother. Be patient and gentle to avoid tearing the delicate egg whites. A perfectly peeled egg white is the canvas for our delicious filling!
-
Preparing the Whites for Filling
Once all the eggs are peeled, rinse them gently to ensure no tiny shell fragments remain. Pat them dry with a paper towel. Then, using a sharp knife, carefully slice each egg in half lengthwise. You want a clean cut right down the middle to create two equal halves. Gently scoop out the bright yellow yolks into a medium-sized mixing bowl. Place the hollowed-out egg white halves onto a serving platter or a clean plate, ready to be filled.
Crafting the Creamy, Flavorful Mexican Deviled Egg Filling
Now for the fun part – transforming those beautiful yolks into a rich, spicy, and utterly irresistible filling. This is where all our carefully selected Mexican-inspired ingredients come together to create a symphony of flavors.
-
Mashing the Yolks to Perfection
In the bowl with your scooped-out egg yolks, use a fork or a potato masher to mash them until they are completely smooth and crumbly. I like to get them as fine as possible at this stage to ensure a wonderfully uniform and creamy filling later on. There shouldn’t be any large lumps remaining.
-
Introducing the Creamy Avocado
Next, it’s time for our star ingredient: the avocado. Cut your ripe avocado in half, remove the pit, and scoop the flesh directly into the bowl with the mashed yolks. Using the same fork or masher, mash the avocado into the yolks until it’s very smooth and well combined. This is where the magic really starts to happen, creating that gorgeous pale green hue and adding a luxurious, buttery texture that sets these deviled eggs apart.
-
The Mayonnaise and Zesty Lime Juice
Add the ½ cup of good quality mayonnaise to the yolk and avocado mixture. Follow this with the 1 tablespoon of fresh lime juice. The lime juice is crucial here – it brightens the flavors incredibly and, as an added bonus, helps to slow down the oxidation process that causes avocado to brown. Give everything a good stir with a spatula or spoon until it’s beautifully creamy and homogenous. You want it to be a spreadable, almost mousse-like consistency.
-
Infusing the Mexican Spices and Aromatics
Now for the flavor enhancers! Add the 2 tablespoons of finely minced red onion, the 1-2 tablespoons of finely minced fresh jalapeño (remember to adjust the amount based on your preferred heat level), and the 2 tablespoons of finely chopped fresh cilantro. Sprinkle in the 1 teaspoon of ground cumin, ½ teaspoon of chili powder, and ¼ teaspoon of smoked paprika. These spices are the heart of our “Mexican” identity, providing warmth, earthiness, and a delightful aroma.
-
Seasoning and Taste Testing
Stir everything together thoroughly until all the ingredients are evenly distributed throughout the creamy mixture. Now for the most important step: taste testing! Take a small spoonful and assess the flavor. This is your chance to adjust the seasoning. Add salt and freshly ground black pepper to taste. Do you want more heat? Add a little more jalapeño or a dash of hot sauce. More tang? Another squeeze of lime. More depth? A tiny bit more cumin. Don’t be shy here; adjusting seasoning is key to a truly delicious dish. You want a balanced flavor profile that sings with creamy, tangy, and subtly spicy notes.
Filling, Garnishing, and Serving Your Masterpiece
With our filling perfected, it’s time to bring these Mexican Deviled Eggs to life. This is where your presentation can truly shine, making them as appealing to the eye as they are to the palate.
-
Filling the Egg Whites: Spoon or Pipe!
You have two main options for filling your egg whites, and both work wonderfully.
Using a Spoon for a Rustic Charm:
If you prefer a more rustic, home-style look, simply take a small spoon and generously dollop the creamy avocado-yolk filling into each hollowed-out egg white half. You can mound it high for an abundant look, spreading it gently with the back of the spoon.
Piping for an Elegant Presentation:
For a more elegant and decorative presentation, I highly recommend using a piping bag fitted with a star tip (like an Ateco 826 or Wilton 1M) or even a simple round tip. Place the piping tip into the end of the bag, then fold the top edges of the bag over to create a cuff. Use a spatula to carefully transfer all of your delicious filling into the piping bag. Twist the top of the bag to seal it and push the filling down towards the tip. Hold the egg white half steady with one hand and, with your other hand, gently squeeze the piping bag, starting from the center of the egg white and creating a beautiful swirl or mound of filling. The star tip creates lovely ridges, while a round tip gives a smooth, classic dome.
-
The Final Flourish: Garnishing for Impact
Once all your egg white halves are filled, it’s time for the garnishes. These aren’t just for looks; they add extra layers of flavor and texture that truly elevate the dish.
- Fresh Cilantro: A final sprinkle of finely chopped fresh cilantro over each deviled egg instantly brightens them up and reinforces that fresh, herbaceous flavor.
- Chili Powder/Smoked Paprika: A light dusting of chili powder or smoked paprika not only adds a beautiful contrasting color but also a subtle whisper of extra spice and smokiness. I often use a small sieve to get a perfectly even sprinkle.
- Jalapeño Slices: For those who love a bit more visual and textual kick, a very thin slice of fresh jalapeño placed atop each egg is a fantastic touch. Just be mindful of the heat level for your guests!
- Crumbled Cotija Cheese: If you’re going for maximum flavor and authenticity, a sprinkle of crumbled cotija cheese adds a salty, slightly tangy, and crumbly counterpoint that is simply divine.
- Hot Sauce Drizzle: For the truly daring, a tiny, artful drizzle of your favorite Mexican-style hot sauce provides a direct hit of heat and flavor.
Arrange your beautifully garnished Mexican Deviled Eggs on your serving platter. They look best when arranged neatly, showcasing their vibrant colors and perfect swirls of filling.
-
Serving and Storage Tips
Serving: Mexican Deviled Eggs are best served chilled or at cool room temperature. If you’ve just made them, a quick 30-minute chill in the refrigerator will help them firm up slightly and allow the flavors to meld beautifully. These are perfect as an appetizer for any gathering, a potluck contribution, or a festive snack.
Storage: If you have any leftovers (which I highly doubt you will!), place them in an airtight container. Lay a piece of plastic wrap directly on top of the deviled eggs before sealing the container to minimize air exposure, which helps prevent the avocado from browning. They will keep well in the refrigerator for up to 2 days. While the flavor might still be good after that, the avocado may start to discolor, and the texture can change slightly. I find they are at their absolute peak within 24 hours of preparation.
Make-Ahead Tip: You can hard-boil and peel the eggs a day in advance and store them in the refrigerator. You can also prepare the yolk and avocado filling (without the cilantro) a few hours ahead, storing it in an airtight container with plastic wrap pressed directly onto the surface to prevent browning. Just before serving, stir in the fresh cilantro, adjust seasoning, fill the egg whites, and garnish. This significantly streamlines the process on the day of your event!
Conclusion:
Why This Recipe is a Must-Try
Well, friends, we’ve reached the end of our culinary journey with what I truly believe is one of the most exciting and delicious appetizers you’ll ever create. If you’ve been searching for a dish that effortlessly combines familiar comfort with an electrifying kick, then look no further. This isn’t just a slight variation on a classic; it’s a complete flavor transformation that will tantalize your taste buds and impress everyone lucky enough to try them. The creamy texture of the yolk filling, perfectly balanced with the bright zest of lime, the smoky depth of chipotle, and the fresh whisper of cilantro, creates an unforgettable experience. It’s the kind of dish that disappears quickly from any party platter, leaving guests asking for the recipe. Forget bland and predictable; these deviled eggs are vibrant, bold, and utterly irresistible, proving that a little creativity can elevate a simple ingredient into something truly extraordinary. I promise you, once you taste these, you’ll wonder how you ever settled for the traditional version. They represent the perfect fusion of classic comfort and zesty Mexican-inspired flavors, making them a standout addition to any spread or a delightful snack any day of the week. Get ready for a flavor fiesta!
Creative Twists and Serving Ideas
Now, let’s talk about making these beauties truly your own and how best to enjoy them. While they are spectacular as they are, don’t hesitate to play around with the garnishes and even some of the ingredients to suit your personal preferences. For a simple yet elegant finish, a dusting of smoked paprika, an extra sprinkle of fresh cilantro, or a tiny sliver of a thinly sliced jalapeño or serrano pepper can add both visual appeal and an extra flavor dimension. Want to take it up a notch? Consider crumbling a little crispy bacon or a sprinkle of toasted pumpkin seeds (pepitas) over the top just before serving for added texture. If you’re a cheese lover, a fine crumble of cotija cheese or even a very mild queso fresco can provide a lovely salty counterpoint. For those who crave more heat, don’t be shy about adding a bit more adobo sauce from the chipotles, or even finely mincing a bit of fresh serrano pepper into the yolk mixture. If you prefer a milder approach, reduce the chipotle and focus on a generous squeeze of lime and plenty of fresh herbs. These versatile eggs aren’t just for parties; they make a fantastic side dish for your next taco night, a vibrant addition to a build-your-own burrito bowl spread, or even a delightful snack for a lazy afternoon. Imagine them nestled amongst a vibrant platter of fresh salsa, guacamole, and tortilla chips, truly setting the scene for a festive gathering. You could even serve them alongside grilled chicken or fish for an added zing. The possibilities are truly endless when you embrace the spirit of this delicious fusion, allowing you to tailor them perfectly to your palate and your occasion.
Your Turn: Share Your Culinary Creations!
So, my friends, it’s your turn! I genuinely hope you feel inspired to head into your kitchen and whip up a batch of these incredible deviled eggs. Don’t be intimidated; the process is straightforward, and the rewards are absolutely delicious. Trust me when I say that making this Mexican Deviled Eggs Recipe will bring a burst of sunshine and flavor to your table, whether you’re hosting a big celebration or just treating yourself and your loved ones to something special. There’s a unique satisfaction that comes from creating something so flavorful from scratch, and even more joy in sharing it. These aren’t just an appetizer; they’re an experience waiting to happen. Once you’ve given them a try, I would absolutely love to hear about your experience! Did you add a unique topping? Did you discover a new favorite garnish? Did they disappear faster than you could say “olé”? Please share your stories, your photos, and your feedback. Your culinary adventures inspire me, and I can’t wait to see how you make this recipe your own. Get cooking, have fun, and prepare to fall in love with your new favorite appetizer! Happy cooking, everyone!
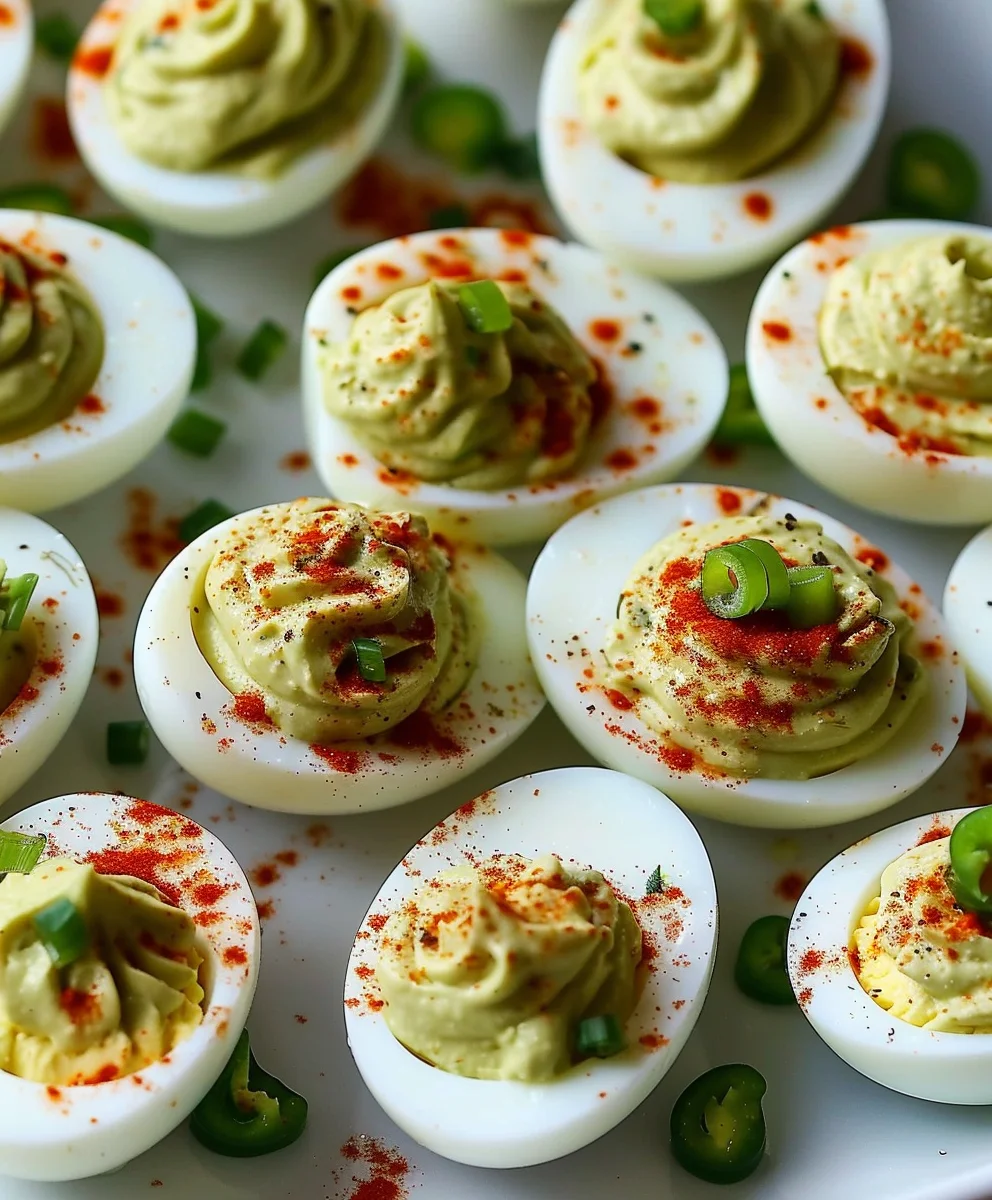
Spicy Mexican Deviled Eggs – Easy & Flavorful Appetizer!
Transform a classic party appetizer into a flavor fiesta with these easy and delicious Mexican Deviled Eggs. This vibrant recipe infuses traditional deviled eggs with zesty, spicy notes from jalapeño, cilantro, lime, and avocado for an unforgettable kick.
Ingredients
-
12 large eggs, hard-boiled and peeled
-
1 ripe avocado, mashed
-
3 tablespoons mayonnaise
-
2 tablespoons Mexican crema (or sour cream/Greek yogurt)
-
1 jalapeño pepper, finely diced (seeds removed for less heat)
-
2 tablespoons lime juice
-
2 tablespoons fresh cilantro, chopped
-
1 teaspoon ground cumin
-
0.5 teaspoon chili powder
-
0.5 teaspoon garlic powder
-
Salt and pepper, to taste
-
Smoked paprika, for garnish
-
Cilantro leaves, for garnish
-
Jalapeño slices, for garnish
-
Lime wedges, for garnish
Instructions
- Step 1
Place 12 eggs in a saucepan, cover with cold water by 1 inch. Add a pinch of salt and a splash of vinegar. Bring to a rolling boil, then turn off heat, cover, and let sit for 12-14 minutes. - Step 2
Immediately transfer eggs to an ice bath for 10-15 minutes until completely cool. Peel gently under cool running water. Rinse and pat dry. - Step 3
Slice each egg in half lengthwise. Scoop yolks into a medium bowl. Place hollowed whites on a platter. - Step 4
Mash yolks until smooth. Add mashed avocado, mayonnaise, Mexican crema (or sour cream/Greek yogurt), and lime juice. Mix until creamy and smooth. - Step 5
Stir in minced red onion, jalapeño, cilantro, cumin, chili powder, and garlic powder. Season with salt and pepper to taste, adjusting flavors as desired. - Step 6
Spoon or pipe the filling into each egg white half. Garnish with smoked paprika, cilantro leaves, jalapeño slices, or lime wedges. - Step 7
Serve chilled or at cool room temperature. Store leftovers in an airtight container for up to 2 days; place plastic wrap directly on eggs to prevent browning. Can make eggs ahead and filling ahead (without cilantro) for easier prep.
Important Information
Nutrition Facts (Per Serving)
It is important to consider this information as approximate and not to use it as definitive health advice.
Allergy Information
Please check ingredients for potential allergens and consult a health professional if in doubt.