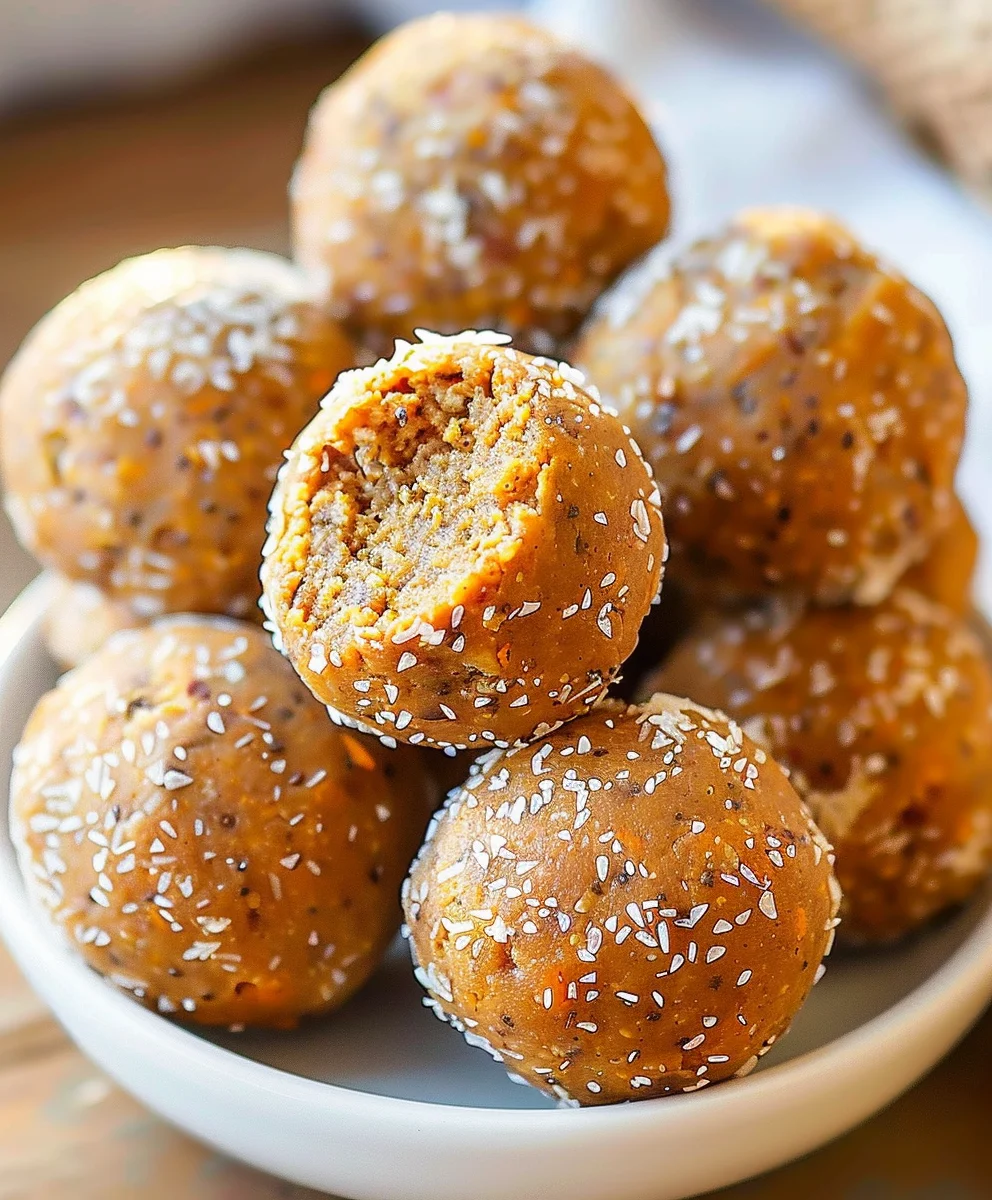
No Bake Healthy Pumpkin Pie Energy Balls are truly about to become your new favorite autumn (or all-year-round!) indulgence. I invite you to imagine capturing all the cozy, spiced magic of a classic pumpkin pie, but in a perfectly portioned, guilt-free package that requires absolutely no oven time. This isn’t just a snack; it’s a delightful revelation for busy individuals, health-conscious foodies, and anyone craving a taste of fall without the fuss. I find myself constantly reaching for these delectable bites!
Why We Love Convenient & Wholesome Snacking
In our incredibly fast-paced world, the demand for convenient, yet genuinely nutritious options has never been higher. That’s precisely where these delightful energy balls shine. While traditional pumpkin pie holds a cherished place in our hearts and on holiday tables, these innovative treats offer a modern, pragmatic twist, reflecting a growing movement towards functional foods that nourish and truly satisfy. I believe they embody the essence of wholesome snacking, providing a quick burst of energy without compromising on exquisite flavor or your dietary goals.
What makes these particular No Bake Healthy Pumpkin Pie Energy Balls so universally adored? It’s their irresistible combination of rich pumpkin flavor, warm cinnamon, nutmeg, and ginger spices, paired with a perfectly chewy texture that simply melts in your mouth. Furthermore, their incredible ease of preparation means you can whip up a batch in mere minutes, making them ideal for meal prep, a quick grab-and-go breakfast, a post-workout refuel, or simply a delightful treat to curb those afternoon cravings. Get ready to fall deeply in love with the simplest, most delicious way to enjoy the beloved flavors of pumpkin pie, anytime you desire.

Ingredients:
- 1 cup (90g) old-fashioned rolled oats: I absolutely love using rolled oats for these No Bake Healthy Pumpkin Pie Energy Balls because they provide such a wonderful, hearty texture and a good source of fiber. If you’re sensitive to gluten, just make sure to grab a certified gluten-free variety.
- ½ cup (120g) pure pumpkin puree: This is the star of our pumpkin pie flavor! Please, please, please make sure you’re using pure pumpkin puree, not pumpkin pie filling, which already has added sugars and spices that we’ll be adding ourselves to get that perfect balance.
- ½ cup (128g) creamy almond butter: I find creamy almond butter offers a beautifully neutral base that allows the pumpkin and spices to shine. However, if you prefer, cashew butter works wonderfully too, or even a good quality peanut butter if you don’t mind a slightly stronger flavor profile. Ensure it’s a natural, unsweetened variety for the healthiest outcome.
- ¼ cup (60ml) pure maple syrup: For that touch of natural sweetness! Maple syrup provides a lovely caramel note that complements the pumpkin perfectly. You could also use honey, but I find maple syrup offers a slightly more autumnal flavor.
- 1 teaspoon pumpkin pie spice: This is where the magic happens for that classic pumpkin pie flavor! It’s usually a blend of cinnamon, ginger, nutmeg, and cloves.
- ½ teaspoon ground cinnamon: I like to add a little extra cinnamon because its warmth really deepens the flavor profile of our No Bake Healthy Pumpkin Pie Energy Balls.
- ¼ teaspoon ground ginger: Just a touch of ginger provides a subtle kick and brightens the overall spice blend.
- Pinch of ground cloves: A tiny bit goes a long way with cloves, adding a rich, aromatic depth that truly brings home the “pie” in pumpkin pie.
- 1 teaspoon pure vanilla extract: Vanilla is a flavor enhancer that pulls all our beautiful autumnal spices together. Don’t skip it!
- 2 tablespoons chia seeds: These tiny powerhouses are not only a fantastic source of omega-3s, fiber, and protein, but they also help bind our energy balls together, creating a wonderful texture and making them incredibly satisfying.
- 2 tablespoons ground flaxseed: Another incredible binder and nutritional booster! Ground flaxseed adds healthy fats and more fiber, contributing to the “healthy” aspect of our No Bake Healthy Pumpkin Pie Energy Balls.
-
Optional coatings:
- ¼ cup shredded unsweetened coconut (my personal favorite for a tropical twist!)
- ¼ cup finely chopped pecans or walnuts (for extra crunch and autumnal flair)
- 2 tablespoons cocoa powder (for a chocolatey twist!)
Crafting the Heart of Your No Bake Healthy Pumpkin Pie Energy Balls: The Wet Ingredients Blend
- Gather Your Tools and Begin the Aromatic Journey: Before we dive into mixing, I always like to ensure all my ingredients are measured out and ready to go. It makes the process so much smoother and more enjoyable! Grab a large mixing bowl; trust me, you’ll want plenty of room to stir comfortably. Now, let’s start with the liquid gold. Into your bowl, I want you to spoon in your ½ cup of pure pumpkin puree. Feel free to use a rubber spatula to get every last bit out of the measuring cup – we don’t want to waste any of that autumnal goodness!
- Introduce the Creamy Foundation: Next up, add your ½ cup of creamy almond butter. This is going to provide the richness and a significant part of the binding power for our No Bake Healthy Pumpkin Pie Energy Balls. If your almond butter has separated, give it a good stir in its jar before adding it to your bowl to ensure it’s nice and smooth. This helps immensely with achieving a uniform consistency in your energy balls.
- Sweeten Naturally and Add Vanilla: Pour in your ¼ cup of pure maple syrup. Its subtle sweetness and distinct flavor are absolutely perfect for this recipe. Follow that with your 1 teaspoon of pure vanilla extract. Vanilla, in my opinion, is a non-negotiable flavor enhancer that truly rounds out all the other ingredients, adding a layer of warmth and depth.
- Unleash the Pumpkin Pie Magic with Spices: Now for the most exciting part for me: the spices! Add your 1 teaspoon of pumpkin pie spice, ½ teaspoon of ground cinnamon, ¼ teaspoon of ground ginger, and that crucial pinch of ground cloves. As you add them, take a moment to inhale deeply – the aroma of these spices together is just intoxicating and instantly transports you to a cozy, autumn kitchen.
- Whisk Until Beautifully Combined: With all the wet ingredients and spices in your bowl, grab a sturdy whisk or a rubber spatula. I recommend whisking vigorously for about 1-2 minutes. Your goal here is to achieve a completely smooth, homogenous mixture where the vibrant orange of the pumpkin puree is uniformly blended with the creamy nut butter and the deep hues of the spices. You shouldn’t see any streaks of separate ingredients. This step is critical because it ensures every single one of our No Bake Healthy Pumpkin Pie Energy Balls will be bursting with balanced pumpkin pie flavor!
Building Body and Nutrition: Incorporating the Dry Ingredients
- Fold in the Oats for Texture and Structure: Once your wet mixture is perfectly smooth and aromatic, it’s time to introduce the main dry component: the oats. Gently fold in your 1 cup of old-fashioned rolled oats. I prefer using rolled oats over instant oats because they retain a bit more texture, giving our energy balls a satisfying chewiness. Use your rubber spatula to carefully mix the oats into the pumpkin mixture. You want to ensure every oat flake gets coated without overmixing.
- Boost the Nutrition with Chia and Flax Seeds: Now, let’s add those nutritional powerhouses! Sprinkle in your 2 tablespoons of chia seeds and 2 tablespoons of ground flaxseed. These tiny seeds are incredible for providing healthy fats, fiber, and omega-3s, truly earning the “healthy” in No Bake Healthy Pumpkin Pie Energy Balls. Beyond their nutritional benefits, they also play a vital role in binding the mixture together as they absorb moisture. Continue to fold everything together with your spatula.
-
Achieving the Perfect Dough Consistency: Keep mixing until all the dry ingredients are fully incorporated into the wet mixture. At this stage, you’re looking for a thick, slightly sticky “dough” that holds together when pressed. It should be cohesive enough that if you were to pinch a small amount between your fingers, it would stick together without crumbling, but not so wet that it feels sloppy. This is the foundation for perfectly formed No Bake Healthy Pumpkin Pie Energy Balls.
-
Quick Troubleshooting Tip for Consistency:
- If your mixture seems too dry and crumbly: This can sometimes happen depending on the consistency of your pumpkin puree or nut butter. Don’t fret! Add a tiny bit more maple syrup (about ½ teaspoon at a time) or a tiny splash of water (start with a ¼ teaspoon) until it reaches the desired stickiness.
- If your mixture seems too wet and sticky: Conversely, if your mixture is overly wet and feels too loose, you can gradually add a bit more rolled oats or ground flaxseed (start with 1 tablespoon of either) until it firms up enough to be rollable. Remember, it will firm up more in the fridge!
-
The Essential Chill: Firming Up for Flawless No Bake Healthy Pumpkin Pie Energy Balls
- Cover and Refrigerate: This step, my friends, is absolutely crucial for the success of your No Bake Healthy Pumpkin Pie Energy Balls. Once you’ve achieved that ideal dough-like consistency, cover your bowl tightly with plastic wrap. Pop the bowl into your refrigerator and let it chill for at least 30 minutes. I often let mine chill for an hour, or even longer if I’m preparing them ahead of time.
-
Why Chilling is Non-Negotiable:
-
Binding Power:
During this chilling period, the oats, chia seeds, and flaxseed will continue to absorb moisture from the pumpkin puree and nut butter. This absorption process is what helps the mixture firm up significantly, making it much easier to roll into neat, sturdy balls without them falling apart or being too sticky to handle.
-
Flavor Development:
Chilling also allows the flavors to meld and deepen. The pumpkin, spices, and sweetness will have time to truly get to know each other, resulting in a more harmonious and pronounced pumpkin pie taste in every bite of your No Bake Healthy Pumpkin Pie Energy Balls.
-
Perfect Texture:
The cold helps create that satisfying, dense, and chewy texture that we adore in energy balls. Warm dough tends to be softer and more prone to crumbling or mushiness.
Seriously, resist the urge to skip or shorten this step! It’s what transforms a good mixture into truly great No Bake Healthy Pumpkin Pie Energy Balls.
-
Rolling into Delightful Bites: Shaping Your No Bake Healthy Pumpkin Pie Energy Balls
- Prepare Your Rolling Station: Once your mixture has sufficiently chilled and firmed up, retrieve the bowl from the refrigerator. If you plan to add an optional coating, now is the time to prepare your shallow dishes or plates. I like to spread out my shredded coconut, chopped nuts, or cocoa powder on separate plates so they’re ready for dipping. This makes the rolling process very efficient.
- Portioning for Uniformity: Using a small cookie scoop (about 1-tablespoon capacity) is my secret weapon for perfectly uniform energy balls. If you don’t have a scoop, simply use a regular tablespoon measure. Scoop out a portion of the chilled mixture.
- The Rolling Technique: Place the scooped portion into the palm of your hand and gently, but firmly, roll it between your palms to form a smooth, compact ball. Aim for a size that’s easy to pop into your mouth as a quick snack – usually about 1 to 1.5 inches in diameter. The cold mixture should be much easier to handle now, less sticky, and should hold its shape beautifully. As you roll, you’ll feel the texture – dense, slightly chewy, and wonderfully fragrant with all those autumn spices. This is the satisfying part of making your own No Bake Healthy Pumpkin Pie Energy Balls!
- Optional Coatings for Extra Flair and Flavor: If you’re using an optional coating, immediately after rolling each ball, gently place it into your chosen coating (shredded coconut, chopped pecans, or cocoa powder). Roll the ball around in the coating, pressing lightly, until it’s evenly covered. I absolutely adore how the coconut flakes cling to the surface, adding both texture and a subtle tropical sweetness that surprisingly complements the pumpkin spice. Chopped nuts add a fantastic crunch and an extra layer of nutty flavor. Cocoa powder provides a delightful bittersweet contrast. This step not only adds visual appeal but also enhances the overall flavor and mouthfeel of your No Bake Healthy Pumpkin Pie Energy Balls.
- Arranging for Final Firming: As you finish rolling and coating each ball, place it on a parchment-lined baking sheet or a plate. Continue this process until you’ve used up all the pumpkin energy ball mixture. You should yield approximately 18-24 delicious energy balls, depending on their size.
Storing and Savoring Your No Bake Healthy Pumpkin Pie Energy Balls
- Final Chill Before Enjoying: While technically ready to eat right away, I find that a final 15-minute chill in the refrigerator helps to really set the coatings (if used) and firm up the energy balls even further. This step also allows the flavors to truly reach their peak, making for an even more satisfying snack.
-
Optimal Storage for Freshness: Once completely chilled and firm, transfer your beautiful No Bake Healthy Pumpkin Pie Energy Balls into an airtight container.
-
Refrigeration:
Store them in the refrigerator for up to 1-2 weeks. This is usually my go-to for daily snacking. They’re perfect for a quick breakfast, a post-workout refuel, or a healthy dessert alternative.
-
Freezing for Longer Shelf Life:
For longer storage, these energy balls freeze wonderfully! Place them in a single layer on a parchment-lined baking sheet and freeze for about an hour until solid. Then, transfer the frozen balls to a freezer-safe airtight container or a heavy-duty freezer bag. They will keep well in the freezer for up to 2-3 months. When you’re ready to enjoy one, simply grab it from the freezer and let it thaw at room temperature for 10-15 minutes, or pop it directly into your mouth for a slightly firmer, colder treat!
I hope you absolutely love these easy, delicious, and incredibly wholesome No Bake Healthy Pumpkin Pie Energy Balls as much as I do! They are truly the perfect grab-and-go snack for anyone looking for a burst of healthy pumpkin pie flavor without any baking required.
-

Conclusion:
Well, there you have it, my friends! We’ve journeyed through the simple, delightful process of creating what I truly believe will become a staple in your healthy snacking repertoire. After all, who can resist the allure of pumpkin pie flavors, especially when they come in such a convenient, nutritious, and incredibly easy-to-make package? These No Bake Healthy Pumpkin Pie Energy Balls are more than just a recipe; they’re a declaration that healthy eating can be utterly delicious, effortlessly quick, and incredibly satisfying. I’ve personally come to rely on these little powerhouses for everything from a pre-workout boost to a guilt-free evening treat, and I’m confident you’ll find them just as indispensable.
The Irresistible Allure of Wholesome Goodness
What makes this recipe an absolute must-try? For starters, it’s the perfect harmony of autumnal spices, creamy pumpkin, and natural sweetness, all rolled into a bite-sized ball that feels like a decadent dessert but fuels you like a champion. Forget about complicated baking steps or waiting for ovens to preheat; this is instant gratification at its finest. In a world where time is a precious commodity, the “no-bake” aspect is nothing short of revolutionary. You can whip up a batch in less time than it takes to brew a cup of coffee, and have a week’s worth of healthy snacks ready to grab and go. Plus, knowing that every single ingredient is contributing to your well-being, rather than detracting from it, adds an unparalleled layer of enjoyment. We’re talking fiber-rich oats, vitamin-packed pumpkin, and natural sweeteners that keep your energy stable, avoiding those unwanted sugar crashes.
Beyond the Basic Ball: Serving Suggestions and Creative Variations
Now that you’ve mastered the core recipe, let’s talk about how to make these incredible energy balls truly your own. While they’re utterly fantastic straight from the fridge, consider serving them alongside your morning coffee or as a post-dinner healthy “dessert” with a sprinkle of cinnamon on top. They’re also phenomenal packed in lunchboxes, offering a much-needed energy kick during a busy workday or a school afternoon. For a fun twist, try rolling some in finely chopped pecans or walnuts for an added crunch and nutty flavor. A dusting of shredded coconut offers a tropical counterpoint to the pumpkin spice, making them even more versatile. If you’re feeling adventurous, a tiny drizzle of melted dark chocolate can elevate them to an almost gourmet status – just be sure to choose a high-quality, low-sugar variety. For those looking for an extra protein punch, a scoop of your favorite vanilla or unflavored protein powder can be mixed into the dough, adjusting the wet ingredients slightly to maintain the perfect rollable consistency. Don’t be afraid to experiment with other spices too; a pinch of cardamom or a touch of black pepper can add an unexpected depth of flavor.
So, please, take a leap of faith into the world of delicious, easy, and healthy snacking. I genuinely believe that once you try these No Bake Healthy Pumpkin Pie Energy Balls, they’ll become a cherished part of your culinary routine. They truly embody the spirit of mindful eating without sacrificing a single ounce of flavor or fun. I can’t wait to hear about your experience! Did you stick to the original, or did you add your own creative spin? What was your favorite part about making and eating them? Share your thoughts, your photos, and your triumphs – because the best part of cooking is connecting and sharing the joy it brings. Happy rolling, and enjoy every wholesome, pumpkin-spiced bite!
No-Bake Healthy Pumpkin Pie Energy Balls
Capture the cozy magic of classic pumpkin pie in perfectly portioned, guilt-free energy balls. These quick and nutritious bites are ideal for busy individuals, offering a burst of fall flavor without any oven time.
Ingredients
-
2 tablespoons paleo flour
-
1 tablespoon vanilla protein powder
-
1 cup cashew butter
-
1 tablespoon maple syrup
-
2 tablespoons pumpkin puree
-
1 tablespoon pumpkin pie spice
Instructions
-
Step 1
In a large mixing bowl, combine the 2 tablespoons pumpkin puree, 1 cup cashew butter, 1 tablespoon maple syrup, and 1 tablespoon pumpkin pie spice. Whisk vigorously until the mixture is smooth and well combined. -
Step 2
Add the 2 tablespoons paleo flour and 1 tablespoon vanilla protein powder to the wet mixture. Use a rubber spatula to mix until a thick, cohesive dough forms. Ensure all dry ingredients are fully incorporated. -
Step 3
Cover the bowl tightly with plastic wrap and refrigerate for at least 30 minutes. This chilling process helps the mixture firm up, making it easier to roll and allowing the flavors to meld beautifully. -
Step 4
Once chilled, use a small cookie scoop (about 1-tablespoon capacity) or a regular tablespoon to portion out the mixture. Roll each portion between your palms to form smooth, compact balls, approximately 1 to 1.5 inches in diameter. -
Step 5
Place the rolled energy balls on a parchment-lined plate or baking sheet. For best results, chill for another 15 minutes before serving. Store the No-Bake Healthy Pumpkin Pie Energy Balls in an airtight container in the refrigerator for up to 1-2 weeks, or freeze for up to 2-3 months.
Important Information
Nutrition Facts (Per Serving)
It is important to consider this information as approximate and not to use it as definitive health advice.
Allergy Information
Please check ingredients for potential allergens and consult a health professional if in doubt.