Crispy Coconut Chicken Tenders: Prepare to be transported to a tropical paradise with every single bite! Forget everything you thought you knew about chicken tenders because this recipe is about to redefine your definition of delicious. Imagine succulent, juicy chicken enveloped in a shatteringly crisp coconut crust – it’s a symphony of textures and flavors that will have your taste buds singing.
While the exact origins of coconut-crusted chicken are difficult to pinpoint, the combination of coconut and chicken is a staple in many Southeast Asian and Caribbean cuisines. These regions have long celebrated the versatility of coconut, using it in everything from savory curries to sweet desserts. This recipe for crispy coconut chicken tenders draws inspiration from these culinary traditions, offering a delightful fusion of global flavors in a familiar and comforting form.
What makes these tenders so irresistible? It’s the perfect balance of sweet and savory. The subtle sweetness of the coconut complements the savory chicken beautifully, while the crispy coating provides a satisfying crunch that keeps you coming back for more. Plus, they’re incredibly easy to make! Whether you’re looking for a quick weeknight dinner or a crowd-pleasing appetizer, these tenders are a guaranteed hit. Get ready to experience chicken tenders like never before!

Ingredients:
- 1.5 lbs boneless, skinless chicken breasts, cut into 1-inch thick strips
- 1 cup all-purpose flour
- 1 teaspoon salt
- 1/2 teaspoon black pepper
- 1/2 teaspoon garlic powder
- 1/4 teaspoon paprika
- 2 large eggs, beaten
- 2 cups sweetened shredded coconut
- 1 cup panko breadcrumbs
- 1/2 cup vegetable oil, for frying
- Optional: Sweet chili sauce, for dipping
Preparing the Chicken and Dredging Station
- First, let’s get our chicken ready. Pat the chicken strips dry with paper towels. This is crucial! Excess moisture will prevent the coating from adhering properly, and we want that crispy coconut crust to stick like glue.
- In a shallow dish, combine the flour, salt, pepper, garlic powder, and paprika. Whisk it all together until it’s evenly distributed. This is our dry dredge, and it’s going to give the chicken a nice base for the egg and coconut mixture to cling to.
- In a second shallow dish, beat the eggs until they are light and frothy. Make sure there are no streaks of yolk or white remaining. A well-beaten egg ensures a smooth and even coating.
- In a third shallow dish, combine the shredded coconut and panko breadcrumbs. Mix them thoroughly. The panko adds extra crispness, while the coconut provides that signature flavor and texture. I sometimes like to add a pinch of sugar to this mixture for a little extra caramelization during frying, but that’s totally optional!
- Now, set up your dredging station. It should look like this: chicken strips, flour mixture, egg wash, coconut-panko mixture. This assembly line approach will make the coating process much smoother and more efficient.
Coating the Chicken
- Take one chicken strip at a time and dredge it in the flour mixture, making sure to coat it completely on all sides. Shake off any excess flour. We don’t want a thick, pasty layer of flour; just a light dusting.
- Next, dip the floured chicken strip into the egg wash, ensuring it’s fully submerged. Let any excess egg drip off. Again, we want a thin, even coating, not a soggy mess.
- Finally, dredge the egg-coated chicken strip in the coconut-panko mixture, pressing gently to help the mixture adhere. Make sure the chicken is completely covered in coconut and panko. This is where the magic happens! The more coconut and panko that sticks, the crispier and more flavorful your chicken tenders will be.
- Place the coated chicken strip on a clean plate or baking sheet. Repeat this process with the remaining chicken strips until they are all coated.
- Pro Tip: Once all the chicken is coated, I like to let it rest in the refrigerator for about 15-20 minutes. This helps the coating to set and adhere even better during frying. It’s not essential, but it definitely makes a difference in the final crispiness.
Frying the Chicken
- Heat the vegetable oil in a large skillet over medium heat. You want the oil to be hot enough to cook the chicken quickly and evenly, but not so hot that it burns the coconut. A good way to test the oil temperature is to drop a small piece of breadcrumb into the oil. If it sizzles and turns golden brown in about 30 seconds, the oil is ready.
- Carefully place the coated chicken strips into the hot oil, being careful not to overcrowd the skillet. Overcrowding will lower the oil temperature and result in soggy chicken. I usually fry about 3-4 strips at a time, depending on the size of my skillet.
- Fry the chicken for about 3-4 minutes per side, or until it’s golden brown and cooked through. The internal temperature of the chicken should reach 165°F (74°C). Use a meat thermometer to ensure it’s cooked properly.
- Once the chicken is cooked, remove it from the skillet and place it on a wire rack lined with paper towels to drain any excess oil. This is crucial for achieving that perfect crispy texture.
- Repeat the frying process with the remaining chicken strips, adding more oil to the skillet as needed.
Serving and Enjoying
- Serve the crispy coconut chicken tenders immediately while they are still hot and crispy.
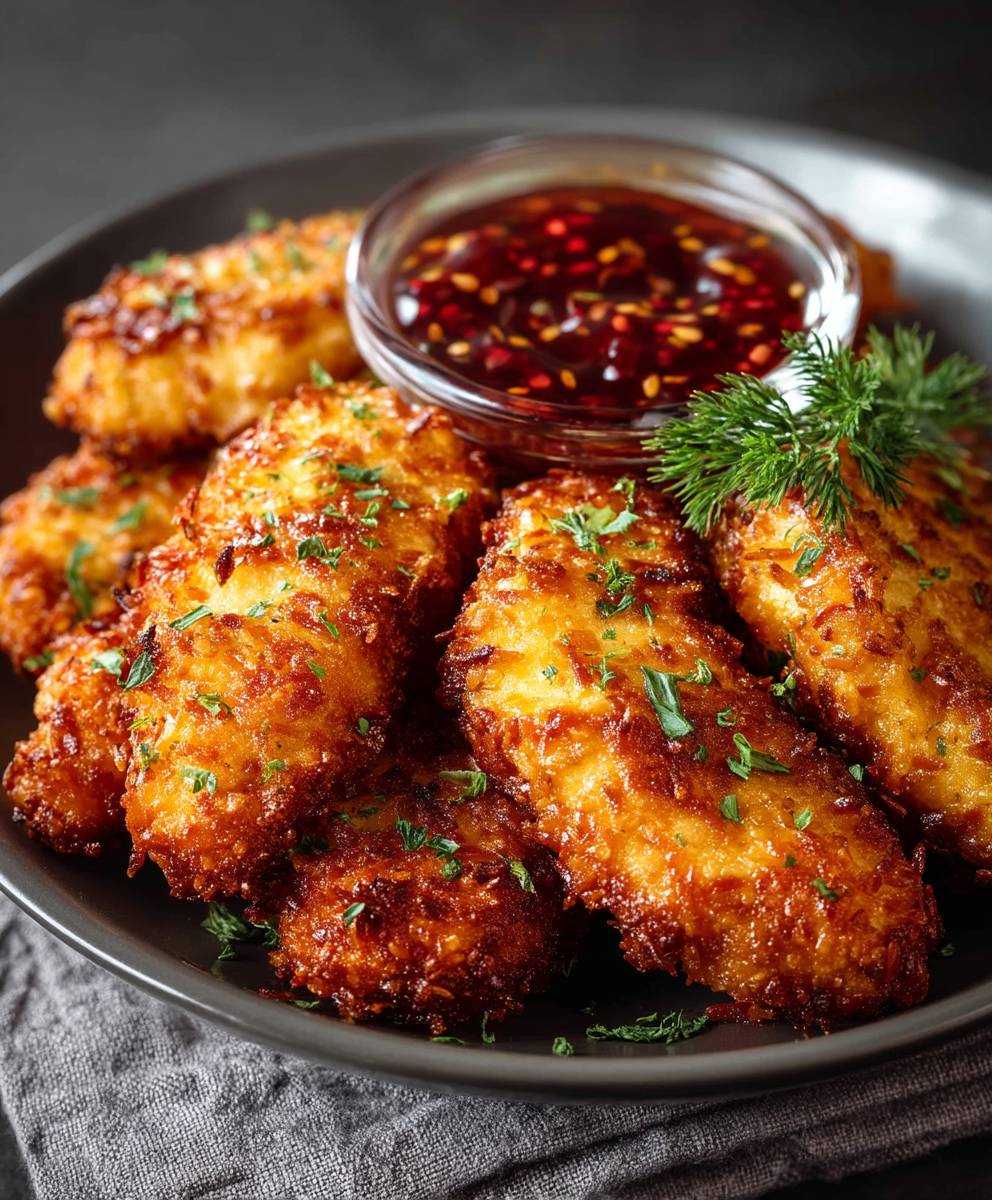
- I love to serve these with sweet chili sauce for dipping. The sweetness and slight heat of the sauce complement the coconut flavor perfectly. Other dipping sauces that would work well include honey mustard, ranch dressing, or even a simple sriracha mayo.
- These chicken tenders are also great served as part of a larger meal. They pair well with rice, salad, or roasted vegetables.
- Storage: If you have any leftovers (which is unlikely!), store them in an airtight container in the refrigerator. They will lose some of their crispiness, but they can be reheated in the oven or air fryer to restore some of the texture.
Tips for Extra Crispy Chicken
- Don’t skip the resting period: Letting the coated chicken rest in the refrigerator for 15-20 minutes helps the coating adhere better and results in a crispier final product.
- Use a wire rack: Placing the fried chicken on a wire rack allows air to circulate around it, preventing it from becoming soggy.
- Don’t overcrowd the skillet: Overcrowding lowers the oil temperature and results in soggy chicken. Fry in batches to maintain the oil temperature.
- Double dredge: For an extra thick and crispy coating, you can double dredge the chicken. After the first coating of flour, egg, and coconut, repeat the process one more time.
- Use fresh oil: Old or used oil can impart a bad flavor to the chicken. Use fresh oil for the best results.
Variations and Substitutions
- Spicy Coconut Chicken: Add a pinch of cayenne pepper or red pepper flakes to the flour mixture for a spicy kick.
- Unsweetened Coconut: If you prefer a less sweet flavor, you can use unsweetened shredded coconut. You may want to add a little sugar to the coconut-panko mixture to compensate.
- Gluten-Free: Use gluten-free flour and gluten-free panko breadcrumbs to make this recipe gluten-free.
- Air Fryer: For a healthier option, you can air fry the chicken tenders instead of frying them in oil. Preheat your air fryer to 400°F (200°C) and cook the chicken for about 10-12 minutes, flipping halfway through, or until golden brown and cooked through. You may need to spray the chicken with a little oil before air frying to help it crisp up.
Enjoy your homemade Crispy Coconut Chicken Tenders! They’re sure to be a hit with the whole family.
Conclusion:
And there you have it! These Crispy Coconut Chicken Tenders are more than just a meal; they’re an experience. From the satisfying crunch of the coconut coating to the juicy, tender chicken inside, every bite is a little piece of tropical paradise. I truly believe this recipe is a must-try for anyone looking to elevate their weeknight dinner game or impress guests with a surprisingly simple yet incredibly flavorful dish.
Why is this recipe a winner? Well, first and foremost, it’s unbelievably delicious. The combination of the sweet coconut, savory chicken, and optional dipping sauce creates a symphony of flavors that will tantalize your taste buds. Secondly, it’s surprisingly easy to make. Forget complicated techniques and hard-to-find ingredients; this recipe uses pantry staples and straightforward instructions, making it accessible to cooks of all skill levels. Finally, it’s incredibly versatile. You can serve these tenders as an appetizer, a main course, or even as a fun snack for game night.
But the fun doesn’t stop there! Let’s talk serving suggestions and variations. For a classic pairing, serve these Crispy Coconut Chicken Tenders with a sweet chili sauce or a tangy honey mustard. If you’re feeling adventurous, try a mango salsa or a pineapple dipping sauce for an extra burst of tropical flavor. For a complete meal, pair them with coconut rice and a side of steamed broccoli or a vibrant coleslaw.
Looking to switch things up? Consider these variations:
* Spicy Kick: Add a pinch of cayenne pepper or a dash of hot sauce to the coconut breading for a fiery twist.
* Herby Goodness: Mix in some dried herbs like thyme, rosemary, or oregano to the breading for an earthy flavor.
* Garlic Lover’s Delight: Add a teaspoon of garlic powder to the breading for a savory boost.
* Air Fryer Option: For a healthier alternative, you can easily cook these tenders in an air fryer. Simply preheat your air fryer to 400°F (200°C) and cook for 10-12 minutes, flipping halfway through, until golden brown and cooked through.
* Gluten-Free Version: Substitute the all-purpose flour with a gluten-free flour blend and use gluten-free panko breadcrumbs for a gluten-free option.
I’m so excited for you to try this recipe and experience the magic of these Crispy Coconut Chicken Tenders for yourself. I’ve poured my heart into creating a recipe that’s both delicious and easy to follow, and I truly believe you’ll love it as much as I do.
So, what are you waiting for? Head to your kitchen, gather your ingredients, and get ready to create a culinary masterpiece. And most importantly, don’t forget to share your experience! I’d love to hear your feedback, see your photos, and learn about any variations you try. Tag me on social media using #CoconutChickenTenders or leave a comment below. Let’s spread the coconut chicken love! Happy cooking! I can’t wait to see what you create. Remember, cooking should be fun and enjoyable, so relax, experiment, and most importantly, have a delicious time!
Crispy Coconut Chicken Tenders: The Ultimate Recipe for Deliciousness
Crispy, flavorful coconut chicken tenders, perfect for dipping and easy to make at home! Coated in sweetened coconut and panko breadcrumbs, then fried to golden perfection.
Ingredients
- 1.5 lbs boneless, skinless chicken breasts, cut into 1-inch thick strips
- 1 cup all-purpose flour
- 1 teaspoon salt
- 1/2 teaspoon black pepper
- 1/2 teaspoon garlic powder
- 1/4 teaspoon paprika
- 2 large eggs, beaten
- 2 cups sweetened shredded coconut
- 1 cup panko breadcrumbs
- 1/2 cup vegetable oil, for frying
- Optional: Sweet chili sauce, for dipping
Instructions
- Prepare Chicken and Dredging Station: Pat chicken strips dry with paper towels. In a shallow dish, combine flour, salt, pepper, garlic powder, and paprika. In a second dish, beat eggs. In a third dish, combine shredded coconut and panko breadcrumbs. Set up your dredging station: chicken, flour mixture, egg wash, coconut-panko mixture.
- Coat the Chicken: Dredge each chicken strip in flour mixture, shake off excess. Dip in egg wash, let excess drip off. Dredge in coconut-panko mixture, pressing gently to adhere. Place coated chicken on a clean plate. Repeat with remaining chicken.
- Refrigerate (Optional): Let the coated chicken rest in the refrigerator for about 15-20 minutes.
- Fry the Chicken: Heat vegetable oil in a large skillet over medium heat. Carefully place coated chicken strips into hot oil, being careful not to overcrowd the skillet. Fry for 3-4 minutes per side, or until golden brown and internal temperature reaches 165°F (74°C).
- Drain and Serve: Remove chicken from skillet and place on a wire rack lined with paper towels to drain excess oil. Repeat with remaining chicken. Serve immediately with sweet chili sauce or your favorite dipping sauce.
Notes
- Crispiness Tips: Don’t skip the resting period. Use a wire rack to drain. Don’t overcrowd the skillet. Consider double dredging. Use fresh oil.
- Variations:
- Spicy: Add cayenne pepper or red pepper flakes to the flour mixture.
- Unsweetened: Use unsweetened coconut and add a little sugar to the coconut-panko mixture.
- Gluten-Free: Use gluten-free flour and panko.
- Air Fryer: Preheat air fryer to 400°F (200°C). Cook for 10-12 minutes, flipping halfway, until golden brown. Spray with oil before air frying.
- Storage: Store leftovers in an airtight container in the refrigerator. Reheat in the oven or air fryer to restore crispiness.