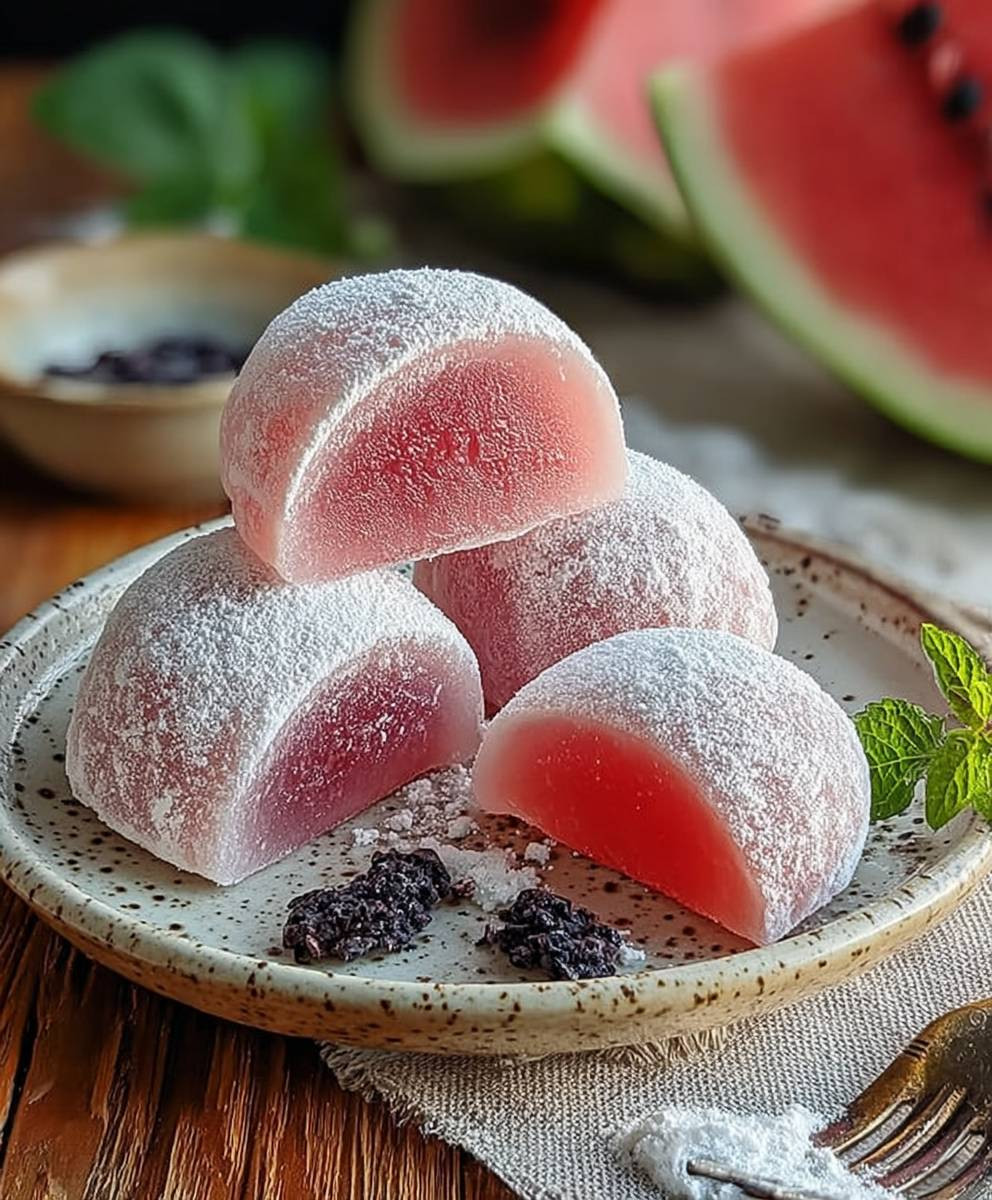
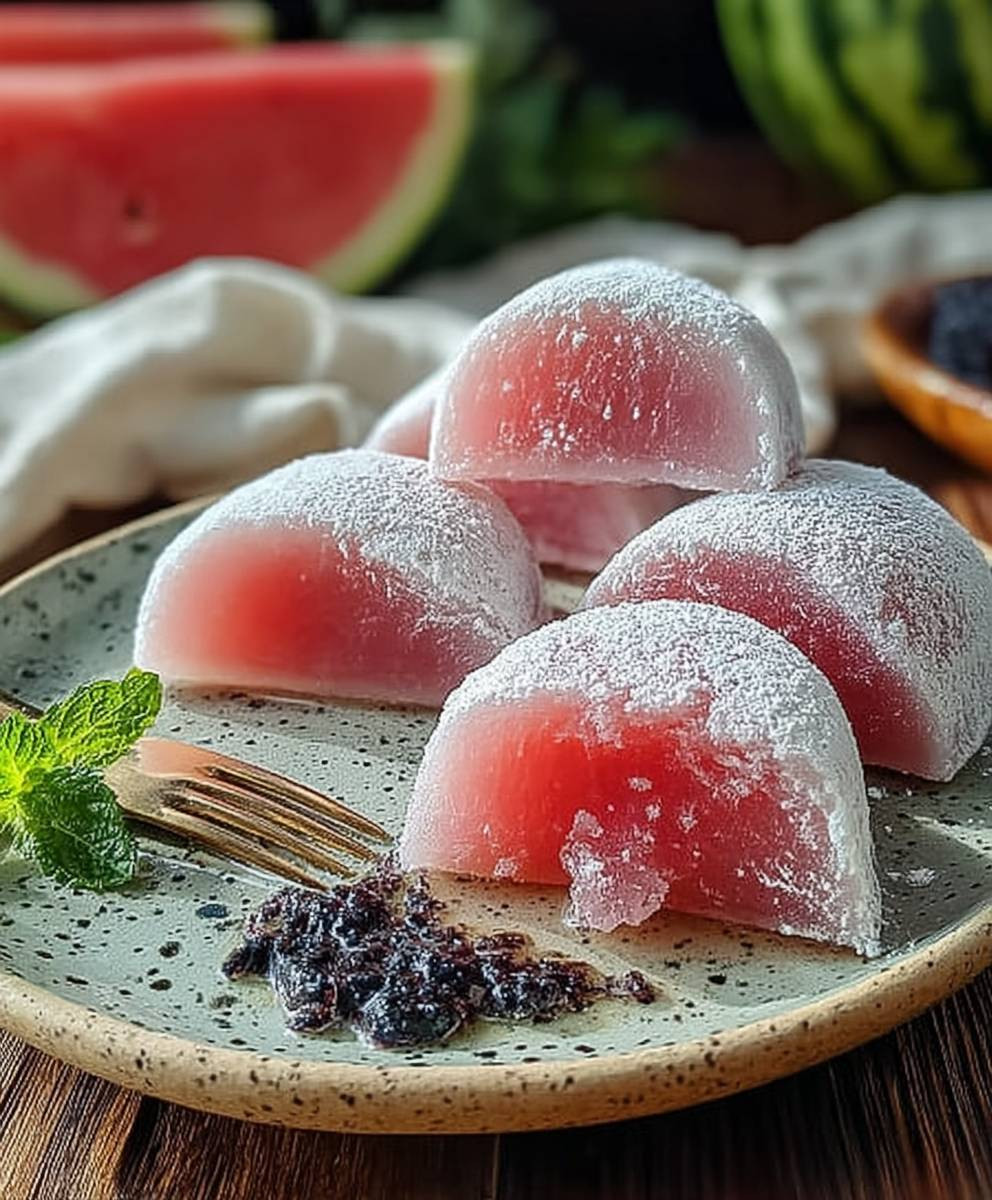
Watermelon Mochi: Prepare to experience a taste of summer in every chewy, delightful bite! Imagine the refreshing sweetness of ripe watermelon perfectly captured in a soft, pillowy mochi. This isn’t just dessert; it’s a vibrant celebration of flavor and texture that will leave you craving more.
Mochi, with its roots deeply embedded in Japanese culture, has been enjoyed for centuries, often associated with celebrations and good fortune. While traditionally made with glutinous rice flour, this modern twist infuses the classic treat with the unmistakable essence of watermelon, creating a fusion that’s both familiar and excitingly new. It’s a playful reimagining of a beloved confection, perfect for warm weather gatherings or simply a sweet escape on a sunny afternoon.
What makes watermelon mochi so irresistible? It’s the harmonious blend of textures – the delicate chewiness of the mochi combined with the juicy, refreshing flavor of watermelon. It’s also incredibly easy to make, requiring minimal ingredients and effort, making it a fantastic option for both seasoned bakers and kitchen novices alike. The vibrant pink hue also adds a visual appeal that’s hard to resist. Get ready to impress your friends and family with this unique and delicious treat!
Ingredients:
- For the Mochi Dough:
- 1 cup (120g) Glutinous Rice Flour (Mochiko)
- 1 cup (240ml) Water
- 1/2 cup (100g) Granulated Sugar
- 1/4 teaspoon Salt
- 1 tablespoon Cornstarch or Potato Starch (for dusting)
- Red food coloring (gel or liquid) – a few drops, adjust to desired shade
- For the Watermelon Filling:
- 2 cups (about 300g) Seedless Watermelon, cubed
- 2 tablespoons Granulated Sugar (adjust to watermelon sweetness)
- 1 tablespoon Lemon Juice
- 1 teaspoon Cornstarch
- 1/4 teaspoon Vanilla Extract
- Mini Chocolate Chips (optional, for watermelon “seeds”)
- For Coating (optional):
- Shredded Coconut
- Additional Cornstarch or Potato Starch
Preparing the Watermelon Filling:
This is a crucial step, as we need to reduce the watermelon’s water content to prevent soggy mochi. Trust me, you don’t want soggy mochi!
- Puree the Watermelon: In a blender or food processor, puree the cubed watermelon until smooth.
- Strain the Puree: Pour the watermelon puree through a fine-mesh sieve or cheesecloth-lined colander into a bowl. This step removes excess water. Let it drain for at least 30 minutes, or even better, an hour. The longer it drains, the less cooking time you’ll need later. I usually give it a gentle stir occasionally to help the process.
- Cook the Watermelon Reduction: Transfer the drained watermelon puree to a saucepan. Add the sugar and lemon juice. Cook over medium heat, stirring constantly, until the mixture thickens. This will take about 15-20 minutes. You’ll know it’s ready when it coats the back of a spoon. Be patient and keep stirring to prevent burning!
- Thicken with Cornstarch: In a small bowl, whisk together the cornstarch and 1 tablespoon of cold water to create a slurry. Gradually add the slurry to the watermelon mixture, stirring constantly. Cook for another minute or two, until the filling is thick and glossy.
- Add Vanilla and Chocolate Chips: Remove the saucepan from the heat and stir in the vanilla extract. If using, gently fold in the mini chocolate chips.
- Cool Completely: Transfer the watermelon filling to a bowl, cover with plastic wrap (pressing the wrap directly onto the surface to prevent a skin from forming), and refrigerate until completely cooled. This is important for easy handling later. I usually let it chill for at least 2 hours, or even overnight.
Making the Mochi Dough:
This part is surprisingly easy, but precision is key. Don’t skip the measurements!
- Combine Dry Ingredients: In a microwave-safe bowl, whisk together the glutinous rice flour, sugar, and salt. Make sure there are no lumps of flour.
- Add Water and Food Coloring: Gradually add the water to the dry ingredients, whisking constantly until a smooth batter forms. Add a few drops of red food coloring and stir until the batter is evenly colored. Aim for a light pink shade, reminiscent of watermelon flesh. You can always add more coloring if needed, but start with a little and work your way up.
- Cover and Microwave: Cover the bowl tightly with microwave-safe plastic wrap. Make sure the plastic wrap is well-sealed to prevent steam from escaping.
- Microwave in Intervals: Microwave on high for 1 minute. Carefully remove the plastic wrap (be cautious of the steam!) and stir the dough vigorously with a wet spatula. The dough will be sticky and partially cooked.
- Repeat Microwaving: Re-cover the bowl with plastic wrap and microwave for another 1 minute. Remove the plastic wrap and stir again. The dough should be becoming more translucent and less sticky.
- Final Microwave: Re-cover the bowl and microwave for a final 30 seconds. Remove the plastic wrap and stir one last time. The dough should be smooth, glossy, and very sticky. If it still looks too wet or uncooked, microwave for another 15-30 seconds, but be careful not to overcook it, as it will become tough.
- Dust and Knead: Generously dust a clean work surface with cornstarch or potato starch. Turn the mochi dough out onto the dusted surface. Be careful, as it will be very hot! Dust your hands with cornstarch as well. Gently knead the dough for a minute or two, incorporating the starch and making it less sticky.
Assembling the Watermelon Mochi:
This is where the magic happens! Get ready to create some adorable and delicious treats.
- Divide the Mochi Dough: Divide the mochi dough into approximately 12-16 equal pieces. You can use a knife or a dough scraper to do this. Keep the pieces covered with plastic wrap or a damp cloth to prevent them from drying out.
- Flatten the Dough: Dust your hands with cornstarch. Take one piece of mochi dough and flatten it into a circle, about 3-4 inches in diameter. The edges should be slightly thinner than the center. You can use your fingers or a small rolling pin to do this.
- Fill with Watermelon Filling: Place a spoonful (about 1-2 teaspoons) of the chilled watermelon filling in the center of the flattened mochi dough.
- Seal the Mochi: Carefully bring the edges of the mochi dough up and around the filling, pinching them together to seal the mochi completely. Make sure there are no gaps, or the filling will leak out during cooking.
- Shape and Dust: Gently roll the sealed mochi ball between your palms to smooth out any imperfections and create a round shape. Dust the mochi ball with cornstarch or potato starch to prevent sticking.
- Repeat: Repeat steps 2-5 with the remaining mochi dough and watermelon filling.
- Optional Coating: If desired, roll the finished mochi balls in shredded coconut for added texture and flavor. This also helps to prevent them from sticking together.
Serving and Storage:
Enjoy your homemade Watermelon Mochi! Here are a few tips for serving and storing them.
- Serve Immediately or Chill: Watermelon mochi is best enjoyed fresh, but they can also be chilled in the refrigerator for a few hours. Chilling them will make them slightly firmer.
- Storage: Store leftover mochi in an airtight container in the refrigerator. They are best consumed within 2-3 days, as the mochi dough will start to harden over time.
- Prevent Sticking: To prevent the mochi from sticking together during storage, dust them generously with cornstarch or potato starch, or wrap them individually in plastic wrap.
- Serving Suggestions: Serve watermelon mochi as a refreshing dessert, a sweet snack, or a fun addition to a bento box. They are also a great treat to share with friends and family.
- Variations: Get creative with your mochi! You can try different fillings, such as other fruit purees, sweet bean paste, or even ice cream. You can also experiment with different colors and flavors for the mochi dough.
Tips for Success:
- Use High-Quality Glutinous Rice Flour: The quality of the glutinous rice flour will affect the texture of the mochi. Look for a brand that is specifically labeled “glutinous rice flour” or “mochiko.”
- Don’t Overcook the Mochi Dough: Overcooked mochi dough will be tough and chewy. Be sure to microwave it in intervals and check the texture after each interval.
- Chill the Watermelon Filling Thoroughly: Chilled filling is easier to handle and will prevent the mochi from becoming soggy.
- Dust Generously with Starch: Cornstarch or potato starch is your best friend when working with mochi dough. Don’t be afraid to use plenty of it to prevent sticking.
- Work Quickly: Mochi dough tends to dry out quickly, so it’s important to work quickly when shaping and filling the mochi.
Enjoy your Watermelon Mochi! I hope you have as much fun making them as I do!
Conclusion:
So, there you have it! This Watermelon Mochi recipe is truly a must-try, and I’m not just saying that. The combination of the chewy, subtly sweet mochi with the refreshing burst of watermelon flavor is simply divine. It’s a delightful treat that’s perfect for a hot summer day, a fun party snack, or even just a little something to brighten up your afternoon.
What makes this recipe so special? First, it’s surprisingly easy to make. Don’t let the word “mochi” intimidate you! The process is straightforward, and with a little patience, you’ll be enjoying homemade mochi in no time. Second, the watermelon flavor is incredibly unique and refreshing. It’s not your typical mochi filling, and that’s what makes it stand out. The natural sweetness of the watermelon complements the glutinous rice flour perfectly, creating a balanced and satisfying treat. Third, it’s a beautiful dessert! The vibrant pink color of the watermelon filling peeking through the translucent mochi is visually appealing and makes it a great option for impressing your guests.
But the best part? It’s incredibly versatile! While I’ve shared my favorite way to enjoy this Watermelon Mochi, feel free to get creative with your serving suggestions and variations.
Serving Suggestions and Variations:
* Whipped Cream and Berries: Serve your mochi with a dollop of freshly whipped cream and a handful of mixed berries for an extra touch of elegance. The creamy texture and tartness of the berries will complement the mochi beautifully.
* Coconut Flakes: Roll your finished mochi in toasted coconut flakes for added texture and a subtle tropical flavor.
* Chocolate Drizzle: A drizzle of melted dark or white chocolate can add a touch of decadence to your Watermelon Mochi.
* Mochi Ice Cream: For an extra refreshing treat, try wrapping a small scoop of watermelon sorbet or ice cream in the mochi.
* Different Watermelon Varieties: Experiment with different types of watermelon! A seedless watermelon will make the process even easier, and a yellow watermelon will give your mochi a unique color and flavor.
* Other Fruit Combinations: While watermelon is the star of the show here, you can also try incorporating other fruits into the filling. A little bit of lime zest or a few chopped mint leaves can add a refreshing twist.
Don’t Be Afraid to Experiment!
The possibilities are endless! The key is to have fun and experiment with different flavors and textures until you find your perfect Watermelon Mochi combination.
I truly believe that this recipe is a winner, and I can’t wait for you to try it. So, gather your ingredients, put on some music, and get ready to embark on a mochi-making adventure! I’m confident that you’ll be delighted with the results.
And most importantly, don’t forget to share your experience! I’d love to hear what you think of the recipe, what variations you tried, and how you served your Watermelon Mochi. Share your photos and stories in the comments below, or tag me on social media. Let’s spread the mochi love! Happy cooking (and eating)!
Watermelon Mochi: A Refreshing Summer Treat – Recipe & Guide
Delightfully chewy and refreshing Watermelon Mochi! These adorable treats feature a sweet watermelon filling wrapped in soft, homemade mochi dough. Perfect for a summer snack or a fun dessert.
Ingredients
- 1 cup (120g) Glutinous Rice Flour (Mochiko)
- 1 cup (240ml) Water
- 1/2 cup (100g) Granulated Sugar
- 1/4 teaspoon Salt
- 1 tablespoon Cornstarch or Potato Starch (for dusting)
- Red food coloring (gel or liquid) – a few drops, adjust to desired shade
- 2 cups (about 300g) Seedless Watermelon, cubed
- 2 tablespoons Granulated Sugar (adjust to watermelon sweetness)
- 1 tablespoon Lemon Juice
- 1 teaspoon Cornstarch
- 1/4 teaspoon Vanilla Extract
- Mini Chocolate Chips (optional, for watermelon “seeds”)
- Shredded Coconut
- Additional Cornstarch or Potato Starch
Instructions
- In a blender or food processor, puree the cubed watermelon until smooth.
- Pour the watermelon puree through a fine-mesh sieve or cheesecloth-lined colander into a bowl. Let it drain for at least 30 minutes, or even better, an hour. Stir occasionally.
- Transfer the drained watermelon puree to a saucepan. Add the sugar and lemon juice. Cook over medium heat, stirring constantly, until the mixture thickens (15-20 minutes). It’s ready when it coats the back of a spoon.
- In a small bowl, whisk together the cornstarch and 1 tablespoon of cold water to create a slurry. Gradually add the slurry to the watermelon mixture, stirring constantly. Cook for another minute or two, until the filling is thick and glossy.
- Remove the saucepan from the heat and stir in the vanilla extract. If using, gently fold in the mini chocolate chips.
- Transfer the watermelon filling to a bowl, cover with plastic wrap (pressing the wrap directly onto the surface to prevent a skin from forming), and refrigerate until completely cooled (at least 2 hours, or overnight).
- In a microwave-safe bowl, whisk together the glutinous rice flour, sugar, and salt.
- Gradually add the water to the dry ingredients, whisking constantly until a smooth batter forms. Add a few drops of red food coloring and stir until the batter is evenly colored.
- Cover the bowl tightly with microwave-safe plastic wrap.
- Microwave on high for 1 minute. Carefully remove the plastic wrap (be cautious of the steam!) and stir the dough vigorously with a wet spatula.
- Re-cover the bowl with plastic wrap and microwave for another 1 minute. Remove the plastic wrap and stir again.
- Re-cover the bowl and microwave for a final 30 seconds. Remove the plastic wrap and stir one last time. The dough should be smooth, glossy, and very sticky. If it still looks too wet or uncooked, microwave for another 15-30 seconds, but be careful not to overcook it.
- Generously dust a clean work surface with cornstarch or potato starch. Turn the mochi dough out onto the dusted surface. Dust your hands with cornstarch as well. Gently knead the dough for a minute or two, incorporating the starch and making it less sticky.
- Divide the mochi dough into approximately 12-16 equal pieces. Keep the pieces covered with plastic wrap or a damp cloth to prevent them from drying out.
- Dust your hands with cornstarch. Take one piece of mochi dough and flatten it into a circle, about 3-4 inches in diameter. The edges should be slightly thinner than the center.
- Place a spoonful (about 1-2 teaspoons) of the chilled watermelon filling in the center of the flattened mochi dough.
- Carefully bring the edges of the mochi dough up and around the filling, pinching them together to seal the mochi completely.
- Gently roll the sealed mochi ball between your palms to smooth out any imperfections and create a round shape. Dust the mochi ball with cornstarch or potato starch to prevent sticking.
- Repeat steps 2-5 with the remaining mochi dough and watermelon filling.
- If desired, roll the finished mochi balls in shredded coconut for added texture and flavor.
Notes
- Use high-quality glutinous rice flour (mochiko) for the best texture.
- Don’t overcook the mochi dough, or it will become tough.
- Chill the watermelon filling thoroughly for easier handling.
- Dust generously with cornstarch or potato starch to prevent sticking.
- Work quickly when shaping and filling the mochi, as the dough can dry out.
- Watermelon mochi is best enjoyed fresh, but they can also be chilled in the refrigerator for a few hours.
- Store leftover mochi in an airtight container in the refrigerator. They are best consumed within 2-3 days, as the mochi dough will start to harden over time.
- To prevent the mochi from sticking together during storage, dust them generously with cornstarch or potato starch, or wrap them individually in plastic wrap.
- Serve watermelon mochi as a refreshing dessert, a sweet snack, or a fun addition to a bento box. They are also a great treat to share with friends and family.
- Get creative with your mochi! You can try different fillings, such as other fruit purees, sweet bean paste, or even ice cream. You can also experiment with different colors and flavors for the mochi dough.


