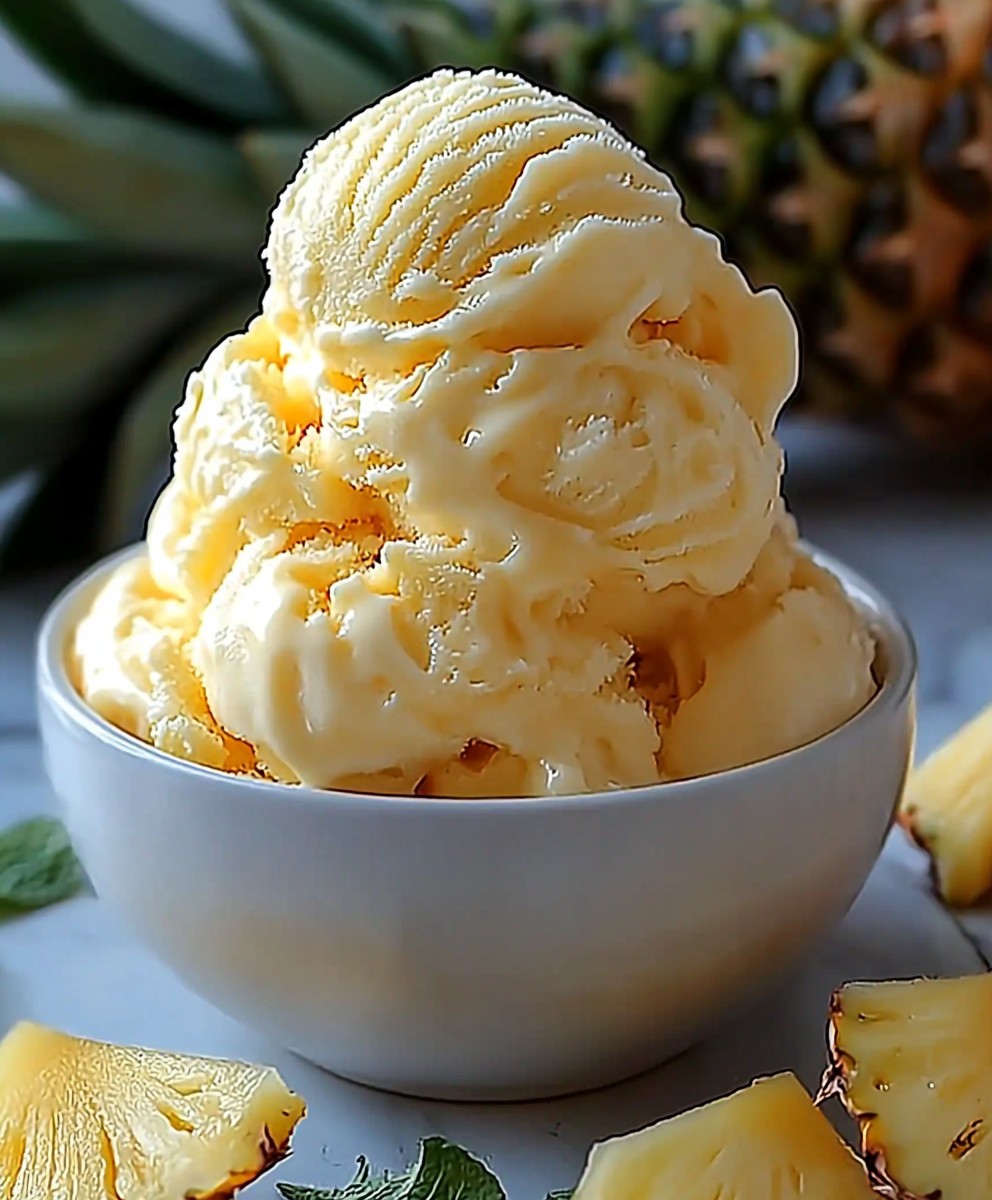
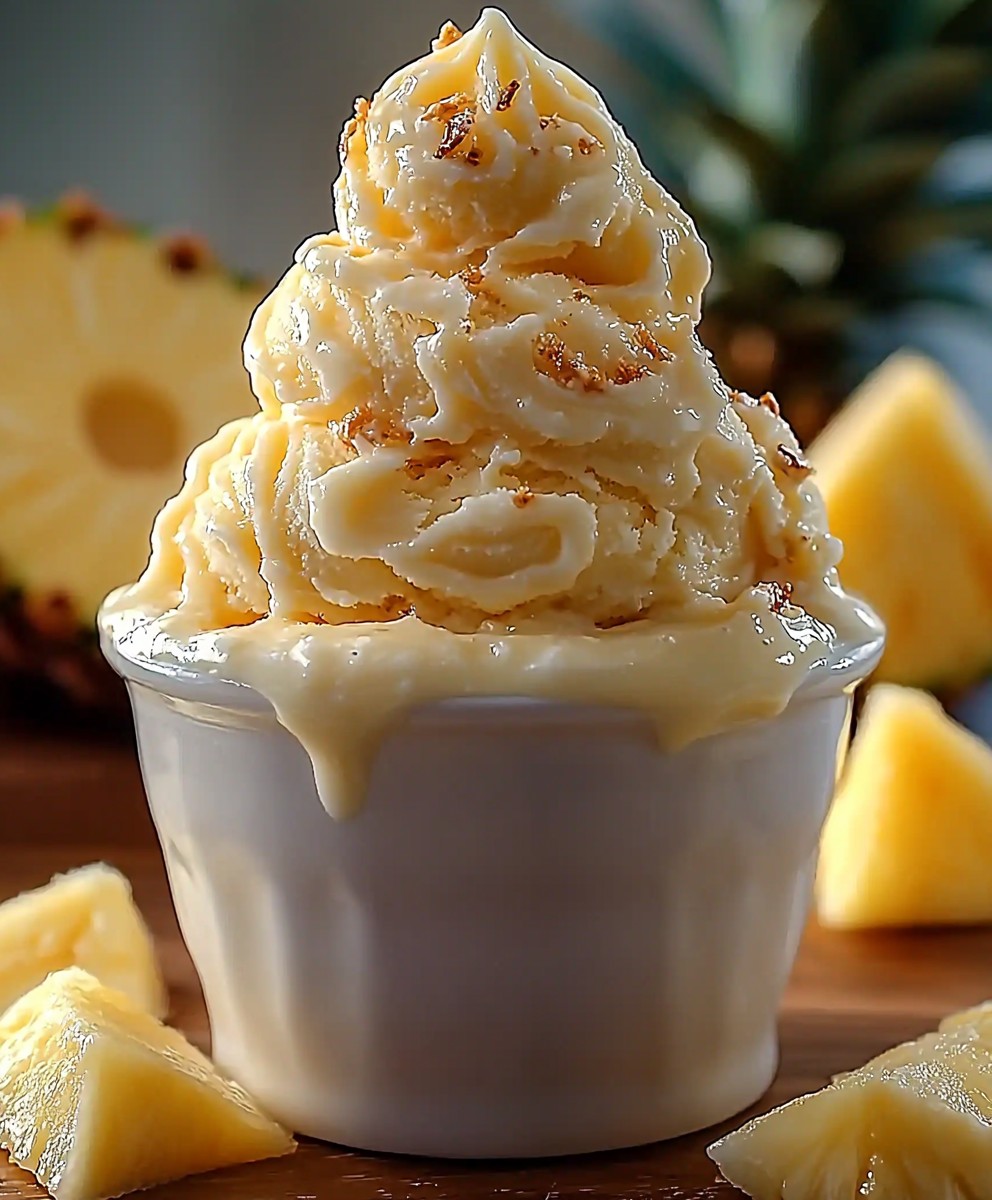
Pineapple Ice Cream: the very words conjure up images of sun-drenched beaches, tropical breezes, and the sweet, tangy taste of paradise. Have you ever dreamt of a dessert that perfectly encapsulates the essence of summer? Look no further! This recipe isn’t just about making ice cream; it’s about crafting an experience, a mini-vacation for your taste buds.
While the exact origins of pineapple ice cream are shrouded in a bit of mystery, pineapples themselves have a rich history, traveling from South America to become a symbol of luxury and hospitality in Europe and beyond. Today, they’re enjoyed worldwide, and their vibrant flavor lends itself beautifully to frozen desserts.
What makes pineapple ice cream so irresistible? It’s the delightful combination of creamy richness and the bright, acidic tang of pineapple. The texture is smooth and luscious, melting in your mouth with each spoonful. Plus, this recipe is surprisingly easy to make at home, requiring minimal ingredients and effort. Whether you’re looking for a refreshing treat on a hot day or a unique dessert to impress your guests, this homemade pineapple ice cream is guaranteed to be a crowd-pleaser. Get ready to embark on a culinary adventure that will transport you to a tropical oasis!
Ingredients:
- 1 large ripe pineapple (about 3-4 pounds), peeled, cored, and chopped
- 1 cup granulated sugar
- 1/2 cup water
- 2 cups heavy cream
- 1 cup whole milk
- 1/4 cup light corn syrup (optional, for smoother texture)
- 1 tablespoon lemon juice (optional, to brighten the flavor)
- 1/4 teaspoon salt
- 1/2 teaspoon vanilla extract (optional, for added flavor depth)
Preparing the Pineapple Base:
- Chop the Pineapple: First things first, make sure your pineapple is properly prepped. Peel it, remove the core, and chop it into roughly 1-inch pieces. The size doesn’t have to be exact, as we’ll be blending it later.
- Make a Pineapple Puree: Add the chopped pineapple to a blender or food processor. Blend until completely smooth. You might need to scrape down the sides a few times to ensure everything is fully pureed. We want a nice, consistent texture here.
- Cook the Pineapple Puree: Pour the pineapple puree into a medium saucepan. Add the granulated sugar and water. Stir well to combine.
- Simmer the Mixture: Place the saucepan over medium heat. Bring the mixture to a gentle simmer, stirring occasionally to prevent sticking. Once simmering, reduce the heat to low and continue to simmer for about 10-15 minutes. This step helps to concentrate the pineapple flavor and dissolve the sugar completely. Keep an eye on it and stir regularly!
- Cool the Pineapple Base: Remove the saucepan from the heat and let the pineapple base cool completely. This is crucial! You don’t want to add hot pineapple to your dairy, as it could curdle. You can speed up the cooling process by transferring the mixture to a bowl and placing it in the refrigerator for about an hour.
Creating the Ice Cream Custard:
- Combine Dairy Ingredients: In a large bowl, whisk together the heavy cream, whole milk, light corn syrup (if using), lemon juice (if using), salt, and vanilla extract (if using). The corn syrup helps to prevent ice crystals from forming, resulting in a smoother ice cream. The lemon juice brightens the pineapple flavor, and the vanilla adds a touch of warmth.
- Incorporate the Pineapple Base: Once the pineapple base is completely cooled, gradually pour it into the dairy mixture, whisking constantly to ensure it’s well combined. We want a homogenous mixture, so take your time and whisk thoroughly.
- Chill the Custard: Cover the bowl with plastic wrap, pressing it directly onto the surface of the custard to prevent a skin from forming. Refrigerate the custard for at least 4 hours, or preferably overnight. This allows the flavors to meld together and the custard to chill thoroughly, which is essential for proper freezing. The colder the custard, the better the ice cream!
Churning and Freezing the Ice Cream:
- Prepare Your Ice Cream Maker: Follow the manufacturer’s instructions for your ice cream maker. If you have a freezer bowl type, make sure it’s been properly frozen for at least 24 hours. A properly frozen bowl is key to successful ice cream making.
- Churn the Ice Cream: Pour the chilled custard into the prepared ice cream maker. Churn according to the manufacturer’s instructions, usually for about 20-25 minutes, or until the ice cream reaches a soft-serve consistency. Keep an eye on it – you want it thick and creamy, but not rock solid.
- Transfer to a Freezer-Safe Container: Once the ice cream is churned, transfer it to a freezer-safe container. A loaf pan or a plastic container with a tight-fitting lid works well.
- Harden the Ice Cream: Place the container in the freezer and freeze for at least 2-3 hours, or until the ice cream is firm enough to scoop. This hardening process is important for achieving the right texture.
Serving and Storage:
- Scoop and Serve: When you’re ready to serve, let the ice cream sit at room temperature for a few minutes to soften slightly, making it easier to scoop.
- Enjoy! Serve your homemade pineapple ice cream in bowls or cones. You can add toppings like toasted coconut flakes, chopped macadamia nuts, or a drizzle of caramel sauce for an extra touch of deliciousness.
- Storage: Store any leftover ice cream in the freezer in an airtight container. It’s best consumed within a week or two for optimal flavor and texture. After that, it might start to develop ice crystals.
Tips for the Best Pineapple Ice Cream:
- Use Ripe Pineapple: The riper the pineapple, the sweeter and more flavorful your ice cream will be. Look for a pineapple that has a fragrant aroma and yields slightly to pressure.
- Don’t Skip the Chilling Time: Chilling the custard is crucial for allowing the flavors to meld together and for achieving the right consistency during churning.
- Adjust Sweetness to Taste: If you prefer a less sweet ice cream, you can reduce the amount of sugar slightly. Taste the pineapple base before adding it to the dairy mixture and adjust accordingly.
- Experiment with Flavors: Feel free to add other flavors to your pineapple ice cream. A little bit of ginger, lime zest, or even a pinch of chili powder can add a unique twist.
- Prevent Ice Crystals: Using light corn syrup helps to prevent ice crystals from forming, resulting in a smoother ice cream. You can also add a tablespoon or two of vodka, as alcohol also helps to inhibit ice crystal formation.
- Proper Storage is Key: To prevent freezer burn, make sure your ice cream is stored in an airtight container. Press a piece of plastic wrap directly onto the surface of the ice cream before sealing the container.
Troubleshooting:
- Ice Cream is Too Icy: This is usually caused by not chilling the custard long enough or by not using enough fat. Make sure to chill the custard for at least 4 hours, and use full-fat heavy cream and whole milk.
- Ice Cream is Too Hard: This can be caused by over-churning or by freezing the ice cream for too long. Avoid over-churning, and let the ice cream soften slightly at room temperature before serving.
- Ice Cream is Too Soft: This can be caused by not chilling the custard enough or by not using a properly frozen ice cream maker bowl. Make sure to chill the custard thoroughly and that your ice cream maker bowl is frozen solid.
- Pineapple Curdled the Dairy: This happens when the pineapple is too hot when added to the dairy. Always make sure the pineapple base is completely cooled before adding it to the cream and milk.
Enjoy your delicious homemade pineapple ice cream! I hope you find this recipe easy to follow and that it brings you lots of sweet, tropical joy.
Conclusion:
So, there you have it! This pineapple ice cream recipe is truly a must-try, and I’m not just saying that. The vibrant, tropical flavor is an absolute explosion of sunshine in every spoonful. It’s creamy, refreshing, and surprisingly easy to make, even without fancy equipment. Forget store-bought versions loaded with artificial flavors and preservatives; this homemade delight is the real deal. It’s the perfect way to cool down on a hot day, impress your friends and family, or simply treat yourself to something special.
But why is it *really* a must-try? Because it’s more than just ice cream; it’s an experience. It’s the taste of summer, the feeling of being on vacation, and the satisfaction of creating something delicious from scratch. Plus, the bright, cheerful color is guaranteed to brighten your day! I’ve made this recipe countless times, and it’s always a hit. The natural sweetness of the pineapple shines through, creating a flavor that’s both familiar and exciting.
And the best part? It’s incredibly versatile!
Serving Suggestions and Variations:
* Classic Scoop: Serve it in a waffle cone or a simple bowl for a classic ice cream experience.
* Pineapple Sundae: Top it with whipped cream, toasted coconut flakes, and a maraschino cherry for a decadent sundae.
* Tropical Float: Combine it with pineapple juice or coconut soda for a refreshing tropical float.
* Grilled Pineapple Pairing: Serve a scoop alongside grilled pineapple for an extra layer of caramelized flavor. The warm pineapple complements the cold ice cream beautifully.
* Ice Cream Sandwiches: Use it to make ice cream sandwiches with graham crackers or homemade cookies.
* Piña Colada Ice Cream: For an adult twist, add a splash of rum extract and a pinch of nutmeg to the recipe.
* Dairy-Free Option: Substitute the heavy cream and milk with coconut cream and coconut milk for a delicious dairy-free version.
* Pineapple Ice Cream Cake: Use this ice cream as a layer in an ice cream cake, paired with vanilla cake and whipped cream.
* Add-Ins: Get creative with add-ins! Try chopped macadamia nuts, candied ginger, or even a swirl of caramel sauce.
Don’t be afraid to experiment and make it your own! The possibilities are endless.
I truly believe you’ll love this pineapple ice cream as much as I do. It’s a guaranteed crowd-pleaser and a recipe you’ll want to make again and again. So, what are you waiting for? Gather your ingredients, follow the simple steps, and get ready to indulge in a taste of paradise.
I’m so excited for you to try this recipe! Once you’ve made it, please come back and share your experience in the comments below. Let me know what variations you tried, what your family thought, and any tips or tricks you discovered along the way. I can’t wait to hear all about your pineapple ice cream adventures! Happy churning!
Pineapple Ice Cream: The Ultimate Guide to Making It at Home
Creamy, homemade pineapple ice cream with a bright, tropical flavor. Made with fresh pineapple, sugar, and a rich dairy base.
Ingredients
- 1 large ripe pineapple (about 3-4 pounds), peeled, cored, and chopped
- 1 cup granulated sugar
- 1/2 cup water
- 2 cups heavy cream
- 1 cup whole milk
- 1/4 cup light corn syrup (optional, for smoother texture)
- 1 tablespoon lemon juice (optional, to brighten the flavor)
- 1/4 teaspoon salt
- 1/2 teaspoon vanilla extract (optional, for added flavor depth)
Instructions
- Peel, core, and chop the pineapple into roughly 1-inch pieces.
- Add the chopped pineapple to a blender or food processor. Blend until completely smooth.
- Pour the pineapple puree into a medium saucepan. Add the granulated sugar and water. Stir well to combine.
- Place the saucepan over medium heat. Bring the mixture to a gentle simmer, stirring occasionally to prevent sticking. Once simmering, reduce the heat to low and continue to simmer for about 10-15 minutes. Stir regularly.
- Remove the saucepan from the heat and let the pineapple base cool completely. You can speed up the cooling process by transferring the mixture to a bowl and placing it in the refrigerator for about an hour.
- In a large bowl, whisk together the heavy cream, whole milk, light corn syrup (if using), lemon juice (if using), salt, and vanilla extract (if using).
- Once the pineapple base is completely cooled, gradually pour it into the dairy mixture, whisking constantly to ensure it’s well combined.
- Cover the bowl with plastic wrap, pressing it directly onto the surface of the custard to prevent a skin from forming. Refrigerate the custard for at least 4 hours, or preferably overnight.
- Follow the manufacturer’s instructions for your ice cream maker. If you have a freezer bowl type, make sure it’s been properly frozen for at least 24 hours.
- Pour the chilled custard into the prepared ice cream maker. Churn according to the manufacturer’s instructions, usually for about 20-25 minutes, or until the ice cream reaches a soft-serve consistency.
- Once the ice cream is churned, transfer it to a freezer-safe container. A loaf pan or a plastic container with a tight-fitting lid works well.
- Place the container in the freezer and freeze for at least 2-3 hours, or until the ice cream is firm enough to scoop.
- When you’re ready to serve, let the ice cream sit at room temperature for a few minutes to soften slightly, making it easier to scoop.
- Serve your homemade pineapple ice cream in bowls or cones. You can add toppings like toasted coconut flakes, chopped macadamia nuts, or a drizzle of caramel sauce for an extra touch of deliciousness.
- Store any leftover ice cream in the freezer in an airtight container. It’s best consumed within a week or two for optimal flavor and texture. After that, it might start to develop ice crystals.
Notes
- Use ripe pineapple for the best flavor.
- Chilling the custard is crucial for flavor melding and consistency.
- Adjust sweetness to taste.
- Experiment with flavors like ginger, lime zest, or chili powder.
- Corn syrup helps prevent ice crystals.
- Store in an airtight container to prevent freezer burn.


