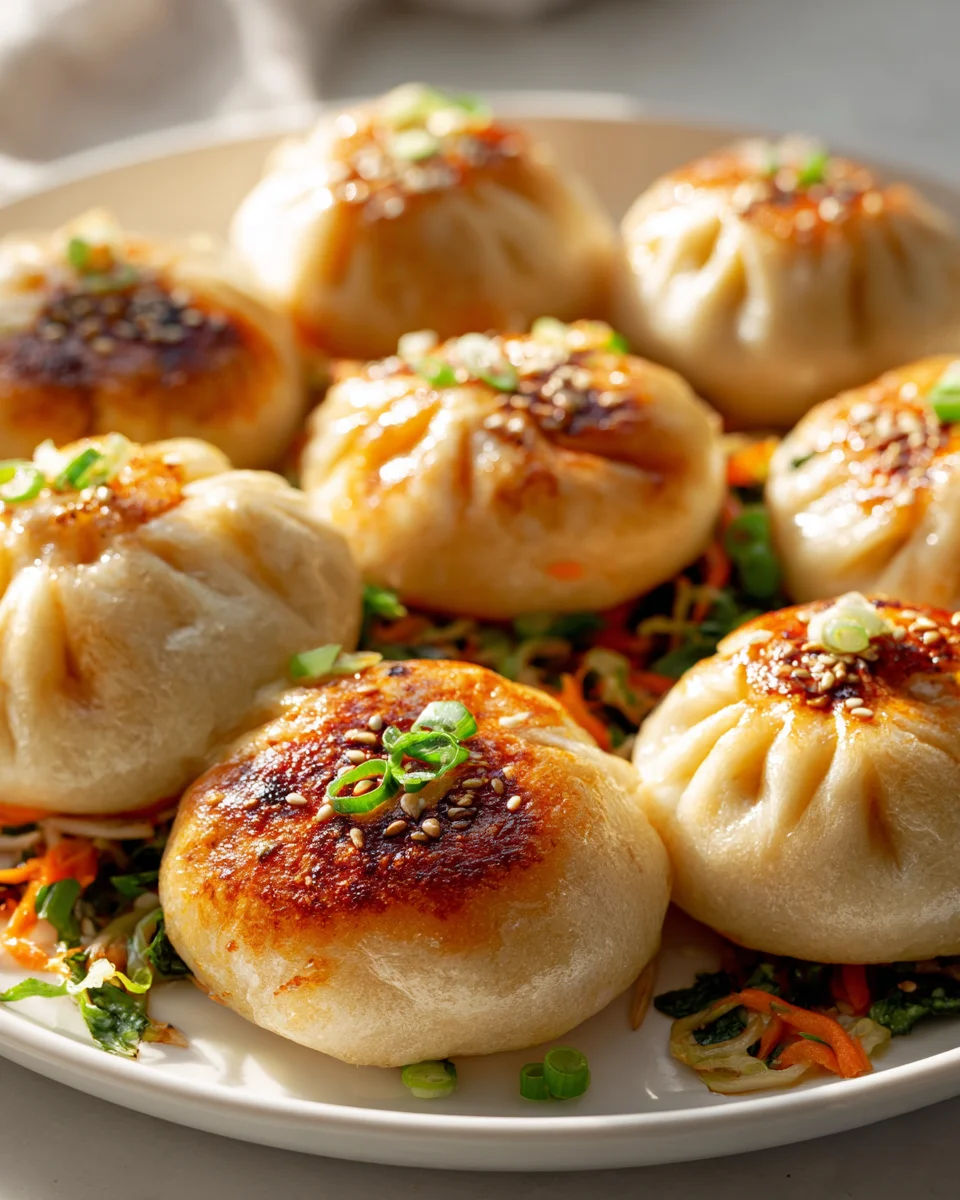
Pan Fried Cabbage And Noodle Buns
Oh boy, have I got something truly special for you today! Get ready to fall head over heels for Pan Fried Cabbage And Noodle Buns. Trust me, these aren’t just any buns; they’re a revelation, a complete meal tucked into a wonderfully crispy, chewy package. What makes this recipe so incredibly special is that perfect harmony of textures and flavors. Imagine a soft, fluffy bun that gets gloriously pan-fried to an irresistible golden crisp on the outside, giving way to a warm, savory, and unbelievably satisfying interior.
Inside, you’ll discover a generous filling packed with tender-crisp shredded cabbage, perfectly seasoned stir-fried noodles, and savory beef, all coming together in a symphony of deliciousness. You are absolutely going to love these because they hit all the right notes: comfort, flavor, and pure satisfaction in every single bite. They’re hearty enough for a light meal, fantastic as a unique appetizer, or simply the most delightful snack you can imagine. Get ready to experience pure culinary joy and maybe even make a new kitchen favorite!

Ingredient Notes
Creating these delightful Pan Fried Cabbage And Noodle Buns is a journey of simple, wholesome ingredients coming together to form something truly special. The beauty of this recipe lies in the balance of a fluffy bun, a savory, hearty filling, and that irresistible crispy pan-fried bottom. Here’s a rundown of what you’ll need and some thoughts on substitutions.
For the Dough
- All-Purpose Flour: This forms the backbone of our buns. I find unbleached all-purpose flour works wonderfully, giving a tender yet sturdy bun. You could experiment with a small percentage of bread flour (say, 10-20%) for a chewier texture, but I typically stick with all-purpose for softness.
- Active Dry Yeast: Essential for that lovely rise. Make sure your yeast is fresh! If you’re unsure, proof it in a little warm water with a pinch of sugar first. Instant yeast can also be used; you might just add it directly to the flour.
- Warm Water: Crucial for activating the yeast. Aim for around 105-115°F (40-46°C). Too hot, and you’ll kill the yeast; too cold, and it won’t activate properly.
- Granulated Sugar: A touch of sugar helps activate the yeast and contributes to browning and flavor.
- Salt: Balances the flavors in the dough. Don’t skip it!
- Vegetable Oil (or other neutral oil): Adds tenderness to the dough and makes it easier to handle.
- Substitution Note: If you’re short on time, you could use store-bought pizza dough or even frozen dinner roll dough, thawed. Just remember to let it come to room temperature and perhaps do a short proof before shaping. The texture won’t be quite the same as a homemade yeast bun, but it will still be delicious!
For the Cabbage and Noodle Filling
- Green Cabbage: The star of our vegetable component. I love the slight crunch and sweetness it brings when cooked down. Napa cabbage is a fantastic alternative if you prefer a milder, more tender texture, and it cooks down a bit quicker.
- Vermicelli Noodles (or Glass Noodles): These thin, translucent noodles are perfect for absorbing all the delicious flavors of the filling without becoming heavy. Rice vermicelli or bean thread noodles (glass noodles) are my go-to. You could also use very thin egg noodles, pre-cooked and chopped, if that’s what you have on hand.
- Ground Beef: Lean ground beef adds a wonderful savory depth and heartiness to our buns. I find 80/20 or 85/15 works best for flavor without being overly greasy. For substitutions, ground chicken or turkey would work, though they might be a bit drier. For a vegetarian option, finely crumbled extra-firm tofu or a mix of sautéed mushrooms (like shiitake and cremini) would be excellent.
- Onion & Garlic: Aromatic essentials that build the flavor base for our filling.
- Fresh Ginger: Adds a zesty, pungent kick that pairs beautifully with the other ingredients. Don’t skimp on fresh ginger if you can help it!
- Soy Sauce: The primary seasoning, providing umami and saltiness. I prefer a good quality light soy sauce.
- Sesame Oil: A drizzle of toasted sesame oil at the end imparts that quintessential nutty, aromatic finish.
- Non-Alcohol Cooking Alternative (e.g., rice vinegar, vegetable broth): Instead of Shaoxing wine or similar, I often use a splash of rice vinegar for a touch of acidity and complexity, or even a dash of vegetable broth to help deglaze the pan and add moisture to the filling.
- White Pepper & a pinch of Sugar: White pepper has a unique pungency that’s common in Asian cooking and differs from black pepper. A tiny pinch of sugar balances the savory notes and enhances the flavor of the cabbage.
Step-by-Step Instructions
Let’s get cooking! Making these Pan Fried Cabbage And Noodle Buns is incredibly rewarding, and I’ll walk you through each step to ensure perfect results.
1. Prepare the Dough (if making from scratch)
- In a large bowl, whisk together the warm water, sugar, and yeast. Let it sit for about 5-10 minutes until foamy, indicating the yeast is active. If it doesn’t foam, your yeast might be old, or the water temperature was off; start again.
- Stir in the oil and salt. Gradually add the flour, mixing with a wooden spoon or your hands until a shaggy dough forms.
- Turn the dough out onto a lightly floured surface and knead for 8-10 minutes until it’s smooth and elastic. It should spring back when lightly poked.
- Lightly oil a clean bowl, place the dough in it, turning once to coat. Cover the bowl with plastic wrap or a damp towel and let it rise in a warm place for 1-1.5 hours, or until doubled in size. This is a crucial step for a light, airy bun.
2. Prepare the Noodle Filling
- While the dough rises, prepare your filling. Cook the vermicelli noodles according to package directions, typically by soaking them in hot water for a few minutes until tender. Drain well, rinse with cold water to prevent sticking, and then snip them into shorter pieces (about 2-3 inches long) with kitchen shears. This makes them easier to mix and eat in the buns.
- Heat a tablespoon of vegetable oil in a large skillet or wok over medium-high heat. Add the ground beef and cook, breaking it up with a spoon, until it’s browned and no longer pink. Drain off any excess fat.
- Add the minced onion, garlic, and grated ginger to the pan with the beef. Sauté for 2-3 minutes until fragrant.
- Stir in the shredded cabbage. Cook for about 5-7 minutes, stirring occasionally, until the cabbage has softened and wilted down significantly. It will release some moisture.
- Add the non-alcohol cooking alternative, soy sauce, white pepper, and a pinch of sugar to the pan. Stir well to combine and cook for another minute.
- Remove from heat, add the snipped noodles, and drizzle with sesame oil. Toss everything together until the noodles are evenly distributed and coated with the delicious filling. Taste and adjust seasoning if needed. Let the filling cool completely before assembling the buns; this prevents the dough from getting soggy.
3. Assemble the Buns
- Once the dough has doubled, gently punch it down to release the air. Turn it out onto a lightly floured surface and divide it into 12-16 equal pieces, depending on how large you want your buns. I usually aim for golf-ball sized pieces for a good handheld bun.
- Take one piece of dough and flatten it into a disc about 4-5 inches in diameter, keeping the edges slightly thinner than the center.
- Spoon about 2-3 tablespoons of the cooled filling into the center of the dough disc.
- Bring the edges of the dough up around the filling, gathering them together at the top. Pinch firmly to seal the bun completely, forming a pleated top or a smooth dome. Ensure there are no gaps where the filling could escape.
- Place the assembled buns seam-side down on squares of parchment paper or a lightly floured surface, leaving some space between them.
4. Second Proofing
- Cover the shaped buns loosely with plastic wrap or a clean damp towel. Let them rise in a warm place for another 20-30 minutes, or until they look visibly puffy. Don’t let them over-proof, or they might collapse during cooking.
5. Pan-Frying the Buns
- Heat 1-2 tablespoons of vegetable oil in a large non-stick skillet over medium heat. You might need to cook the buns in batches.
- Carefully place the buns seam-side down into the hot oil, ensuring they are not touching. Cook for 3-5 minutes, until the bottoms are beautifully golden brown and crispy. Peek at one to check!
- Once the bottoms are golden, carefully pour about 1/2 cup of water (or vegetable broth) into the skillet. Immediately cover the skillet with a tight-fitting lid to trap the steam.
- Reduce the heat to medium-low and steam the buns for 8-10 minutes, or until the tops are cooked through and puffy. The water should evaporate during this time.
- Remove the lid and increase the heat back to medium for another 1-2 minutes to crisp up the bottoms again if needed. The water should be fully evaporated.
- Carefully remove the buns from the skillet and serve immediately. Repeat with remaining buns, adding more oil as needed.
Tips & Suggestions
- Don’t Overfill: While tempting, overfilling the buns can make them hard to seal and more likely to burst during cooking. Aim for a generous but manageable amount.
- Cool the Filling: This is a big one! Hot filling can start to cook the dough prematurely, making it difficult to work with and potentially leading to a tough bun. Always ensure your filling is completely cool before assembly.
- Consistent Dough Division: For evenly cooked buns, try to divide your dough into equal portions. A kitchen scale can be really helpful here.
- Achieving the Perfect Crisp: Don’t rush the initial browning step. A good golden crust is key to the “pan-fried” experience. After steaming, if your bottoms aren’t as crispy as you’d like, a quick minute or two uncovered over medium heat can fix that.
- Prevent Sticking: If you’re using parchment squares, they are fantastic for preventing sticking and making transfer to the pan easy. If not, make sure your surface is well-floured but not excessively so, as too much flour can make the dough tough.
- Serving Suggestions: These buns are fantastic on their own, but they also pair wonderfully with a simple dipping sauce. I often mix soy sauce with a dash of rice vinegar, a few drops of sesame oil, and a sprinkle of chili flakes. Sometimes a little grated ginger or finely chopped green onion adds extra freshness.
- Making Ahead: You can prepare the filling a day in advance and store it in the refrigerator. The dough can also be made ahead; after the first rise, punch it down and refrigerate it overnight. Let it come to room temperature for about 30 minutes before shaping.
Storage
These Pan Fried Cabbage And Noodle Buns are best enjoyed fresh, hot off the skillet, but I understand that sometimes you might have leftovers or want to prepare them in advance. Here’s how I handle storage:
- Refrigeration: Cooked buns can be stored in an airtight container in the refrigerator for up to 3 days. Make sure they are completely cooled before storing to prevent sogginess.
- Freezing (Cooked Buns): For longer storage, freeze the cooked and cooled buns. Place them in a single layer on a baking sheet and freeze until solid (this prevents them from sticking together). Once frozen, transfer them to a freezer-safe bag or container. They will keep well for up to 1-2 months.
- Reheating:
- From Refrigerator: My preferred method for reheating is to lightly pan-fry them again. Heat a little oil in a non-stick skillet over medium-low heat, place the buns in, and cover. Heat for 5-7 minutes, flipping once, until warmed through and the bottom is crispy again. You can also microwave them for 30-60 seconds, but this won’t give you the crispy bottom.
- From Freezer: You can reheat frozen buns directly in a skillet. Place them in a cold skillet with a tiny bit of oil, then turn the heat to medium-low, cover, and cook for about 10-15 minutes, flipping occasionally, until heated through and crisp. You might need to add a tablespoon or two of water and cover for a few minutes to help steam them back to tenderness before crisping. Alternatively, thaw them in the fridge overnight and then reheat as you would refrigerated buns.
- Freezing (Uncooked Buns): You can also freeze the shaped, unproofed buns. Place them on a parchment-lined tray and freeze until solid. Once frozen, transfer them to a freezer-safe bag. When ready to cook, thaw them in the refrigerator overnight, then let them come to room temperature and proof for about 30-45 minutes before pan-frying as directed.
Final Thoughts
I truly hope you’ll carve out some time to create these incredible Pan Fried Cabbage And Noodle Buns! There’s a certain magic that happens when the perfectly crisp, golden-brown exterior gives way to the incredibly flavorful, juicy beef, tender cabbage, and satisfyingly chewy noodles inside. It’s a symphony of textures and tastes that elevates a simple bun into something truly special. These aren’t just a meal; they’re a delightful experience, a heartwarming bite of comfort food that’s both uniquely satisfying and wonderfully delicious. I have a feeling that once you try your hand at making these Pan Fried Cabbage And Noodle Buns, they’ll quickly become a cherished recipe in your culinary repertoire!
Crispy & Flavorful Pan Fried Cabbage And Noodle Buns

Experience the delightful harmony of textures and flavors with these Pan Fried Cabbage And Noodle Buns. Each bun is a crispy, chewy package filled with savory beef, tender cabbage, and perfectly seasoned noodles.
- Prep Time: 1 hour 30 mins
- Cook Time: 30 mins
- Total Time: 2 hours
- Yield: 12-16 buns
- Category: Appetizer
- Method: Pan-Frying
- Cuisine: Asian
Ingredients
- For the Dough:
- All-Purpose Flour
- Active Dry Yeast
- Warm Water
- Granulated Sugar
- Salt
- Vegetable Oil (or other neutral oil)
- For the Cabbage and Noodle Filling:
- Green Cabbage
- Vermicelli Noodles (or Glass Noodles)
- Ground Beef
- Onion
- Garlic
- Fresh Ginger
- Soy Sauce
- Sesame Oil
- Non-Alcohol Cooking Alternative (e.g., rice vinegar, vegetable broth)
- White Pepper
- A pinch of Sugar
Instructions
- 1. Prepare the Dough (if making from scratch): In a large bowl, whisk together the warm water, sugar, and yeast. Let it sit for about 5-10 minutes until foamy, indicating the yeast is active. If it doesn't foam, your yeast might be old, or the water temperature was off; start again.
- 2. Stir in the oil and salt. Gradually add the flour, mixing with a wooden spoon or your hands until a shaggy dough forms.
- 3. Turn the dough out onto a lightly floured surface and knead for 8-10 minutes until it’s smooth and elastic. It should spring back when lightly poked.
- 4. Lightly oil a clean bowl, place the dough in it, turning once to coat. Cover the bowl with plastic wrap or a damp towel and let it rise in a warm place for 1-1.5 hours, or until doubled in size.
- 5. Prepare the Noodle Filling: While the dough rises, prepare your filling. Cook the vermicelli noodles according to package directions, typically by soaking them in hot water for a few minutes until tender. Drain well, rinse with cold water to prevent sticking, and then snip them into shorter pieces (about 2-3 inches long) with kitchen shears.
- 6. Heat a tablespoon of vegetable oil in a large skillet or wok over medium-high heat. Add the ground beef and cook, breaking it up with a spoon, until it's browned and no longer pink. Drain off any excess fat.
- 7. Add the minced onion, garlic, and grated ginger to the pan with the beef. Sauté for 2-3 minutes until fragrant.
- 8. Stir in the shredded cabbage. Cook for about 5-7 minutes, stirring occasionally, until the cabbage has softened and wilted down significantly.
- 9. Add the non-alcohol cooking alternative, soy sauce, white pepper, and a pinch of sugar to the pan. Stir well to combine and cook for another minute.
- 10. Remove from heat, add the snipped noodles, and drizzle with sesame oil. Toss everything together until the noodles are evenly distributed and coated with the filling. Let the filling cool completely before assembling the buns.
- 11. Assemble the Buns: Once the dough has doubled, gently punch it down to release the air. Turn it out onto a lightly floured surface and divide it into 12-16 equal pieces.
- 12. Take one piece of dough and flatten it into a disc about 4-5 inches in diameter.
- 13. Spoon about 2-3 tablespoons of the cooled filling into the center of the dough disc.
- 14. Bring the edges of the dough up around the filling, gathering them together at the top. Pinch firmly to seal the bun completely.
- 15. Place the assembled buns seam-side down on squares of parchment paper or a lightly floured surface.
- 16. Second Proofing: Cover the shaped buns loosely with plastic wrap or a clean damp towel. Let them rise in a warm place for another 20-30 minutes.
- 17. Pan-Frying the Buns: Heat 1-2 tablespoons of vegetable oil in a large non-stick skillet over medium heat. Carefully place the buns seam-side down into the hot oil, ensuring they are not touching. Cook for 3-5 minutes, until the bottoms are beautifully golden brown and crispy.
- 18. Once the bottoms are golden, carefully pour about 1/2 cup of water into the skillet. Immediately cover the skillet with a tight-fitting lid to trap the steam.
- 19. Reduce the heat to medium-low and steam the buns for 8-10 minutes, or until the tops are cooked through and puffy.
- 20. Remove the lid and increase the heat back to medium for another 1-2 minutes to crisp up the bottoms again if needed. Carefully remove the buns from the skillet and serve immediately.
Nutrition
- Serving Size: 1 bun
- Calories: 250
- Sugar: 2 g
- Sodium: 400 mg
- Fat: 12 g
- Saturated Fat: 4 g
- Unsaturated Fat: 6 g
- Trans Fat: 0 g
- Carbohydrates: 30 g
- Fiber: 2 g
- Protein: 10 g
- Cholesterol: 40 mg
Keywords: Don't overfill the buns to prevent bursting. Always cool the filling completely before assembly to avoid cooking the dough prematurely.