Lunchbox Mini Pizzas: The Perfect Portable Lunch Solution
Lunchbox Mini Pizzas! Are you tired of the same old boring lunches? Do you crave a fun, flavorful, and easy way to pack a satisfying meal for your kids (or yourself)? Then look no further! I’ve developed a recipe for Lunchbox Mini Pizzas that’s guaranteed to be a hit. These aren’t your average pizzas; these are perfectly portioned, customizable, and incredibly convenient for busy weekdays.
While the concept of pizza is undeniably Italian in origin, these mini pizzas are designed with modern convenience in mind. Forget the hassle of cutting up a large pizza and dealing with messy leftovers. These individual pizzas are the perfect size for little hands (and grown-up ones too!), making them ideal for school lunches, picnics, or even a quick and satisfying dinner.
Why You’ll Love These Lunchbox Mini Pizzas
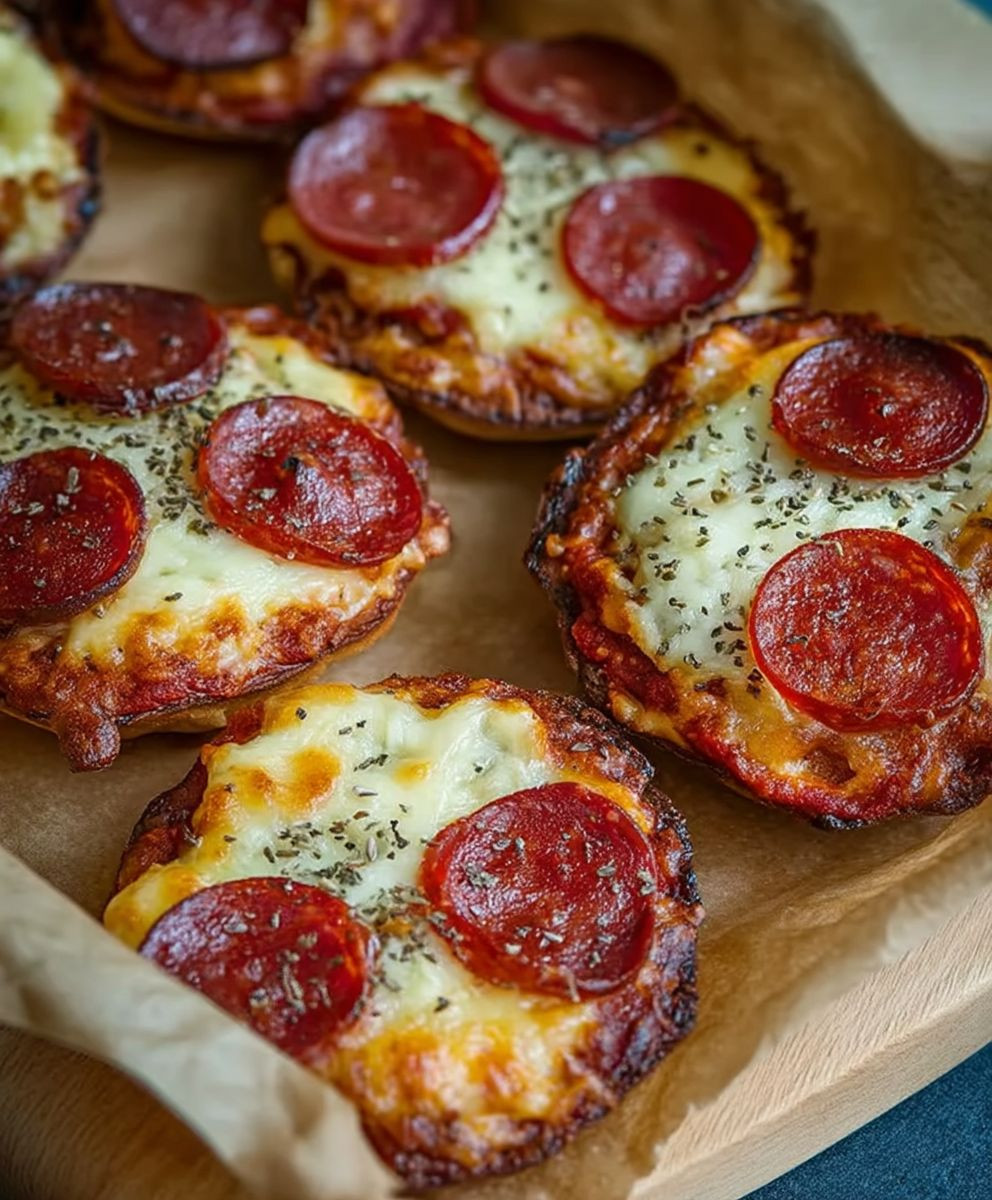
The beauty of these Lunchbox Mini Pizzas lies in their versatility. The recipe provides a base, but you can easily customize the toppings to suit everyone’s preferences. From classic pepperoni and cheese to veggie-packed delights, the possibilities are endless! The taste? Expect a crispy, cheesy crust with your favorite toppings – a winning combination that’s both satisfying and fun. The texture is a delightful contrast between the soft dough and the melted cheese, making each bite a little adventure.
Beyond the deliciousness, the convenience factor is a major plus. These mini pizzas are quick to assemble, bake quickly, and are easy to pack. No more soggy sandwiches or sad salads! With these Lunchbox Mini Pizzas, you can ensure your loved ones enjoy a delicious and exciting lunch every day. So, let’s get started and create some lunchtime magic with these amazing Lunchbox Mini Pizzas!

Ingredients:
- 1 cup warm water (105-115°F)
- 2 ¼ teaspoons active dry yeast
- 1 teaspoon sugar
- 2 tablespoons olive oil
- 3 cups all-purpose flour, plus more for dusting
- 1 teaspoon salt
- ½ cup pizza sauce
- 1 cup shredded mozzarella cheese
- ½ cup shredded Parmesan cheese
- Your favorite pizza toppings (pepperoni, mushrooms, onions, peppers, etc.) – I like to use a variety!
- 1 egg, beaten (for egg wash)
- Optional: Dried oregano, garlic powder, onion powder for seasoning the dough
Preparing the Pizza Dough:
- In a large bowl, combine the warm water, yeast, and sugar. Let stand for 5-10 minutes until foamy. This ensures your yeast is active and ready to work its magic!
- Once foamy, stir in the olive oil, salt, and optional dried oregano, garlic powder, and onion powder. I find a little extra seasoning in the dough itself adds a lovely depth of flavor.
- Gradually add the flour, one cup at a time, mixing with a wooden spoon or spatula until a shaggy dough forms. Don’t be afraid to get your hands a little messy at this stage!
- Turn the dough out onto a lightly floured surface and knead for 5-7 minutes, or until the dough is smooth and elastic. If the dough is too sticky, add a little more flour, a tablespoon at a time. If it’s too dry, add a teaspoon of water at a time.
- Place the dough in a lightly oiled bowl, turning to coat. Cover the bowl with plastic wrap and let rise in a warm place for 1-1.5 hours, or until doubled in size. This is the crucial part where the dough gets all fluffy and airy.
Shaping the Mini Pizzas:
- Once the dough has risen, punch it down gently to release the air. This helps prevent the pizzas from being too airy and ensures a nice, even texture.
- Divide the dough into 12 equal pieces. I find using a kitchen scale helps ensure even-sized mini pizzas, but you can eyeball it if you prefer.
- Roll each piece of dough into a small circle, about 4-5 inches in diameter. You can use a rolling pin or even just flatten them with your hands. Don’t worry about perfect circles; rustic is charming!
- Lightly grease a mini muffin tin. This will prevent the pizzas from sticking and make cleanup a breeze.
- Press each dough circle into a muffin cup, gently pressing it into the sides and bottom. Make sure the dough reaches the edges of the cup for a nice, full mini pizza.
Preparing and Baking the Mini Pizzas:
- Preheat your oven to 400°F (200°C). Make sure your oven is fully preheated before you put the pizzas in for even baking.
- Spread a thin layer of pizza sauce over each mini pizza crust. Don’t overload it; you want enough sauce to add flavor without making the crust soggy.
- Sprinkle each pizza with shredded mozzarella and Parmesan cheese. I love the combination of mozzarella’s stretchiness and Parmesan’s sharp flavor.
- Add your favorite pizza toppings. Get creative! Pepperoni, mushrooms, onions, peppers – the possibilities are endless. Just remember to distribute the toppings evenly.
- Brush the edges of each mini pizza with the beaten egg. This gives the crust a beautiful golden-brown color and adds a little extra richness.
- Bake for 12-15 minutes, or until the crust is golden brown and the cheese is melted and bubbly. Keep a close eye on them towards the end of baking to prevent burning.
- Important Note: Oven temperatures can vary, so keep an eye on your mini pizzas and adjust baking time as needed. If the edges are browning too quickly, you can tent them loosely with foil.
Cooling and Serving:
- Once baked, let the mini pizzas cool in the muffin tin for a few minutes before carefully removing them. This allows the cheese to set slightly and prevents them from falling apart.
- Serve warm and enjoy! These mini pizzas are perfect for lunchboxes, parties, or a quick and easy weeknight meal. They’re also great for picky eaters, as everyone can customize their own mini pizza with their favorite toppings.
-
Storage:
Leftover mini pizzas can be stored in an airtight container at room temperature for up to 2 days or in the refrigerator for up to 4 days. Reheat them in the oven or microwave before serving.
Conclusion:
So there you have it – my recipe for Lunchbox Mini Pizzas! I truly believe this recipe is a must-try for several reasons. First, it’s incredibly versatile. The base recipe is simple and adaptable to any taste preference. Don’t like pepperoni? No problem! Substitute with ham, chicken, veggies, or even different cheeses. The possibilities are endless, making it perfect for picky eaters and adventurous palates alike. Secondly, it’s incredibly convenient. These mini pizzas are the perfect size for little hands and little appetites, making them ideal for lunchboxes, after-school snacks, or even a fun party appetizer. The prep time is minimal, and the baking time is quick, meaning less time in the kitchen and more time enjoying the delicious results.
Third, and perhaps most importantly, these Lunchbox Mini Pizzas are delicious! The combination of crispy crust, melty cheese, and your favorite toppings is simply irresistible. I’ve found that even the most discerning pizza lovers are won over by these bite-sized delights. They offer all the fun and flavor of a full-sized pizza in a manageable, kid-friendly portion.
Serving Suggestions & Variations:
While the recipe provides a fantastic foundation, I encourage you to experiment and make these mini pizzas your own! Here are a few ideas to get you started:
- Theme Nights: Create different mini pizzas for each night of the week. Monday could be “Meat Lovers,” Tuesday “Veggie Delight,” and so on. This adds a fun element of surprise and variety to your child’s lunchbox.
- Dipping Sauces: Elevate the experience by offering a selection of dipping sauces alongside the pizzas. Marinara sauce is a classic choice, but ranch dressing, pesto, or even a spicy buffalo sauce can add exciting new dimensions of flavor.
- Gluten-Free Option: For those with gluten sensitivities, simply substitute the pizza dough with a gluten-free alternative. Many excellent gluten-free pizza doughs are available in stores, or you can even make your own from scratch.
- Make it a Meal: Pair these mini pizzas with a side salad or some fresh fruit for a complete and balanced lunch or snack. A small container of yogurt or some baby carrots would also complement the pizzas perfectly.
- Adult-Sized Pizzas: Don’t limit yourself to mini versions! Use the same recipe and toppings to create larger individual pizzas for a quick and easy weeknight dinner.
Why You Should Try This Recipe:
These Lunchbox Mini Pizzas are more than just a recipe; they’re a solution to a common problem: packing healthy and appealing lunches for kids (and adults!). They’re quick, easy, customizable, and most importantly, delicious. They’re a guaranteed crowd-pleaser, perfect for everything from school lunches to birthday parties. The convenience factor alone makes this recipe a winner in my book. No more battling with picky eaters or spending hours in the kitchen preparing elaborate lunches. These mini pizzas are a time-saver and a taste-bud tantalizer all rolled into one.
Share Your Creations!
I’d love to see your creations! Once you’ve tried this recipe, please share your photos and feedback on social media using #LunchboxMiniPizzas. I can’t wait to see the delicious variations you come up with. Happy baking, and happy eating!
Lunchbox Mini Pizzas: Easy Recipe for Kids
Easy, fun, customizable mini pizzas baked in a muffin tin! Perfect for parties or a quick weeknight meal.
Ingredients
- 1 cup warm water (105-115°F)
- 2 ¼ teaspoons active dry yeast
- 1 teaspoon sugar
- 2 tablespoons olive oil
- 3 cups all-purpose flour, plus more for dusting
- 1 teaspoon salt
- ½ cup pizza sauce
- 1 cup shredded mozzarella cheese
- ½ cup shredded Parmesan cheese
- Your favorite pizza toppings (pepperoni, mushrooms, onions, peppers, etc.)
- 1 egg, beaten (for egg wash)
- Optional: Dried oregano, garlic powder, onion powder for seasoning the dough
Instructions
- In a large bowl, combine warm water, yeast, and sugar. Let stand 5-10 minutes until foamy.
- Stir in olive oil, salt, and optional seasonings (oregano, garlic powder, onion powder).
- Gradually add flour, one cup at a time, mixing until a shaggy dough forms.
- Turn dough onto a lightly floured surface and knead for 5-7 minutes, until smooth and elastic. Add more flour if sticky, or water if too dry.
- Place dough in a lightly oiled bowl, turning to coat. Cover and let rise in a warm place for 1-1.5 hours, or until doubled.
- Punch down dough gently.
- Divide dough into 12 equal pieces.
- Roll each piece into a 4-5 inch circle.
- Lightly grease a mini muffin tin.
- Press each dough circle into a muffin cup.
- Preheat oven to 400°F (200°C).
- Spread a thin layer of pizza sauce over each crust.
- Sprinkle with mozzarella and Parmesan cheese.
- Add your favorite toppings.
- Brush edges with beaten egg.
- Bake for 12-15 minutes, or until crust is golden brown and cheese is melted and bubbly. Watch carefully to prevent burning; tent with foil if edges brown too quickly.
- Let cool in muffin tin for a few minutes before removing.
- Serve warm.
Notes
- Oven temperatures vary; adjust baking time as needed.
- Leftovers can be stored in an airtight container at room temperature for up to 2 days or in the refrigerator for up to 4 days. Reheat before serving.
- Using a kitchen scale to divide the dough ensures even-sized mini pizzas.