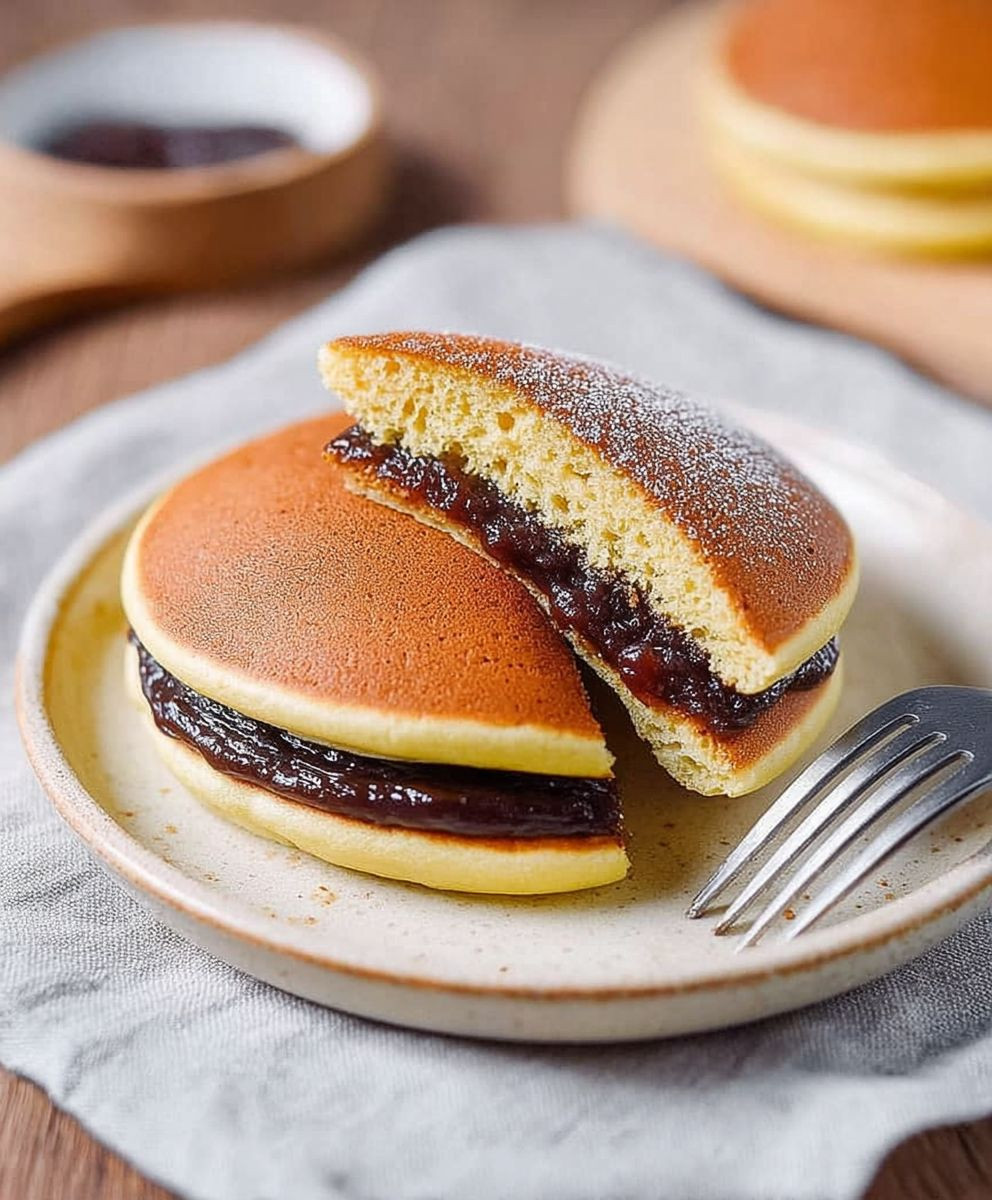
Japanese Red Bean Pancake, or “Dorayaki” as it’s known in Japan, is a delightful treat that’s sure to bring a smile to your face. Imagine two golden-brown, fluffy pancakes embracing a sweet, melt-in-your-mouth red bean paste filling. Sounds heavenly, right? This isn’t just a pancake; it’s a little piece of Japanese culture!
Dorayaki has a rich history, with some legends tracing its origins back to a samurai who left his gong (dora) behind at a farmer’s house, who then used it to cook pancakes. While the exact origins are debated, what’s undeniable is its enduring popularity in Japan and beyond. It’s even a favorite of the beloved cartoon character, Doraemon!
So, why do people adore this simple yet satisfying dessert? Well, the combination of the soft, slightly sweet pancake and the subtly earthy and sweet red bean paste (anko) is simply irresistible. The texture is a delightful contrast – the airy pancake against the smooth, creamy filling. Plus, Japanese Red Bean Pancake is incredibly versatile. It’s perfect as a quick breakfast, a delightful afternoon snack with a cup of green tea, or even a light dessert after dinner. And the best part? It’s surprisingly easy to make at home! Let’s dive into this classic recipe and create your own batch of happiness.

Ingredients:
- For the Pancake Batter:
- 1 cup (120g) all-purpose flour
- 1 teaspoon baking powder
- 1/2 teaspoon baking soda
- 1/4 teaspoon salt
- 2 tablespoons granulated sugar
- 1 large egg
- 1 cup (240ml) milk
- 2 tablespoons melted unsalted butter, plus more for greasing
- 1 teaspoon vanilla extract
- For the Red Bean Filling (Anko):
- 1 cup (200g) dried azuki beans
- 4 cups water, plus more for soaking
- 1 cup (200g) granulated sugar, or to taste
- 1/4 teaspoon salt
- Optional Toppings:
- Unsalted butter
- Maple syrup
- Whipped cream
- Fresh fruit (strawberries, blueberries, raspberries)
- Matcha powder
- Sesame seeds
Preparing the Red Bean Filling (Anko)
Okay, let’s start with the Anko, because it takes the longest. Don’t worry, it’s mostly hands-off simmering time!
- Soak the Azuki Beans: Rinse the dried azuki beans thoroughly under cold water. Place them in a large bowl and cover with plenty of cold water (at least 4 cups). Let them soak for at least 4 hours, or preferably overnight. This step is crucial for softening the beans and reducing cooking time. I usually soak them before I go to bed so they’re ready to go in the morning.
- First Boil and Drain: Drain the soaked azuki beans and transfer them to a large pot. Add 4 cups of fresh water. Bring the mixture to a boil over high heat. Once boiling, reduce the heat to medium-low and simmer for about 5 minutes. This initial boil helps to remove any impurities and bitterness from the beans.
- Drain and Rinse Again: Drain the beans again and rinse them thoroughly under cold water. This step is important to remove any remaining impurities. Make sure you get all the little bits!
- Second Boil and Simmer: Return the rinsed beans to the pot and add another 4 cups of fresh water. Bring the mixture to a boil over high heat, then reduce the heat to low, cover the pot, and simmer gently for about 1 to 1.5 hours, or until the beans are very tender and easily mashed with a fork. Check the water level periodically and add more water if needed to keep the beans covered. You don’t want them to dry out!
- Add Sugar and Salt: Once the beans are tender, drain off any excess water, leaving just a little bit in the pot. Add the granulated sugar and salt to the pot. Stir well to combine.
- Mash and Cook: Cook over medium heat, stirring constantly, until the sugar is dissolved and the mixture thickens to your desired consistency. This usually takes about 15-20 minutes. You can use a potato masher or the back of a spoon to mash the beans as they cook. I like mine a little chunky, but you can make it as smooth as you like. Be careful, the mixture can splatter as it thickens!
- Cool Completely: Remove the pot from the heat and let the anko cool completely. As it cools, it will thicken further. You can store the anko in an airtight container in the refrigerator for up to 5 days, or in the freezer for up to 2 months.
Preparing the Pancake Batter
While the anko is cooling (or if you’re using pre-made anko, lucky you!), let’s whip up the pancake batter. It’s super easy!
- Combine Dry Ingredients: In a large bowl, whisk together the all-purpose flour, baking powder, baking soda, salt, and granulated sugar. Make sure everything is well combined so you don’t get any pockets of baking powder.
- Combine Wet Ingredients: In a separate bowl, whisk together the egg, milk, melted butter, and vanilla extract.
- Combine Wet and Dry: Pour the wet ingredients into the dry ingredients and whisk until just combined. Be careful not to overmix the batter. A few lumps are okay! Overmixing can lead to tough pancakes.
- Rest the Batter: Let the batter rest for 5-10 minutes. This allows the gluten to relax, resulting in more tender pancakes. While the batter rests, you can prepare your cooking surface.
Cooking the Pancakes
Now for the fun part! Cooking the pancakes is quick and easy. Just follow these simple steps.
- Heat the Griddle or Pan: Heat a lightly oiled griddle or non-stick frying pan over medium heat. You want the surface to be hot enough that the pancakes cook evenly and develop a nice golden-brown color, but not so hot that they burn. A good way to test the temperature is to sprinkle a few drops of water onto the surface. If the water sizzles and evaporates quickly, the griddle is ready.
- Pour the Batter: Pour 1/4 cup of batter onto the hot griddle for each pancake. Leave enough space between the pancakes so they don’t run into each other.
- Cook the First Side: Cook for 2-3 minutes, or until bubbles start to form on the surface of the pancakes and the edges look set.
- Flip and Cook the Second Side: Carefully flip the pancakes with a spatula and cook for another 2-3 minutes, or until they are golden brown on the second side and cooked through.
- Keep Warm: Transfer the cooked pancakes to a plate and keep them warm in a preheated oven (200°F or 93°C) while you cook the remaining batter.
Assembling the Japanese Red Bean Pancakes
Alright, the pancakes are cooked, the anko is ready, now let’s put it all together!
- Spread the Anko: Take one pancake and spread a generous amount of anko (red bean paste) evenly over one side. You can be as generous as you like! I like a lot of anko.
- Fold or Stack: You can either fold the pancake in half, like a taco, or place another pancake on top to make a sandwich.
- Add Toppings (Optional): Now for the fun part! Add your favorite toppings. A pat of butter and some maple syrup are classic choices. You can also add whipped cream, fresh fruit, a dusting of matcha powder, or a sprinkle of sesame seeds. Get creative!
- Serve Immediately: Serve the Japanese red bean pancakes immediately while they are still warm and delicious. Enjoy!
Tips for Perfect Pancakes:
- Don’t Overmix the Batter: Overmixing develops the gluten in the flour, resulting in tough pancakes. Mix until just combined, leaving a few lumps.
- Use a Hot Griddle: A hot griddle is essential for achieving golden-brown pancakes. Test the temperature by sprinkling a few drops of water onto the surface.
- Don’t Flip Too Early: Wait until bubbles start to form on the surface of the pancakes and the edges look set before flipping.
- Keep Pancakes Warm: Keep cooked pancakes warm in a preheated oven while you cook the remaining batter.
- Adjust Sweetness: Adjust the amount of sugar in the anko to your liking.
Variations:
- Matcha Pancakes: Add 1-2 tablespoons of matcha powder to the pancake batter for a green tea flavor.
- Chocolate Chip Pancakes: Add 1/2 cup of chocolate chips to the pancake batter.
- Fruit Pancakes: Add 1/2 cup of chopped fruit (such as blueberries, strawberries, or bananas) to the pancake batter.
- Savory Pancakes: Omit the sugar from the pancake batter and add chopped vegetables, herbs, and cheese for a savory pancake.
- Mochi Pancakes: Add glutinous rice flour (mochiko) to the batter for a chewier texture. Start with 1/4 cup and adjust to your preference.
Storage:
- Anko: Store leftover anko in an airtight container in the refrigerator for up to 5 days, or in the freezer for up to 2 months.
- Pancakes: Store leftover pancakes in an airtight container in the refrigerator for up to 3

Conclusion:
Well, there you have it! I truly believe this Japanese Red Bean Pancake recipe is an absolute must-try. It’s not just a pancake; it’s a delightful experience, a little taste of Japan right in your own kitchen. The subtle sweetness of the red bean paste perfectly complements the fluffy, slightly chewy texture of the pancake itself. It’s a comforting and satisfying treat that’s surprisingly easy to make, even if you’re not a seasoned baker.
What makes this recipe so special is its versatility. You can enjoy it as a quick and easy breakfast, a satisfying afternoon snack, or even a light dessert. The possibilities are endless!
Serving Suggestions and Variations:
* Classic Style: Serve your Japanese Red Bean Pancake warm with a pat of butter and a drizzle of maple syrup. The combination of the warm pancake, melting butter, and sweet syrup is simply divine.
* Matcha Magic: For an extra layer of Japanese flavor, try adding a teaspoon of matcha powder to the pancake batter. This will give your pancakes a beautiful green hue and a slightly earthy, subtly bitter flavor that pairs perfectly with the red bean paste.
* Fruity Fun: Top your pancakes with fresh berries, such as strawberries, blueberries, or raspberries. The tartness of the berries will provide a lovely contrast to the sweetness of the red bean paste. You could even add a dollop of whipped cream for an extra touch of indulgence.
* Savory Twist: While traditionally sweet, you can experiment with savory fillings. Try adding a sprinkle of sesame seeds to the batter and serving the pancakes with a side of soy sauce for dipping. You could even add a fried egg on top for a complete meal.
* Ice Cream Dream: For a truly decadent dessert, serve your warm Japanese Red Bean Pancake with a scoop of vanilla ice cream or green tea ice cream. The contrast of the warm pancake and cold ice cream is simply irresistible.
* Whipped Cream Delight: A simple dollop of whipped cream can elevate this pancake to a whole new level. Consider adding a sprinkle of cinnamon or cocoa powder on top of the whipped cream for an extra touch of flavor.
* Chocolate Indulgence: If you’re a chocolate lover, try adding chocolate chips to the pancake batter or drizzling melted chocolate over the finished pancakes. The combination of chocolate and red bean paste is surprisingly delicious.
I’ve tried all of these variations myself, and each one offers a unique and delightful experience. Don’t be afraid to get creative and experiment with different toppings and fillings to find your own perfect combination. The beauty of this recipe is that it’s so adaptable to your own personal preferences.
I truly hope you’ll give this Japanese Red Bean Pancake recipe a try. It’s a simple yet satisfying treat that’s sure to become a new favorite in your household. I’m confident that you’ll love the unique flavor and texture of these pancakes as much as I do.
And most importantly, I’d love to hear about your experience! Please feel free to share your photos, comments, and variations in the comments section below. Let me know what you thought of the recipe and what toppings you tried. I’m always eager to learn from your culinary adventures. Happy cooking, and enjoy your delicious Japanese Red Bean Pancake!
Japanese Red Bean Pancake: A Delicious & Easy Recipe
Fluffy Japanese pancakes filled with sweet red bean paste (anko). A delightful breakfast or dessert treat!
Ingredients
- 1 cup (120g) all-purpose flour
- 1 teaspoon baking powder
- 1/2 teaspoon baking soda
- 1/4 teaspoon salt
- 2 tablespoons granulated sugar
- 1 large egg
- 1 cup (240ml) milk
- 2 tablespoons melted unsalted butter, plus more for greasing
- 1 teaspoon vanilla extract
- 1 cup (200g) dried azuki beans
- 4 cups water, plus more for soaking
- 1 cup (200g) granulated sugar, or to taste
- 1/4 teaspoon salt
- Unsalted butter
- Maple syrup
- Whipped cream
- Fresh fruit (strawberries, blueberries, raspberries)
- Matcha powder
- Sesame seeds
Instructions
- Soak the Azuki Beans: Rinse the dried azuki beans thoroughly under cold water. Place them in a large bowl and cover with plenty of cold water (at least 4 cups). Let them soak for at least 4 hours, or preferably overnight.
- First Boil and Drain: Drain the soaked azuki beans and transfer them to a large pot. Add 4 cups of fresh water. Bring the mixture to a boil over high heat. Once boiling, reduce the heat to medium-low and simmer for about 5 minutes.
- Drain and Rinse Again: Drain the beans again and rinse them thoroughly under cold water.
- Second Boil and Simmer: Return the rinsed beans to the pot and add another 4 cups of fresh water. Bring the mixture to a boil over high heat, then reduce the heat to low, cover the pot, and simmer gently for about 1 to 1.5 hours, or until the beans are very tender and easily mashed with a fork. Check the water level periodically and add more water if needed to keep the beans covered.
- Add Sugar and Salt: Once the beans are tender, drain off any excess water, leaving just a little bit in the pot. Add the granulated sugar and salt to the pot. Stir well to combine.
- Mash and Cook: Cook over medium heat, stirring constantly, until the sugar is dissolved and the mixture thickens to your desired consistency. This usually takes about 15-20 minutes. You can use a potato masher or the back of a spoon to mash the beans as they cook.
- Cool Completely: Remove the pot from the heat and let the anko cool completely. As it cools, it will thicken further. You can store the anko in an airtight container in the refrigerator for up to 5 days, or in the freezer for up to 2 months.
- Combine Dry Ingredients: In a large bowl, whisk together the all-purpose flour, baking powder, baking soda, salt, and granulated sugar.
- Combine Wet Ingredients: In a separate bowl, whisk together the egg, milk, melted butter, and vanilla extract.
- Combine Wet and Dry: Pour the wet ingredients into the dry ingredients and whisk until just combined. Be careful not to overmix the batter. A few lumps are okay!
- Rest the Batter: Let the batter rest for 5-10 minutes.
- Heat the Griddle or Pan: Heat a lightly oiled griddle or non-stick frying pan over medium heat.
- Pour the Batter: Pour 1/4 cup of batter onto the hot griddle for each pancake. Leave enough space between the pancakes so they don’t run into each other.
- Cook the First Side: Cook for 2-3 minutes, or until bubbles start to form on the surface of the pancakes and the edges look set.
- Flip and Cook the Second Side: Carefully flip the pancakes with a spatula and cook for another 2-3 minutes, or until they are golden brown on the second side and cooked through.
- Keep Warm: Transfer the cooked pancakes to a plate and keep them warm in a preheated oven (200°F or 93°C) while you cook the remaining batter.
- Spread the Anko: Take one pancake and spread a generous amount of anko (red bean paste) evenly over one side.
- Fold or Stack: You can either fold the pancake in half, like a taco, or place another pancake on top to make a sandwich.
- Add Toppings (Optional): Add your favorite toppings. A pat of butter and some maple syrup are classic choices. You can also add whipped cream, fresh fruit, a dusting of matcha powder, or a sprinkle of sesame seeds.
- Serve Immediately: Serve the Japanese red bean pancakes immediately while they are still warm and delicious.
Notes
- Don’t Overmix the Batter: Overmixing develops the gluten in the flour, resulting in tough pancakes. Mix until just combined, leaving a few lumps.
- Use a Hot Griddle: A hot griddle is essential for achieving golden-brown pancakes. Test the temperature by sprinkling a few drops of water onto the surface.
- Don’t Flip Too Early: Wait until bubbles start to form on the surface of the pancakes and the edges look set before flipping.
- Keep Pancakes Warm: Keep cooked pancakes warm in a preheated oven while you cook the remaining batter.
- Adjust Sweetness: Adjust the amount of sugar in the anko to your liking.
- Anko Storage: Store leftover anko in an airtight container in the refrigerator for up to 5 days, or in the freezer for up to 2 months.
- Pancake Storage: Store leftover pancakes in an airtight container in the refrigerator for up to 3 days. Reheat in a microwave or toaster.