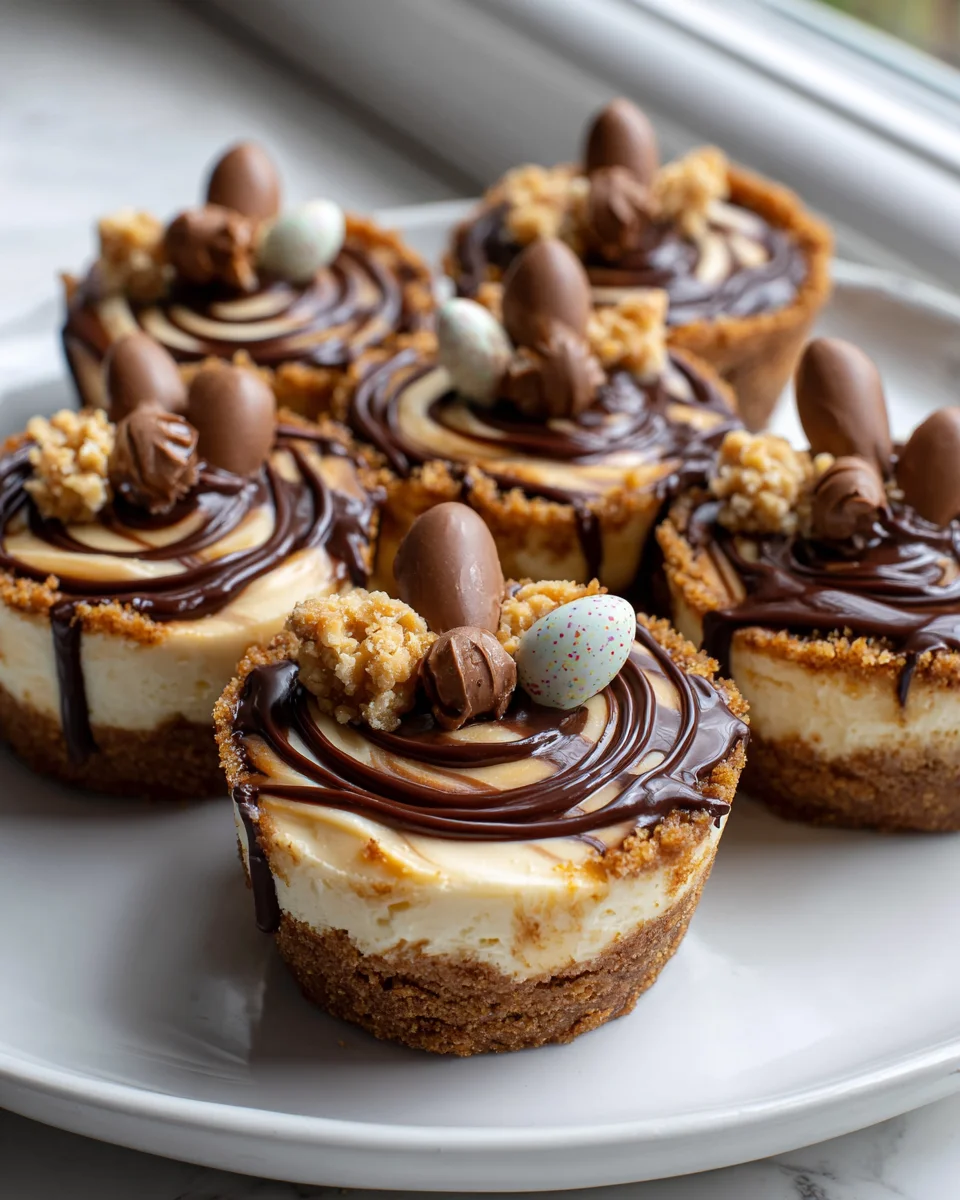
Peanut Butter Eggs Cheesecake Cups
Oh my goodness, get ready to swoon! I’m so excited to share my absolute favorite new creation with you: Peanut Butter Eggs Cheesecake Cups. Seriously, if you’re a fan of the iconic peanut butter and chocolate combination, and you adore the creamy dreaminess of cheesecake, then prepare for your mind to be blown. What makes these little wonders so incredibly special? Well, we’ve taken everything you love about those irresistible peanut butter chocolate eggs – you know the ones! – and transformed them into a sophisticated, yet super fun, individual cheesecake treat. No more fighting over slices of a big cheesecake; these are perfectly portioned cups of pure joy!
You are going to absolutely adore these Peanut Butter Eggs Cheesecake Cups because they strike that perfect balance between nostalgic comfort and elegant indulgence. Imagine a buttery graham cracker crust, topped with a rich, velvety smooth peanut butter cheesecake filling that’s just sweet enough with a hint of salt. And then, for the grand finale, we crown each cup with crumbled pieces of your favorite peanut butter chocolate eggs, perhaps even a drizzle of extra chocolate. They’re ridiculously easy to make, look absolutely adorable on any dessert table, and are guaranteed to be the first treat to disappear at any gathering. Trust me, these aren’t just dessert; they’re an experience in a cup. Let’s dive in and make some magic!

Ingredient Notes
Crafting these delectable Peanut Butter Eggs Cheesecake Cups starts with selecting the right ingredients. Each component plays a vital role in achieving that perfect balance of creamy cheesecake, rich peanut butter, and delightful crunch.
For the Graham Cracker Crust:
- Graham Cracker Crumbs: I always reach for finely crushed graham cracker crumbs as the base. They provide a sturdy, subtly sweet foundation for our cheesecake. If you don’t have pre-crushed crumbs, simply process whole graham crackers in a food processor until they’re fine.
- Granulated Sugar: Just a touch of sugar in the crust enhances its sweetness and helps achieve that golden-brown finish.
- Unsalted Butter (Melted): This is the binding agent! Melted butter holds the crumbs together, ensuring a firm, delicious crust. Using unsalted butter allows us to control the overall saltiness of the dish.
For the Peanut Butter Cheesecake Filling:
- Full-Fat Cream Cheese (Softened): This is the star of any cheesecake, and for these cups, full-fat cream cheese is non-negotiable for that rich, velvety texture. Make sure it’s at room temperature before you start mixing to ensure a smooth, lump-free batter.
- Creamy Peanut Butter: For the best results, I recommend using a standard creamy peanut butter (like Jif or Skippy) rather than natural peanut butter that separates. The standard varieties have a more consistent texture and flavor that blends seamlessly into the cheesecake. If you prefer natural, ensure it’s very well-stirred.
- Granulated Sugar: Sweetens the cheesecake and balances the tanginess of the cream cheese and richness of the peanut butter.
- Large Eggs (Room Temperature): Eggs are crucial for the cheesecake’s structure and creamy texture. Always use room temperature eggs, as they incorporate more smoothly into the batter, preventing overmixing and potential cracks.
- Vanilla Extract: A splash of good quality vanilla extract enhances all the other flavors.
- Sour Cream (Room Temperature): This secret ingredient adds a slight tang and an incredibly smooth, moist texture to the cheesecake. Like the cream cheese and eggs, ensure it’s at room temperature.
For the “Peanut Butter Eggs” Component & Garnish:
- Mini Chocolate Peanut Butter Eggs: This is where the “Peanut Butter Eggs” in the title really shine! I love using individually wrapped chocolate peanut butter eggs (like Reese’s Eggs, especially when they’re in season, or their year-round mini versions). You can chop them to mix into the batter, or place a whole mini one in the center of each cup before baking for a delightful surprise. For garnish, more chopped eggs work perfectly.
- Optional Toppings: Whipped cream, chocolate sauce drizzle, or even a sprinkle of chopped peanuts can take these cups to the next level visually and texturally.
Substitutions I’ve Explored:
- Crust: If graham crackers aren’t your favorite, you could easily substitute them with crushed digestive biscuits for a similar texture, or even crushed chocolate cookies (like Oreos, with the cream filling removed) for a chocolate crust twist.
- Peanut Butter: While I recommend creamy for consistency, if you absolutely love a bit of crunch, you could try a crunchy peanut butter, just be aware it will alter the smoothness of the cheesecake batter slightly.
- Peanut Butter Eggs: If specific peanut butter egg candies aren’t available, you could use chopped regular peanut butter cups, or even make your own simple peanut butter filling (peanut butter, powdered sugar, butter) rolled into small balls to insert into the cups.
Step-by-Step Instructions
Making these Peanut Butter Eggs Cheesecake Cups is a fun and surprisingly straightforward process. Follow these steps, and you’ll have a batch of delightful individual cheesecakes ready to impress!
Step 1: Prepare for Baking
- First things first, preheat your oven to 325°F (160°C).
- Line a standard 12-cup muffin tin with paper liners. I find that lightly greasing the tin before adding the liners can sometimes help prevent sticking, though good quality liners usually do the trick.
Step 2: Make the Graham Cracker Crust
- In a medium bowl, combine your graham cracker crumbs, granulated sugar, and melted unsalted butter. Mix well until the crumbs are evenly moistened. It should resemble wet sand.
- Divide the mixture evenly among the 12 prepared muffin cups. Using the back of a spoon or a small tamper, firmly press the crust mixture down into an even layer at the bottom of each liner.
- Bake the crusts for 5-7 minutes. This brief bake helps set the crust, making it sturdier and preventing it from becoming soggy later. Remove from the oven and set aside to cool slightly while you prepare the filling. Keep the oven on.
Step 3: Prepare the Peanut Butter Cheesecake Filling
- In a large mixing bowl, using an electric mixer (handheld or stand mixer with paddle attachment), beat the softened full-fat cream cheese on medium speed until it’s completely smooth and creamy, about 2-3 minutes. Make sure there are no lumps!
- Add the creamy peanut butter and granulated sugar to the cream cheese. Beat on medium speed until well combined and smooth, scraping down the sides of the bowl as needed.
- Next, beat in the vanilla extract.
- Reduce the mixer speed to low. Add the room temperature eggs, one at a time, mixing just until each egg is incorporated. It’s crucial not to overmix at this stage, as too much air can cause cracks in your cheesecake.
- Finally, gently fold in the room temperature sour cream until just combined. Again, avoid overmixing.
Step 4: Fill the Cups and Add the “Eggs”
- Spoon the peanut butter cheesecake filling evenly over the baked graham cracker crusts in each muffin cup. Each cup should be about three-quarters full.
- Now for the “Peanut Butter Eggs”! If you’re using whole mini chocolate peanut butter eggs, gently press one into the center of the filling in each cup. If you’re using chopped eggs, you can either sprinkle them over the top now or fold them into the batter before spooning it into the cups (I often do a mix of both!).
Step 5: Bake the Cheesecake Cups
- Carefully transfer the muffin tin to your preheated oven.
- Bake for 18-22 minutes, or until the edges are set, but the centers still have a slight jiggle. Remember, they will continue to set as they cool. Overbaking can lead to dry cheesecakes and cracks.
Step 6: Cool and Chill
- Once baked, turn off the oven and prop the oven door open slightly with a wooden spoon. Let the cheesecake cups cool in the oven for about 15-20 minutes. This slow cooling helps prevent cracking.
- Remove the muffin tin from the oven and transfer it to a wire rack to cool completely at room temperature.
- Once fully cooled, transfer the muffin tin to the refrigerator and chill the cheesecake cups for at least 4 hours, or preferably overnight. Chilling is absolutely essential for the cheesecake to firm up, develop its full flavor, and be easy to remove from the liners.
Step 7: Garnish and Serve
- Once thoroughly chilled, carefully lift each cheesecake cup out of the muffin tin using the paper liners.
- Before serving, you can add your chosen garnishes. I love a dollop of whipped cream, a drizzle of melted chocolate, and a sprinkle of extra chopped mini chocolate peanut butter eggs or roasted peanuts.
- Serve cold and enjoy your homemade Peanut Butter Eggs Cheesecake Cups!
Tips & Suggestions
To ensure your Peanut Butter Eggs Cheesecake Cups turn out perfectly every time, I’ve gathered some of my best tips and suggestions. These small details can make a big difference in the final product!
- Room Temperature Ingredients are Key: This is arguably the most important tip for any cheesecake. Ensure your cream cheese, eggs, and sour cream are at room temperature. This allows them to blend smoothly and evenly, creating a silky batter free of lumps and preventing overmixing, which can introduce too much air and cause cracks. I usually take them out of the fridge at least an hour before I plan to start baking.
- Don’t Overmix the Batter: Once you add the eggs, mix only until just combined. Overmixing incorporates too much air into the batter, and this air expands during baking and then collapses during cooling, leading to cracks. We want a dense, smooth cheesecake, not a soufflé!
- The Gentle Bake and Cool: Cheesecakes are sensitive to sudden temperature changes. Baking at a lower temperature and allowing them to cool gradually (first in the oven with the door ajar, then on a wire rack, then in the fridge) minimizes the risk of cracking and ensures a tender texture.
- The Power of Chilling: Patience is a virtue, especially with cheesecake. Do NOT skip or shorten the chilling time. A minimum of 4 hours, or ideally overnight, is crucial for the cheesecake to fully set, firm up, and allow its flavors to meld beautifully. It also makes them much easier to handle and serve.
- Preventing a Soggy Crust: The short pre-bake of the graham cracker crust helps create a barrier that prevents the crust from absorbing too much moisture from the cheesecake filling, keeping it nice and crisp. Make sure your butter-to-crumb ratio is also just right – not too wet, not too dry.
- For Easy Removal: Always use paper liners for individual cheesecake cups. If you’re concerned about liners sticking, you can lightly spray the inside of the liners with cooking spray before adding the crust, but good quality liners usually release easily after thorough chilling.
- Vary Your “Eggs”: While I love the mini chocolate peanut butter eggs, feel free to get creative! You could chop regular peanut butter cups, or even make a quick peanut butter truffle mixture (peanut butter, powdered sugar, melted butter) rolled into small balls to place in the center of each cup for a homemade “egg” surprise.
- Crust Variations: Don’t feel tied to graham crackers. Crushed vanilla wafers, chocolate wafer cookies, or even shortbread biscuits can make excellent crust alternatives for different flavor profiles.
- Topping Ideas: Beyond whipped cream and extra peanut butter eggs, consider a drizzle of caramel sauce, a sprinkle of sea salt to enhance the peanut butter flavor, or even a mini chocolate chip garnish.
- Making Ahead: These cheesecake cups are fantastic for making ahead! They need to chill for a long time anyway, so preparing them a day or even two in advance is perfect for entertaining. Just add the fresh garnishes right before serving.
Storage
Proper storage is essential to keep your Peanut Butter Eggs Cheesecake Cups fresh, delicious, and safe to eat. Here’s how I typically store them:
Refrigeration:
- Airtight Container: Once your cheesecake cups are fully chilled and set, remove them from the muffin tin (if you haven’t already). The best way to store them is in a single layer in an airtight container. If you need to stack them, place a piece of parchment paper or wax paper between layers to prevent them from sticking or squishing.
- Longevity: Stored correctly in the refrigerator, these cheesecake cups will stay fresh for up to 5-7 days. The flavors often deepen and improve a day or two after they’re made, making them an excellent make-ahead dessert.
- Avoid Exposure: Cheesecakes can absorb odors from other foods in your fridge, so the airtight container is crucial not just for freshness but also to maintain their pure flavor.
Freezing:
- For Longer Storage: If you’ve made a big batch or want to enjoy them over a longer period, these cheesecake cups freeze beautifully!
- Initial Freeze: First, remove the cheesecake cups from their paper liners (if you want to reduce bulk in the freezer). Place the individual cheesecake cups on a baking sheet lined with parchment paper. Freeze them uncovered for about 1-2 hours, or until they are firm to the touch. This step is important for preventing them from sticking together.
- Wrap and Store: Once individually frozen, wrap each cheesecake cup tightly in plastic wrap, then place them in a freezer-safe airtight container or a heavy-duty freezer bag. Removing as much air as possible will help prevent freezer burn.
- Longevity: Properly frozen, Peanut Butter Eggs Cheesecake Cups can be stored for up to 1-2 months. Beyond this, the quality might start to decline, though they would still be safe to eat.
- Thawing: When you’re ready to enjoy a frozen cheesecake cup, transfer it from the freezer to the refrigerator to thaw slowly overnight. I typically leave them wrapped while thawing to prevent condensation. Avoid thawing at room temperature for food safety and to maintain texture.
- Garnish After Thawing: If you plan to add fresh garnishes like whipped cream or chocolate drizzle, always do so after the cheesecake cups have thawed.
Always keep these cheesecake cups chilled until just before serving for the best taste and texture!
Final Thoughts
I hope you’re as excited about these Peanut Butter Eggs Cheesecake Cups as I am! They truly are a fantastic combination, bringing together that irresistible creamy peanut butter flavor with the rich, tangy goodness of cheesecake, all nestled in perfectly portioned cups. It’s the kind of dessert that feels special, whether you’re making it for a gathering or just treating yourself to something wonderfully indulgent. The individual serving size makes them not just adorable, but also incredibly convenient – no slicing required! Trust me, once you try these Peanut Butter Eggs Cheesecake Cups, you’ll understand why they’re destined to become a firm favorite in your dessert repertoire. Go ahead, gather your ingredients, and prepare to delight your taste buds with this truly delightful treat!
Irresistible Peanut Butter Eggs Cheesecake Cups Recipe

Indulge in these delightful Peanut Butter Eggs Cheesecake Cups that perfectly blend creamy cheesecake with the nostalgic flavors of peanut butter and chocolate. These individual treats are not only easy to make but are sure to be the star of any dessert table!
- Prep Time: 30 mins
- Cook Time: 25 mins
- Total Time: 55 minutes
- Yield: 12 servings
- Category: Dessert
- Method: Baking
- Cuisine: American
Ingredients
- Graham Cracker Crumbs
- Granulated Sugar
- Unsalted Butter (Melted)
- Full-Fat Cream Cheese (Softened)
- Creamy Peanut Butter
- Granulated Sugar
- Large Eggs (Room Temperature)
- Vanilla Extract
- Sour Cream (Room Temperature)
- Mini Chocolate Peanut Butter Eggs
- Optional Toppings: Whipped cream, chocolate sauce drizzle, or chopped peanuts
Instructions
- Preheat your oven to 325°F (160°C).
- Line a standard 12-cup muffin tin with paper liners, lightly greasing the tin if desired.
- In a medium bowl, combine graham cracker crumbs, granulated sugar, and melted unsalted butter. Mix until the crumbs are evenly moistened.
- Divide the mixture evenly among the 12 prepared muffin cups and press down to form an even layer.
- Bake the crusts for 5-7 minutes, then remove from the oven and set aside to cool slightly.
- In a large mixing bowl, beat the softened full-fat cream cheese on medium speed until smooth and creamy.
- Add creamy peanut butter and granulated sugar to the cream cheese and beat until well combined.
- Beat in the vanilla extract.
- Reduce mixer speed to low and add room temperature eggs one at a time, mixing just until incorporated.
- Gently fold in the room temperature sour cream until just combined.
- Spoon the peanut butter cheesecake filling evenly over the baked graham cracker crusts, filling each cup about three-quarters full.
- Press a whole mini chocolate peanut butter egg into the center of each cup or fold chopped eggs into the batter before filling.
- Transfer the muffin tin to the preheated oven and bake for 18-22 minutes until edges are set but centers still jiggle.
- Turn off the oven and prop the door open slightly. Let the cheesecake cups cool in the oven for 15-20 minutes.
- Remove the muffin tin from the oven and transfer it to a wire rack to cool completely.
- Once cooled, refrigerate the cheesecake cups for at least 4 hours or overnight.
- Carefully lift each cheesecake cup out of the muffin tin using the paper liners.
- Add garnishes like whipped cream, melted chocolate, and chopped mini chocolate peanut butter eggs before serving.
Nutrition
- Serving Size: 1 cup
- Calories: 250
- Sugar: 15 g
- Sodium: 150 mg
- Fat: 15 g
- Saturated Fat: 7 g
- Unsaturated Fat: 5 g
- Trans Fat: 0 g
- Carbohydrates: 25 g
- Fiber: 1 g
- Protein: 5 g
- Cholesterol: 50 mg
Keywords: Ensure all ingredients are at room temperature for best results. Avoid overmixing the batter to prevent cracks in the cheesecake. You can substitute graham crackers with crushed digestive biscuits or chocolate cookies for a different crust flavor.