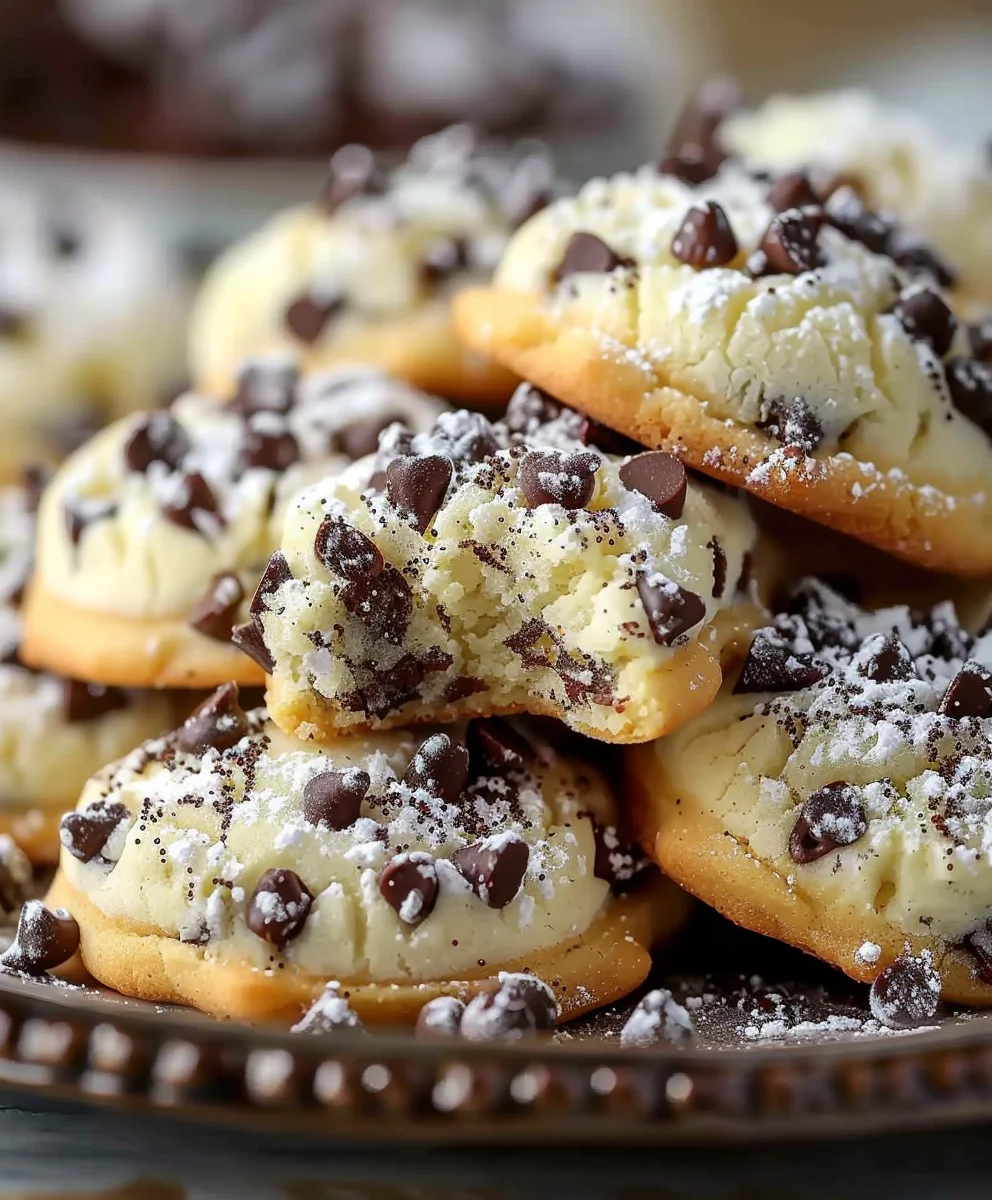
Cannoli Cookies are more than just a sweet treat; they are a charming homage to a beloved Italian classic, transformed into a portable delight. Imagine sinking your teeth into a perfectly baked cookie that encapsulates all the iconic flavors and textures of a traditional Sicilian cannoli – the crispness, the rich, creamy ricotta, and the subtle hints of citrus and chocolate. It’s an innovative creation that brings the grandeur of a pastry shop favorite right into your home kitchen, without the need for intricate frying.
While the traditional cannolo boasts a storied history, dating back to ancient times and becoming synonymous with Sicilian festivities, these modern Cannoli Cookies offer a wonderful new chapter. They capture the very essence of why people adore cannoli: the exquisite balance of a slightly crisp shell giving way to a sweet, tangy, and utterly luxurious ricotta cheese filling, often studded with candied fruit or mini chocolate chips. This cookie adaptation delivers that very same complex flavor profile in a more accessible, everyday format, making it a truly brilliant innovation.
I find that what truly makes these cookies irresistible is their ability to evoke that nostalgic, comforting feeling of a classic Italian dessert while offering the familiar, satisfying chew of a cookie. They are incredibly popular not just for their unique taste, combining delicate sweetness with a zesty undertone, but also for their delightful texture and sheer convenience. These Cannoli Cookies embody a celebration of flavor, making them perfect for sharing, gifting, or simply savoring with a cup of espresso.

Ingredients:
- For the Cookie Dough (The “Shell” for Your Cannoli Cookies):
- 3 cups (360g) all-purpose flour, plus extra for dusting (I always recommend sifting your flour for the lightest texture in these Cannoli Cookies!)
- 1 teaspoon baking powder
- ½ teaspoon salt
- 1 cup (226g) unsalted butter, softened to room temperature (This is key for proper creaming!)
- 1 ¼ cups (250g) granulated sugar
- 2 large eggs, at room temperature
- 1 teaspoon pure vanilla extract (Good quality makes all the difference!)
- 1 teaspoon lemon zest (optional, but it adds a beautiful brightness, reminiscent of classic cannoli)
- For the Creamy Cannoli Filling:
- 2 pounds (approximately 900g) whole milk ricotta cheese (Crucial: You’ll need to drain this extensively!)
- 1 cup (120g) powdered sugar, sifted (Sifting prevents lumps, making your filling silky smooth)
- 1 teaspoon pure vanilla extract
- ½ teaspoon orange zest (optional, but it’s a lovely, authentic touch for our Cannoli Cookies)
- ¾ cup mini chocolate chips, plus more for garnish (I prefer mini ones so they distribute evenly)
- ¼ cup finely chopped candied orange peel or pistachios (optional, for mixing into the filling for extra texture and flavor)
- For Garnish and Decoration:
- ½ cup mini chocolate chips (for dipping the sides)
- ½ cup finely chopped pistachios (for dipping the sides)
- Powdered sugar, for dusting (The final flourish for perfect Cannoli Cookies!)
Phase 1: Preparing the Exquisite Cookie Dough for Your Cannoli Cookies
-
Sifting the Dry Ingredients:
I always start by combining my dry ingredients in a medium bowl. Grab your all-purpose flour, baking powder, and salt. Give them a good sift together into a bowl. This ensures everything is perfectly aerated and evenly distributed, which is essential for a tender cookie base for our Cannoli Cookies. Set this bowl aside for now. -
Creaming Butter and Sugar to Perfection:
In a large mixing bowl, using either a stand mixer fitted with the paddle attachment or a hand mixer, beat your softened unsalted butter on medium speed until it’s light and fluffy, usually about 1-2 minutes. Then, gradually add your granulated sugar, beating for another 3-5 minutes until the mixture is truly pale and fluffy. This creaming process incorporates air, which contributes to the delightful texture of your cookie shells. Don’t rush this step; it’s fundamental to the success of your Cannoli Cookies! -
Incorporating Eggs and Vanilla:
Now, it’s time to add the eggs, one at a time. After each egg, beat well until it’s fully incorporated into the butter and sugar mixture, scraping down the sides of the bowl as needed. This prevents separation and ensures a smooth batter. Once both eggs are in and combined, stir in the vanilla extract and the optional lemon zest. The lemon zest, for me, truly elevates these cookies, giving them that classic, bright cannoli flavor profile. -
Combining Wet and Dry Mixtures:
With your mixer on low speed, gradually add the sifted dry ingredients to the wet mixture, a third at a time. Mix just until the flour is incorporated and no streaks remain. Be careful not to overmix! Overmixing develops the gluten in the flour too much, which can lead to tough cookies, and we want wonderfully tender shells for our Cannoli Cookies. The dough should be soft, but not overly sticky. -
Chilling the Dough (Crucial for Cannoli Cookies Texture!):
Gather the dough, flatten it into a disc, and wrap it tightly in plastic wrap. Transfer it to the refrigerator to chill for at least 1 hour, or up to overnight. This chilling period is absolutely vital. It allows the butter to firm up, making the dough easier to handle, and it prevents the cookies from spreading too much in the oven. More importantly, it gives the flavors a chance to meld and deepen, resulting in a more flavorful cookie base. Trust me, patience here pays off immensely for these Cannoli Cookies!
Phase 2: Crafting the Luxurious Cannoli Filling
-
The All-Important Ricotta Draining (Emphasize this!):
This step cannot be overstated: properly draining your ricotta cheese is the secret to a thick, luscious cannoli filling that won’t make your Cannoli Cookies soggy. Place a fine-mesh sieve over a bowl and line it with several layers of cheesecloth or a clean kitchen towel. Spoon the whole milk ricotta into the lined sieve. Cover it lightly with plastic wrap and refrigerate it for a minimum of 4 hours, but ideally overnight, or even up to 24 hours. You’ll be amazed at how much liquid drains out. The drier the ricotta, the richer and more stable your filling will be. You want a ricotta that is almost like a thick paste. -
Mixing the Filling Ingredients:
Once your ricotta is thoroughly drained, transfer it to a large mixing bowl. Add the sifted powdered sugar, vanilla extract, and the optional orange zest. Using a rubber spatula or a sturdy spoon, gently fold everything together until well combined and smooth. I prefer not to use a mixer here, as it can make the ricotta too thin or watery. Then, gently fold in the mini chocolate chips and the optional candied orange peel or pistachios. This creates a classic cannoli flavor and texture, perfectly suited for these delightful Cannoli Cookies. -
Chilling the Filling (Allows Flavors to Meld):
Cover the bowl of filling tightly with plastic wrap and refrigerate it for at least 30 minutes, or until you’re ready to assemble your cookies. Chilling allows the flavors to meld beautifully and ensures the filling is firm enough to pipe easily without losing its shape. This small step contributes significantly to the overall deliciousness of your Cannoli Cookies.
Phase 3: Baking Your Delightful Cannoli Cookie Shells
-
Preheating and Preparing Baking Sheets:
About 15-20 minutes before you plan to bake, preheat your oven to 375°F (190°C). Line two large baking sheets with parchment paper or silicone baking mats. This prevents sticking and ensures even baking, which is particularly important for delicate cookies like these Cannoli Cookies. -
Rolling and Cutting the Dough (Shape Options: Round or Oval):
Remove the chilled cookie dough from the refrigerator. On a lightly floured surface (don’t add too much flour, just enough to prevent sticking), roll out the dough to about ¼-inch thickness. For the classic Cannoli Cookie look, you can use a 2-inch round cookie cutter, or for a slightly more elongated shape, an oval cutter works wonderfully. Cut out your cookie shapes and carefully transfer them to the prepared baking sheets, leaving about 1 inch between each cookie. Re-roll any scraps, but try not to overwork the dough. If the dough becomes too soft to handle, pop it back in the fridge for 10-15 minutes. -
Baking the Cookie Shells:
Bake one sheet at a time in the preheated oven for 8-11 minutes, or until the edges are lightly golden and the centers are just set. The exact time will vary depending on your oven and the size of your cookies, so keep a close eye on them. We want them cooked through but still tender, not overly crisp, to mimic that perfect cannoli shell texture. This soft chew is what truly makes them exceptional Cannoli Cookies. -
Cooling the Cookie Shells:
Once baked, immediately transfer the cookies from the hot baking sheets to a wire rack to cool completely. They will firm up as they cool. Resist the urge to fill them while they’re warm, as this could cause the filling to melt and make your cookies soggy. Complete cooling is essential for the structural integrity of your Cannoli Cookies.
Phase 4: Assembling and Decorating Your Signature Cannoli Cookies
-
Preparing for Filling:
Once your cookie shells are completely cool and your cannoli filling is nicely chilled and firm, prepare your piping bag. Fit a large round or star tip into a sturdy piping bag. Spoon the cannoli filling into the bag. If you don’t have a piping bag, a large resealable plastic bag with a corner snipped off will work just fine. Having a well-prepared piping setup makes the assembly of these Cannoli Cookies much easier and neater. -
Filling the Cannoli Cookies:
Take one cooled cookie and pipe a generous dollop of the cannoli filling onto the flat side of half of the cookies. Gently place another cookie on top, flat side down, pressing gently to create a sandwich. The filling should just peek out the sides a little. I like to pipe enough filling so that each bite gets a good amount of that creamy deliciousness, truly bringing out the “cannoli” in our Cannoli Cookies. Repeat this process until all your cookies are assembled. -
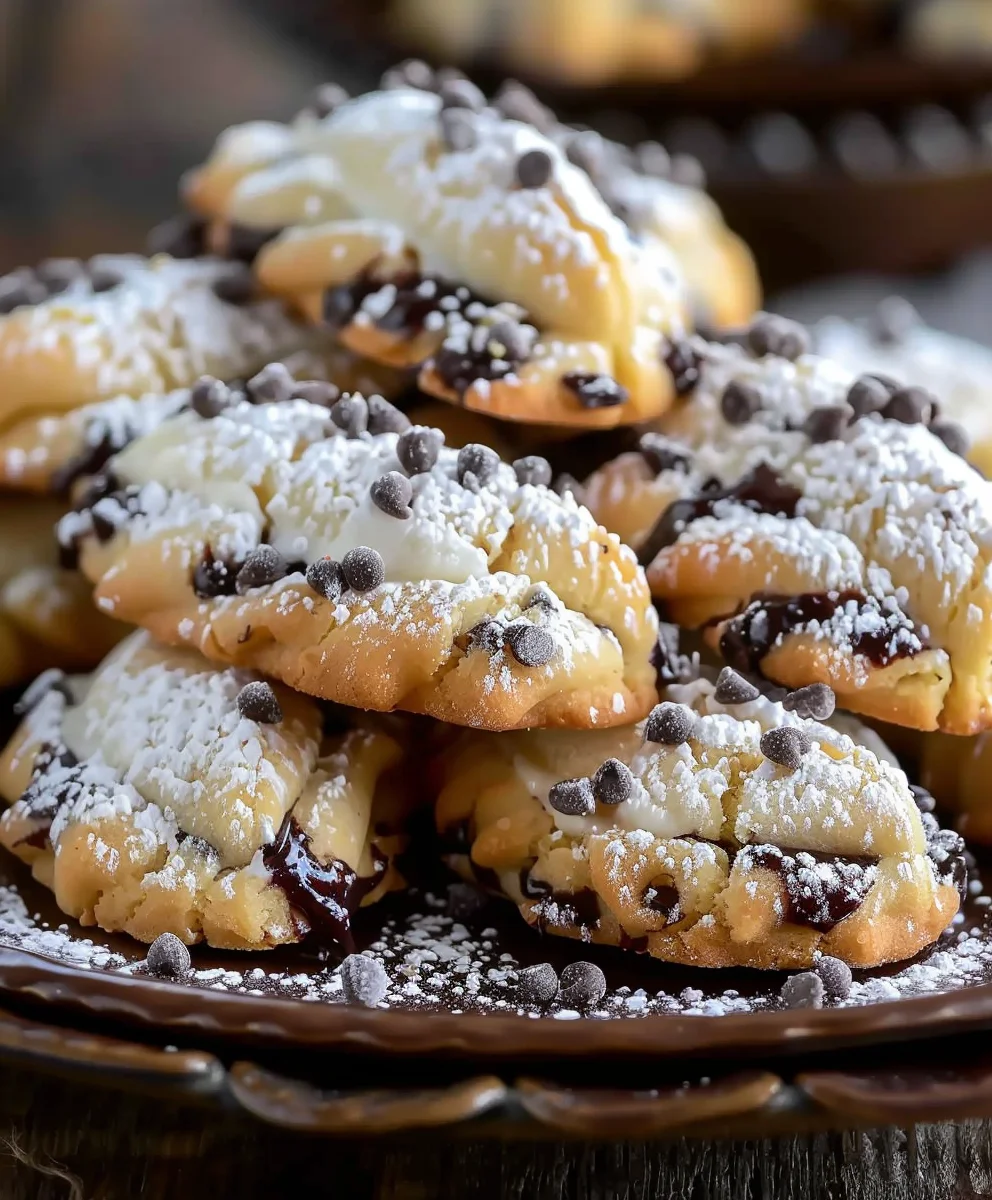
The Final Touches: Garnish and Presentation:
Now for the fun part – decorating! Place the remaining mini chocolate chips in a shallow dish and the chopped pistachios in another. Gently roll the edges of each filled cookie sandwich into the chocolate chips or pistachios, or both, to coat the exposed filling. This not only adds visual appeal but also provides an extra layer of texture and flavor, perfectly complementing the creamy filling and tender cookie. Arrange your beautiful Cannoli Cookies on a serving platter. -
Resting and Serving Your Incredible Cannoli Cookies:
For the best flavor and texture, I actually recommend letting your assembled Cannoli Cookies rest in the refrigerator for at least 30 minutes before serving. This allows the cookie to slightly soften from the moisture of the filling and allows the flavors to meld even further. Just before serving, give them a delicate dusting of powdered sugar. These are truly best enjoyed fresh, but they can be stored in an airtight container in the refrigerator for up to 3 days. However, the cookie shells will gradually soften over time.
Tips for Perfect Cannoli Cookies:
- Quality of Ricotta: Always opt for whole milk ricotta cheese for your filling. It’s richer, creamier, and has less water content to begin with, making the draining process more effective. Skimping on this ingredient will impact the luxuriousness of your Cannoli Cookies.
- Don’t Rush the Chill: Both the cookie dough and the filling benefit immensely from chilling. The dough becomes easier to handle and bakes more evenly, while the filling firms up and allows flavors to deepen. If you rush these steps, the overall quality of your Cannoli Cookies will suffer.
- Preventing Soggy Cookies: The main culprit for soggy Cannoli Cookies is poorly drained ricotta. Take your time with this step, letting it drain overnight if possible. Additionally, only fill the cookies when you are ready to serve them, or at most a few hours in advance, to maintain the best cookie texture.
- Get Creative with Garnishes: While mini chocolate chips and pistachios are classic, feel free to experiment! A drizzle of melted dark chocolate, a touch of candied fruit, or even a sprinkle of edible glitter can add your personal touch to these delightful Cannoli Cookies.
- Serving Temperature: While these are delightful straight from the fridge, letting them sit at room temperature for about 10-15 minutes before serving can really help the flavors of the filling bloom, making each bite of your Cannoli Cookies even more enjoyable.
Conclusion:
So, here we are at the delightful culmination of our baking adventure! If you’ve been following along, you already know the magic that happens when classic Italian flavors meet the comforting familiarity of a homemade cookie. There’s a reason why I’m so incredibly passionate about this particular recipe, and why I genuinely believe it’s an absolute must-try for anyone who loves baking, Italian desserts, or simply a truly exceptional treat.
Why are these Cannoli Cookies an absolute game-changer? Well, first and foremost, they capture the essence of a traditional cannoli without the fuss of frying shells. We’re talking about that rich, creamy ricotta cheese filling, subtly sweetened and often brightened with a hint of citrus, all nestled within a soft, chewy cookie base. Then, we add those irresistible chocolate chips – sometimes mini, sometimes standard, always a welcome textural and flavor contrast – and a sprinkle of chopped pistachios for that signature crunch and vibrant color. It’s a symphony of textures: the tender cookie, the velvety filling, the crisp chocolate, and the nutty pistachio. Each bite is a journey, a miniature explosion of flavor that transports you straight to a quaint Italian bakery, all from the comfort of your own kitchen.
Embrace the Versatility: Serving & Variation Ideas
Once your batch of these incredible cookies is baked and cooled, the possibilities for enjoyment are endless. They are, of course, absolutely divine on their own, perhaps with a strong espresso or a glass of chilled milk. But why stop there? For a truly indulgent dessert experience, try serving them alongside a scoop of vanilla bean gelato or a dollop of fresh whipped cream. They make an exquisite ending to any dinner party, offering a touch of sophisticated sweetness without being overly heavy. Imagine a beautifully arranged platter of these cookies at your next gathering – they’re guaranteed to be a conversation starter and disappear rapidly!
And let’s talk about variations – this is where you can truly make this recipe your own! While the classic rendition is perfect, feel free to experiment. Instead of just semi-sweet chocolate chips, consider using dark chocolate for a more intense flavor, or white chocolate for a sweeter, creamier touch. For an extra layer of nutty goodness, toast your pistachios lightly before chopping, or even try adding finely chopped almonds or walnuts to the dough. A dash of orange zest mixed into the ricotta filling can elevate the citrus notes, bringing a brighter, more aromatic dimension to the flavor profile. Or, for those who love a bit of spice, a pinch of cinnamon or nutmeg in the cookie dough can add warmth and complexity. If you’re feeling adventurous, you could even drizzle a little melted chocolate or a simple powdered sugar glaze over the top for an extra flourish. Think about transforming them into “cookie sandwiches” by spreading an extra layer of that luscious ricotta filling between two cooled cookies – pure decadence! For special occasions, consider adding a sprinkle of festive sprinkles before the cookies set to match your holiday theme. The beauty of these Cannoli Cookies lies in their adaptability, allowing you to tailor them to your precise cravings or the preferences of your guests.
Your Turn to Bake and Share!
I truly hope this recipe has inspired you to preheat your oven and embark on this delicious journey. Baking should be a joy, an act of creation, and I promise you, the reward of these exquisite Cannoli Cookies is well worth every moment spent in the kitchen. There’s something immensely satisfying about presenting a homemade treat that looks and tastes so professionally crafted, yet is entirely achievable for the home baker.
Don’t just take my word for it – experience the magic yourself! I am so incredibly eager to hear about your baking adventures. Did you try a new variation? Did they become an instant family favorite? Did you share them with friends and receive rave reviews? Please, don’t hesitate to share your thoughts, your photos, and any brilliant tweaks you discover. Your experiences not only inspire me but also help build a wonderful community of fellow food enthusiasts. So go on, gather your ingredients, turn on your favorite tunes, and get ready to create something truly special. Happy baking, my friends!
Cannoli Cookies
A charming homage to a beloved Italian classic, these Cannoli Cookies capture the iconic flavors and textures of a traditional Sicilian cannoli—crispness, creamy ricotta, hints of citrus and chocolate—in a delightful, easy-to-make cookie format.
Ingredients
-
1 cup (240 ml) all-purpose flour
-
½ cup (100 g) granulated sugar
-
½ cup (120 g) ricotta cheese
-
1 large egg
-
1 tsp vanilla extract
-
1 tsp lemon zest
-
½ cup (75 g) mini chocolate chips
-
½ cup (75 g) chopped pistachios
-
Powdered sugar for dusting
Instructions
-
Step 1
Prepare Cookie Dough: In a bowl, combine 1 cup all-purpose flour, ½ cup granulated sugar, 1 large egg, 1 tsp vanilla extract, and 1 tsp lemon zest. Mix until a cohesive dough forms. -
Step 2
Chill Dough: Flatten the dough into a disc, wrap tightly in plastic, and chill in the refrigerator for at least 1 hour. -
Step 3
Drain Ricotta: Place ½ cup ricotta cheese in a fine-mesh sieve lined with several layers of cheesecloth or a clean kitchen towel. Refrigerate for at least 4 hours, or ideally overnight, to thoroughly drain excess liquid. -
Step 4
Prepare Filling: In a bowl, combine the thoroughly drained ricotta cheese and 1 tsp vanilla extract. Gently fold in ¼ cup of the mini chocolate chips. Chill the filling for 30 minutes. -
Step 5
Bake Cookie Shells: Preheat oven to 375°F (190°C). On a lightly floured surface, roll the chilled dough to ¼-inch thickness. Cut out 2-inch rounds and carefully transfer them to parchment-lined baking sheets. Bake for 8-11 minutes, or until the edges are lightly golden. Transfer to a wire rack to cool completely. -
Step 6
Assemble Cookies: Once cookie shells are completely cool and filling is chilled, pipe or spoon a generous dollop of filling onto the flat side of half the cookie shells. Top with the remaining shells to form sandwiches. -
Step 7
Garnish and Serve: Roll the exposed edges of the filled cookies into the remaining ¼ cup mini chocolate chips and ½ cup chopped pistachios. Dust with powdered sugar just before serving. For best flavor, chill assembled cookies for at least 30 minutes prior to serving.
Important Information
Nutrition Facts (Per Serving)
It is important to consider this information as approximate and not to use it as definitive health advice.
Allergy Information
Please check ingredients for potential allergens and consult a health professional if in doubt.