Irresistible Baked Italian Sub Sandwiches Recipe
Oh boy, have I got a treat for you today! Forget everything you thought you knew about your average Italian sub. While I love a good cold cut sandwich as much as the next person, this recipe for Irresistible Baked Italian Sub Sandwiches Recipe takes things to a whole new level of deliciousness. What makes it so special, you ask? Well, it’s all about that magical moment when you introduce a classic sub to the warm embrace of your oven.
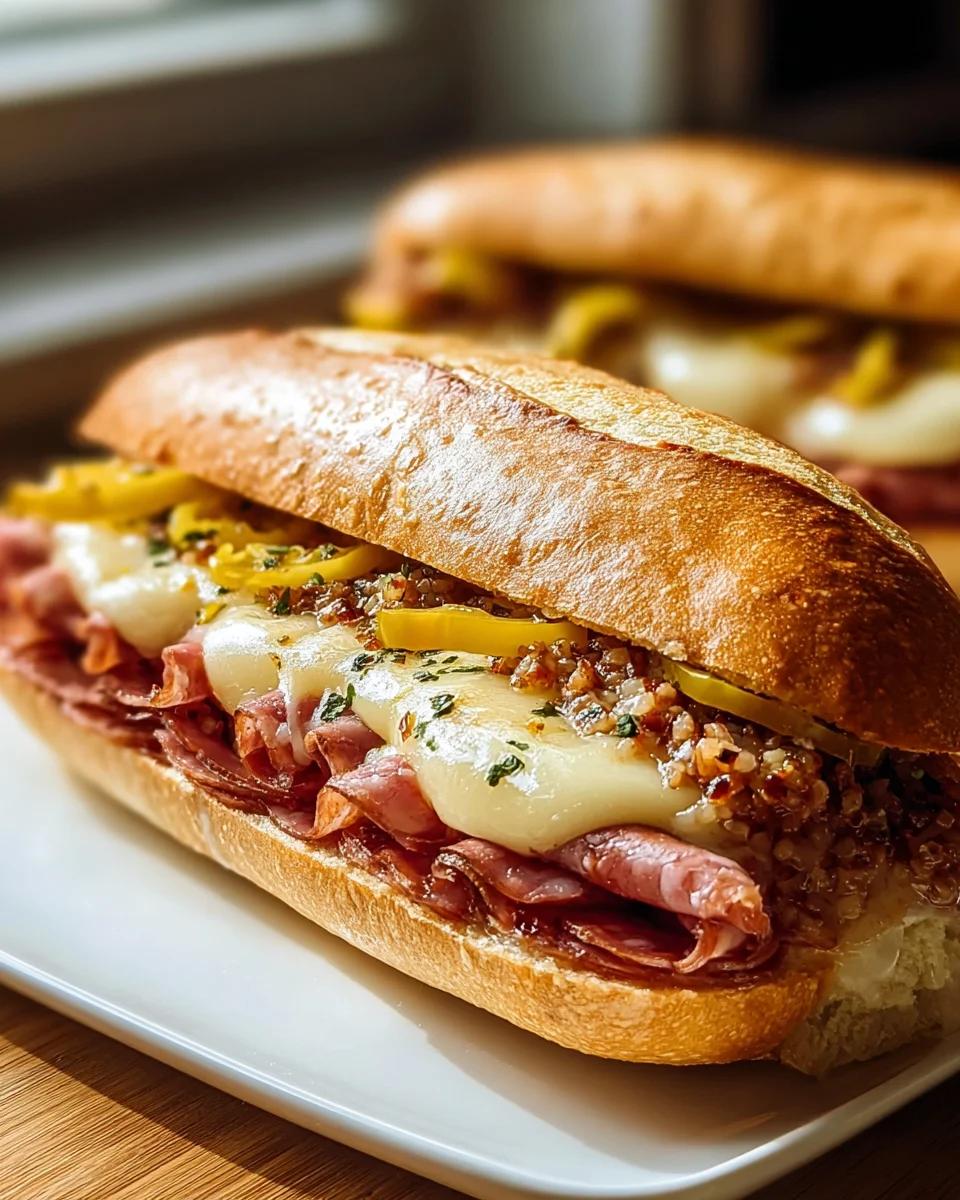
Imagine this: crusty bread, piled high with a symphony of savory Italian-style beef, tangy pepperoncini, a medley of melty cheeses, and vibrant seasonings, all baked until the bread is perfectly toasted, the fillings are gloriously warm, and the cheese is bubbly and gooey. It’s comforting, hearty, and utterly packed with flavor. Every bite is a warm hug for your taste buds! I promise you, once you try a baked Italian sub, there’s simply no going back.
You’re going to absolutely love this recipe because it transforms a simple sandwich into a substantial, incredibly satisfying meal perfect for a casual dinner, game day, or feeding a hungry crowd. It’s surprisingly easy to put together, yet delivers an impressive “wow” factor. We’re talking about all the iconic Italian sub flavors you adore, amplified and elevated by the baking process. Get ready to experience your new favorite way to enjoy an Italian sub!

Welcome, fellow food lovers! Today, I’m absolutely thrilled to share one of my favorite go-to recipes: my ‘Irresistible Baked Italian Sub Sandwiches’. Forget your average cold sub; baking these beauties transforms them into something truly special – warm, melty, and bursting with flavor. It’s the kind of dish that gets rave reviews every single time. Perfect for a casual dinner, game day, or feeding a crowd, these baked subs are designed to be utterly delicious and surprisingly simple to put together. Let’s dive into making these mouth-watering sandwiches!
Ingredient Notes
To create these irresistible baked Italian sub sandwiches, the quality and selection of your ingredients truly make a difference. Here’s a breakdown of what I recommend and some handy substitutions:
- The Bread: This is your foundation! I highly recommend using fresh, good-quality Italian sub rolls, hoagie rolls, or even a soft baguette. Look for rolls that are sturdy enough to hold up to the fillings and baking without becoming too soggy, but still have a tender interior. Avoid overly crusty bread that might be tough to eat once baked.
- The Meats: A classic Italian sub is all about the layers of delicious deli meats. To keep this recipe inclusive and delightful for everyone, I focus on non-pork options that still deliver that authentic Italian flavor profile. I typically use a combination of:
- Thinly sliced beef salami
- Spicy beef pepperoni
- Smoked turkey ham or regular turkey breast
- Sometimes, I’ll add some thinly sliced beef mortadella for an extra layer of flavor and texture.
The key is variety and thinly slicing them so you can layer them generously.
- The Cheese: Provolone is my top choice here. Its mild, slightly nutty flavor and incredible melt make it perfect for a baked sandwich. Other fantastic melting cheeses that work well include fresh mozzarella (sliced thinly), Monterey Jack, or even a good quality white cheddar if you prefer. Layering the cheese strategically helps keep the bread from getting soggy.
- The Vegetables (Baked): Thinly sliced red onion and green bell peppers add a lovely sweetness and a slight crunch that softens beautifully in the oven. If you like a little tang, don’t hesitate to add some sliced non-alcoholic banana peppers or mild giardiniera (ensure it’s alcohol-free).
- The Dressing: A good quality Italian dressing is essential for infusing flavor. You can use your favorite store-bought brand, or easily whip up a homemade version with olive oil, red wine vinegar, dried oregano, garlic powder, a pinch of salt, and black pepper. A light drizzle is all you need before baking.
- The Fresh Toppings (Post-Bake): This is where you get that refreshing contrast! Shredded crisp iceberg or romaine lettuce, and ripe, thinly sliced tomatoes are non-negotiable for me. They add a much-needed cool, fresh bite to the warm, gooey sandwich.
Step-by-Step Instructions
Ready to create your masterpiece? Here’s how I assemble and bake my irresistible Italian sub sandwiches:
- Preheat Your Oven: Start by preheating your oven to 375°F (190°C). This ensures your oven is ready to go as soon as your subs are assembled, leading to even baking.
- Prepare the Rolls: Carefully slice each sub roll lengthwise, but don’t cut all the way through! You want to create a “hinge” so the sandwich stays together. Lightly toast the insides of the rolls in the oven for about 3-5 minutes before filling if you prefer a crispier interior and an extra layer of protection against sogginess. Remove and set aside.
- Build the First Layer of Flavor: Open up your rolls and drizzle the inside lightly with a little olive oil or a touch of your Italian dressing. This adds flavor and a bit of moisture.
- Cheese Base: Lay a generous layer of provolone cheese directly onto the bottom half of each roll. This creates a barrier for the bread and ensures gooey, melted cheese throughout.
- Meat Mountain Time: Now for the fun part! Start layering your beef salami, beef pepperoni, turkey ham, and any other desired deli meats. I like to fold and interlace them to create volume and a beautiful presentation. Don’t be shy – this is an Italian sub, after all!
- Add the Baked Veggies: Scatter your thinly sliced red onion, green bell peppers, and any banana peppers or giardiniera over the meats. These will soften and become sweet during baking.
- More Cheese, Please! Top the vegetables and meats with another layer of provolone cheese. This acts as a delicious “glue” and ensures every bite is cheesy.
- The Final Drizzle: Drizzle a little more Italian dressing over the top layer of cheese and fillings. You can also sprinkle a pinch of dried oregano or red pepper flakes here if you like a little extra kick.
- Close and Wrap: Gently close your sub sandwiches. If you want a softer, steamier bread, wrap each sub individually in aluminum foil. If you prefer a crispier crust, you can skip the foil and place them directly on a baking sheet.
- Bake to Perfection: Place the wrapped or unwrapped subs on a baking sheet. Bake for 15-20 minutes, or until the cheese is beautifully melted and bubbly, and the bread is warmed through and lightly toasted. If wrapped in foil, uncover for the last 5 minutes to crisp up the top.
- Finishing Touches: Carefully remove the hot subs from the oven. Open them up and add your fresh shredded lettuce and sliced tomatoes. A final light drizzle of Italian dressing or just plain olive oil and red wine vinegar takes them over the top.
- Slice and Serve: Slice the baked subs into manageable portions and serve immediately. Enjoy the warm, gooey, and utterly irresistible goodness!
Tips & Suggestions
Here are a few extra tips and tricks I’ve learned to make your ‘Irresistible Baked Italian Sub Sandwiches’ truly exceptional:
- Don’t Skimp on the Bread Prep: That initial light toast of the roll’s interior might seem small, but it makes a huge difference in preventing a soggy bottom. It creates a slight barrier and adds a lovely texture.
- Layering is Key: Think about your layers! Cheese first helps create that gooey, melty barrier. Layering different meats gives a complex flavor profile. And adding cheese on top acts like a delicious blanket.
- Mind the Veggies: The fresh vegetables (lettuce, tomato) go on after baking. This maintains their crispness and cool temperature, providing a perfect textural and temperature contrast to the warm, melty core of the sandwich. Baking lettuce and tomatoes would just make them wilted and watery.
- Spice it Up: If you enjoy a bit of heat, consider adding a sprinkle of red pepper flakes with the dressing before baking. Or, for a flavorful and tangy kick, ensure any giardiniera or banana peppers you add are non-alcoholic.
- Customization is Encouraged: While I’ve given you my favorite combination, feel free to make these subs your own! Swap out meats (turkey, roast beef), add different cheeses, or include other veggies like roasted red peppers (added before baking) or fresh spinach (added after baking).
- Serve with Sides: These subs are hearty enough on their own, but they pair wonderfully with a simple green salad, some potato chips, or a cup of your favorite tomato soup for a complete meal.
Storage
While these ‘Irresistible Baked Italian Sub Sandwiches’ are definitely best enjoyed fresh out of the oven, I understand sometimes you might have leftovers or want to plan a little ahead. Here’s my advice:
- Storing Leftovers: If you have any leftover baked subs, it’s best to remove any fresh toppings (lettuce, tomato) first, as they will get soggy. Wrap the remaining sandwich tightly in plastic wrap or aluminum foil. Store it in the refrigerator for up to 2-3 days.
- Reheating: To reheat, remove the wrap and place the sub on a baking sheet. Reheat in a preheated oven at 300°F (150°C) for about 10-15 minutes, or until warmed through and the cheese is re-melted. An air fryer or toaster oven also works wonderfully for reheating, as it helps crisp up the bread. Avoid the microwave if possible, as it tends to make the bread soggy. Once reheated, add fresh lettuce and tomato if desired.
- Making Ahead: You can definitely prep your ingredients in advance! Slice your rolls, meats, and baked vegetables, and store them separately in airtight containers in the refrigerator. However, I highly recommend assembling and baking the sandwiches just before you plan to serve them. The magic of these subs is in their warm, melty, fresh-baked state, and pre-assembling too far in advance can lead to a less-than-perfect texture.
Final Thoughts
Well, there you have it! My hope is that you’re now as excited as I am about the prospect of sinking your teeth into these incredible sandwiches. This Irresistible Baked Italian Sub Sandwiches Recipe truly takes a classic to a whole new level. The warmth, the perfectly melted cheese, the harmony of savory beef and fresh ingredients all baked together until golden brown – it’s pure magic that makes this dish a true standout.
It’s more than just a sandwich; it’s a hearty, satisfying meal that brings joy to the table. Whether you’re planning a casual dinner, a lively game day feast, or just looking for an easy yet impressive weeknight option, this Irresistible Baked Italian Sub Sandwiches Recipe delivers every single time. I promise you, once you experience the comforting, savory goodness of these baked subs, you’ll understand why I call them irresistible. Don’t wait – give this recipe a try, and prepare to fall in love!
Irresistible Baked Beef Italian Sub Sandwiches Recipe

Experience the ultimate comfort food with these Irresistible Baked Beef Italian Sub Sandwiches. Packed with savory meats, melty cheese, and vibrant toppings, they are perfect for any casual gathering or weeknight dinner.
- Prep Time: 15 mins
- Cook Time: 20 mins
- Total Time: 35 minutes
- Yield: 4 servings
- Category: Dinner
- Method: Baking
- Cuisine: Italian
Ingredients
- Italian sub rolls or hoagie rolls
- Thinly sliced beef salami
- Spicy beef pepperoni
- Smoked turkey ham or regular turkey breast
- Thinly sliced beef mortadella (optional)
- Provolone cheese
- Fresh mozzarella (sliced thinly) or Monterey Jack or white cheddar (optional)
- Thinly sliced red onion
- Thinly sliced green bell peppers
- Sliced non-alcoholic banana peppers or mild giardiniera (ensure it's alcohol-free)
- Italian dressing
- Olive oil
- Red wine vinegar
- Dried oregano
- Garlic powder
- Salt
- Black pepper
- Shredded iceberg or romaine lettuce (for topping)
- Thinly sliced tomatoes (for topping)
Instructions
- Preheat your oven to 375°F (190°C).
- Carefully slice each sub roll lengthwise, creating a 'hinge' without cutting all the way through. Lightly toast the insides of the rolls in the oven for about 3-5 minutes if you prefer a crispier interior.
- Open up your rolls and drizzle the inside lightly with olive oil or Italian dressing.
- Lay a generous layer of provolone cheese directly onto the bottom half of each roll.
- Layer beef salami, beef pepperoni, turkey ham, and any other desired deli meats, folding and interlacing them for volume.
- Scatter thinly sliced red onion, green bell peppers, and any banana peppers or giardiniera over the meats.
- Top the vegetables and meats with another layer of provolone cheese.
- Drizzle a little more Italian dressing over the top layer of cheese and fillings, and sprinkle with dried oregano or red pepper flakes if desired.
- Gently close your sub sandwiches. Wrap each sub in aluminum foil for a softer bread, or place them directly on a baking sheet for a crispier crust.
- Bake for 15-20 minutes, or until the cheese is melted and bubbly and the bread is warmed through and lightly toasted. If wrapped in foil, uncover for the last 5 minutes.
- Carefully remove the hot subs from the oven, open them up, and add fresh shredded lettuce and sliced tomatoes. Drizzle with Italian dressing or olive oil and red wine vinegar.
- Slice the baked subs into manageable portions and serve immediately.
Nutrition
- Serving Size: 1 sandwich
- Calories: 600
- Sugar: 3 g
- Sodium: 1200 mg
- Fat: 30 g
- Saturated Fat: 12 g
- Unsaturated Fat: 15 g
- Trans Fat: 0 g
- Carbohydrates: 50 g
- Fiber: 2 g
- Protein: 30 g
- Cholesterol: 80 mg
Keywords: Don't skimp on toasting the bread's interior to prevent sogginess. Layering different meats and cheeses creates a complex flavor profile. Add fresh vegetables after baking for the best texture.