Raspberry Chia Jam (no Cook)
Oh my goodness, get ready to fall head over heels for something truly magical in your kitchen! I am so excited to share my absolute favorite way to capture the sweet, tangy essence of fresh raspberries in a jar, and guess what? There’s no cooking involved!
What makes this Raspberry Chia Jam (no Cook) so incredibly special, you ask? Well, for starters, the name says it all – NO COOKING! That means you get to skip the hot stove and the tedious canning process, making this a jam that’s ready in mere minutes. It’s a game-changer for anyone who loves homemade goodness but is short on time. Plus, by not cooking the fruit, we retain so much more of that beautiful, bright, fresh raspberry flavor and all their wonderful nutrients. We’re also using the power of chia seeds to naturally thicken our jam, adding a healthy boost of fiber and omega-3s without needing tons of added sugar or pectin.
You are going to absolutely adore this recipe because it’s ridiculously easy, incredibly fresh-tasting, and so much healthier than most store-bought options. Imagine spreading a spoonful of this vibrant, ruby-red goodness on your morning toast, swirling it into your yogurt, topping your oatmeal, or even using it as a filling for desserts – all knowing you made it in a flash with minimal effort. This dish is simply a delightful blend of mashed fresh raspberries, a touch of sweetness, and those miraculous little chia seeds working their thickening magic overnight (or in just a couple of hours). It’s an effortless way to enjoy the taste of summer, anytime you please!

Ingredient Notes
Making delicious Raspberry Chia Jam without cooking is incredibly simple, and it relies on just a few key ingredients. Here’s what you’ll need and some handy substitution ideas to make it your own!
Raspberries
These are the star of our jam! I love using fresh, ripe raspberries when they’re in season – their natural sweetness and slight tartness are just perfect. However, don’t hesitate to use frozen raspberries; they work just as beautifully for this recipe. In fact, frozen raspberries are often more economical and consistently available. If you’re using frozen, I recommend letting them thaw completely before you begin. This allows them to release their juices, which is essential for the chia seeds to do their magic. No need to stress about perfect raspberries, as long as they’re sweet and vibrant, your jam will be fantastic.
Chia Seeds
Ah, the unsung hero of no-cook jams! Chia seeds are truly magical in this recipe, acting as a natural gelling agent. When combined with liquid, they swell up, forming a gel-like consistency that transforms liquidy fruit into a spreadable jam. You can use either black or white chia seeds; there’s no significant difference in their gelling properties or flavor, so just use whichever you have on hand. They also pack a fantastic nutritional punch, adding fiber and omega-3s to your breakfast table.
Sweetener
Because raspberries can vary in sweetness, I always suggest adding sweetener to taste. My personal preference for this jam is maple syrup or agave nectar. They offer a lovely natural sweetness that complements the fruit beautifully and keeps the jam refined sugar-free, if that’s important to you. You could also use granulated sugar, honey (if not vegan), or even a sugar substitute if preferred. Start with the recommended amount and then add more if you like it sweeter. Remember, you can always add more, but you can’t take it away!
Lemon Juice
A little squeeze of fresh lemon juice is crucial here. It might seem like a small detail, but it makes a huge difference! Lemon juice brightens the flavor of the raspberries, cutting through the sweetness and adding a lovely tang that truly makes the jam pop. It also subtly helps in the gelling process, even though the chia seeds are doing most of the work. I always recommend fresh lemon juice for the best flavor.
Vanilla Extract (Optional)
While not strictly necessary, a splash of vanilla extract can add a wonderful depth and warmth to your raspberry jam. It rounds out the flavors beautifully. If you’re looking for an alternative to traditional vanilla extract, there are excellent non-alcohol vanilla extract options available that work just as well.
Step-by-Step Instructions
Get ready for the easiest jam you’ve ever made! This no-cook Raspberry Chia Jam comes together in minutes, with most of the time spent waiting for the chia seeds to work their magic.
- Prepare Your Raspberries: If you’re using fresh raspberries, give them a quick, gentle rinse and pat them dry. If you’re using frozen raspberries, make sure they are fully thawed. I usually place them in a bowl in the fridge overnight or on the counter for a few hours. Thawing is important because it releases all that wonderful juice that the chia seeds will absorb.
- Mash the Raspberries: Transfer your thawed or fresh raspberries into a medium-sized mixing bowl. Now, it’s time to mash them! You can use a fork, a potato masher, or even the back of a sturdy spoon. I personally love a jam with a bit of texture, so I don’t mash them completely smooth; I leave some lovely chunks of raspberry. If you prefer a smoother jam, you can mash them more thoroughly or even pulse them a few times in a food processor, but be careful not to over-process them into a liquid.
- Combine Ingredients: To your mashed raspberries, add the chia seeds, your chosen sweetener (maple syrup or agave nectar work wonderfully), and the fresh lemon juice. If you’re using the optional non-alcohol vanilla extract, add that in now too. Give everything a really good stir with a spoon, making sure the chia seeds are evenly distributed throughout the fruit mixture. You want every seed to have a chance to absorb some liquid!
- Rest and Thicken: This is where the magic happens! Cover your bowl and place it in the refrigerator. Let it chill for at least 30 minutes to an hour. During this time, the chia seeds will begin to absorb the liquid from the raspberries and swell, transforming the mixture into a thick, jam-like consistency. I like to give it another good stir halfway through the chilling time to ensure even gelling. If you have the time, letting it chill for 2-4 hours, or even overnight, will result in an even thicker, more set jam.
- Taste and Adjust: Once your jam has thickened, give it a taste. Is it sweet enough for you? Does it need a little more tang? This is your chance to adjust the flavor. You can add a little more sweetener if desired, or another tiny squeeze of lemon juice if you want it brighter. Stir well after any adjustments.
- Transfer and Store: Spoon your glorious homemade Raspberry Chia Jam into clean jars or airtight containers. It’s now ready to enjoy!
Tips & Suggestions
Making Raspberry Chia Jam is super straightforward, but a few insider tips can elevate your experience and help you tailor it perfectly to your liking. Here are some of my go-to suggestions:
Controlling the Texture
The beauty of no-cook jam is its versatility. If you prefer a chunkier jam with whole fruit pieces, simply mash your raspberries less vigorously with a fork or potato masher. Leave plenty of delicious fruit bits intact! For a super smooth jam, you can use an immersion blender or a regular blender to briefly pulse the raspberries (and even the final jam mixture) until you reach your desired consistency. Just be careful not to blend for too long, as it can make the jam too thin if you break down the fruit too much before gelling.
Adjusting Sweetness and Tartness
I always recommend starting with a conservative amount of sweetener and then tasting the jam after it has thickened. Raspberries can vary wildly in their natural sweetness, so what’s perfect for one batch might be too sweet or too tart for another. You can always stir in a little more maple syrup, agave, or even a pinch of sugar at the end. Similarly, if you feel it needs more brightness, a tiny extra squeeze of lemon juice can work wonders.
Troubleshooting Thin Jam
If, after an hour or two of chilling, your jam is still a bit runnier than you’d like, don’t fret! This is easily fixed. Simply stir in an additional tablespoon or two of chia seeds into the mixture. Give it another good stir, and then let it sit in the refrigerator for at least another 30 minutes to an hour. The new chia seeds will absorb more liquid and help it thicken up perfectly. Sometimes, very juicy fruit just needs a little extra help!
Flavor Variations
While raspberry is a classic for a reason, don’t be afraid to experiment with other fruits! This no-cook chia jam method works beautifully with strawberries, blueberries, blackberries, or even a mix of berries. You can also get creative with spices. A pinch of cinnamon, a tiny grating of fresh ginger, or a hint of cardamom can add an unexpected and delightful twist to your jam. Just remember to add a small amount and taste as you go.
Serving Suggestions
This Raspberry Chia Jam is incredibly versatile! Of course, it’s amazing spread generously on toast, English muffins, or warm scones. But don’t stop there! I love stirring it into my morning oatmeal or yogurt for a burst of fruit flavor. It’s also fantastic dolloped on pancakes, waffles, or French toast. For a delightful dessert, swirl it into plain cheesecake batter, use it as a filling for tarts, or simply spoon it over a scoop of vanilla ice cream.
Gifting Homemade Goodness
Homemade Raspberry Chia Jam makes a wonderful thoughtful gift! Spoon it into pretty jars, tie a ribbon around the lid, and attach a small label. It’s a lovely way to share a bit of homemade sweetness with friends, family, or neighbors. Just be sure to remind them that it needs to be kept refrigerated!
Storage
Because this Raspberry Chia Jam is made without any cooking or traditional canning methods, it’s important to store it correctly to maintain its freshness and ensure food safety. But don’t worry, it’s very simple!
Refrigeration is Key
Unlike store-bought jams that are often shelf-stable due to high sugar content and canning, your homemade Raspberry Chia Jam needs to be stored in the refrigerator at all times. Once made, transfer the jam into clean, airtight jars or containers. This prevents spoilage and keeps it fresh and delicious.
How Long Does it Last?
When stored properly in the refrigerator, your Raspberry Chia Jam will typically last for about 1 to 2 weeks. The exact lifespan can sometimes depend on the freshness of your fruit and the cleanliness of your containers. I find that it’s usually so good, it rarely lasts that long anyway!
Can You Freeze It?
Absolutely, yes! Freezing is a fantastic option if you’ve made a larger batch or want to enjoy your jam for longer than a couple of weeks. Spoon the jam into freezer-safe containers, leaving a little bit of headspace at the top (about half an inch) to allow for expansion as it freezes. You can also use small freezer-safe bags. It will keep well in the freezer for up to 3-4 months.
When you’re ready to enjoy your frozen jam, simply transfer it to the refrigerator to thaw overnight. Give it a good stir once thawed, and it will be ready to use, tasting just as fresh as the day you made it.
Signs of Spoilage
Always trust your senses. If you notice any unusual smells, visible mold, or discoloration, it’s best to discard the jam. Because it’s a fresh product, it’s better to be safe than sorry!
Final Thoughts
And there you have it! I genuinely hope you’ve enjoyed discovering the sheer simplicity and incredible reward of this recipe. This Raspberry Chia Jam (no Cook) isn’t just a spread; it’s a game-changer for your breakfasts, snacks, and even desserts. Who knew making fresh, wholesome jam could be this effortlessly delicious?
I truly believe this recipe is a must-try because it perfectly captures the vibrant essence of raspberries, enhanced by the healthy power of chia seeds, all without any cooking required or a mountain of refined sugar. It’s the ultimate answer for anyone craving a quick, natural, and utterly delightful topping for their toast, yogurt, or oatmeal. Once you experience how easy and incredibly satisfying it is to whip up your own batch of this glorious Raspberry Chia Jam (no Cook), you’ll understand why I’m so excited about it. Give it a go – I promise you won’t be disappointed!
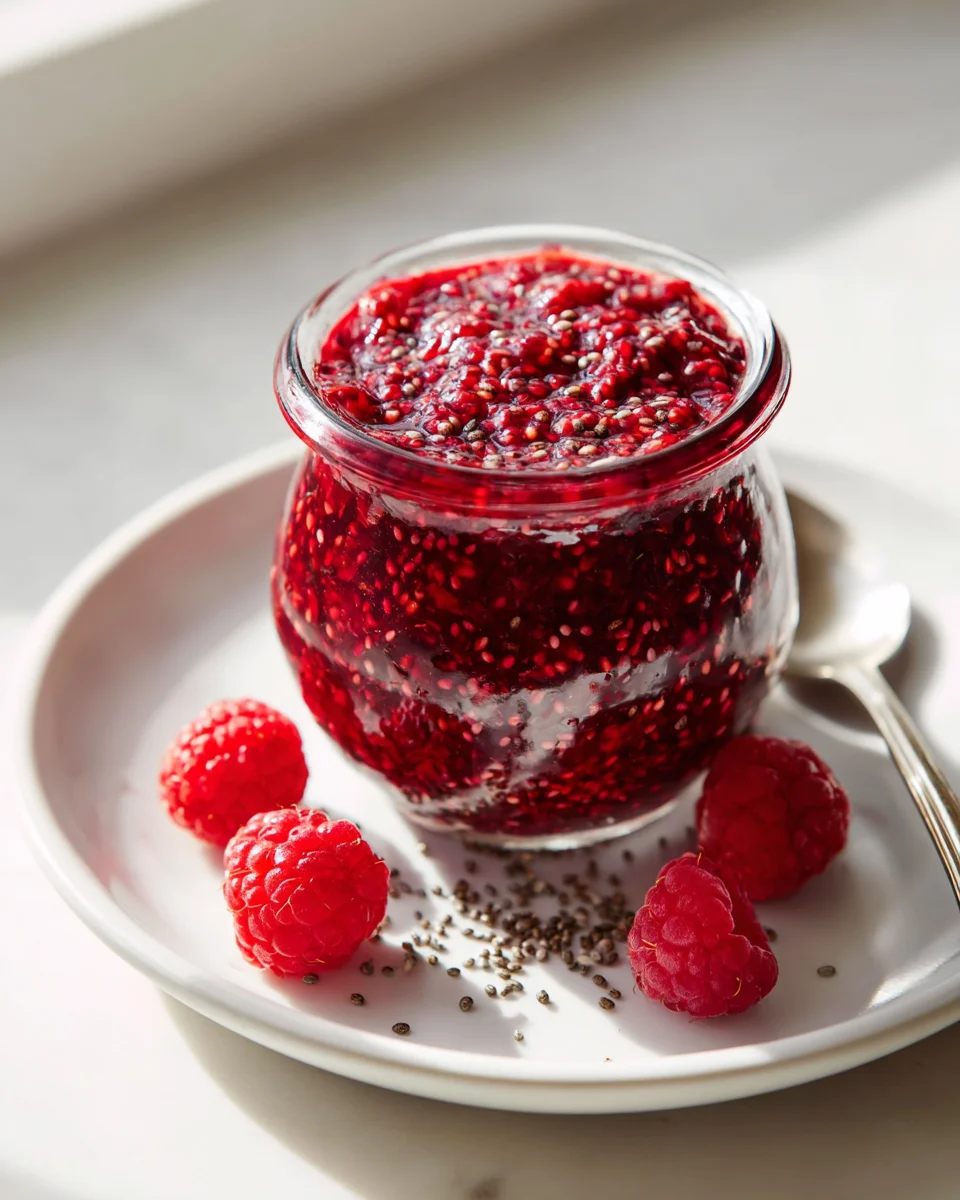
Homemade Raspberry Chia Jam (No Cook) – Simple & Fresh

This no-cook Raspberry Chia Jam captures the sweet, tangy essence of fresh raspberries in a jar, making it a quick and healthy treat. With just a few simple ingredients, you can enjoy a vibrant, homemade jam that’s perfect for spreading on toast or swirling into yogurt.
- Prep Time: 15 mins
- Cook Time: 0 mins
- Total Time: 15 minutes
- Yield: 1.5 cups 1x
- Category: Condiment
- Method: No Cook
- Cuisine: American
Ingredients
- 2 cups fresh or frozen raspberries
- 1/4 cup chia seeds
- 1/4 cup maple syrup or agave nectar (or sweetener of choice)
- 2 tablespoons fresh lemon juice
- 1 teaspoon vanilla extract (optional)
Instructions
- Prepare Your Raspberries: If you're using fresh raspberries, give them a quick, gentle rinse and pat them dry. If you’re using frozen raspberries, make sure they are fully thawed.
- Mash the Raspberries: Transfer your thawed or fresh raspberries into a medium-sized mixing bowl. Mash them with a fork, potato masher, or the back of a sturdy spoon, leaving some chunks for texture.
- Combine Ingredients: To your mashed raspberries, add the chia seeds, your chosen sweetener, and the fresh lemon juice. If using, add the vanilla extract. Stir well to ensure the chia seeds are evenly distributed.
- Rest and Thicken: Cover your bowl and place it in the refrigerator. Let it chill for at least 30 minutes to an hour for the chia seeds to absorb the liquid and thicken the mixture.
- Taste and Adjust: Once thickened, taste the jam and adjust sweetness or tanginess as desired by adding more sweetener or lemon juice.
- Transfer and Store: Spoon your homemade Raspberry Chia Jam into clean jars or airtight containers and enjoy!
Nutrition
- Serving Size: 1 tablespoon
- Calories: 30
- Sugar: 5 g
- Sodium: 1 mg
- Fat: 1 g
- Saturated Fat: 0 g
- Unsaturated Fat: 0 g
- Trans Fat: 0 g
- Carbohydrates: 7 g
- Fiber: 1 g
- Protein: 1 g
- Cholesterol: 0 mg
Keywords: For a chunkier jam, mash the raspberries less vigorously. If the jam is too runny, stir in additional chia seeds and let it sit for longer. Experiment with other fruits or spices for different flavors.