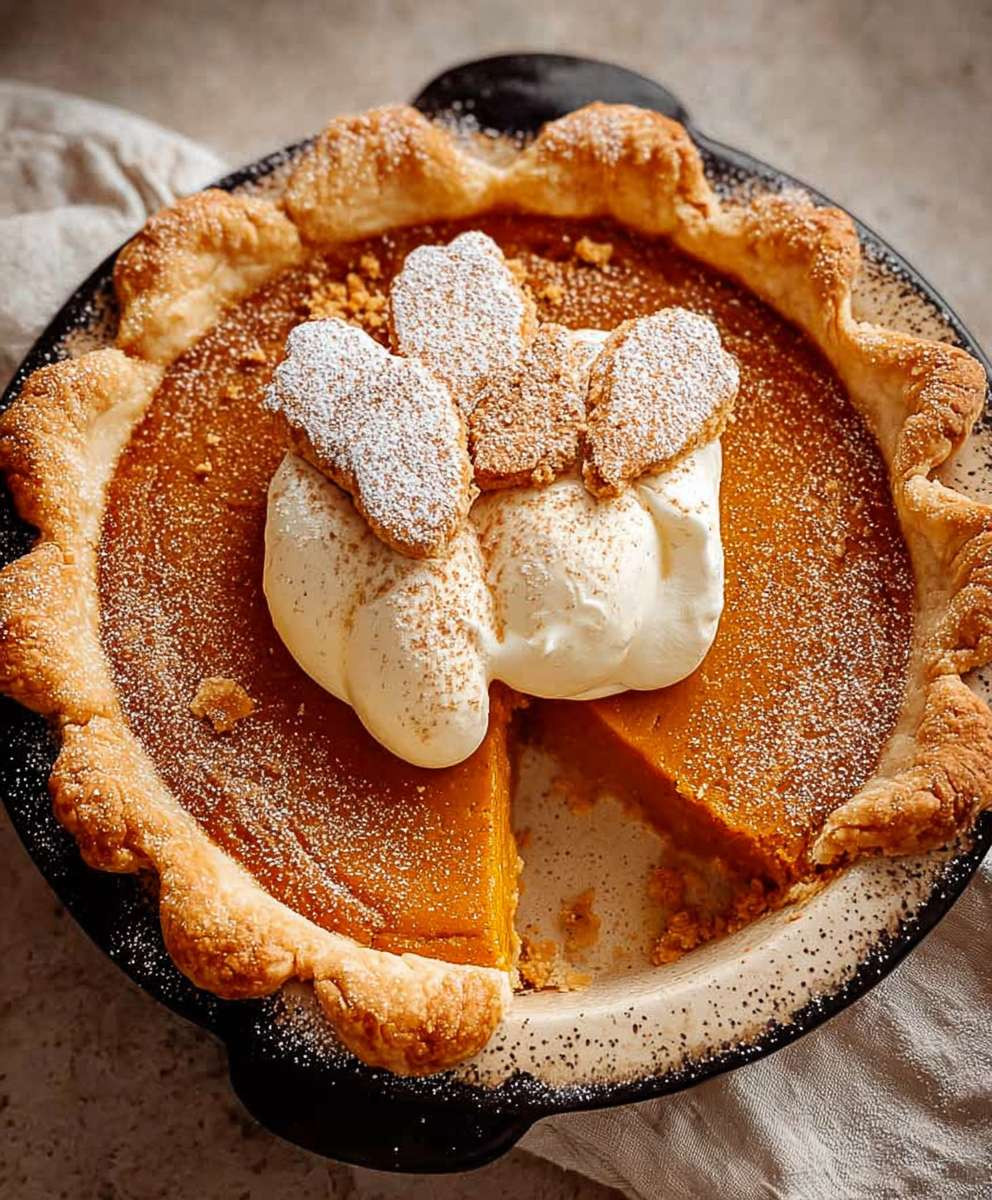
Homemade Pumpkin Pie: the quintessential dessert that embodies the warmth and comfort of autumn. Imagine the scene: crisp air, falling leaves, and the aroma of cinnamon and spice wafting from your oven. What could be more inviting? This isn’t just a pie; it’s a slice of tradition, a taste of nostalgia, and a guaranteed crowd-pleaser for any holiday gathering.
Pumpkin pie boasts a rich history, deeply intertwined with the American Thanksgiving tradition. While pumpkins themselves have been cultivated for thousands of years, the pumpkin pie as we know it today evolved from early colonial recipes, adapting to available ingredients and culinary techniques. It represents resourcefulness and the celebration of the harvest.
But why is homemade pumpkin pie so beloved? It’s the perfect marriage of textures – the smooth, creamy filling against the flaky, buttery crust. The flavor profile is equally captivating, a symphony of sweet pumpkin, warm spices like cinnamon, ginger, and nutmeg, and a hint of vanilla. Beyond the taste, it’s incredibly satisfying to bake from scratch, knowing you’ve created something truly special to share with loved ones. Plus, it’s surprisingly easy to make! So, ditch the store-bought version and let’s embark on a journey to create the ultimate homemade pumpkin pie that will have everyone asking for seconds.

Ingredients:
- For the Crust:
- 1 1/4 cups all-purpose flour, plus more for dusting
- 1/2 teaspoon salt
- 1/2 cup (1 stick) unsalted butter, very cold and cut into cubes
- 1/4 cup vegetable shortening, very cold
- 4-6 tablespoons ice water
- For the Pumpkin Filling:
- 1 (15-ounce) can pumpkin puree (not pumpkin pie filling)
- 1 cup evaporated milk
- 3/4 cup granulated sugar
- 1/2 cup packed light brown sugar
- 2 large eggs
- 1 teaspoon ground cinnamon
- 1/2 teaspoon ground ginger
- 1/4 teaspoon ground cloves
- 1/4 teaspoon ground nutmeg
- 1/2 teaspoon salt
Making the Pie Crust
Okay, let’s start with the crust. I know some people are intimidated by making pie crust from scratch, but trust me, it’s not as hard as it seems! The key is to keep everything cold. Cold ingredients = flaky crust.
- Combine Dry Ingredients: In a large bowl, whisk together the flour and salt. This ensures the salt is evenly distributed throughout the flour.
- Cut in the Butter and Shortening: Add the cold, cubed butter and shortening to the flour mixture. Using a pastry blender (or your fingertips, if you’re feeling brave!), cut the butter and shortening into the flour until the mixture resembles coarse crumbs. You should still see small pieces of butter and shortening – that’s what creates those flaky layers! Don’t overmix!
- Add Ice Water: Gradually add the ice water, one tablespoon at a time, mixing gently after each addition. Mix until the dough just comes together. Be careful not to add too much water, or the crust will be tough. You want it to be moist enough to form a ball, but not sticky.
- Form the Dough: Gently form the dough into a disc. Wrap it tightly in plastic wrap and refrigerate for at least 30 minutes, or up to 2 days. This allows the gluten to relax, which will make the crust easier to roll out.
- Roll Out the Dough: On a lightly floured surface, roll out the dough into a 12-inch circle. Make sure your surface and rolling pin are lightly floured to prevent sticking. Roll from the center outwards, rotating the dough as you go to ensure an even circle.
- Transfer to Pie Plate: Carefully transfer the rolled-out dough to a 9-inch pie plate. Gently press the dough into the bottom and up the sides of the plate.
- Trim and Crimp the Edges: Trim any excess dough hanging over the edge of the pie plate. You can use kitchen shears or a sharp knife for this. Then, crimp the edges of the crust using your fingers or a fork. There are tons of fancy crimping techniques out there, but a simple fork crimp works just fine!
- Pre-Bake (Blind Bake) the Crust: This step is optional, but I highly recommend it, especially if you want a really crisp crust. Preheat your oven to 375°F (190°C). Line the pie crust with parchment paper and fill it with pie weights (or dried beans). Bake for 15 minutes. Remove the parchment paper and pie weights and bake for another 5-10 minutes, or until the crust is lightly golden brown. This helps prevent the crust from getting soggy when you add the filling. Let the crust cool slightly before adding the filling.
Making the Pumpkin Filling
Now for the star of the show – the pumpkin filling! This is where the magic happens. It’s super easy to make, and the aroma that fills your kitchen while it’s baking is simply divine.
- Combine Ingredients: In a large bowl, whisk together the pumpkin puree, evaporated milk, granulated sugar, brown sugar, eggs, cinnamon, ginger, cloves, nutmeg, and salt until smooth. Make sure there are no lumps!
- Pour into Crust: Pour the pumpkin filling into the prepared pie crust.
Baking the Pie
Almost there! Now it’s time to bake our masterpiece. Patience is key here – you want the filling to be set but still have a slight jiggle in the center.
- Bake: Preheat your oven to 375°F (190°C). Bake the pie for 50-60 minutes, or until the filling is set around the edges but still has a slight jiggle in the center. If the crust starts to brown too quickly, you can cover the edges with foil or a pie shield.
- Cool: Let the pie cool completely on a wire rack before slicing and serving. This is important! The filling will continue to set as it cools.
- Refrigerate: Once cooled, refrigerate the pie for at least 2 hours before serving. This will help the filling to firm up even more.
Tips and Tricks for the Perfect Pumpkin Pie
Here are a few extra tips to help you achieve pumpkin pie perfection:
- Use Cold Ingredients: I can’t stress this enough! Cold butter and shortening are essential for a flaky crust.
- Don’t Overmix the Dough: Overmixing develops the gluten in the flour, which can result in a tough crust. Mix just until the dough comes together.
- Blind Bake the Crust: This helps prevent the crust from getting soggy.
- Use Pumpkin Puree, Not Pumpkin Pie Filling: Pumpkin pie filling already has spices and sugar added, so you won’t be able to control the flavor as much.
- Don’t Overbake the Pie: Overbaking can cause the filling to crack. The filling should be set around the edges but still have a slight jiggle in the center.
- Let the Pie Cool Completely: This allows the filling to set properly.
- Serve with Whipped Cream: Because everything is better with whipped cream!
Variations
Want to mix things up a bit? Here are a few ideas:
- Add Chocolate: Stir in 1/2 cup of chocolate chips into the pumpkin filling for a chocolatey twist.
- Add Spices: Experiment with different spices, such as cardamom or allspice.
- Use a Different Crust: Try a graham cracker crust or a gingersnap crust for a unique flavor.
- Top with Streusel: Add a streusel topping for extra sweetness and crunch.
Troubleshooting
Encountering problems? Here are some common issues and how to fix them:
- Soggy Crust: Make sure to blind bake the crust and let the pie cool completely before slicing.
- Cracked Filling: Don’t overbake the pie.
- Tough Crust: Don’t overmix the dough and use cold ingredients.
- Filling Not Setting: Make sure you’re using the correct amount of ingredients and that your oven is at the correct temperature.
Storage
Pumpkin pie can be stored in the refrigerator for up to 3 days. Cover it tightly with plastic wrap or store it in an airtight container.
You can also freeze pumpkin pie for up to 2 months. Wrap it tightly in plastic wrap and then in foil. Thaw it in the refrigerator overnight before serving.
Enjoy your homemade pumpkin pie! I hope this recipe helps you create a delicious and memorable dessert for your family and friends.
Conclusion:
And there you have it! This homemade pumpkin pie recipe isn’t just another dessert; it’s a slice of autumn, a warm hug on a chilly day, and a guaranteed crowd-pleaser all rolled into one. From the rich, buttery crust to the smooth, spiced filling, every element of this pie is designed to deliver pure, unadulterated comfort. I truly believe that once you’ve tasted a pumpkin pie made from scratch, you’ll never go back to store-bought again. The difference in flavor and texture is simply undeniable.
But what truly makes this recipe a must-try is its versatility. While it’s absolutely divine served warm with a dollop of freshly whipped cream (my personal favorite!), there are so many ways to customize it to your liking. For a richer experience, try adding a swirl of caramel sauce on top just before serving. Or, if you’re feeling adventurous, sprinkle some toasted pecans or walnuts for a delightful crunch.
If you’re looking to elevate your pie game even further, consider experimenting with different spices. A pinch of cardamom or a dash of ginger can add a unique and unexpected twist to the classic pumpkin pie flavor. You could even try using different types of squash in the filling! Butternut squash, for example, offers a slightly sweeter and nuttier flavor that complements the pumpkin beautifully.
And don’t forget about the crust! While the recipe calls for a traditional pie crust, you can easily adapt it to suit your preferences. A graham cracker crust is a delicious alternative, especially if you’re short on time. Or, for a gluten-free option, try using a gluten-free pie crust mix.
Serving Suggestions:
* Warm with whipped cream or vanilla ice cream.
* Drizzled with caramel sauce or chocolate syrup.
* Sprinkled with toasted nuts (pecans, walnuts, or almonds).
* Served with a side of spiced apple cider.
* As a Thanksgiving or holiday dessert centerpiece.
Variations:
* Add a swirl of caramel or chocolate to the filling before baking.
* Use different types of squash (butternut, acorn) for a unique flavor.
* Experiment with different spices (cardamom, ginger, nutmeg).
* Try a graham cracker or gluten-free crust.
* Top with a streusel topping for added texture.
I know that making a pie from scratch can seem daunting, but trust me, it’s worth the effort. This recipe is designed to be easy to follow, even for beginner bakers. And the satisfaction of creating a beautiful and delicious pie from start to finish is truly rewarding.
So, what are you waiting for? Gather your ingredients, preheat your oven, and get ready to bake the best homemade pumpkin pie you’ve ever tasted. I’m confident that you’ll love it as much as I do.
And most importantly, I’d love to hear about your experience! Once you’ve tried this recipe, please come back and share your thoughts in the comments below. Did you make any modifications? What did your family and friends think? Your feedback is invaluable and helps me to continue creating recipes that you’ll love. Happy baking! I can’t wait to hear how your pie turns out! Let me know if you have any questions along the way, I’m here to help.
Homemade Pumpkin Pie: The Ultimate Recipe Guide
Classic homemade pumpkin pie with a flaky crust and a smooth, spiced pumpkin filling. Perfect for Thanksgiving or any fall gathering!
Ingredients
- 1 1/4 cups all-purpose flour, plus more for dusting
- 1/2 teaspoon salt
- 1/2 cup (1 stick) unsalted butter, very cold and cut into cubes
- 1/4 cup vegetable shortening, very cold
- 4-6 tablespoons ice water
- 1 (15-ounce) can pumpkin puree (not pumpkin pie filling)
- 1 cup evaporated milk
- 3/4 cup granulated sugar
- 1/2 cup packed light brown sugar
- 2 large eggs
- 1 teaspoon ground cinnamon
- 1/2 teaspoon ground ginger
- 1/4 teaspoon ground cloves
- 1/4 teaspoon ground nutmeg
- 1/2 teaspoon salt
Instructions
- Combine Dry Ingredients: In a large bowl, whisk together the flour and salt.
- Cut in the Butter and Shortening: Add the cold, cubed butter and shortening to the flour mixture. Using a pastry blender (or your fingertips), cut the butter and shortening into the flour until the mixture resembles coarse crumbs.
- Add Ice Water: Gradually add the ice water, one tablespoon at a time, mixing gently after each addition. Mix until the dough just comes together.
- Form the Dough: Gently form the dough into a disc. Wrap it tightly in plastic wrap and refrigerate for at least 30 minutes, or up to 2 days.
- Roll Out the Dough: On a lightly floured surface, roll out the dough into a 12-inch circle.
- Transfer to Pie Plate: Carefully transfer the rolled-out dough to a 9-inch pie plate. Gently press the dough into the bottom and up the sides of the plate.
- Trim and Crimp the Edges: Trim any excess dough hanging over the edge of the pie plate. Crimp the edges of the crust using your fingers or a fork.
- Pre-Bake (Blind Bake) the Crust: Preheat your oven to 375°F (190°C). Line the pie crust with parchment paper and fill it with pie weights (or dried beans). Bake for 15 minutes. Remove the parchment paper and pie weights and bake for another 5-10 minutes, or until the crust is lightly golden brown. Let the crust cool slightly before adding the filling.
- Combine Ingredients: In a large bowl, whisk together the pumpkin puree, evaporated milk, granulated sugar, brown sugar, eggs, cinnamon, ginger, cloves, nutmeg, and salt until smooth.
- Pour into Crust: Pour the pumpkin filling into the prepared pie crust.
- Bake: Preheat your oven to 375°F (190°C). Bake the pie for 50-60 minutes, or until the filling is set around the edges but still has a slight jiggle in the center. If the crust starts to brown too quickly, you can cover the edges with foil or a pie shield.
- Cool: Let the pie cool completely on a wire rack before slicing and serving.
- Refrigerate: Once cooled, refrigerate the pie for at least 2 hours before serving.
Notes
- Use cold ingredients for the flakiest crust.
- Don’t overmix the dough.
- Blind baking the crust prevents a soggy bottom.
- Use pumpkin puree, not pumpkin pie filling.
- Don’t overbake the pie.
- Let the pie cool completely before slicing.
- Serve with whipped cream!