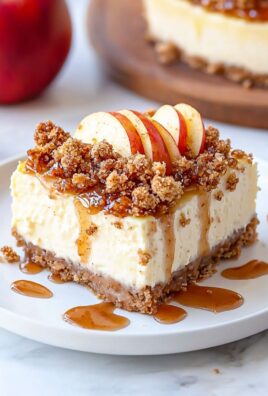
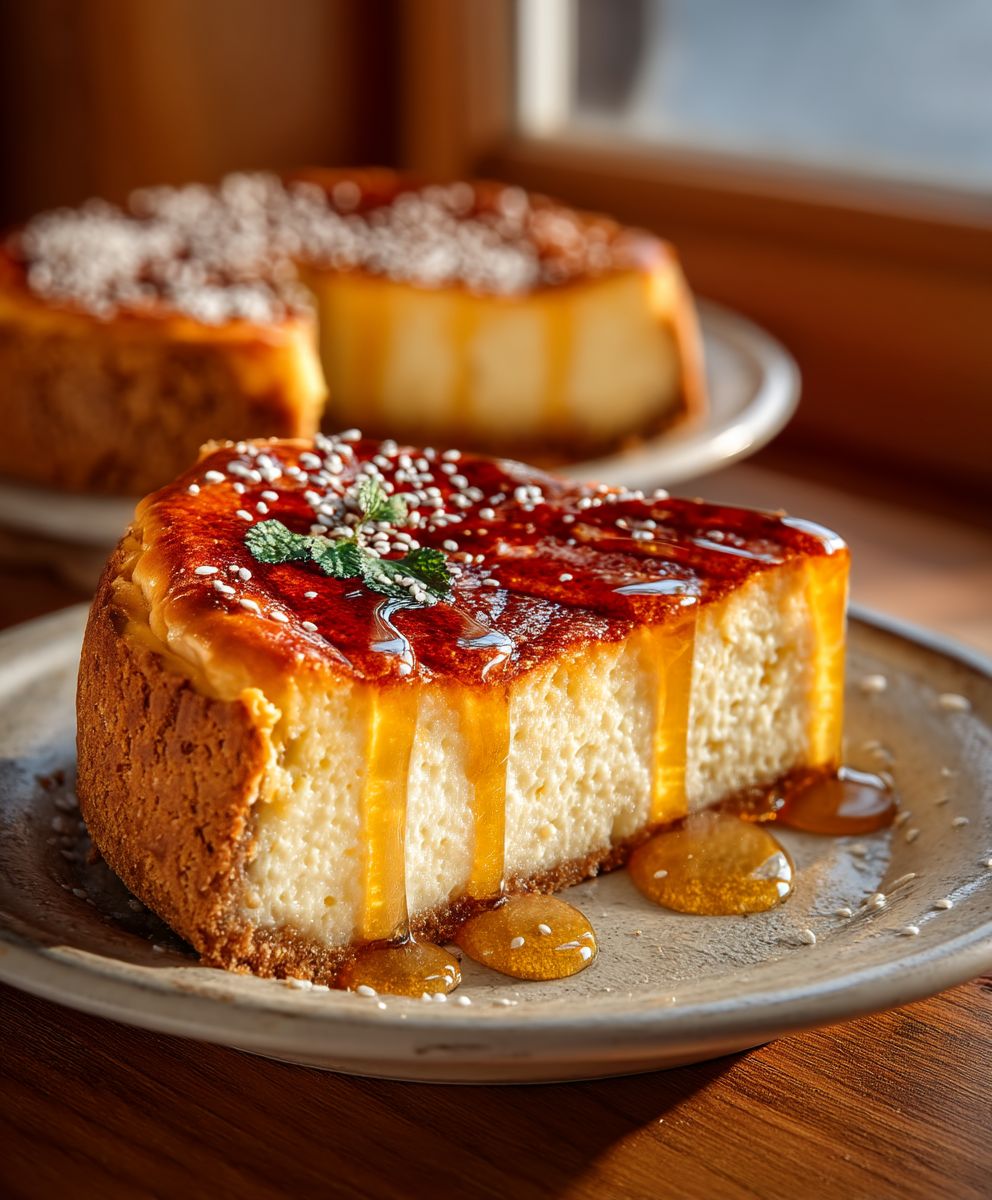
Greek Honey Pie, or “Melopita” as it’s known in Greece, is a dessert that whispers of sun-drenched islands and ancient traditions. Imagine sinking your teeth into a slice of golden, custardy goodness, the aroma of honey and cinnamon swirling around you. This isn’t just a pie; it’s a taste of history, a sweet echo of celebrations and family gatherings passed down through generations.
Melopita boasts a history as rich and golden as its filling. While variations exist across different regions of Greece, the core ingredients – honey, cheese, and eggs – remain constant, reflecting the country’s agricultural bounty. It’s a dessert often associated with religious festivals and special occasions, symbolizing prosperity and sweetness in life. The simplicity of the ingredients belies the complex and satisfying flavor profile that makes it so beloved.
What is it about Greek Honey Pie that captivates so many? Perhaps it’s the delightful contrast between the creamy, slightly tangy cheese filling and the intense sweetness of the honey. Or maybe it’s the comforting warmth of the cinnamon and the satisfyingly dense yet tender texture. Whatever the reason, this pie is undeniably addictive. Plus, it’s surprisingly easy to make, requiring minimal ingredients and effort, making it the perfect dessert for both experienced bakers and kitchen novices alike. So, are you ready to embark on a culinary journey to Greece? Let’s get baking!

Ingredients:
- For the Phyllo Dough:
- 2 cups all-purpose flour, plus more for dusting
- 1 teaspoon salt
- 1 cup lukewarm water
- 1/4 cup olive oil, plus more for brushing
- 1 tablespoon white vinegar
- 1 cup cornstarch, for dusting between layers
- For the Honey Syrup:
- 1 1/2 cups honey (preferably Greek thyme honey)
- 1 cup granulated sugar
- 1 cup water
- 1 cinnamon stick
- 1 lemon peel (a strip of zest, about 2 inches long)
- 2 tablespoons lemon juice
- For the Filling:
- 1 cup unsalted butter, melted
- 1 cup granulated sugar
- 4 large eggs
- 1 cup fine semolina flour
- 1 teaspoon baking powder
- 1 teaspoon vanilla extract
- 1/2 teaspoon ground cinnamon
- 1/4 teaspoon ground cloves
- 1/4 cup brandy or orange liqueur (optional)
- 1 cup finely chopped walnuts or almonds
Preparing the Phyllo Dough (Homemade – Optional, you can use store-bought)
Okay, let’s tackle the phyllo dough. I know it sounds intimidating, but trust me, it’s worth the effort! If you’re short on time, feel free to use store-bought phyllo dough. But if you’re feeling adventurous, here’s how I make mine:
- Combine Dry Ingredients: In a large bowl, whisk together the flour and salt.
- Add Wet Ingredients: Gradually add the lukewarm water, olive oil, and white vinegar to the dry ingredients. Mix until a shaggy dough forms.
- Knead the Dough: Turn the dough out onto a lightly floured surface and knead for about 8-10 minutes, or until it becomes smooth and elastic. It should be soft and pliable.
- Rest the Dough: Form the dough into a ball, lightly coat it with olive oil, and place it in a clean bowl. Cover with plastic wrap and let it rest for at least 30 minutes, or up to 2 hours. This allows the gluten to relax, making it easier to stretch the dough later.
- Divide the Dough: After resting, divide the dough into 8-10 equal pieces.
- Roll Out Each Piece: On a lightly floured surface, roll out each piece of dough into a very thin circle, about 12-14 inches in diameter. The thinner, the better! Use plenty of cornstarch to prevent the dough from sticking.
- Stack the Layers: As you roll out each piece, stack them on top of each other, sprinkling generously with cornstarch between each layer. This prevents them from sticking together during baking.
- Final Stretch (Optional): Once all the layers are stacked, you can gently stretch the entire stack even further, if desired. Be careful not to tear the dough.
Making the Honey Syrup
Now, let’s get that luscious honey syrup going. This is what gives the pie its signature sweetness and sticky goodness.
- Combine Ingredients: In a medium saucepan, combine the honey, sugar, water, cinnamon stick, and lemon peel.
- Simmer the Syrup: Bring the mixture to a boil over medium heat, then reduce the heat to low and simmer for about 10-15 minutes, or until the syrup has thickened slightly.
- Remove from Heat: Remove the saucepan from the heat and stir in the lemon juice.
- Cool the Syrup: Let the syrup cool completely before using. This is important because you want to pour the cold syrup over the hot pie.
- Remove Solids: Once cooled, remove the cinnamon stick and lemon peel.
Preparing the Filling
The filling is where all the delicious flavors come together! It’s rich, nutty, and perfectly spiced.
- Melt the Butter: Melt the butter in a saucepan or in the microwave. Let it cool slightly.
- Whisk Sugar and Eggs: In a large bowl, whisk together the sugar and eggs until light and fluffy.
- Add Semolina and Baking Powder: Gradually add the semolina flour and baking powder to the egg mixture, whisking until just combined. Be careful not to overmix.
- Incorporate Wet Ingredients: Stir in the melted butter, vanilla extract, cinnamon, cloves, and brandy or orange liqueur (if using).
- Add Nuts: Fold in the chopped walnuts or almonds.
Assembling the Pie
This is where the magic happens! We’re going to layer everything together to create that beautiful, golden-brown pie.
- Preheat Oven: Preheat your oven to 350°F (175°C).
- Grease the Pan: Grease a 9×13 inch baking pan with butter or cooking spray.
- Layer the Phyllo Dough: If using homemade phyllo, carefully transfer the stack of dough to the prepared baking pan. Gently spread it out to fit the pan. If using store-bought phyllo, unroll the dough and layer about half of the sheets in the pan, brushing each sheet with melted butter.
- Pour in the Filling: Pour the filling evenly over the phyllo dough.
- Top with Phyllo Dough: Top the filling with the remaining phyllo dough sheets, brushing each sheet with melted butter. If using homemade phyllo, you may need to gently stretch and arrange the dough to cover the filling.
- Score the Top: Using a sharp knife, score the top layer of phyllo dough into diamond shapes or squares. This will help the pie bake evenly and make it easier to serve.
- Bake: Bake for 45-60 minutes, or until the phyllo dough is golden brown and the filling is set.
Finishing Touches
Almost there! The final step is to soak the pie in that delicious honey syrup.
- Pour the Syrup: As soon as the pie comes out of the oven, slowly and evenly pour the cold honey syrup over the hot pie. The syrup should sizzle as it soaks into the phyllo dough.
- Let it Soak: Let the pie cool completely in the pan, allowing the syrup to fully absorb. This may take several hours, or even overnight.
- Serve: Once the pie has cooled and the syrup has been absorbed, cut it into squares or diamond shapes and serve. I like to sprinkle a little extra chopped nuts on top for garnish.
Tips for Success:
- Don’t be afraid of the phyllo dough! It can be a little tricky to work with, but with a little practice, you’ll get the hang of it. Just remember to keep it covered with a damp towel to prevent it from drying out.
- Use good quality honey. The honey is the star of this pie, so it’s worth using a good quality honey with a rich flavor. Greek thyme honey is my personal favorite.
- Let the pie cool completely before serving. This allows the syrup to fully absorb and the flavors to meld together.
- Store leftovers in an airtight container at room temperature. The pie will keep for several days.
Variations:
- Add citrus zest. Grated orange or lemon zest can add a bright, fresh flavor to the filling.
- Use different nuts. Pecans, pistachios, or almonds can be used in place of walnuts.
- Add spices. A pinch of nutmeg or cardamom can add a warm, aromatic flavor to the filling.
- Make it gluten-free. Use gluten-free phyllo dough and semolina flour.
Conclusion:
This Greek Honey Pie, or Melopita as it’s traditionally known, is more than just a dessert; it’s a taste of sunshine, history, and pure indulgence all rolled into one delightful package. I truly believe this recipe is a must-try for anyone looking to expand their baking repertoire and impress their friends and family with a truly unique and unforgettable treat. The combination of the creamy, ricotta-based filling, the fragrant honey, and the subtle hint of cinnamon creates a symphony of flavors that will dance on your palate. It’s the kind of dessert that evokes memories of warm summer evenings and lazy afternoons spent in the Mediterranean.
But what truly sets this Greek Honey Pie apart is its versatility. While the recipe I’ve shared is a classic, there are countless ways to customize it to your own preferences. For a richer, more decadent experience, try using full-fat ricotta cheese and adding a touch of orange zest to the filling. The citrus notes will complement the honey beautifully and add an extra layer of complexity. If you’re looking for a lighter option, you can substitute part of the ricotta with Greek yogurt, which will add a tangy twist and reduce the overall fat content.
Serving suggestions are endless! This pie is delicious served warm, straight from the oven, with a dollop of Greek yogurt or a scoop of vanilla ice cream. The contrast between the warm pie and the cold topping is simply divine. It’s also wonderful served at room temperature, making it a perfect make-ahead dessert for parties and gatherings. For a truly authentic Greek experience, drizzle a little extra honey over each slice just before serving. You can also sprinkle some chopped walnuts or pistachios on top for added texture and flavor.
And don’t be afraid to experiment with different types of honey! Each variety will impart a unique flavor profile to the pie. Thyme honey, with its herbaceous notes, is a classic choice, but you could also try orange blossom honey for a floral aroma or chestnut honey for a bolder, more robust flavor. The possibilities are endless!
I’ve poured my heart and soul into perfecting this recipe, and I’m confident that you’ll love it as much as I do. It’s a relatively simple recipe to follow, even for beginner bakers, and the results are truly spectacular. The aroma that fills your kitchen as this pie bakes is simply intoxicating, and the first bite is pure bliss.
So, what are you waiting for? Gather your ingredients, preheat your oven, and get ready to embark on a culinary adventure to the sun-drenched shores of Greece. I promise you won’t be disappointed. This Greek Honey Pie is a guaranteed crowd-pleaser and a dessert that you’ll be making again and again.
I’m so excited for you to try this recipe! Once you’ve had a chance to bake it, please come back and share your experience in the comments below. I’d love to hear about any variations you tried, any tips you have to share, and, most importantly, how much you enjoyed it. Happy baking! Let me know if you have any questions, and I’ll do my best to help. I can’t wait to see your beautiful Greek Honey Pie creations!
Greek Honey Pie: A Delicious & Authentic Recipe
Rich Greek Honey Pie (Galatopita) with flaky phyllo, creamy semolina custard, and fragrant honey syrup. Perfect for special occasions!
Ingredients
- 2 cups all-purpose flour, plus more for dusting
- 1 teaspoon salt
- 1 cup lukewarm water
- 1/4 cup olive oil, plus more for brushing
- 1 tablespoon white vinegar
- 1 cup cornstarch, for dusting between layers
- 1 1/2 cups honey (preferably Greek thyme honey)
- 1 cup granulated sugar
- 1 cup water
- 1 cinnamon stick
- 1 lemon peel (a strip of zest, about 2 inches long)
- 2 tablespoons lemon juice
- 1 cup unsalted butter, melted
- 1 cup granulated sugar
- 4 large eggs
- 1 cup fine semolina flour
- 1 teaspoon baking powder
- 1 teaspoon vanilla extract
- 1/2 teaspoon ground cinnamon
- 1/4 teaspoon ground cloves
- 1/4 cup brandy or orange liqueur (optional)
- 1 cup finely chopped walnuts or almonds
Instructions
- In a large bowl, whisk together the flour and salt.
- Gradually add the lukewarm water, olive oil, and white vinegar. Mix until a shaggy dough forms.
- Turn the dough out onto a lightly floured surface and knead for 8-10 minutes, until smooth and elastic.
- Form the dough into a ball, coat with olive oil, and place in a clean bowl. Cover and let rest for 30 minutes to 2 hours.
- Divide the dough into 8-10 equal pieces.
- Roll out each piece into a very thin circle (12-14 inches), using plenty of cornstarch to prevent sticking.
- Stack the layers, sprinkling generously with cornstarch between each layer.
- (Optional) Gently stretch the entire stack further.
- In a medium saucepan, combine honey, sugar, water, cinnamon stick, and lemon peel.
- Bring to a boil, then reduce heat and simmer for 10-15 minutes, until slightly thickened.
- Remove from heat and stir in lemon juice.
- Let the syrup cool completely. Remove cinnamon stick and lemon peel.
- Melt the butter and let it cool slightly.
- In a large bowl, whisk together the sugar and eggs until light and fluffy.
- Gradually add the semolina flour and baking powder, whisking until just combined.
- Stir in the melted butter, vanilla extract, cinnamon, cloves, and brandy/orange liqueur (if using).
- Fold in the chopped walnuts or almonds.
- Preheat oven to 350°F (175°C).
- Grease a 9×13 inch baking pan.
- Layer the phyllo dough: If using homemade, transfer the stack to the pan. If using store-bought, layer about half the sheets, brushing each with melted butter.
- Pour the filling evenly over the phyllo dough.
- Top with the remaining phyllo dough, brushing each sheet with melted butter.
- Score the top layer of phyllo dough into diamond shapes or squares.
- Bake for 45-60 minutes, or until golden brown and the filling is set.
- As soon as the pie comes out of the oven, slowly and evenly pour the cold honey syrup over the hot pie.
- Let the pie cool completely in the pan, allowing the syrup to fully absorb (several hours or overnight).
- Cut into squares or diamond shapes and serve. Sprinkle with extra chopped nuts for garnish.
Notes
- Don’t be afraid of the phyllo dough! Keep it covered with a damp towel to prevent drying out.
- Use good quality honey for the best flavor.
- Let the pie cool completely before serving to allow the syrup to fully absorb.
- Store leftovers in an airtight container at room temperature for several days.
- Variations: Add citrus zest, use different nuts (pecans, pistachios, almonds), add spices (nutmeg, cardamom), or make it gluten-free with gluten-free phyllo dough and semolina flour.