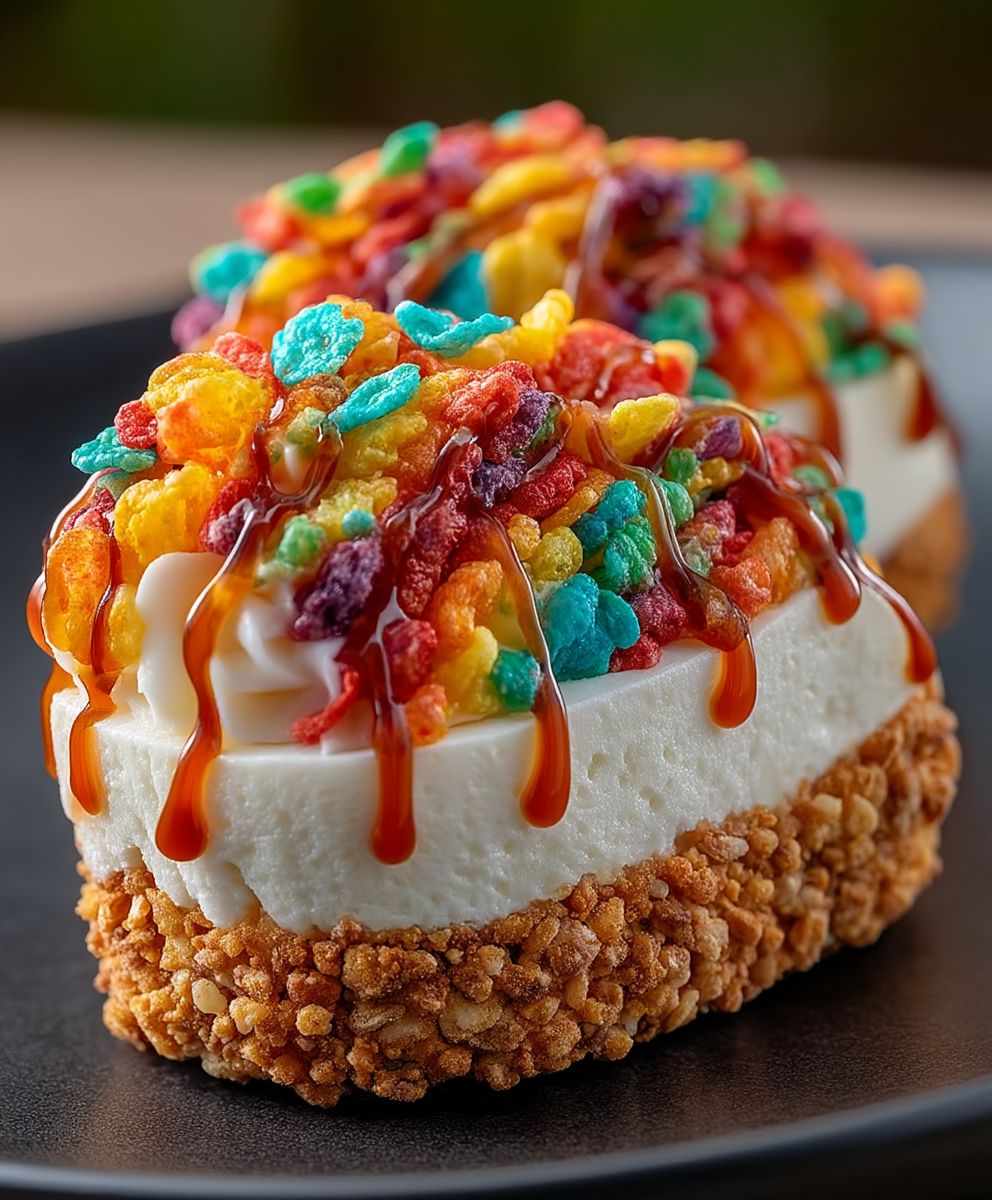
Fruity Pebbles Cheesecake Tacos: Prepare to have your mind blown! Imagine the creamy, dreamy indulgence of cheesecake, perfectly nestled inside a sweet, crunchy taco shell, and then showered with the vibrant, nostalgic goodness of Fruity Pebbles. Yes, you read that right – we’re taking dessert to a whole new level of fun and deliciousness!
While not steeped in centuries of tradition, the concept of dessert tacos has been gaining popularity as a playful and innovative way to enjoy classic flavors in a novel format. Think of it as a culinary adventure, a fusion of textures and tastes that’s guaranteed to bring a smile to your face. It’s a celebration of creativity in the kitchen, and these Fruity Pebbles Cheesecake Tacos are the perfect example.
What makes this dessert so irresistible? It’s the delightful combination of textures – the smooth, rich cheesecake filling, the satisfying crunch of the taco shell, and the playful pop of the Fruity Pebbles. The flavors are equally captivating, offering a sweet and tangy balance that’s both comforting and exciting. Plus, they’re incredibly easy to make and perfect for parties, potlucks, or simply a fun weekend treat. Who can resist a handheld dessert that’s this visually appealing and utterly delicious?

Ingredients:
- For the Fruity Pebbles Taco Shells:
- 4 cups Fruity Pebbles cereal
- 4 tablespoons unsalted butter, melted
- 2 tablespoons granulated sugar
- For the Cheesecake Filling:
- 16 ounces cream cheese, softened
- 1 cup powdered sugar
- 1 teaspoon vanilla extract
- 1/2 cup heavy cream
- 1/4 cup Fruity Pebbles cereal, crushed (for mixing into the filling)
- For the Toppings (optional):
- Whipped cream
- Fresh berries (strawberries, blueberries, raspberries)
- Chocolate shavings
- Extra Fruity Pebbles cereal
- Rainbow sprinkles
Making the Fruity Pebbles Taco Shells
Okay, let’s get started with the most fun part – creating those vibrant Fruity Pebbles taco shells! This is where the magic happens, and trust me, the aroma alone is worth the effort.
- Prepare the Cereal Mixture: In a large bowl, combine the 4 cups of Fruity Pebbles cereal, 4 tablespoons of melted unsalted butter, and 2 tablespoons of granulated sugar. Mix everything together really well, making sure the cereal is evenly coated with the butter and sugar. This mixture is what will hold our taco shells together, so don’t skimp on the mixing!
- Shape the Taco Shells: Now, this is where a little creativity comes in. You’ll need a taco shell mold or a makeshift one. If you don’t have a mold, you can use aluminum foil to create a U-shape. Press the Fruity Pebbles mixture firmly into the mold, ensuring it’s evenly distributed and compact. The tighter you pack it, the sturdier the shell will be.
- Bake the Taco Shells: Preheat your oven to 350°F (175°C). Place the taco shells (still in their molds) on a baking sheet lined with parchment paper. Bake for 8-10 minutes, or until the shells are set and slightly golden around the edges. Keep a close eye on them, as they can burn quickly.
- Cool and Harden: Once baked, carefully remove the taco shells from the oven and let them cool completely in the molds. This is crucial! As they cool, they will harden and become more stable. Don’t try to remove them while they’re still warm, or they might crumble. Once completely cool, gently remove the taco shells from the molds. If they’re sticking, try using a thin knife or spatula to loosen the edges.
- Troubleshooting: If your taco shells are too fragile, it could be because they weren’t packed tightly enough or weren’t baked long enough. If they’re too hard, you might have baked them for too long. Experiment with the baking time and packing density to find what works best for you.
Preparing the Cheesecake Filling
While the taco shells are cooling, let’s whip up that creamy, dreamy cheesecake filling. This is the heart of our dessert, and it’s incredibly easy to make.
- Soften the Cream Cheese: This is a non-negotiable step! Make sure your cream cheese is completely softened to room temperature. This will ensure a smooth, lump-free filling. If you’re in a hurry, you can microwave it in 15-second intervals, but be careful not to melt it.
- Combine Cream Cheese and Powdered Sugar: In a large bowl, beat the softened cream cheese with the powdered sugar until smooth and creamy. Use an electric mixer for the best results, but you can also do it by hand if you’re feeling ambitious. Make sure to scrape down the sides of the bowl occasionally to ensure everything is evenly mixed.
- Add Vanilla Extract and Heavy Cream: Stir in the vanilla extract and then gradually add the heavy cream. Beat until the filling is light and fluffy. Be careful not to overbeat, as this can cause the filling to become too thin.
- Fold in Crushed Fruity Pebbles: Gently fold in the 1/4 cup of crushed Fruity Pebbles cereal. This adds a little extra flavor and texture to the filling. Don’t overmix, just fold until the cereal is evenly distributed.
- Chill the Filling: Cover the bowl with plastic wrap and refrigerate the cheesecake filling for at least 30 minutes. This will help it firm up and make it easier to pipe or spoon into the taco shells.
Assembling the Fruity Pebbles Cheesecake Tacos
Now for the grand finale – putting everything together! This is where you get to unleash your inner artist and create some truly Instagram-worthy desserts.
- Fill the Taco Shells: Once the cheesecake filling has chilled, you can either spoon it into the taco shells or use a piping bag for a more professional look. If using a piping bag, fit it with a large round tip and pipe the filling into each taco shell. If spooning, just fill each shell evenly, leaving a little room at the top for toppings.
- Add Toppings: This is where you can really get creative! Top the cheesecake filling with whipped cream, fresh berries, chocolate shavings, extra Fruity Pebbles cereal, rainbow sprinkles – whatever your heart desires! The more colorful and fun, the better.
- Serve Immediately: These Fruity Pebbles Cheesecake Tacos are best served immediately. The taco shells can soften over time, so it’s best to enjoy them while they’re still crisp.
- Storage (if needed): If you have any leftovers (which is unlikely!), store them in an airtight container in the refrigerator. The taco shells may soften slightly, but they’ll still taste delicious.
Tips and Variations
Want to take your Fruity Pebbles Cheesecake Tacos to the next level? Here are a few ideas:
- Different Cereal Shells: Experiment with other cereals! Cocoa Pebbles, Rice Krispies, or even crushed graham crackers can be used to make the taco shells.
- Flavored Cheesecake Filling: Add a few drops of food coloring to the cheesecake filling to match the color of the cereal. You can also add different extracts, such as lemon, almond, or strawberry, to create a unique flavor profile.
- Chocolate-Dipped Shells: Dip the edges of the taco shells in melted chocolate and then sprinkle with Fruity Pebbles for an extra touch of sweetness and visual appeal.
- Mini Tacos: Use smaller taco shell molds to create mini Fruity Pebbles Cheesecake Tacos, perfect for parties or individual desserts.
- Vegan Option: Use vegan cream cheese and butter substitutes to make this recipe vegan-friendly.
Enjoy!
I hope you have as much fun making and eating these Fruity Pebbles Cheesecake Tacos as I do! They’re a guaranteed crowd-pleaser and a perfect way to add a little bit of fun to any occasion. Don’t be afraid to experiment with different flavors and toppings to create your own unique version. Happy baking!
Conclusion:
So there you have it! These Fruity Pebbles Cheesecake Tacos are truly a must-try dessert that’s guaranteed to bring a smile to everyone’s face. The vibrant colors, the creamy cheesecake filling, and the satisfying crunch of the waffle cone “taco shell” create a symphony of textures and flavors that’s simply irresistible. I know, I know, it sounds a little crazy, but trust me on this one – it’s a flavor explosion you won’t regret!
Why are these tacos a game-changer? Because they’re fun, they’re easy to make (seriously, even the kids can help!), and they’re a unique twist on classic desserts. Forget boring old cheesecake slices; these tacos are the life of the party! They’re perfect for birthday celebrations, potlucks, or even just a fun weekend treat. Plus, who can resist the nostalgic charm of Fruity Pebbles?
But the fun doesn’t stop there! Feel free to get creative with your serving suggestions and variations. For an extra touch of indulgence, drizzle the finished tacos with melted white chocolate or a homemade berry sauce. A sprinkle of extra Fruity Pebbles on top adds even more visual appeal and that signature cereal crunch.
Serving Suggestions:
* Serve them chilled for a refreshing treat on a hot day.
* Arrange them on a platter for a colorful and eye-catching dessert display.
* Pair them with a scoop of vanilla ice cream for an extra decadent experience.
* Offer a variety of toppings, like whipped cream, chocolate shavings, and fresh fruit, so everyone can customize their own taco.
Variations to Explore:
* Experiment with different flavors of cheesecake filling. Try adding a hint of lemon zest, vanilla extract, or even a swirl of Nutella.
* Use different types of cereal for the coating. Cocoa Pebbles, Rice Krispies, or even crushed Oreos would all be delicious alternatives.
* Instead of waffle cones, try using sugar cones or even homemade tortillas for the taco shells.
* For a healthier option, use a low-fat cream cheese and a sugar substitute in the cheesecake filling.
I’m absolutely confident that you’ll love these Fruity Pebbles Cheesecake Tacos as much as I do. They’re a guaranteed crowd-pleaser, and they’re so much fun to make! The combination of creamy cheesecake, crunchy cereal, and the playful taco presentation is simply unbeatable.
So, what are you waiting for? Gather your ingredients, put on some music, and get ready to create some dessert magic! I can’t wait to hear what you think.
Don’t be shy – give this recipe a try! And when you do, please share your experience with me! I’d love to see your creations and hear about any variations you come up with. Tag me in your photos on social media, or leave a comment below. Let’s spread the Fruity Pebbles Cheesecake Taco love! I’m eager to see how you make this already amazing recipe your own. Remember, the best part of cooking is sharing the joy with others, so get baking and let’s make some memories!
Fruity Pebbles Cheesecake Tacos: A Deliciously Fun Recipe
Crispy Fruity Pebbles taco shells filled with creamy cheesecake and topped with your favorite treats make this a fun and colorful dessert!
Ingredients
- 4 cups Fruity Pebbles cereal
- 4 tablespoons unsalted butter, melted
- 2 tablespoons granulated sugar
- 16 ounces cream cheese, softened
- 1 cup powdered sugar
- 1 teaspoon vanilla extract
- 1/2 cup heavy cream
- 1/4 cup Fruity Pebbles cereal, crushed (for mixing into the filling)
- Whipped cream
- Fresh berries (strawberries, blueberries, raspberries)
- Chocolate shavings
- Extra Fruity Pebbles cereal
- Rainbow sprinkles
Instructions
- In a large bowl, combine the Fruity Pebbles cereal, melted butter, and granulated sugar. Mix well until the cereal is evenly coated.
- Press the Fruity Pebbles mixture firmly into taco shell molds (or makeshift foil molds), ensuring it’s evenly distributed and compact.
- Preheat oven to 350°F (175°C). Place the taco shells (in molds) on a parchment-lined baking sheet. Bake for 8-10 minutes, or until set and slightly golden.
- Carefully remove from oven and let cool completely in the molds. Once cool, gently remove the taco shells from the molds.
- Ensure cream cheese is completely softened to room temperature.
- In a large bowl, beat the softened cream cheese with the powdered sugar until smooth and creamy.
- Stir in the vanilla extract and then gradually add the heavy cream. Beat until the filling is light and fluffy.
- Gently fold in the crushed Fruity Pebbles cereal.
- Cover and refrigerate the cheesecake filling for at least 30 minutes.
- Spoon or pipe the chilled cheesecake filling into the taco shells.
- Top with whipped cream, fresh berries, chocolate shavings, extra Fruity Pebbles, sprinkles, or any desired toppings.
- Best served immediately to enjoy the crisp taco shells.
- Store leftovers in an airtight container in the refrigerator.
Notes
- Troubleshooting Taco Shells: If shells are too fragile, pack tighter or bake longer. If too hard, bake for less time.
- Variations:
Use different cereals for the shells (Cocoa Pebbles, Rice Krispies, graham crackers).
Flavor the cheesecake filling with food coloring or extracts (lemon, almond, strawberry).
Dip the edges of the taco shells in melted chocolate and sprinkle with Fruity Pebbles.
Make mini tacos using smaller molds.
Use vegan cream cheese and butter substitutes for a vegan option.