Easy pumpkin crisp dessert: the words alone conjure up images of cozy autumn evenings, the scent of cinnamon and spice filling the air, and the satisfying crunch of a warm, buttery topping. But what if I told you that achieving this autumnal bliss doesn’t require hours in the kitchen or a degree in pastry arts?
Pumpkin crisp, in its essence, is a humble dessert, a delightful evolution of the classic fruit crisp. While the exact origins are debated, similar fruit-based crisps and crumbles have been comforting families for generations, particularly in North America. The addition of pumpkin, a quintessential symbol of fall harvests, elevates this simple dessert to a seasonal masterpiece.
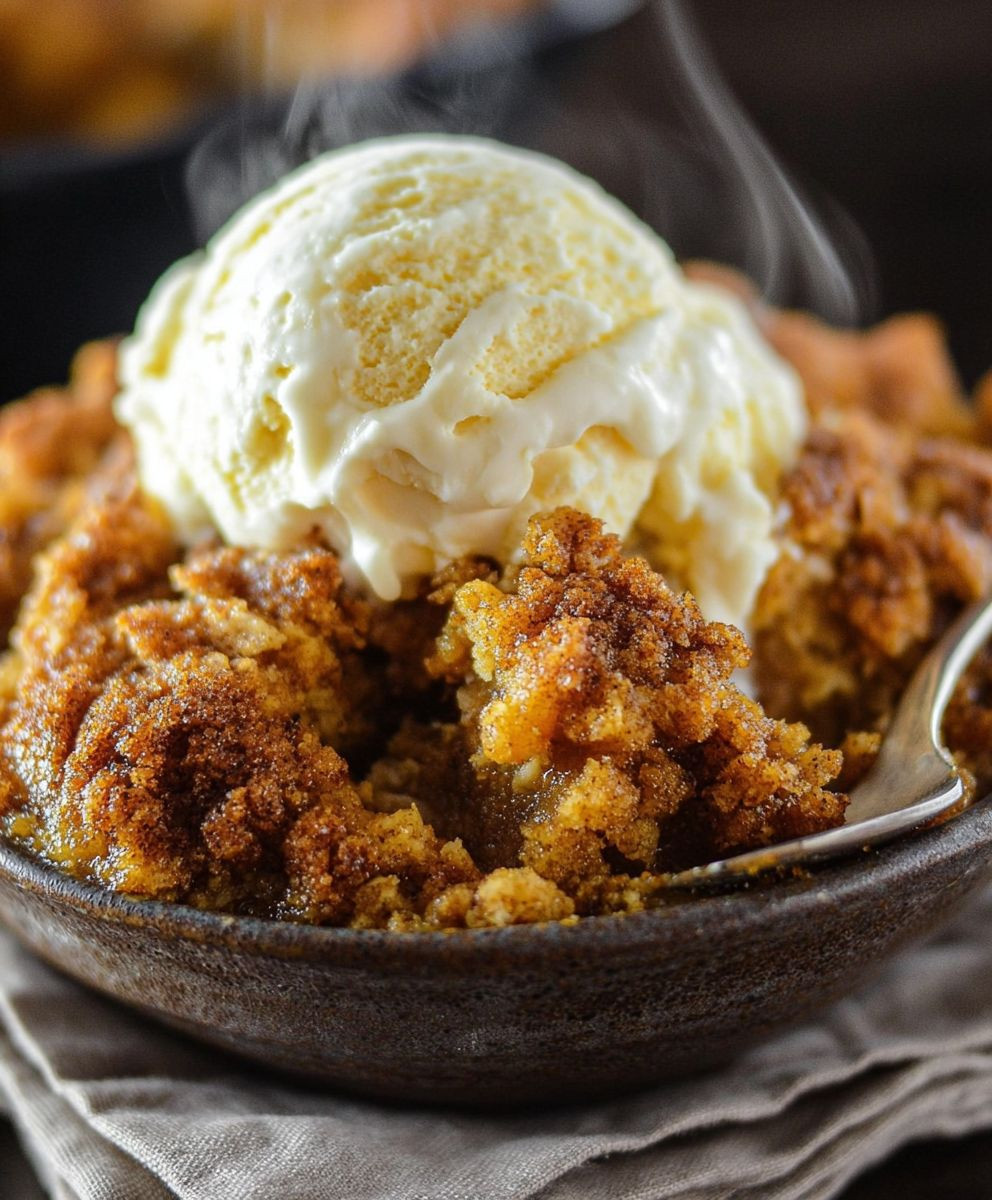
What makes this easy pumpkin crisp dessert so universally loved? It’s the perfect marriage of textures and flavors. The creamy, spiced pumpkin filling, reminiscent of pumpkin pie but without the fuss of a crust, is beautifully complemented by the crumbly, golden-brown topping. The contrast between the soft, warm filling and the crisp, buttery topping is simply irresistible. Plus, it’s incredibly easy to customize! Add pecans or walnuts to the topping for extra crunch, or a dollop of whipped cream or vanilla ice cream for an extra touch of indulgence. But the best part? It’s a crowd-pleaser that requires minimal effort, making it the perfect dessert for busy weeknights or festive gatherings. So, let’s get baking and create a little autumn magic!

Ingredients:
- 1 (15 ounce) can pumpkin puree
- 1 (12 ounce) can evaporated milk
- 1 cup granulated sugar
- 1 teaspoon ground cinnamon
- 1/2 teaspoon ground ginger
- 1/4 teaspoon ground cloves
- 1/4 teaspoon salt
- 1 box (15.25 ounce) yellow cake mix
- 1 cup (2 sticks) cold unsalted butter, cut into cubes
- 1 cup chopped pecans or walnuts (optional)
Preparing the Pumpkin Filling:
Okay, let’s get started! First, we’re going to whip up that delicious pumpkin filling. This is the heart and soul of our crisp, so pay attention!
- Combine the Pumpkin and Evaporated Milk: In a large bowl, grab your can of pumpkin puree and scoop it all in. Then, pour in the entire can of evaporated milk. Make sure you get every last drop – we want that creamy texture!
- Add the Sweetness: Now, it’s time for the sugar. Add the full cup of granulated sugar to the bowl. This will give our filling that perfect level of sweetness that complements the pumpkin spice.
- Spice it Up!: This is where the magic happens! Add the cinnamon, ginger, and cloves. Don’t be shy with the spices – they’re what make this crisp taste like autumn in a bowl. Remember, we’re using 1 teaspoon of cinnamon, 1/2 teaspoon of ginger, and 1/4 teaspoon of cloves.
- A Pinch of Salt: Don’t forget the salt! Just a 1/4 teaspoon will do. Salt enhances the flavors of the other ingredients and balances the sweetness.
- Mix it Well: Now, grab your whisk and get ready to mix! Whisk all the ingredients together until they are completely combined and smooth. There shouldn’t be any lumps of pumpkin or sugar. The mixture should be a beautiful, uniform orange color. This usually takes about 2-3 minutes of vigorous whisking.
Creating the Crisp Topping:
Next up, we’re making the crumbly, buttery topping that gives this dessert its signature “crisp” texture. This part is super easy, but it’s important to get the butter nice and cold!
- Pour in the Cake Mix: In a separate, large bowl, pour in the entire box of yellow cake mix. Don’t add any of the ingredients listed on the box – we’re just using the dry mix as is.
- Add the Cold Butter: This is key! Take your cold butter (it should be straight from the fridge) and cut it into small cubes. Add the cubed butter to the bowl with the cake mix. The colder the butter, the better the crisp topping will be.
- Cut in the Butter: Now, using a pastry blender or your fingertips, cut the butter into the cake mix. The goal is to break the butter down into smaller pieces and incorporate it into the cake mix until the mixture resembles coarse crumbs. If you’re using your fingertips, work quickly to prevent the butter from melting. You can also use a food processor for this step, pulsing until the mixture is crumbly.
- Add the Nuts (Optional): If you’re using nuts, now’s the time to add them! Sprinkle the chopped pecans or walnuts over the cake mix and butter mixture. Gently toss to combine. The nuts add a lovely crunch and nutty flavor to the crisp.
Assembling and Baking the Crisp:
Alright, we’re in the home stretch! Now we’re going to put everything together and bake it until it’s golden brown and bubbly. Get ready for your kitchen to smell amazing!
- Prepare the Baking Dish: Preheat your oven to 350°F (175°C). Grease a 9×13 inch baking dish with butter or cooking spray. This will prevent the crisp from sticking to the dish and make it easier to serve.
- Pour in the Pumpkin Filling: Pour the pumpkin filling evenly into the prepared baking dish. Spread it out so that it covers the entire bottom of the dish.
- Sprinkle on the Crisp Topping: Now, sprinkle the cake mix and butter topping evenly over the pumpkin filling. Make sure to cover the entire surface of the filling with the topping. You want every bite to have that delicious crisp texture.
- Bake the Crisp: Place the baking dish in the preheated oven and bake for 45-55 minutes, or until the topping is golden brown and the filling is bubbly around the edges. The exact baking time may vary depending on your oven, so keep an eye on it.
- Let it Cool: Once the crisp is done baking, remove it from the oven and let it cool for at least 15-20 minutes before serving. This will allow the filling to set slightly and prevent it from being too runny.
Serving Suggestions:
This pumpkin crisp is delicious on its own, but it’s even better with a few toppings! Here are some of my favorite ways to serve it:
- Whipped Cream: A dollop of whipped cream adds a light and airy sweetness that complements the pumpkin spice perfectly.
- Vanilla Ice Cream: A scoop of vanilla ice cream is a classic pairing with warm desserts. The cold ice cream melts slightly into the warm crisp, creating a delightful contrast of temperatures and textures.
- Caramel Sauce: A drizzle of caramel sauce adds a rich and decadent touch. The caramel flavor pairs beautifully with the pumpkin and spices.
- Pecans or Walnuts: If you didn’t add nuts to the topping, you can sprinkle some chopped pecans or walnuts over the top for added crunch.
- Cinnamon Sugar: A sprinkle of cinnamon sugar adds a touch of sweetness and warmth.
Tips and Tricks:
Here are a few extra tips and tricks to help you make the perfect pumpkin crisp:
- Use Cold Butter: I can’t stress this enough! Cold butter is essential for creating a crumbly crisp topping. If the butter is too warm, it will melt and the topping will be greasy and dense.
- Don’t Overmix the Topping: Overmixing the topping will develop the gluten in the cake mix, resulting in a tough topping. Mix just until the butter is incorporated and the mixture resembles coarse crumbs.
- Adjust the Spices to Your Liking: If you prefer a stronger spice flavor, feel free to add more cinnamon, ginger, or cloves. You can also add a pinch of nutmeg or allspice.
- Use Different Nuts: If you don’t like pecans or walnuts, you can use other nuts such as almonds, cashews, or macadamia nuts.
- Make it Gluten-Free: To make this crisp gluten-free, simply use a gluten-free yellow cake mix.
- Make it Ahead: You can assemble the crisp ahead of time and store it in the refrigerator for up to 24 hours before baking. Just be sure to add the topping right before baking to prevent it from getting soggy.
- Reheat Leftovers: Leftover pumpkin crisp can be stored in the refrigerator for up to 3 days. To reheat, simply microwave it for a few seconds or bake it in a preheated oven at 350°F (175°C) until warmed through.
Variations:
Want to mix things up a bit? Here are some fun variations you can try:
- Apple Pumpkin Crisp: Add a layer of sliced apples to the bottom of the baking dish before pouring in the pumpkin filling. The apples will add a tart and juicy contrast to the sweet and spicy pumpkin.
- Cranberry Pumpkin Crisp: Add a layer of fresh or frozen cranberries to the bottom of the baking dish before pouring in the pumpkin filling. The cranberries will add a tart and tangy flavor that complements the pumpkin.
- Chocolate Chip Pumpkin Crisp: Sprinkle chocolate chips over the pumpkin filling before adding the topping. The chocolate chips will add a rich and decadent touch.
- Caramel Apple Pumpkin Crisp: Combine the apple variation with a drizzle of caramel sauce before baking for an extra special treat.
Troubleshooting:
Sometimes things don’t go exactly as planned. Here are some common problems and how to fix them:
- Topping is Too Dry: If the topping is too dry, add a tablespoon or two of melted butter until it reaches the desired consistency.
- Topping is Too Greasy: If the topping is too greasy

Conclusion:
And there you have it! This easy pumpkin crisp dessert is truly a must-try, especially as the leaves start to turn and the air gets that crisp autumn chill. It’s the kind of recipe that becomes a family favorite, passed down through generations, and requested at every holiday gathering. Why? Because it’s ridiculously simple to make, uses ingredients you probably already have in your pantry, and delivers an explosion of warm, comforting flavors that just scream “fall.”
But beyond the ease and the deliciousness, this crisp is special because it’s so versatile. Feel free to experiment! Want to kick up the spice? Add a pinch of cayenne pepper to the pumpkin mixture for a subtle warmth that balances the sweetness. Craving a nuttier flavor? Toss in a handful of chopped pecans or walnuts to the topping. For a truly decadent experience, try using brown butter in the crisp topping – the nutty, caramelized flavor will elevate this dessert to a whole new level.
Serving suggestions? Oh, the possibilities are endless! A scoop of vanilla ice cream melting over a warm slice is a classic for a reason. But don’t stop there! A dollop of whipped cream, a drizzle of caramel sauce, or even a sprinkle of cinnamon sugar can add that extra touch of magic. For a lighter option, try serving it with a dollop of Greek yogurt and a sprinkle of granola. And if you’re feeling particularly adventurous, why not try pairing it with a scoop of salted caramel ice cream? The salty-sweet combination is simply divine.
This easy pumpkin crisp dessert is also fantastic served warm or at room temperature, making it perfect for potlucks and parties. You can even make it ahead of time and simply reheat it before serving. Just be sure to cover it loosely with foil to prevent the topping from getting too brown.
I truly believe that this recipe is a winner. It’s the perfect balance of sweet, spicy, and comforting, and it’s so easy to make that even the most novice baker can whip it up with confidence. It’s the kind of dessert that brings people together, sparks conversation, and creates lasting memories.
Don’t just take my word for it, though!
I wholeheartedly encourage you to give this recipe a try. I’m confident that you’ll love it as much as I do. And once you’ve made it, I’d absolutely love to hear about your experience. Did you make any variations? What did you serve it with? What did your family and friends think?
Please, share your thoughts and photos in the comments below! I’m always eager to learn from your experiences and see how you’ve made this recipe your own. Let’s create a community of pumpkin crisp lovers and share our tips and tricks for making the perfect fall dessert. So go ahead, grab your ingredients, preheat your oven, and get ready to bake up a batch of pure autumnal bliss. Happy baking! I can’t wait to hear all about your easy pumpkin crisp dessert success!
Easy Pumpkin Crisp Dessert: The Perfect Fall Treat
Easy and delicious Pumpkin Crisp with a buttery cake mix topping, perfect for fall!
Ingredients
- 1 (15 ounce) can pumpkin puree
- 1 (12 ounce) can evaporated milk
- 1 cup granulated sugar
- 1 teaspoon ground cinnamon
- 1/2 teaspoon ground ginger
- 1/4 teaspoon ground cloves
- 1/4 teaspoon salt
- 1 box (15.25 ounce) yellow cake mix
- 1 cup (2 sticks) cold unsalted butter, cut into cubes
- 1 cup chopped pecans or walnuts (optional)
Instructions
- Prepare the Pumpkin Filling: In a large bowl, combine pumpkin puree, evaporated milk, granulated sugar, cinnamon, ginger, cloves, and salt. Whisk until smooth.
- Create the Crisp Topping: In a separate bowl, pour in the yellow cake mix. Add the cold, cubed butter.
- Using a pastry blender or your fingertips, cut the butter into the cake mix until the mixture resembles coarse crumbs. If using nuts, gently toss them in.
- Assemble and Bake: Preheat oven to 350°F (175°C). Grease a 9×13 inch baking dish.
- Pour the pumpkin filling into the prepared dish, spreading evenly.
- Sprinkle the cake mix and butter topping evenly over the pumpkin filling.
- Bake for 45-55 minutes, or until the topping is golden brown and the filling is bubbly around the edges.
- Let cool for at least 15-20 minutes before serving.
- Serve with whipped cream, vanilla ice cream, caramel sauce, or a sprinkle of cinnamon sugar (optional).
Notes
- Use cold butter for the best crisp topping.
- Don’t overmix the topping.
- Adjust spices to your preference.
- Can be made gluten-free by using a gluten-free yellow cake mix.
- Assemble ahead of time and store in the refrigerator for up to 24 hours before baking.
- Leftovers can be stored in the refrigerator for up to 3 days.