Peanut Butter Squares are a true classic, an irresistible treat that instantly transports you back to simpler times and moments of pure, unadulterated joy. I still remember the excitement building as my grandmother would pull a fresh pan of these from the fridge, the promise of that first bite almost too much to bear. There’s something undeniably magical about the perfect interplay of rich, salty peanut butter and sweet confection that makes this dessert a universally beloved indulgence. While their precise origins might be delightfully murky, these no-bake wonders have firmly established themselves as a cherished staple across North America, gracing countless bake sale tables, holiday gatherings, and impromptu family dessert sessions.
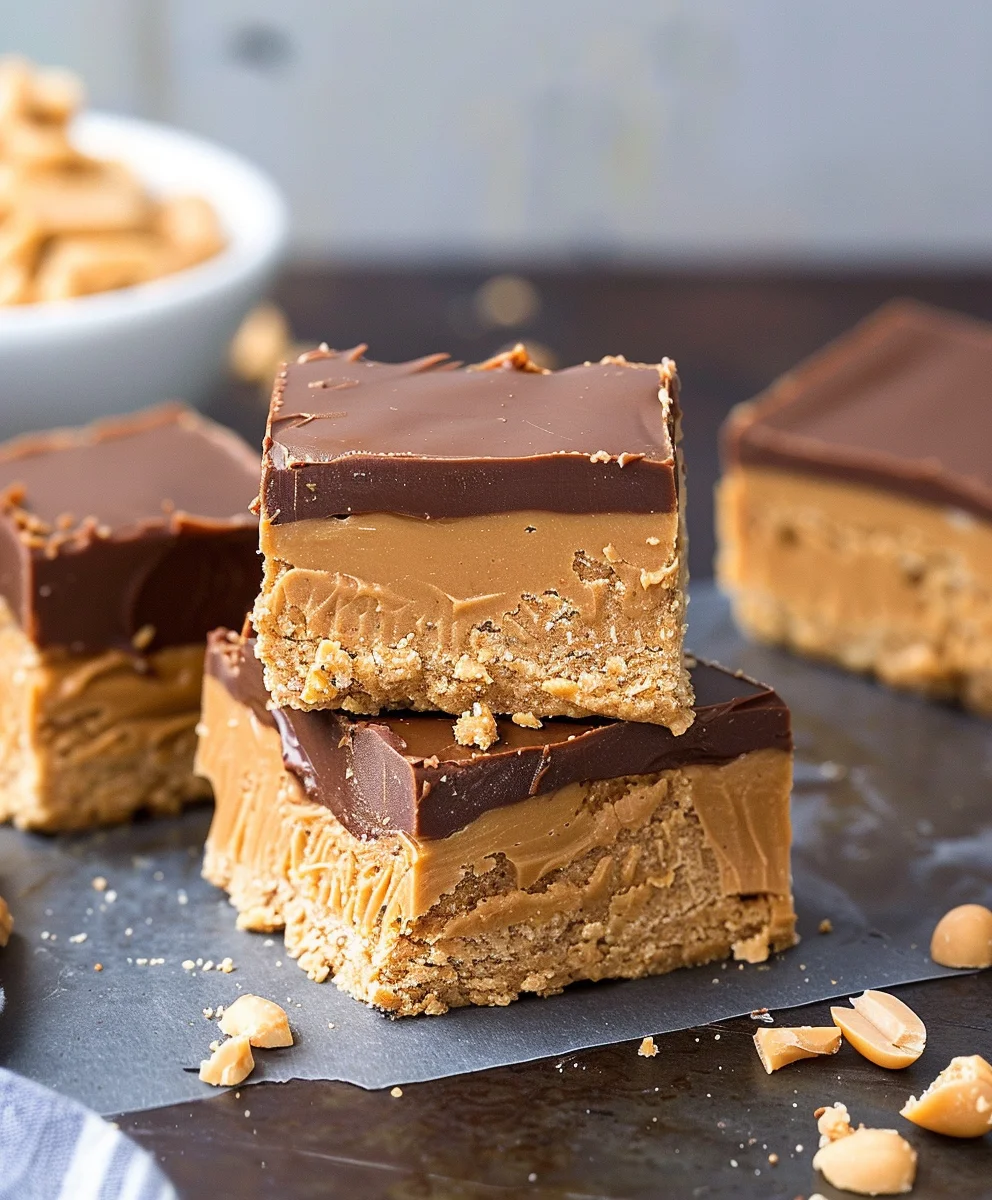
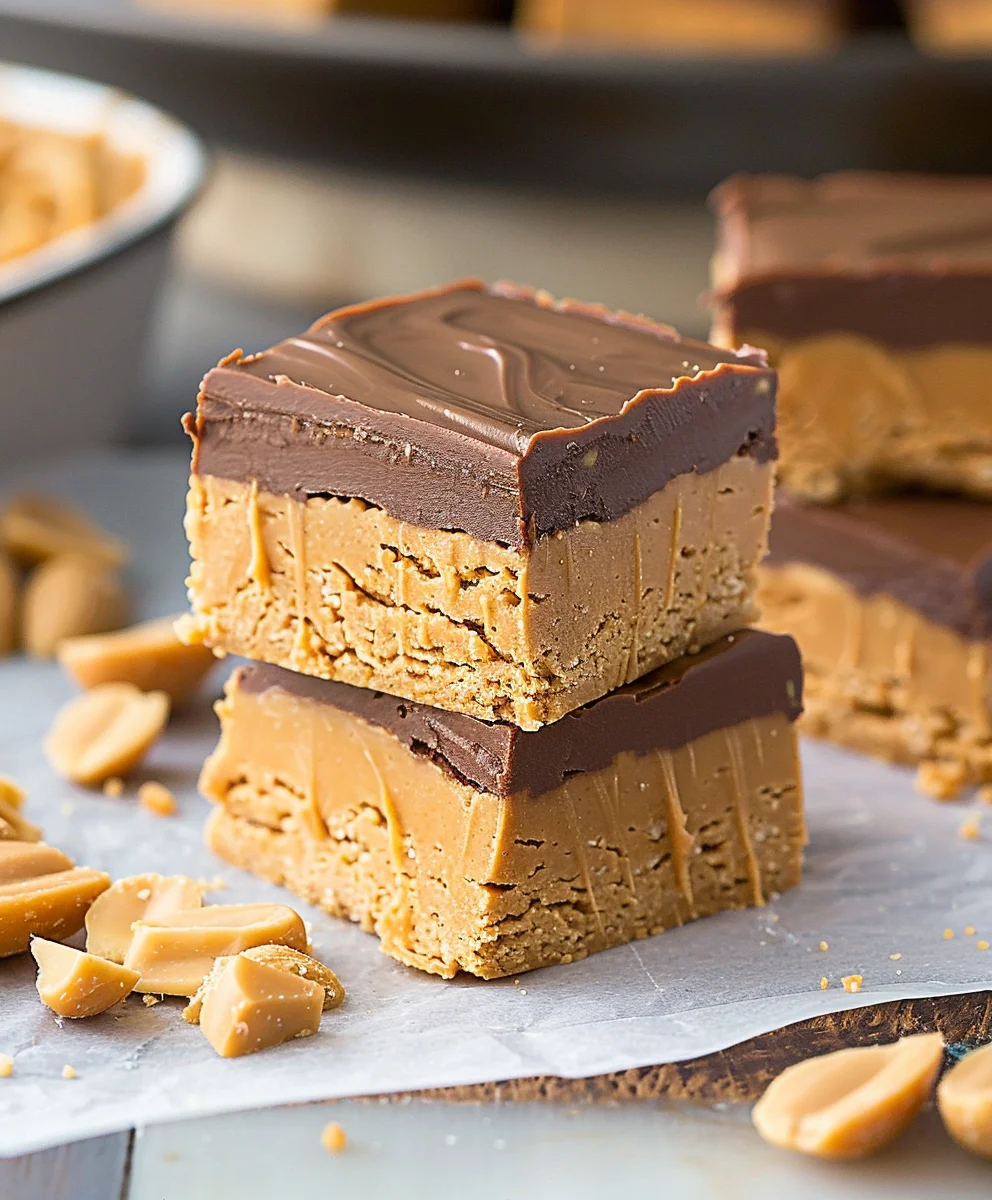
People simply adore these delicious squares for their incredible texture: a perfectly crumbly, buttery base topped with a smooth, luscious peanut butter layer, often finished with a thin, glossy blanket of chocolate. It’s a symphony of flavors and textures that satisfies every craving. The sheer convenience of whipping up a batch of these delectable Peanut Butter Squares without even needing to turn on the oven is another key reason for their enduring popularity. They offer comfort, nostalgia, and a burst of deliciousness in every bite, proving that sometimes, the simplest recipes are truly the best.

Ingredients:
- For the Graham Cracker Base:
- 1 ½ cups (approximately 10-12 full sheets) graham cracker crumbs (I find it easiest to buy them pre-crushed, but a food processor works wonders too!)
- ½ cup (1 stick) unsalted butter, melted (Always opt for unsalted so you can control the salt content yourself!)
- ¼ cup granulated sugar (Just a touch of sweetness to complement the salty base.)
- For the Creamy Peanut Butter Filling:
- 1 cup (2 sticks) unsalted butter, softened (Not melted! This is key for a light, creamy texture.)
- 1 ½ cups creamy peanut butter (Please, for the love of perfect squares, use the no-stir, conventional kind like Jif or Skippy. Natural peanut butter tends to separate and can make the filling oily.)
- 3 ½ cups powdered sugar (also known as confectioners’ sugar), sifted (Sifting is a small step that makes a huge difference in smoothness!)
- 1 teaspoon pure vanilla extract (A little splash really brings out the peanut butter flavor.)
- For the Decadent Chocolate Topping:
- 1 ½ cups semi-sweet chocolate chips (Good quality chocolate makes all the difference here!)
- ¼ cup (½ stick) unsalted butter (Again, unsalted is our friend!)
- 2 tablespoons light corn syrup (This is my secret weapon for a glossy, perfectly set, non-cracking chocolate layer. You can omit it, but I highly recommend it!)
Preparing the Base Layer for Your Peanut Butter Squares
- Get Your Pan Ready: First things first, we need to prepare our pan. I always reach for a 9×13 inch baking pan for these delightful squares. To make removal and cleanup an absolute breeze, I highly recommend lining your pan with parchment paper, leaving an overhang on the longer sides. This little trick creates “handles” that will allow you to lift the entire slab of squares out of the pan once they’re chilled and set. If you don’t have parchment paper, a good greasing and flouring will do, but trust me, the parchment method is superior for these no-bake treats. You want your pan ready to go before you even think about mixing anything, as timing is everything in no-bake recipes.
- Crush Those Graham Crackers: If you’re starting with whole graham crackers, now’s the time to turn them into fine crumbs. My favorite method is tossing them into a food processor and pulsing until they’re a fine, uniform texture. Alternatively, you can place them in a large Ziploc bag, seal it, and use a rolling pin to crush them. The goal is fine crumbs, similar to sand, because this will create a much more stable and cohesive base. Any large chunks will make the base uneven and crumbly, which we definitely don’t want.
- Melt the Butter: In a medium microwave-safe bowl, melt your ½ cup of unsalted butter. I usually pop it in the microwave for about 30-45 seconds, stirring halfway, until it’s completely liquid. Be careful not to overheat it, as melted butter can get very hot very quickly. If you prefer the stovetop, melt it gently in a small saucepan over low heat.
- Combine and Sweeten: Once your butter is melted, pour it over your graham cracker crumbs in a mixing bowl. Add the ¼ cup of granulated sugar. Now, using a spoon or your clean hands, mix everything together thoroughly. You want every single crumb to be moistened by the butter, creating a consistency akin to wet sand. Take your time with this step, ensuring there are no dry pockets of crumbs left at the bottom of the bowl. This uniform moisture is crucial for the base to set properly.
- Press the Base: Pour the graham cracker mixture into your prepared 9×13 inch pan. Now comes the important part: pressing it down firmly and evenly. I find the flat bottom of a drinking glass or a ¼-cup dry measuring cup works perfectly for this. Press down with consistent pressure across the entire surface. You want this base to be very compact and flat, as it will be the sturdy foundation for our delicious Peanut Butter Squares. Once pressed, pop the pan into the refrigerator to chill for at least 15-20 minutes while we prepare the peanut butter filling. This chilling step helps to firm up the butter in the base, making it less likely to shift or crumble when you add the next layer.
Crafting the Creamy Peanut Butter Filling
- Cream the Butter and Peanut Butter: In a large mixing bowl, using an electric mixer (either a stand mixer with a paddle attachment or a hand-held mixer), beat the 1 cup of softened unsalted butter until it’s light and fluffy, usually about 1-2 minutes on medium speed. The butter should be genuinely softened, not melted, as this creates air pockets for a wonderfully creamy texture. Then, add the 1 ½ cups of creamy peanut butter to the bowl. Beat the butter and peanut butter together on medium speed until they are thoroughly combined, smooth, and appear light in color, scraping down the sides of the bowl as needed. This usually takes another 2-3 minutes. You’re aiming for a unified, airy mixture before adding the sugar.
- Incorporate the Powdered Sugar: Now, it’s time to add the powdered sugar. This is where the magic happens and our filling starts to take on its iconic texture. Gradually add the 3 ½ cups of sifted powdered sugar, about a cup at a time, to the peanut butter mixture. Start on low speed to prevent a cloud of sugar from engulfing your kitchen, then increase to medium speed after each addition. Beat well after each addition until the sugar is fully incorporated and the mixture starts to thicken. You’ll notice the texture transforming from a loose cream to a rich, dense, and wonderfully pliable dough-like consistency. Scrape down the sides and bottom of the bowl frequently to ensure everything is evenly mixed. Don’t be tempted to add all the sugar at once, as it can overwhelm the mixer and make it harder to achieve a smooth consistency. The filling should be thick enough to spread but still quite soft.
- Add the Vanilla: Once all the powdered sugar is incorporated and the filling is wonderfully smooth and thick, add the 1 teaspoon of pure vanilla extract. Beat on medium speed for another minute, just until the vanilla is fully distributed throughout the mixture. The vanilla adds a beautiful depth of flavor that complements the peanut butter perfectly. Give the mixture one last scrape down with a spatula to ensure everything is perfectly blended.
- Spread the Peanut Butter Layer: Retrieve your chilled pan with the graham cracker base from the refrigerator. Spoon the peanut butter filling over the chilled crust. This filling will be quite thick, so use an offset spatula or the back of a spoon to carefully and evenly spread it across the entire graham cracker base. Work gently so as not to disturb the crust underneath. Aim for a smooth, uniform layer from edge to edge. Once you have a beautiful, even layer, return the pan to the refrigerator. We need this layer to firm up a bit before we add the chocolate topping, typically another 20-30 minutes, or even longer if your kitchen is particularly warm. Patience is a virtue here! A well-chilled peanut butter layer will make applying the chocolate topping much easier and result in cleaner layers when cut.
Creating the Silky Chocolate Topping
- Prepare for Melting: While your peanut butter filling is chilling, it’s the perfect time to prepare our glorious chocolate topping. In a medium, microwave-safe bowl, combine the 1 ½ cups of semi-sweet chocolate chips, ¼ cup of unsalted butter, and the 2 tablespoons of light corn syrup. The corn syrup, as I mentioned, is a fantastic ingredient that helps the chocolate topping stay soft and glossy, preventing it from cracking when you cut into the squares. It really elevates the final texture.
- Melt the Chocolate Mixture: My preferred method for melting chocolate for this recipe is the microwave, as it’s quick and efficient. Microwave the mixture on high power in 30-second intervals, stirring thoroughly after each interval. Chocolate retains its shape even when melted, so stirring is absolutely crucial to assess its true state. Continue microwaving and stirring until the mixture is completely smooth and glossy, with no lumps remaining. This usually takes about 1.5 to 2 minutes total, depending on your microwave’s wattage. Alternatively, you can melt the ingredients in a heatproof bowl set over a saucepan of simmering water (a double boiler method), stirring until smooth. Whichever method you choose, be gentle and avoid overheating, which can cause the chocolate to seize or become grainy.
- Achieve Perfect Consistency: Once melted, the chocolate mixture should be beautifully smooth, pourable, and glossy. Give it a final stir with a rubber spatula to ensure perfect homogeneity. It should be warm enough to pour and spread easily, but not so hot that it melts the peanut butter layer underneath. If it feels too hot, let it sit for a minute or two to cool down slightly.
Assembling and Chilling Your Peanut Butter Squares
- Pour the Chocolate Topping: Retrieve your pan from the refrigerator, ensuring the peanut butter layer is nice and firm. Carefully pour the melted chocolate topping over the chilled peanut butter layer. The contrast in temperatures will help the chocolate set beautifully.
- Spread Evenly: Using an offset spatula or the back of a spoon, gently and quickly spread the chocolate topping across the entire surface, creating an even, smooth layer from edge to edge. Work efficiently but carefully, as the cold peanut butter layer will cause the chocolate to start setting relatively quickly. You want a uniform coating without disturbing the layer below. The goal is a pristine, glossy chocolate finish.
- The Final Chill: Now for the hardest part: waiting! Place the pan back into the refrigerator to chill for at least 2-3 hours, or even better, overnight. This extended chilling time is absolutely essential. It allows all three layers – the graham cracker base, the creamy peanut butter filling, and the chocolate topping – to set up completely and meld together into one cohesive, sliceable treat. If you try to cut them too soon, the layers will be soft, messy, and your beautiful squares won’t hold their shape. Trust me, the wait is worth every single delicious bite!
Serving and Storage Tips for Perfect Peanut Butter Squares
- Cutting Your Squares: Once the Peanut Butter Squares are thoroughly chilled and firm, use the parchment paper overhang to carefully lift the entire slab out of the pan and onto a cutting board. This is where those parchment “handles” truly shine! For clean, professional-looking cuts, my top tip is to use a large, sharp chef’s knife. For even neater slices, run your knife under hot water for a few seconds, then wipe it completely dry. The warmth of the blade helps it glide through the chocolate topping without cracking it. Make a cut, then wipe the knife clean with a damp cloth before making the next cut. This prevents dragging crumbs and chocolate between slices. I usually cut the slab in half lengthwise, then cut each half into smaller squares or rectangles. A typical 9×13 inch pan yields about 24-32 squares, depending on how large you like them.
- Presentation and Enjoyment: Arrange your perfectly cut Peanut Butter Squares on a serving platter. These are absolutely irresistible on their own, but if you’re feeling fancy, a tiny sprinkle of flaky sea salt on top of each square just before serving can really elevate the flavors, creating that delightful sweet and salty contrast. They are perfect for potlucks, bake sales, parties, or simply as a treat for your family. The combination of the crisp graham cracker base, the rich and creamy peanut butter filling, and the smooth chocolate topping is pure comfort food bliss.
- Storing Leftovers: If (and that’s a big “if”!) you happen to have any Peanut Butter Squares left, store them in an airtight container in the refrigerator. They will keep beautifully for up to a week. Keeping them chilled helps maintain their firm texture and prevents the layers from becoming too soft. You can also freeze these squares for longer storage. To do so, place the cut squares in a single layer on a baking sheet and freeze until solid, then transfer them to a freezer-safe bag or container. They can be frozen for up to 2-3 months. Just be sure to let them thaw in the refrigerator for a few hours before serving for the best texture. They taste just as good, if not better, when slightly chilled!
Conclusion:
Well, there you have it, my friends! We’ve journeyed through the simple steps to create a truly iconic treat, and now it’s time for the grand finale – the part where I absolutely insist you bring this magic into your own kitchen. I genuinely believe that some recipes aren’t just about food; they’re about creating moments, sharing joy, and making memories. This recipe for the ultimate no-bake delight perfectly embodies that spirit. It’s more than just a dessert; it’s a declaration of deliciousness, an effortless masterpiece that promises to be the star of any gathering, or simply your secret weapon for a blissful solo snack session.
Why are these Peanut Butter Squares an absolute non-negotiable must-try? For starters, the ease of preparation is simply unmatched. No oven required, minimal cleanup, and a surprisingly short list of ingredients means you can whip up a batch even on your busiest days. But beyond the convenience, it’s the symphony of flavors and textures that truly sets them apart. Imagine that rich, creamy, melt-in-your-mouth peanut butter base, perfectly balanced with a hint of sweetness and a satisfying chewiness from the crushed cookies. Then comes the crowning glory – a layer of smooth, decadent chocolate that snaps just right when you bite into it, providing a delightful contrast. It’s sweet, it’s salty, it’s indulgent, and it hits every single craving spot you never even knew you had. Trust me when I say, these squares don’t just disappear quickly; they vanish into thin air, leaving behind only crumbs and happy sighs. They are the quintessential crowd-pleaser, guaranteed to elicit rave reviews and requests for the recipe wherever they make an appearance.
Elevate Your Peanut Butter Square Experience: Serving Suggestions & Creative Variations
Once you’ve crafted your perfect batch, the fun doesn’t have to stop there! While these beauties are phenomenal straight from the fridge, here are a few ways I love to serve them and some ideas to spark your own creative variations. For a simple yet elegant presentation, try serving them chilled, cut into neat squares, perhaps with a dusting of cocoa powder or a tiny sprinkle of flaky sea salt on top to really enhance that sweet and salty dynamic. They pair wonderfully with a cold glass of milk, a robust cup of coffee, or even a soothing cup of tea for an afternoon treat. For a truly decadent dessert experience, consider serving a square warm (just a few seconds in the microwave!) alongside a scoop of vanilla bean ice cream, allowing the chocolate to soften and create a luscious sauce. You could even crumble a few pieces over a bowl of your favorite yogurt for an unexpected breakfast twist!
Feeling adventurous? The beauty of these Peanut Butter Squares lies in their versatility. Don’t be afraid to experiment with the chocolate topping – instead of just semi-sweet, try a mix of dark and milk chocolate, or even a layer of white chocolate for a different flavor profile. For an extra textural kick, sprinkle some mini chocolate chips, chopped peanuts, or even crushed pretzels onto the still-wet chocolate layer before chilling. If you’re a fan of a little extra chew, consider adding a handful of shredded coconut or even some dried cranberries to the peanut butter base mixture. Another delightful twist is to swirl a tablespoon or two of raspberry jam or salted caramel sauce onto the melted chocolate before it sets, creating beautiful patterns and introducing new layers of flavor. Imagine a batch with a ripple of strawberry jam – a classic peanut butter and jelly reimagined in dessert form! The possibilities are truly endless, limited only by your imagination and what delights your taste buds the most.
Your Turn to Create and Share!
Now, it’s your turn. I’ve shared my love for this incredible recipe, and I sincerely hope I’ve inspired you to roll up your sleeves and give it a whirl. There’s something immensely satisfying about creating something so delicious with your own hands, especially when it brings such genuine smiles to faces. I promise you, making these is an absolute joy, and tasting them is pure bliss. Once you’ve experienced the magic of these simple, yet utterly divine treats, I would absolutely love to hear about it! Please don’t hesitate to share your experiences, your serving suggestions, or any brilliant variations you come up with. Did you add something unique? Did your family devour them in record time? Snap a photo, tell us your story, and let’s celebrate the shared joy of baking and indulging. Go on, you deserve this treat!
Easy No-Bake Peanut Butter Squares
Peanut Butter Squares are a true classic, an irresistible no-bake treat featuring a perfectly crumbly, buttery graham cracker base, a smooth, luscious peanut butter filling, and a glossy chocolate topping. Universally adored for their delightful textures, rich flavors, and incredible convenience, these squares are a crowd-pleasing dessert perfect for any occasion.
Ingredients
-
2 ⅓ cups graham cracker crumbs
-
½ cup unsalted butter, melted (for base)
-
¼ cup granulated sugar
-
1 cup unsalted butter, softened (for filling)
-
1 ¾ cups creamy peanut butter
-
2 cups powdered sugar, sifted
-
1 teaspoon pure vanilla extract
-
1 ½ cups semi-sweet chocolate chips
-
¼ cup unsalted butter (for topping)
-
2 tablespoons light corn syrup
Instructions
-
Step 1
Line a 9×13 inch baking pan with parchment paper, leaving an overhang. In a bowl, combine 2 ⅓ cups graham cracker crumbs, ½ cup melted unsalted butter, and ¼ cup granulated sugar. Press the mixture firmly and evenly into the prepared pan. Chill in the refrigerator for 15-20 minutes. -
Step 2
In a large bowl, using an electric mixer, beat 1 cup softened unsalted butter until light and fluffy. Add 1 ¾ cups creamy peanut butter and beat until smooth. Gradually add 2 cups sifted powdered sugar and 1 teaspoon pure vanilla extract, beating until the mixture is thick and smooth. Spread this filling evenly over the chilled graham cracker base. Return the pan to the refrigerator for 20-30 minutes to firm up. -
Step 3
In a medium microwave-safe bowl, combine 1 ½ cups semi-sweet chocolate chips, ¼ cup unsalted butter, and 2 tablespoons light corn syrup. Microwave on high in 30-second intervals, stirring thoroughly after each, until completely smooth and glossy. Let cool slightly if too hot. -
Step 4
Retrieve the pan from the refrigerator. Carefully pour the melted chocolate topping over the chilled peanut butter layer. Gently and quickly spread the chocolate into an even layer. Place the pan back into the refrigerator to chill for at least 2-3 hours, or preferably overnight, until all layers are thoroughly set and firm. -
Step 5
Once thoroughly chilled, use the parchment paper overhang to lift the entire slab onto a cutting board. For clean cuts, use a large, sharp knife warmed under hot water and wiped dry, cleaning between each cut. Cut into 24-32 squares. Store leftover Peanut Butter Squares in an airtight container in the refrigerator for up to a week, or freeze for up to 2-3 months.
Important Information
Nutrition Facts (Per Serving)
It is important to consider this information as approximate and not to use it as definitive health advice.
Allergy Information
Please check ingredients for potential allergens and consult a health professional if in doubt.