Deviled Eggs are a true culinary marvel, a dish that effortlessly bridges the gap between simple ingredients and sophisticated flavor. There’s an undeniable charm to these creamy, savory bites that makes them disappear faster than any other appetizer at a gathering. Their history is surprisingly rich, with precursors dating back to ancient Rome, where seasoned eggs were a popular starter. The ‘deviled’ moniker itself, appearing in the 18th century, refers to the spicy or zesty preparation of food, perfectly capturing the delightful kick in our modern recipe.
We absolutely adore Deviled Eggs not just for their rich, custardy yolk filling and perfectly firm whites, but also for their incredible versatility and nostalgic appeal. They are the quintessential party food, perfect for everything from elegant holiday tables to casual summer picnics. The combination of creamy texture, tangy mustard, and a hint of spice creates a symphony of flavors that is truly irresistible. Plus, they are remarkably easy to prepare, making them a go-to for hosts and hostesses seeking a crowd-pleasing appetizer that requires minimal fuss but delivers maximum impact. Get ready to elevate your appetizer game with this beloved classic!

Ingredients:
- 12 large eggs: For truly perfect Deviled Eggs, the freshness of the eggs can sometimes play a role in how easily they peel after boiling. Often, eggs that are a few days to a week old actually peel more consistently than very fresh ones. Opt for large eggs to ensure you have a generous amount of space for your delicious filling in each half.
- ½ cup mayonnaise: This ingredient forms the creamy, rich base of your Deviled Eggs filling. I personally always reach for a high-quality, full-fat mayonnaise because it offers the best flavor and a wonderfully silken texture that you just can’t quite replicate with lighter versions. You can adjust this amount slightly to achieve your desired consistency – some like their filling a bit stiffer, while others prefer a softer, creamier scoop.
- 1 tablespoon Dijon mustard: The distinctive tangy, slightly sharp, and subtly spicy kick of Dijon mustard is absolutely indispensable for classic Deviled Eggs. It adds crucial depth of flavor and provides a fantastic counterpoint to the richness of the egg yolks and mayonnaise. While yellow mustard can be used in a pinch, Dijon truly elevates the dish with its more sophisticated flavor profile.
- 1 teaspoon white vinegar or apple cider vinegar: A small touch of acid is a game-changer; it instantly brightens the entire Deviled Eggs mixture, cutting through the richness and enhancing all the other wonderful flavors. Seriously, do not skip this! White vinegar is a traditional choice, offering a clean tang, but apple cider vinegar can introduce a subtle, fruity undertone that’s equally delightful.
- ¼ teaspoon salt, or to taste: Salt is fundamental for awakening and balancing all the flavors in your Deviled Eggs. I recommend starting with a quarter teaspoon and then, crucially, tasting and adjusting. Remember, you can always add more salt, but once it’s in, you can’t take it out!
- ⅛ teaspoon black pepper, or to taste: Freshly ground black pepper will give you the most aromatic and robust flavor. It adds a subtle warmth and a gentle bite that complements the other ingredients beautifully.
- Pinch of cayenne pepper (optional): For those who appreciate a very subtle warmth and a barely-there hint of spice, a tiny pinch of cayenne pepper can mysteriously elevate your Deviled Eggs. The goal isn’t to make them overtly spicy, but rather to add another intriguing layer of flavor that keeps people coming back for more.
- Paprika, for garnish: Sweet paprika is the quintessential garnish for Deviled Eggs. It provides a beautiful pop of vibrant color and imparts a faint, earthy sweetness. If you’re feeling adventurous, smoked paprika can offer a deeper, more robust, and savory flavor.
- Fresh chives or parsley, finely chopped (optional, for garnish): For an added touch of freshness, visual appeal, and sophisticated elegance, a delicate sprinkle of finely chopped fresh chives or parsley can really make your Deviled Eggs shine and provide a lovely contrast.
Preparing the Eggs for Perfect Deviled Eggs
- Boil the Eggs: The initial and arguably most critical step in creating incredible Deviled Eggs is ensuring your eggs are cooked perfectly. There are several methods for boiling eggs, but I’m going to share my tried-and-true approach that consistently delivers excellent results and significantly aids in easier peeling.
- Cold Start Method: Carefully place your 12 large eggs in a single layer at the bottom of a large saucepan. It’s important that the pan is adequately sized so the eggs aren’t crowded, which can lead to uneven cooking or, worse, cracking during the boiling process. Cover the eggs with cold tap water, ensuring the water level is about one inch above the tops of the eggs. This cold start method is excellent because it helps to prevent the eggs from cracking by bringing them up to temperature gradually, minimizing thermal shock.
- Bring to a Boil: Place the saucepan over high heat and bring the water to a full, rolling boil. Watch it carefully! As soon as the water reaches a vigorous, bubbling boil, immediately remove the pan from the heat source. This quick transition from active boiling to off-heat resting is key.
- Cover and Let Stand: Once removed from the heat, cover the saucepan tightly with a lid. Allow the eggs to stand undisturbed in the hot water for exactly 12-14 minutes. For yolks that are firm but still beautifully creamy and vibrant yellow – perfect for Deviled Eggs – 12 minutes is usually ideal for large eggs. If you prefer a slightly firmer yolk, you can extend the time to 13 or even 14 minutes. It’s crucial not to peek or disturb the pan during this standing time. The residual heat from the water will continue to cook the eggs gently and evenly, ensuring a consistent texture throughout. This specific method is fantastic because it significantly minimizes the risk of overcooking, which is the primary cause of that unsightly greenish-gray ring that sometimes forms around the yolk – a common culinary mishap when preparing eggs for Deviled Eggs.
- Prepare an Ice Bath: While your eggs are patiently standing in the hot water, take this opportunity to prepare a large bowl filled generously with ice water. This ice bath is an absolutely essential step, serving two vital purposes: it immediately stops the cooking process, preventing any further denaturation of the proteins, and perhaps even more importantly, it promotes significantly easier peeling later on. The rapid temperature change causes the egg white to contract and pull away from the shell membrane, making the shell much less adhesive.
- Cool the Eggs: Once the 12-14 minutes of standing time are complete, carefully drain all the hot water from the saucepan. Immediately, using a slotted spoon, transfer the hot eggs into the prepared ice bath. Allow the eggs to cool completely in the ice bath for at least 10-15 minutes, or until they are cold to the touch. This step is non-negotiable for achieving those coveted smooth, easy-to-peel eggs and to ensure the yolks remain perfectly colored.
- Peel the Eggs: This stage is often considered the trickiest part of making Deviled Eggs, but by following the ice bath method precisely, it should be a much smoother and less frustrating experience.
- Gentle Cracking: Once the eggs are thoroughly chilled, remove them one by one from the ice bath. Gently tap an egg on a hard, flat surface (such as your kitchen countertop) to create small, widespread cracks all over the shell. Then, roll the egg between your hands with light but firm pressure to further break up the shell into even smaller pieces. This comprehensive cracking helps to loosen the shell from the membrane.
- Peel Under Water (Optional but Recommended): For the cleanest and easiest peel, especially if you find your eggs are still proving a bit stubborn, I highly recommend peeling them under a slow, steady stream of cold running water or submerged in a bowl of cold water. The water acts as a lubricant, helping to get under the thin membrane that lies between the egg white and the shell, effectively separating it and making the shell slide off with remarkable ease. Always try to start peeling from the wider end of the egg, as this is where the air pocket typically forms, making it easier to get the initial purchase.
- Inspect and Rinse: As you peel each egg, diligently remove all shell fragments and any bits of the inner membrane. Give each perfectly peeled egg a quick rinse under cold water to ensure it’s completely clean and free of any lingering shell pieces. Place your smooth, pristine white eggs on a paper towel-lined plate to gently blot away any excess moisture. Taking your time and being meticulous here is paramount for the ultimate presentation of your Deviled Eggs. While imperfectly peeled eggs can certainly still be used, their visual appeal, which is a big part of the Deviled Eggs experience, will undoubtedly suffer slightly.
Crafting the Creamy Deviled Eggs Filling
- Halve the Eggs and Extract Yolks: With your beautifully peeled eggs now ready, it’s time to prepare them for the star of the show – the creamy Deviled Eggs filling.
- Slice Carefully: Using a very sharp, non-serrated knife, carefully slice each egg precisely lengthwise down the middle. A clean, decisive cut is incredibly important for maintaining a neat and attractive presentation of the egg white halves. If necessary, wipe your knife blade clean between each cut with a damp cloth to prevent any residual yolk from smearing the pristine white edges.
- Remove Yolks: Gently scoop out the vibrant yellow yolks from each egg white half. Collect all the yolks and place them into a medium-sized mixing bowl. Arrange the now empty egg white halves neatly on your chosen serving platter. If you intend to use a piping bag for the filling, it might be helpful to arrange the egg whites on a tray or even in an empty egg carton to keep them stable and upright while you work.
- Mash the Yolks: Using a sturdy fork, thoroughly mash the egg yolks in the mixing bowl until they are completely smooth and entirely free of any lumps or large pieces. You are aiming for a very fine, uniform, and slightly crumbly texture. While some individuals might prefer a slightly chunkier texture, for truly creamy and decadent Deviled Eggs, mashing them as finely as possible is a key step. For larger batches, a potato masher can prove to be a wonderfully efficient tool for this task.
- Create the Deviled Eggs Mixture: Now, the moment of magic! Add the mayonnaise, Dijon mustard, white vinegar (or apple cider vinegar), salt, and black pepper to your finely mashed yolks. If you’ve decided to include it for that subtle kick, add the pinch of cayenne pepper now as well.
- Combine Thoroughly: Using a rubber spatula or a sturdy spoon, vigorously mix all the ingredients together until they are completely smooth and wonderfully creamy. Your goal is for every single ingredient to be fully incorporated, creating a homogenous, vibrant yellow filling with an inviting sheen. Take your time during this mixing phase; really beat the mixture well, as this action helps to achieve that desired silky, luscious texture that defines exceptional Deviled Eggs.
- Taste and Adjust: This is arguably the most paramount step for crafting perfectly seasoned Deviled Eggs. Take a small spoonful of the filling and taste it critically. Does it need a bit more salt to brighten the flavors? Perhaps a tiny extra grind of black pepper for a touch more bite? Could it benefit from another small dash of vinegar to enhance its tanginess, or a spoonful more mayonnaise to achieve peak creaminess? Adjust the seasonings precisely to your personal preference. Remember that the flavors will meld and deepen slightly as the Deviled Eggs chill, but this initial taste test is absolutely crucial for setting the foundation. Do not be timid about tasting and adjusting! This is how you transform good Deviled Eggs into truly unforgettable ones.
- Achieving Ideal Consistency: The finished Deviled Eggs filling should possess a consistency that is firm enough to hold its shape beautifully when mounded or piped, yet soft and pliable enough to be easily spooned or extruded from a piping bag. If you find the mixture to be too stiff, incorporate a tiny bit more mayonnaise or even a small drop of milk or cream to loosen it. Conversely, if it’s too loose, it might indicate that your yolks weren’t mashed finely enough or that too much liquid was added – though this is less common when following these proportions precisely.
Assembling and Finishing Your Deviled Eggs
- Fill the Egg Whites: Now comes the satisfying part – filling those patiently waiting egg white halves with your incredibly delicious Deviled Eggs mixture.
- Spoon Method (Simple and Classic): If you’re aiming for a charmingly rustic, home-style appearance, simply use two small spoons to generously scoop the filling into each egg white cavity. Gently shape the filling into a neat, appealing mound, taking care to ensure that each half receives an equitable amount. This method is wonderfully quick, incredibly easy, and results in a traditionally comforting Deviled Eggs aesthetic.
- Piping Bag Method (Elegant Presentation): For a more refined, elegant, and polished presentation, I highly recommend using a piping bag fitted with a star tip (or any other decorative tip that catches your eye). Carefully spoon the prepared Deviled Eggs filling into the piping bag. Twist the top of the bag securely to seal it, then apply gentle, steady pressure to squeeze the filling into each egg white half, creating beautiful, professional-looking swirls or peaks. This method admittedly requires a little more time and finesse but will make your Deviled Eggs look as though they were prepared by a gourmet chef, making them perfect for parties, holiday gatherings, or any special occasion. Be mindful not to overfill the piping bag, and maintain consistent pressure for an even and attractive result.
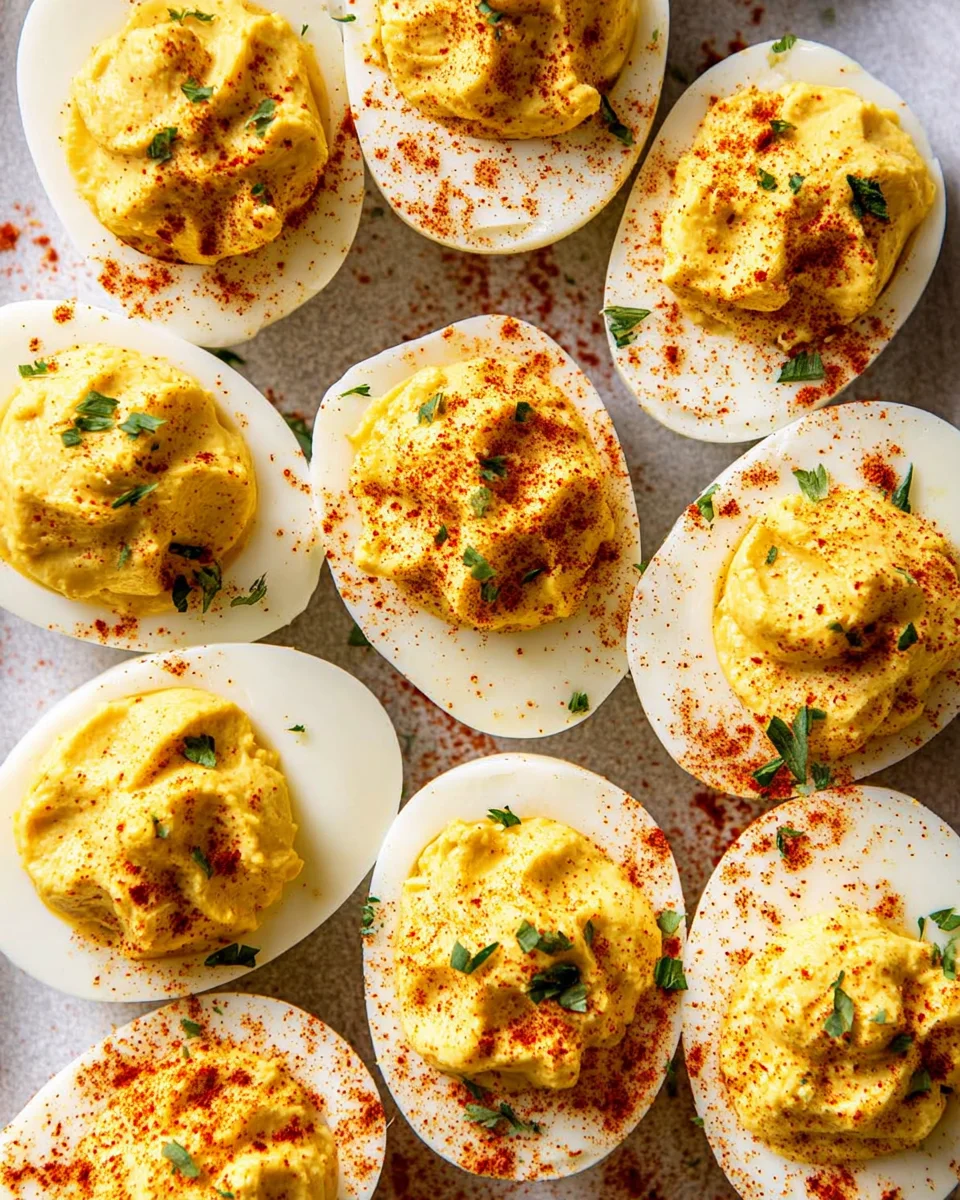
- Garnish Your Deviled Eggs: This is the crucial final flourish that truly defines and completes the quintessential Deviled Eggs!
- Paprika: Lightly and evenly dust each filled Deviled Egg half with paprika. You can achieve a uniform coating by using a small sieve or a dedicated spice shaker. Sweet paprika will add that characteristic warm color and a very mild, pleasing earthy flavor. For those who enjoy a deeper, more robust, and savory note, smoked paprika can be a fantastic alternative.
- Fresh Herbs (Optional): If you desire an extra layer of visual appeal and a burst of fresh flavor, sprinkle a tiny amount of finely chopped fresh chives or parsley directly over the paprika on each Deviled Egg. The vibrant green offers a stunning contrast to the yellow filling and red paprika, truly elevating the overall aesthetic and adding a delicate aromatic touch to your Deviled Eggs.
- Chill Before Serving: While it’s incredibly tempting to immediately sample one of your masterpieces, Deviled Eggs genuinely taste their absolute best when they are well-chilled.
- Refrigerate: Carefully arrange your freshly garnished Deviled Eggs on your serving platter. Cover them loosely with plastic wrap to prevent drying out and refrigerate for a minimum of 30 minutes. An hour or even longer is even better, as this crucial chilling time allows all the wonderful flavors to fully meld, deepen, and develop, resulting in a more harmonious taste. Chilling also helps the filling firm up slightly, making them easier and neater to handle, and ensures each bite is refreshingly cool.
- Storage: Deviled Eggs are truly at their peak when enjoyed fresh, ideally within 24-48 hours of preparation. Should you have any delightful leftovers, store them covered tightly with plastic wrap in the refrigerator. Due to the presence of mayonnaise, it is imperative that Deviled Eggs are not left at room temperature for more than 2 hours for food safety reasons.
Tips for Deviled Eggs Perfection
- Don’t Rush the Cooling: As I emphasized earlier, properly cooling your eggs in an ice bath is your secret weapon for consistently easy peeling. Resist any urge to skip or shorten this critical step; patience here truly pays off with perfectly smooth egg whites, ideal for your Deviled Eggs.
- Season Generously but Carefully: To achieve truly flavorful Deviled Eggs, they need to be seasoned generously. Don’t be timid with salt, pepper, and that essential touch of acid. Always, always taste the filling and adjust the seasonings as needed; this is the difference between good Deviled Eggs and truly spectacular ones.
- Consider Your Mayonnaise: The brand and quality of the mayonnaise you choose will have a significant impact on the final taste and texture of your Deviled Eggs. Opt for a brand that you genuinely enjoy and trust for its flavor.
- Variations Are Welcome: While this recipe provides a foolproof foundation for classic Deviled Eggs, never hesitate to unleash your creativity and experiment! You could add finely chopped pickles or sweet relish for an extra layer of tang and delightful crunch, a dash of your favorite hot sauce for a fiery kick, a tiny bit of curry powder for an exotic twist, or even crumbled bacon for a savory crunch. The possibilities for unique Deviled Eggs creations are endless once you’ve mastered this basic technique.
- Make Ahead Considerations: You can efficiently boil and peel your eggs up to 2 days in advance, storing them submerged in cold water or in an airtight container in the refrigerator. You can also prepare the Deviled Eggs filling a few hours ahead of time and keep it covered tightly in the fridge. However, for the absolute best texture, freshest taste, and most appealing appearance, I strongly recommend filling the egg whites no more than a few hours before you plan to serve, and garnishing just before presenting them. This approach prevents the egg whites from drying out and ensures the paprika (or other garnishes) remains vibrant and doesn’t become soggy.
- Transporting Deviled Eggs: If you’re planning to bring your delightful Deviled Eggs to a potluck, picnic, or gathering, investing in a dedicated Deviled Egg carrier is a fantastic idea. These specialized containers are designed to keep the egg halves secure and prevent them from sliding around, ensuring they arrive looking as perfect as when you meticulously made them. Always remember to keep them properly chilled during transport to maintain freshness and food safety.
Conclusion:
And there you have it! You’ve just uncovered a recipe that, I promise you, will become an instant classic in your culinary repertoire. This isn’t just another dish; it’s a guaranteed crowd-pleaser, a conversation starter, and an absolute joy to both make and devour. I truly believe that every kitchen, every host, and every hungry guest deserves to experience the magic of these perfectly balanced, exquisitely creamy, and utterly irresistible treats.
Why This Recipe is an Absolute Must-Try
What makes this particular recipe stand out, you ask? It’s the meticulous balance of flavors that we’ve carefully cultivated – a harmonious blend of tang from the mustard and vinegar, a rich creaminess from the yolks, and just the right hint of savory seasoning. There’s an undeniable elegance in its simplicity, yet it delivers a profound depth of flavor that belies its straightforward preparation. You’ll find yourself reaching for this recipe again and again, whether you’re hosting an elaborate holiday feast, a casual backyard barbecue, or simply craving a delightful snack that feels incredibly special. It’s an exercise in culinary satisfaction, proving that often, the most beloved dishes are those crafted with care from humble ingredients.
This recipe transforms the everyday egg into something extraordinary, elevating it from a simple ingredient to a star appetizer that consistently disappears first from any platter. The texture is divine – smooth, velvety, and utterly melt-in-your-mouth – making each bite a moment of pure bliss. It’s comforting, familiar, yet with subtle nuances that make it distinctly superior. Trust me, once you taste these, you’ll understand why I’m so enthusiastic. It’s more than just food; it’s an experience, a memory in the making.
Serving Suggestions & Creative Variations to Explore
Now that you’ve mastered the foundational perfection of these delectable bites, let’s talk about how to present them and, more excitingly, how to unleash your own culinary creativity! For serving, arrange your glorious creations on a beautiful platter, perhaps nestled on a bed of fresh lettuce or vibrant kale for a pop of color. A sprinkle of fresh chives or finely chopped dill offers not only visual appeal but also a burst of fresh flavor. A dusting of smoked paprika provides a lovely color contrast and a hint of smoky warmth that complements the creamy filling beautifully. These are absolutely phenomenal as appetizers for any occasion – think Easter brunch, Thanksgiving dinner, summer picnics, game day parties, or even just a fancy weekend snack.
But the true fun begins with variations! This recipe for Deviled Eggs is merely a magnificent starting point, a blank canvas for your imagination. Want to add a spicy kick? Finely mince a jalapeño or a few dashes of your favorite hot sauce into the filling. For a smoky twist, consider a tiny touch of liquid smoke (use sparingly!) or crumbled, crispy bacon bits mixed right into the yolk mixture, or even sprinkled on top as a garnish. Craving an herbaceous delight? Incorporate finely chopped fresh dill, parsley, or tarragon. If you’re feeling adventurous, try a Mediterranean flair by adding finely minced sun-dried tomatoes, a hint of fresh basil, and a few capers. For an unexpected richness, a tiny dollop of pesto can work wonders. And for those who love a bit of crunch, consider topping them with some crispy fried onions or even finely crushed potato chips right before serving. The possibilities are truly endless, allowing you to tailor this classic to perfectly suit your taste and the occasion.
So, what are you waiting for? Dive into your kitchen and give this recipe a try. I promise you, it’s easier than you think and the rewards are absolutely delicious. Don’t be shy about experimenting with your own personal touch – that’s where the true joy of cooking lies! Once you’ve made them, I’d absolutely love to hear about your experience. Did you add a unique twist? Were they a hit at your gathering? Please share your thoughts, photos, and any creative variations you come up with in the comments. Your culinary adventures inspire me, and I can’t wait to see how you make these irresistible bites your very own. Happy cooking!
Easy Classic Deviled Eggs
A timeless appetizer, this easy deviled eggs recipe creates creamy, tangy, and subtly spicy bites perfect for any gathering. Simple to make, yet always a crowd-pleaser.
Ingredients
Instructions
Important Information
Nutrition Facts (Per Serving)
It is important to consider this information as approximate and not to use it as definitive health advice.
Allergy Information
Please check ingredients for potential allergens and consult a health professional if in doubt.