Dark Chocolate Nut Bars: A Decadent Treat for Any Occasion
Dark Chocolate Nut Bars – just the name conjures up images of rich, dark chocolate melting in your mouth, punctuated by the satisfying crunch of perfectly roasted nuts. I’ve always been a huge fan of no-bake recipes, and these bars are a perfect example of how simple ingredients can create an incredibly delicious and impressive dessert. They’re far more sophisticated than your average energy bar, yet surprisingly easy to make, even for novice bakers.
While the precise origins of chocolate nut bars are difficult to pinpoint, the combination of chocolate and nuts has been a beloved pairing across cultures for centuries. Think of the ancient Aztec’s use of cacao beans, or the numerous traditional recipes from around the world featuring nuts and sweet treats. My recipe draws inspiration from these rich culinary traditions, offering a modern twist on a timeless classic.
What makes Dark Chocolate Nut Bars so irresistible? It’s the perfect balance of textures and flavors, of course! The intense bitterness of the dark chocolate is beautifully complemented by the salty, crunchy nuts. The chewy, fudgy texture provides a delightful contrast, making each bite a unique experience. Beyond the taste, these bars are incredibly convenient. They require no baking, making them ideal for a quick dessert or a last-minute treat for unexpected guests. They also store well, making them perfect for meal prepping or packing for a picnic.
So, are you ready to embark on this delicious journey with me? Let’s dive into the recipe and create some truly unforgettable Dark Chocolate Nut Bars!

Ingredients:
- 1 cup (2 sticks) unsalted butter, softened
- 1 ½ cups granulated sugar
- 1 cup packed light brown sugar
- 4 large eggs
- 2 teaspoons vanilla extract
- 2 cups all-purpose flour
- 1 teaspoon baking soda
- 1 teaspoon salt
- 1 cup unsweetened cocoa powder
- 1 cup chopped walnuts or pecans (or a mix!)
- 1 cup semi-sweet chocolate chips
- ½ cup milk chocolate chips
- Optional: ½ cup chopped dried cranberries or cherries
Preparing the Batter:
- Preheat your oven to 350°F (175°C). Grease and flour a 9×13 inch baking pan. I like to line the bottom with parchment paper for easy removal later – it makes cleanup a breeze!
- In a large bowl, cream together the softened butter, granulated sugar, and brown sugar until the mixture is light and fluffy. This is where a stand mixer really shines, but a good old-fashioned hand mixer works perfectly fine too. Just be prepared for a bit of a workout!
- Beat in the eggs one at a time, then stir in the vanilla. Make sure to scrape down the sides of the bowl to incorporate everything evenly. You want a smooth, well-combined batter.
- In a separate bowl, whisk together the flour, baking soda, salt, and cocoa powder. This helps prevent lumps and ensures everything is evenly distributed in the batter.
- Gradually add the dry ingredients to the wet ingredients, mixing on low speed until just combined. Be careful not to overmix; a few lumps are okay. Overmixing can lead to tough bars.
- Stir in the chopped nuts, semi-sweet chocolate chips, milk chocolate chips, and dried cranberries or cherries (if using). I love the burst of tartness the cranberries add, but it’s totally optional.
Baking Process:
- Pour the batter into the prepared baking pan and spread it evenly. A spatula works well for this. Make sure it’s nice and level for even baking.
- Bake for 25-30 minutes, or until a wooden skewer inserted into the center comes out with just a few moist crumbs attached. Don’t overbake! Slightly underbaked bars are fudgier and more delicious.
- Let the bars cool completely in the pan before cutting. This is crucial! Cutting them while they’re warm will result in crumbly, messy bars. I usually let them cool completely on a wire rack for even cooling.
Cutting and Serving:
- Once the bars are completely cool, use a sharp knife to cut them into squares. I find that a serrated knife works best for clean cuts. If you’re feeling fancy, you can dust them with powdered sugar before serving.
- Store the bars in an airtight container at room temperature for up to a week. They’re best enjoyed within a few days for optimal freshness and texture. But let’s be honest, they rarely last that long!
Tips and Variations:
- For a richer chocolate flavor, use dark cocoa powder instead of unsweetened cocoa powder. Just be aware that it might make the bars a bit more bitter.
- Feel free to experiment with different types of nuts and dried fruits. Macadamia nuts, almonds, and pecans all work well. You could also try adding chopped pretzels or toffee bits for a fun twist.
- If you want a chewier bar, reduce the baking time by a few minutes. If you prefer a cakier bar, bake for a few minutes longer.
- For a more intense chocolate flavor, add a tablespoon or two of strong brewed coffee to the batter. The coffee enhances the chocolate flavor beautifully.
- Pro Tip: For perfectly even bars, use a ruler and a pizza cutter to cut them. This ensures consistent size and shape.
- To make these bars even more decadent, drizzle melted dark chocolate over the top after they’ve cooled. A simple touch that elevates the entire experience.
Troubleshooting:
- My bars are dry and crumbly: You may have overbaked them. Next time, reduce the baking time by a few minutes and check for doneness earlier.
- My bars are sticky: You may have underbaked them or used too much brown sugar. Next time, increase the baking time slightly and consider reducing the amount of brown sugar.
- My bars are flat: Make sure your butter is softened but not melted. Melted butter will result in flatter bars.

Conclusion:
So there you have it – my recipe for incredibly decadent Dark Chocolate Nut Bars! I truly believe this recipe is a must-try for several reasons. First, the flavor combination is simply divine. The rich, intense bitterness of the dark chocolate is perfectly balanced by the crunchy, nutty texture and subtle sweetness of the nuts. It’s a symphony of flavors that will tantalize your taste buds and leave you wanting more. Second, these bars are incredibly easy to make. Even if you’re a beginner baker, you’ll find this recipe straightforward and achievable. The minimal ingredients and simple steps make it perfect for a quick dessert or a last-minute treat for guests.
Third, and perhaps most importantly, these Dark Chocolate Nut Bars are incredibly versatile. They’re the perfect blend of indulgence and satisfying crunch, making them suitable for any occasion. Need a quick pick-me-up? Grab a bar. Hosting a party? These are guaranteed to be a crowd-pleaser. Want a healthier dessert option? Feel free to experiment with different types of nuts and even add dried fruits for extra flavor and texture.
Serving Suggestions & Variations:
While these bars are delicious on their own, there are countless ways to elevate them even further. I love serving them slightly chilled, as the coolness enhances the chocolate’s intensity. You can also drizzle them with extra melted dark chocolate or sprinkle them with sea salt for an extra touch of sophistication. For a festive touch, consider adding a dusting of powdered sugar or cocoa powder.
Feeling adventurous? Experiment with different types of nuts! Instead of just almonds, try pecans, walnuts, cashews, or even macadamia nuts. You can also add a sprinkle of chopped dried cranberries, cherries, or apricots for a burst of fruity sweetness. If you prefer a milkier chocolate flavor, you can substitute some of the dark chocolate with milk chocolate or even white chocolate. The possibilities are truly endless!
For a truly unique twist, consider adding a touch of spice. A pinch of cinnamon, cardamom, or chili powder can add a surprising and delightful complexity to the flavor profile. You could even incorporate some espresso powder for a mocha-inspired bar. Don’t be afraid to get creative and experiment with different flavor combinations to find your perfect Dark Chocolate Nut Bar recipe.
Why You Should Try This Recipe:
This recipe isn’t just about making a delicious treat; it’s about creating a memorable experience. The aroma of baking chocolate and nuts will fill your kitchen, creating a warm and inviting atmosphere. The process of making these bars is therapeutic and rewarding, allowing you to disconnect from the daily grind and focus on something enjoyable. And finally, the sheer satisfaction of biting into a perfectly crafted Dark Chocolate Nut Bar is an experience you won’t soon forget.
Share Your Experience!
I encourage you to try this recipe and share your experience with me! Let me know what variations you tried, what your favorite part was, and how your Dark Chocolate Nut Bars turned out. You can share your photos and feedback on social media using the hashtag #DarkChocolateNutBars. I can’t wait to see your creations and hear your thoughts. Happy baking!
Dark Chocolate Nut Bars: Homemade Recipe & Nutritional Benefits
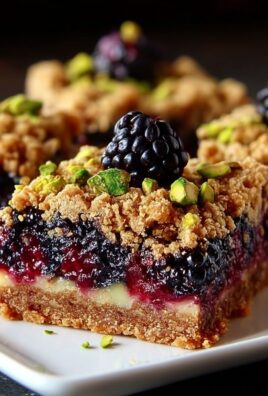
Decadent and chewy chocolate walnut bars packed with chocolate chips and nuts, perfect for any occasion.
Ingredients
- 1 cup (2 sticks) unsalted butter, softened
- 1 ½ cups granulated sugar
- 1 cup packed light brown sugar
- 4 large eggs
- 2 teaspoons vanilla extract
- 2 cups all-purpose flour
- 1 teaspoon baking soda
- 1 teaspoon salt
- 1 cup unsweetened cocoa powder
- 1 cup chopped walnuts or pecans (or a mix!)
- 1 cup semi-sweet chocolate chips
- ½ cup milk chocolate chips
- ½ cup chopped dried cranberries or cherries (optional)
Instructions
- Preheat oven to 350°F (175°C). Grease and flour a 9×13 inch baking pan. Lining the bottom with parchment paper is recommended for easy removal.
- Cream together softened butter, granulated sugar, and brown sugar until light and fluffy. (Stand or hand mixer recommended).
- Beat in eggs one at a time, then stir in vanilla extract. Scrape down the bowl.
- In a separate bowl, whisk together flour, baking soda, salt, and cocoa powder.
- Gradually add dry ingredients to wet ingredients, mixing on low speed until just combined. Don’t overmix.
- Stir in nuts, semi-sweet chocolate chips, milk chocolate chips, and dried cranberries/cherries (if using).
- Pour batter into prepared pan and spread evenly.
- Bake for 25-30 minutes, or until a wooden skewer inserted into the center comes out with just a few moist crumbs.
- Let cool completely in the pan before cutting. Cool completely on a wire rack for even cooling.
- Once cool, use a sharp knife (serrated knife recommended) to cut into squares. Dust with powdered sugar (optional).
- Store in an airtight container at room temperature for up to a week.
Notes
- For richer chocolate flavor, use dark cocoa powder.
- Experiment with different nuts and dried fruits (macadamia nuts, almonds, pretzels, toffee bits).
- Adjust baking time for desired texture: less time for chewier bars, more time for cakier bars.
- Add 1-2 tablespoons of strong brewed coffee for enhanced chocolate flavor.
- Use a ruler and pizza cutter for perfectly even bars.
- Drizzle with melted dark chocolate after cooling for extra decadence.