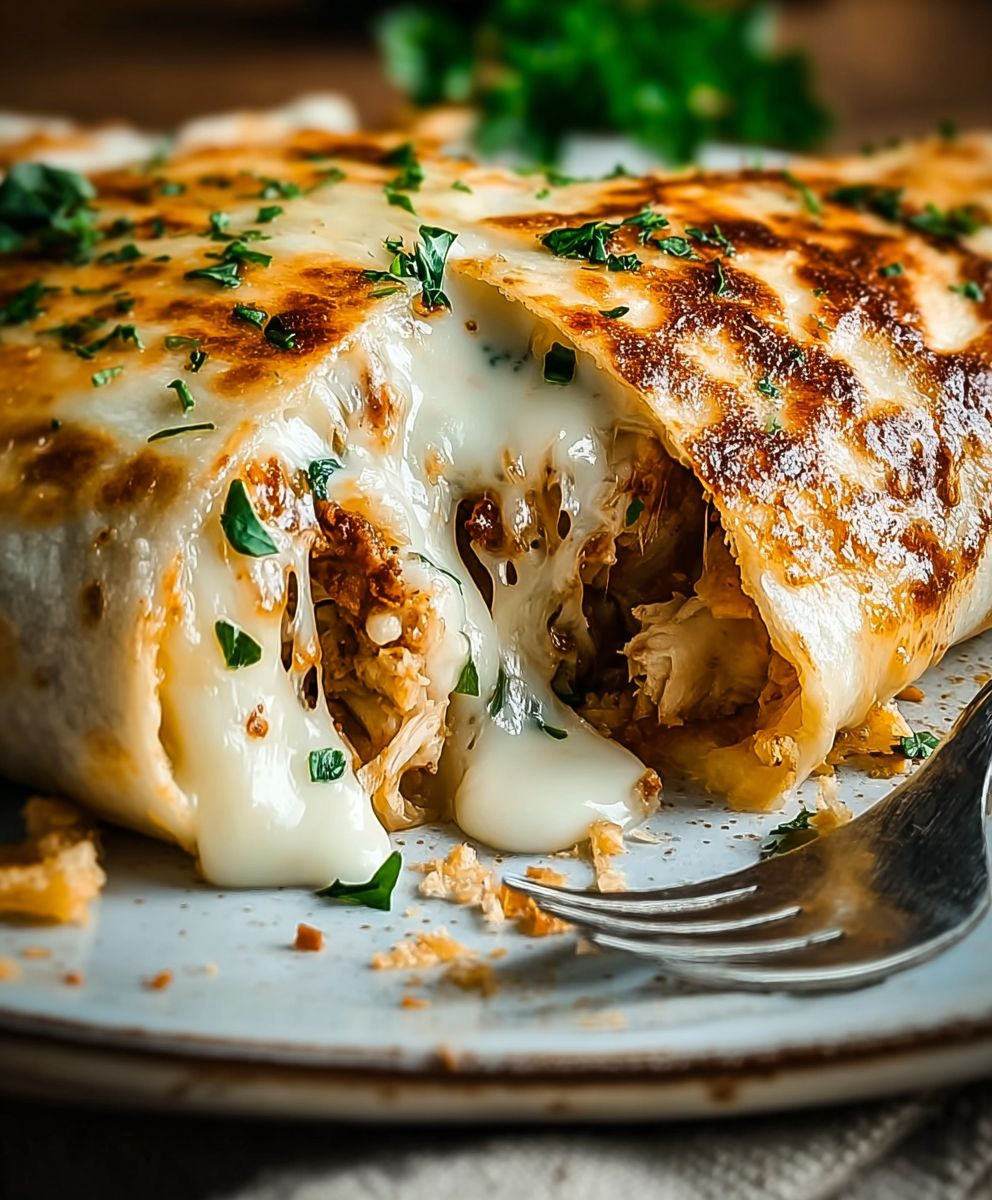
Cheesy Garlic Chicken Wraps: Prepare to meet your new weeknight dinner obsession! Imagine sinking your teeth into a warm, toasted wrap bursting with juicy, garlic-infused chicken, smothered in melted, gooey cheese. Sounds divine, right? This isn’t just a quick meal; it’s a flavor explosion that will have everyone at the table begging for seconds.
While the exact origins of the chicken wrap are somewhat modern, the concept of wrapping savory fillings in flatbreads dates back centuries across various cultures. From Middle Eastern shawarma to Mexican burritos, the idea of portable, delicious meals has always been a winner. Our Cheesy Garlic Chicken Wraps take inspiration from these global traditions, adding a distinctly American twist with the generous use of cheese and that irresistible garlic flavor we all crave.
What makes these wraps so irresistible? It’s the perfect combination of textures and tastes. The tender, flavorful chicken, the creamy, melted cheese, and the slightly crispy tortilla create a symphony in your mouth. Plus, they’re incredibly convenient! Whether you’re looking for a speedy dinner after a long day or a satisfying lunch on the go, these Cheesy Garlic Chicken Wraps are the answer. They are also easily customizable, allowing you to add your favorite veggies or spices to create a truly personalized meal. Get ready to experience a new level of wrap satisfaction!

Ingredients:
- 1.5 lbs boneless, skinless chicken breasts, cut into bite-sized pieces
- 1 tbsp olive oil
- 2 cloves garlic, minced
- 1/2 tsp dried oregano
- 1/2 tsp dried basil
- 1/4 tsp red pepper flakes (optional, for a little heat)
- Salt and freshly ground black pepper to taste
- 8 large flour tortillas
- 1 cup shredded mozzarella cheese
- 1/2 cup shredded cheddar cheese
- 1/4 cup grated Parmesan cheese
- 1/4 cup butter, melted
- 1 tbsp garlic powder
- 1 tbsp chopped fresh parsley (for garnish)
- Optional toppings: sour cream, salsa, guacamole, chopped tomatoes, shredded lettuce
Preparing the Chicken:
- First, let’s get the chicken ready. In a large bowl, toss the bite-sized chicken pieces with olive oil, minced garlic, oregano, basil, red pepper flakes (if using), salt, and pepper. Make sure the chicken is evenly coated with all the delicious spices.
- Heat a large skillet over medium-high heat. Once the skillet is hot, add the seasoned chicken. Cook the chicken for about 6-8 minutes, or until it’s cooked through and no longer pink inside. Be sure to stir occasionally to ensure even cooking. You want a nice golden-brown color on the chicken.
- Once the chicken is cooked, remove it from the skillet and set it aside. We’ll need it later for assembling the wraps.
Preparing the Garlic Butter:
- Now, let’s make the garlic butter that will take these wraps to the next level! In a small bowl, combine the melted butter and garlic powder. Mix well until the garlic powder is fully incorporated into the butter. This garlic butter will add a fantastic flavor to the tortillas.
Assembling the Wraps:
- Time to assemble the wraps! Lay one tortilla flat on a clean surface. Brush the entire surface of the tortilla with a generous amount of the garlic butter. Don’t be shy – the more garlic butter, the better!
- Sprinkle a layer of mozzarella cheese, cheddar cheese, and Parmesan cheese over the garlic buttered tortilla. We want a good cheesy base for our chicken.
- Next, add a portion of the cooked chicken to the center of the tortilla, on top of the cheese. Don’t overload the tortilla, or it will be difficult to wrap.
- Sprinkle another layer of mozzarella, cheddar, and Parmesan cheese over the chicken. We want cheese on top and bottom of the chicken for maximum cheesiness!
- Now, carefully fold in the sides of the tortilla, and then tightly roll it up from the bottom. Make sure the wrap is snug so that the filling doesn’t spill out during cooking.
- Repeat steps 1-5 with the remaining tortillas, garlic butter, cheese, and chicken.
Cooking the Wraps:
- Heat a large skillet or griddle over medium heat. You can lightly grease the skillet with cooking spray or a little bit of olive oil to prevent the wraps from sticking.
- Place the assembled wraps in the skillet, seam-side down. This will help seal the wraps and prevent them from unraveling.
- Cook the wraps for about 3-4 minutes per side, or until they are golden brown and crispy, and the cheese is melted and gooey. Keep an eye on them to prevent burning. You might need to adjust the heat depending on your stove.
- Once the wraps are cooked to perfection, remove them from the skillet and place them on a cutting board.
Serving:
- Let the wraps cool slightly before cutting them in half diagonally. This will make them easier to handle and eat.
- Garnish the wraps with chopped fresh parsley for a pop of color and freshness.
- Serve the Cheesy Garlic Chicken Wraps immediately while they are hot and the cheese is melted and gooey.
- Optional: Serve with your favorite toppings, such as sour cream, salsa, guacamole, chopped tomatoes, or shredded lettuce. These toppings will add extra flavor and texture to the wraps.
Tips and Variations:
- Spice it up: If you like a little heat, add more red pepper flakes to the chicken or a dash of hot sauce to the wraps before rolling them up.
- Add veggies: Feel free to add some chopped vegetables to the wraps, such as bell peppers, onions, or spinach. This will add extra nutrients and flavor.
- Use different cheeses: Experiment with different types of cheese, such as Monterey Jack, pepper jack, or provolone.
- Make it vegetarian: Substitute the chicken with black beans, refried beans, or grilled vegetables for a vegetarian option.
- Air Fryer Option: You can also cook these wraps in an air fryer! Preheat your air fryer to 400°F (200°C). Place the assembled wraps in the air fryer basket, making sure they are not overcrowded. Cook for about 8-10 minutes, flipping halfway through, until golden brown and crispy.
- Make Ahead: You can assemble the wraps ahead of time and store them in the refrigerator for up to 24 hours. When ready to cook, simply follow the cooking instructions. This is a great option for meal prepping or entertaining.
- Serving Suggestions: These wraps are delicious on their own, but they also pair well with a side salad, coleslaw, or potato salad.
Enjoy!
I hope you enjoy making and eating these Cheesy Garlic Chicken Wraps as much as I do! They are a quick, easy, and delicious meal that is perfect for any occasion. Don’t be afraid to experiment with different ingredients and toppings to create your own unique version of this recipe. Happy cooking!
Conclusion:
And there you have it! These Cheesy Garlic Chicken Wraps are more than just a quick lunch or dinner; they’re a flavor explosion waiting to happen. I truly believe this recipe is a must-try because it perfectly balances ease of preparation with incredible taste. Forget boring sandwiches – these wraps are packed with juicy, garlicky chicken, melty cheese, and all the deliciousness you could ask for. The best part? It’s completely customizable to your preferences!
But why is this recipe a must-try? It’s simple: it’s incredibly versatile. Whether you’re a seasoned cook or just starting out, the steps are straightforward and easy to follow. Plus, the ingredients are readily available, so you won’t have to spend hours searching for obscure items. It’s the perfect solution for busy weeknights when you need a satisfying meal on the table in under 30 minutes. And let’s be honest, who can resist the allure of cheesy, garlicky goodness?
Beyond the basic recipe, the possibilities are endless! Feeling adventurous? Add some sliced jalapeños for a spicy kick. Want to incorporate more veggies? Sautéed bell peppers and onions would be a fantastic addition. You could even swap out the cheddar cheese for Monterey Jack or pepper jack for a different flavor profile. For a lighter option, use whole wheat tortillas and add a dollop of Greek yogurt instead of sour cream.
Serving suggestions? These Cheesy Garlic Chicken Wraps are delicious on their own, but they also pair perfectly with a side of crispy sweet potato fries, a fresh garden salad, or even a simple bowl of tomato soup. For a fun twist, cut the wraps into smaller pieces and serve them as appetizers at your next gathering. They’re guaranteed to be a crowd-pleaser!
Variations to Explore:
* Mediterranean Twist: Add crumbled feta cheese, olives, and a drizzle of olive oil.
* BBQ Chicken Wraps: Use BBQ sauce instead of garlic butter and add some coleslaw for a tangy crunch.
* Spicy Fiesta Wraps: Incorporate black beans, corn, and a dash of chili powder for a Southwestern flair.
* Vegetarian Option: Substitute the chicken with grilled halloumi cheese or seasoned black beans.
I’m so excited for you to try this recipe and experience the deliciousness for yourself. I poured my heart into creating a recipe that’s both easy and satisfying, and I truly believe you’ll love it. Don’t be afraid to get creative and experiment with different variations to find your perfect combination.
So, what are you waiting for? Head to the kitchen, gather your ingredients, and get ready to create some amazing Cheesy Garlic Chicken Wraps. I can’t wait to hear about your experience! Please, share your photos and comments with me – I’d love to see your creations and hear about any modifications you made. Let me know what you think of this cheesy garlic chicken wraps recipe! Happy cooking!
Cheesy Garlic Chicken Wraps: The Ultimate Recipe Guide
Quick and easy meal featuring seasoned chicken, melted cheese, and garlic butter, all wrapped in a warm tortilla and cooked to golden perfection.
Ingredients
- 1.5 lbs boneless, skinless chicken breasts, cut into bite-sized pieces
- 1 tbsp olive oil
- 2 cloves garlic, minced
- 1/2 tsp dried oregano
- 1/2 tsp dried basil
- 1/4 tsp red pepper flakes (optional, for a little heat)
- Salt and freshly ground black pepper to taste
- 8 large flour tortillas
- 1 cup shredded mozzarella cheese
- 1/2 cup shredded cheddar cheese
- 1/4 cup grated Parmesan cheese
- 1/4 cup butter, melted
- 1 tbsp garlic powder
- 1 tbsp chopped fresh parsley (for garnish)
- Optional toppings: sour cream, salsa, guacamole, chopped tomatoes, shredded lettuce
Instructions
- In a large bowl, toss the bite-sized chicken pieces with olive oil, minced garlic, oregano, basil, red pepper flakes (if using), salt, and pepper. Make sure the chicken is evenly coated with all the spices.
- Heat a large skillet over medium-high heat. Once the skillet is hot, add the seasoned chicken. Cook the chicken for about 6-8 minutes, or until it’s cooked through and no longer pink inside. Be sure to stir occasionally to ensure even cooking. You want a nice golden-brown color on the chicken.
- Once the chicken is cooked, remove it from the skillet and set it aside. We’ll need it later for assembling the wraps.
- In a small bowl, combine the melted butter and garlic powder. Mix well until the garlic powder is fully incorporated into the butter. This garlic butter will add a fantastic flavor to the tortillas.
- Lay one tortilla flat on a clean surface. Brush the entire surface of the tortilla with a generous amount of the garlic butter. Don’t be shy – the more garlic butter, the better!
- Sprinkle a layer of mozzarella cheese, cheddar cheese, and Parmesan cheese over the garlic buttered tortilla. We want a good cheesy base for our chicken.
- Next, add a portion of the cooked chicken to the center of the tortilla, on top of the cheese. Don’t overload the tortilla, or it will be difficult to wrap.
- Sprinkle another layer of mozzarella, cheddar, and Parmesan cheese over the chicken. We want cheese on top and bottom of the chicken for maximum cheesiness!
- Now, carefully fold in the sides of the tortilla, and then tightly roll it up from the bottom. Make sure the wrap is snug so that the filling doesn’t spill out during cooking.
- Repeat steps 1-5 with the remaining tortillas, garlic butter, cheese, and chicken.
- Heat a large skillet or griddle over medium heat. You can lightly grease the skillet with cooking spray or a little bit of olive oil to prevent the wraps from sticking.
- Place the assembled wraps in the skillet, seam-side down. This will help seal the wraps and prevent them from unraveling.
- Cook the wraps for about 3-4 minutes per side, or until they are golden brown and crispy, and the cheese is melted and gooey. Keep an eye on them to prevent burning. You might need to adjust the heat depending on your stove.
- Once the wraps are cooked to perfection, remove them from the skillet and place them on a cutting board.
- Let the wraps cool slightly before cutting them in half diagonally. This will make them easier to handle and eat.
- Garnish the wraps with chopped fresh parsley for a pop of color and freshness.
- Serve the Cheesy Garlic Chicken Wraps immediately while they are hot and the cheese is melted and gooey.
- Optional: Serve with your favorite toppings, such as sour cream, salsa, guacamole, chopped tomatoes, or shredded lettuce. These toppings will add extra flavor and texture to the wraps.
Notes
- Spice it up: If you like a little heat, add more red pepper flakes to the chicken or a dash of hot sauce to the wraps before rolling them up.
- Add veggies: Feel free to add some chopped vegetables to the wraps, such as bell peppers, onions, or spinach. This will add extra nutrients and flavor.
- Use different cheeses: Experiment with different types of cheese, such as Monterey Jack, pepper jack, or provolone.
- Make it vegetarian: Substitute the chicken with black beans, refried beans, or grilled vegetables for a vegetarian option.
- Air Fryer Option: You can also cook these wraps in an air fryer! Preheat your air fryer to 400°F (200°C). Place the assembled wraps in the air fryer basket, making sure they are not overcrowded. Cook for about 8-10 minutes, flipping halfway through, until golden brown and crispy.
- Make Ahead: You can assemble the wraps ahead of time and store them in the refrigerator for up to 24 hours. When ready to cook, simply follow the cooking instructions. This is a great option for meal prepping or entertaining.
- Serving Suggestions: These wraps are delicious on their own, but they also pair well with a side salad, coleslaw, or potato salad.