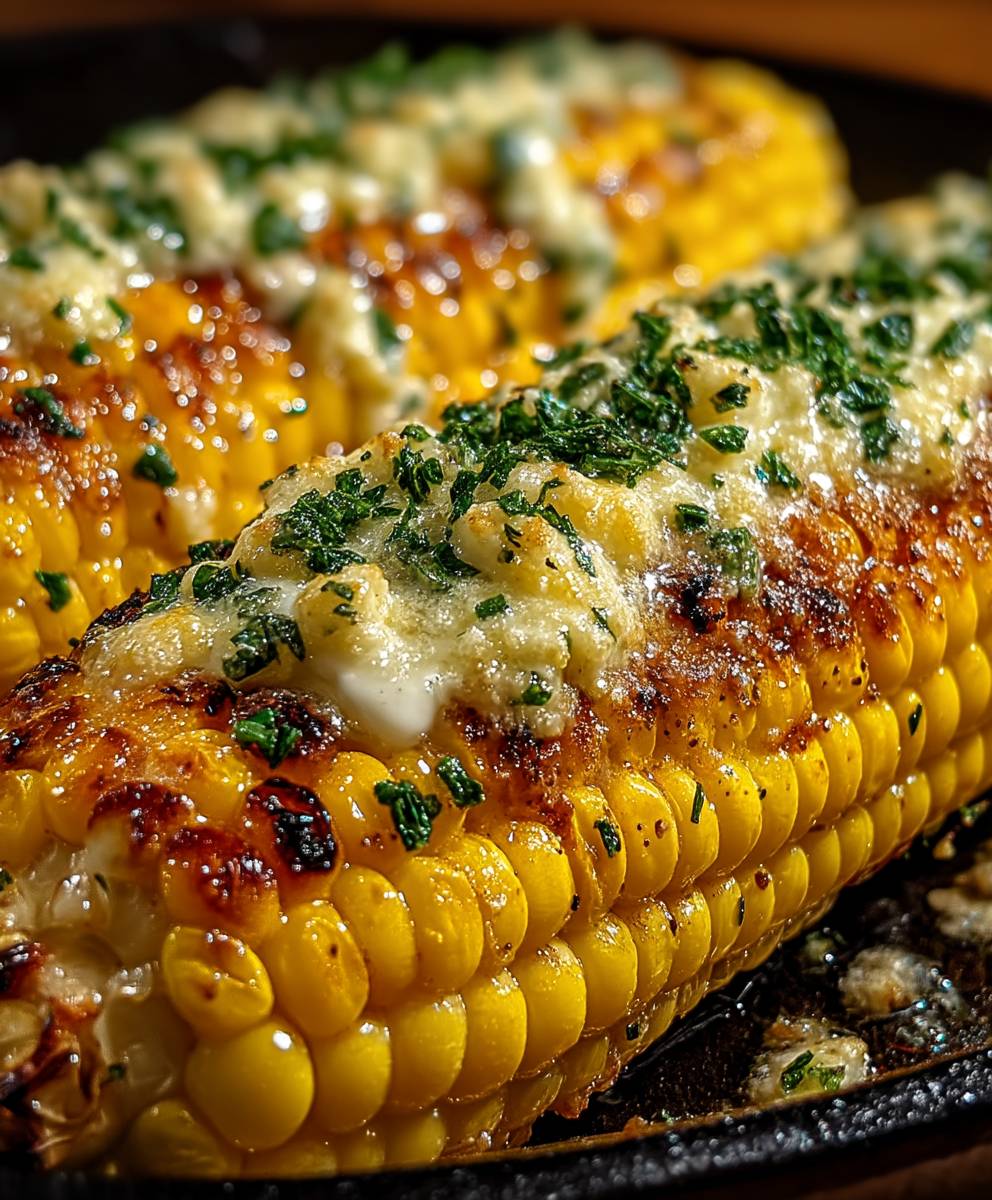
Cheesy Garlic Butter Corn: Prepare to experience a flavor explosion that will redefine your love for corn on the cob! Forget everything you thought you knew about this summer staple because we’re about to elevate it to a whole new level of deliciousness. Imagine sweet, juicy corn kernels slathered in a rich, savory blend of garlic butter and then generously coated in melted, gooey cheese. Are you drooling yet?
Corn, in its simplest form, has been a dietary cornerstone for centuries, deeply rooted in the cultures of the Americas. From ancient civilizations to modern-day barbecues, its versatility and nutritional value have made it a beloved ingredient worldwide. But this Cheesy Garlic Butter Corn recipe takes that humble history and infuses it with a modern twist, creating a dish that’s both comforting and exciting.
What makes this recipe so irresistible? It’s the perfect marriage of textures and tastes. The sweetness of the corn is beautifully balanced by the savory garlic butter, while the melted cheese adds a creamy, decadent element that’s simply divine. Plus, it’s incredibly easy to make, requiring minimal ingredients and effort. Whether you’re looking for a crowd-pleasing side dish for your next cookout or a quick and satisfying snack, this Cheesy Garlic Butter Corn is guaranteed to be a hit. Get ready to savor every single bite!

Ingredients:
- 6 ears of fresh corn, husked
- 1/2 cup (1 stick) unsalted butter, softened
- 4 cloves garlic, minced
- 1/2 cup grated Parmesan cheese
- 1/4 cup grated mozzarella cheese
- 2 tablespoons chopped fresh parsley
- 1 tablespoon chopped fresh chives
- 1/2 teaspoon garlic powder
- 1/4 teaspoon red pepper flakes (optional)
- Salt and freshly ground black pepper to taste
Preparing the Garlic Butter:
Okay, let’s get started by making the star of the show – the cheesy garlic butter! This is where all the flavor magic happens, so pay close attention.
- Soften the Butter: First things first, make sure your butter is nice and soft. You can leave it out at room temperature for about an hour, or if you’re in a hurry, you can microwave it for a few seconds at a time until it’s pliable but not melted. We want it soft enough to easily mix with the other ingredients.
- Combine the Ingredients: In a medium-sized bowl, add the softened butter, minced garlic, Parmesan cheese, mozzarella cheese, parsley, chives, garlic powder, and red pepper flakes (if using).
- Mix Thoroughly: Using a fork or a spatula, mix all the ingredients together until they are well combined. You want a smooth, creamy mixture with all the herbs and cheeses evenly distributed. Don’t be afraid to really get in there and work it!
- Season to Taste: Now, give your garlic butter a taste! Add salt and freshly ground black pepper to your liking. Remember, the Parmesan cheese is already a bit salty, so start with a small amount and adjust as needed. I usually add about 1/4 teaspoon of salt and a few grinds of black pepper.
- Set Aside: Once your garlic butter is perfectly seasoned, set it aside. We’ll use it later to slather all over our delicious corn! You can keep it at room temperature if you’re using it soon, or store it in the refrigerator for later use. If you refrigerate it, just let it soften slightly before using.
Cooking the Corn:
Now that our garlic butter is ready, it’s time to cook the corn. You have a few options here, and I’ll walk you through each one. Choose the method that works best for you!
Boiling the Corn:
Boiling is a classic and easy way to cook corn on the cob. It’s quick and requires minimal effort.
- Prepare the Corn: Make sure your corn is husked and the silks are removed. You can leave the corn whole or cut it in half, depending on your preference.
- Bring Water to a Boil: Fill a large pot with water and bring it to a rolling boil. You’ll need enough water to completely submerge the corn.
- Add the Corn: Carefully add the corn to the boiling water.
- Cook the Corn: Cook the corn for about 5-7 minutes, or until the kernels are tender and bright yellow. Don’t overcook it, or it will become mushy.
- Remove and Drain: Use tongs to remove the corn from the pot and place it on a plate lined with paper towels to drain excess water.
Grilling the Corn:
Grilling adds a smoky flavor to the corn that’s absolutely irresistible. This is my personal favorite method!
- Prepare the Grill: Preheat your grill to medium heat.
- Prepare the Corn: You can grill the corn with the husks on or off. If grilling with the husks on, soak the corn in water for about 30 minutes before grilling to prevent the husks from burning. If grilling with the husks off, lightly brush the corn with oil to prevent it from sticking to the grill.
- Grill the Corn: Place the corn on the grill and cook for about 15-20 minutes, turning occasionally, until the kernels are tender and slightly charred.
- Remove from Grill: Remove the corn from the grill and let it cool slightly before handling.
Roasting the Corn:
Roasting is another great option for cooking corn, especially if you’re making a large batch. It brings out the natural sweetness of the corn.
- Preheat the Oven: Preheat your oven to 400°F (200°C).
- Prepare the Corn: Husk the corn and remove the silks.
- Wrap in Foil (Optional): You can wrap each ear of corn in aluminum foil with a pat of butter and some seasonings, or you can roast them directly on a baking sheet. Wrapping them in foil will help them steam and stay moist.
- Roast the Corn: Place the corn on a baking sheet and roast for about 20-25 minutes, or until the kernels are tender.
- Remove from Oven: Remove the corn from the oven and let it cool slightly before handling.
Assembling the Cheesy Garlic Butter Corn:
Alright, the moment we’ve all been waiting for! It’s time to slather that amazing garlic butter all over the cooked corn and enjoy the cheesy, garlicky goodness.
- Spread the Garlic Butter: While the corn is still warm, generously spread the garlic butter all over each ear of corn. Make sure to get into all the nooks and crannies!
- Garnish (Optional): If you want to add a little extra flair, you can sprinkle some extra Parmesan cheese, chopped parsley, or chives on top.
- Serve Immediately: Serve the cheesy garlic butter corn immediately and enjoy! This is best enjoyed hot, when the butter is melted and the cheese is gooey.
Tips and Variations:
Want to take your cheesy garlic butter corn to the next level? Here are a few tips and variations to try:
- Add Some Heat: If you like a little spice, add a pinch of cayenne pepper or a dash of hot sauce to the garlic butter.
- Use Different Cheeses: Experiment with different types of cheese, such as cheddar, Monterey Jack, or pepper jack.
- Add Bacon: Crispy bacon bits are always a welcome addition to anything cheesy and garlicky.
- Make it Vegan: Use vegan butter and vegan cheese to make this recipe vegan-friendly.
- Grill in Foil Packets: For easy cleanup and extra flavor, grill the corn in foil packets with the garlic butter and seasonings.
- Lemon Zest: Add a teaspoon of lemon zest to the garlic butter for a bright, citrusy flavor.
I hope you enjoy this recipe as much as I do! It’s perfect for summer barbecues, potlucks, or just a simple weeknight dinner. Let me know in the comments if you try it and what variations you come up with!
Conclusion:
This Cheesy Garlic Butter Corn isn’t just another side dish; it’s a flavor explosion waiting to happen! Seriously, if you’re looking for something that’s quick, easy, and guaranteed to be a crowd-pleaser, look no further. The combination of sweet corn, savory garlic butter, and melty cheese is simply irresistible. I’ve made this for countless barbecues, potlucks, and even just a simple weeknight dinner, and it’s always the first thing to disappear.
Why is this a must-try? Because it elevates humble corn on the cob to a whole new level of deliciousness. It’s the perfect balance of sweet and savory, with a creamy, cheesy texture that will have you craving more. Plus, it’s so incredibly simple to make – even a beginner cook can nail this recipe. Forget boring boiled corn; this is where the real flavor party is!
But the best part? This recipe is incredibly versatile! Feel free to experiment with different cheeses. I’ve used everything from sharp cheddar to creamy Monterey Jack, and they all work beautifully. For a little kick, try adding a pinch of red pepper flakes or a dash of hot sauce to the garlic butter. If you’re feeling adventurous, sprinkle some crumbled bacon on top for an extra layer of smoky goodness.
Serving Suggestions and Variations:
* Serve it straight off the grill for that amazing smoky char.
* Cut the corn off the cob and mix it into a creamy pasta salad.
* Use it as a topping for tacos or nachos.
* Add some chopped cilantro or parsley for a fresh, vibrant flavor.
* For a spicier version, incorporate some finely chopped jalapeños into the butter mixture.
* Consider grilling the corn in its husk for a more intense smoky flavor before adding the butter and cheese.
* If you’re short on time, you can even use frozen corn kernels – just thaw them completely before adding them to the pan.
* For a vegan option, substitute the butter with a plant-based butter alternative and use a vegan cheese substitute.
I truly believe that this cheesy garlic butter corn will become a staple in your kitchen. It’s the perfect side dish for any occasion, and it’s so easy to customize to your own taste.
So, what are you waiting for? Grab some corn, gather your ingredients, and get cooking! I promise you won’t be disappointed. And once you’ve tried it, I’d love to hear what you think! Share your photos and comments with me – let me know what variations you tried and how much you loved it. I’m always looking for new ideas and inspiration, and I can’t wait to see what you create! Happy cooking! I’m confident that you and your family will love this recipe as much as mine does. Don’t be afraid to get creative and make it your own! Let me know in the comments what you think!
Cheesy Garlic Butter Corn: The Ultimate Guide to Deliciousness
Sweet corn on the cob slathered in a flavorful cheesy garlic butter. A perfect side dish for summer barbecues!
Ingredients
- 6 ears of fresh corn, husked
- 1/2 cup (1 stick) unsalted butter, softened
- 4 cloves garlic, minced
- 1/2 cup grated Parmesan cheese
- 1/4 cup grated mozzarella cheese
- 2 tablespoons chopped fresh parsley
- 1 tablespoon chopped fresh chives
- 1/2 teaspoon garlic powder
- 1/4 teaspoon red pepper flakes (optional)
- Salt and freshly ground black pepper to taste
Instructions
- Soften the Butter: Make sure your butter is nice and soft. You can leave it out at room temperature for about an hour, or if you’re in a hurry, you can microwave it for a few seconds at a time until it’s pliable but not melted.
- Combine the Ingredients: In a medium-sized bowl, add the softened butter, minced garlic, Parmesan cheese, mozzarella cheese, parsley, chives, garlic powder, and red pepper flakes (if using).
- Mix Thoroughly: Using a fork or a spatula, mix all the ingredients together until they are well combined.
- Season to Taste: Add salt and freshly ground black pepper to your liking. Remember, the Parmesan cheese is already a bit salty, so start with a small amount and adjust as needed.
- Set Aside: Once your garlic butter is perfectly seasoned, set it aside. You can keep it at room temperature if you’re using it soon, or store it in the refrigerator for later use. If you refrigerate it, just let it soften slightly before using.
- Prepare the Corn: Make sure your corn is husked and the silks are removed.
- Bring Water to a Boil: Fill a large pot with water and bring it to a rolling boil.
- Add the Corn: Carefully add the corn to the boiling water.
- Cook the Corn: Cook the corn for about 5-7 minutes, or until the kernels are tender and bright yellow.
- Remove and Drain: Use tongs to remove the corn from the pot and place it on a plate lined with paper towels to drain excess water.
- Prepare the Grill: Preheat your grill to medium heat.
- Prepare the Corn: You can grill the corn with the husks on or off. If grilling with the husks on, soak the corn in water for about 30 minutes before grilling to prevent the husks from burning. If grilling with the husks off, lightly brush the corn with oil to prevent it from sticking to the grill.
- Grill the Corn: Place the corn on the grill and cook for about 15-20 minutes, turning occasionally, until the kernels are tender and slightly charred.
- Remove from Grill: Remove the corn from the grill and let it cool slightly before handling.
- Preheat the Oven: Preheat your oven to 400°F (200°C).
- Prepare the Corn: Husk the corn and remove the silks.
- Wrap in Foil (Optional): You can wrap each ear of corn in aluminum foil with a pat of butter and some seasonings, or you can roast them directly on a baking sheet. Wrapping them in foil will help them steam and stay moist.
- Roast the Corn: Place the corn on a baking sheet and roast for about 20-25 minutes, or until the kernels are tender.
- Remove from Oven: Remove the corn from the oven and let it cool slightly before handling.
- Spread the Garlic Butter: While the corn is still warm, generously spread the garlic butter all over each ear of corn.
- Garnish (Optional): If you want to add a little extra flair, you can sprinkle some extra Parmesan cheese, chopped parsley, or chives on top.
- Serve Immediately: Serve the cheesy garlic butter corn immediately and enjoy!
Notes
- Add Some Heat: If you like a little spice, add a pinch of cayenne pepper or a dash of hot sauce to the garlic butter.
- Use Different Cheeses: Experiment with different types of cheese, such as cheddar, Monterey Jack, or pepper jack.
- Add Bacon: Crispy bacon bits are always a welcome addition to anything cheesy and garlicky.
- Make it Vegan: Use vegan butter and vegan cheese to make this recipe vegan-friendly.
- Grill in Foil Packets: For easy cleanup and extra flavor, grill the corn in foil packets with the garlic butter and seasonings.
- Lemon Zest: Add a teaspoon of lemon zest to the garlic butter for a bright, citrusy flavor.