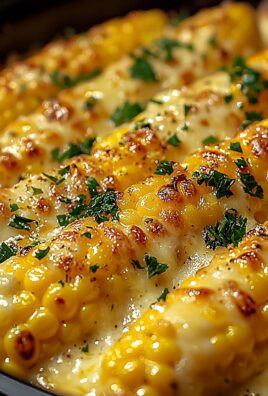
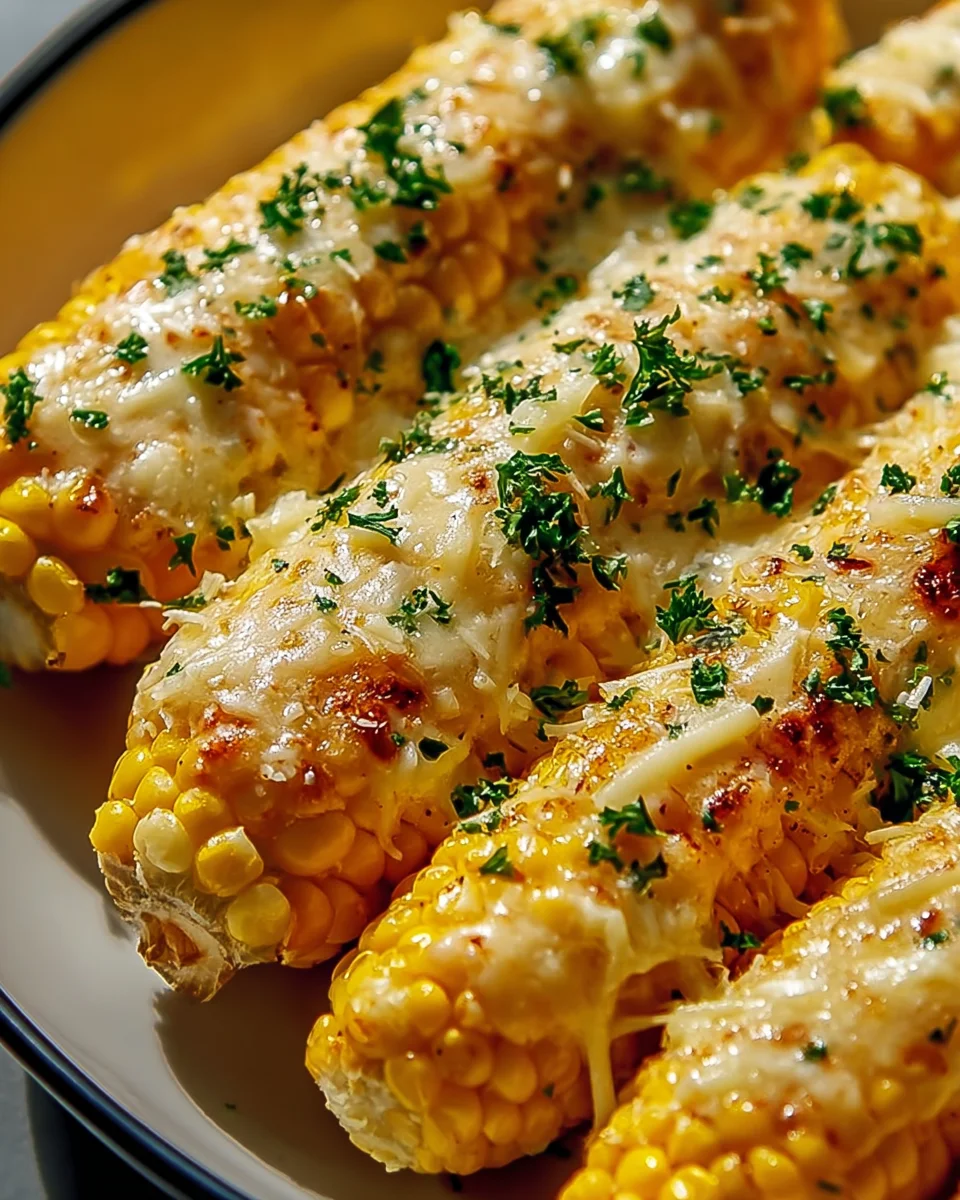
Cheesy Garlic Butter Corn The Ultimate Delicious Recipe
Hello there, food lovers! Today, I am absolutely thrilled to share with you something truly special, something that will elevate your side dish game to legendary status: Cheesy Garlic Butter Corn The Ultimate Delicious Recipe. Forget everything you thought you knew about serving corn, because this isn’t just a side; it’s a star. I promise you, once you try this recipe, your taste buds will thank you profusely. What makes this dish so utterly irresistible? Well, imagine perfectly cooked, sweet corn kernels – whether fresh off the cob or conveniently frozen – enveloped in a rich, aromatic garlic butter. But we don’t stop there! Oh no, we take it up several notches by introducing a generous helping of glorious, melty cheese that creates a creamy, dreamy coating around every single kernel. It’s warm, it’s comforting, it’s bursting with flavor, and frankly, it’s just pure happiness in a bowl. This isn’t your grandma’s boiled corn (unless your grandma was a secret culinary genius!). It’s a deliciously indulgent side that’s guaranteed to be the first thing to disappear at any meal, turning even the simplest dinner into a feast. Get ready to fall in love with corn all over again!

Ingredient Notes
Welcome to the heart of what makes Cheesy Garlic Butter Corn an absolute showstopper! While the name itself hints at pure deliciousness, choosing the right ingredients truly elevates this dish from good to utterly unforgettable. Let’s dive into the core components that will transform your kitchen into a beacon of savory bliss.
Corn
The star of our dish! For the ultimate flavor and texture, I always recommend using fresh corn on the cob when it’s in season. There’s nothing quite like the sweet, crisp kernels that pop in your mouth. You’ll need about 4-6 ears, yielding roughly 3-4 cups of kernels. To prepare, simply remove the husks and silks, then stand each ear upright in a bowl and carefully slice downwards with a sharp knife to remove the kernels. If fresh corn isn’t available or you’re short on time, frozen corn kernels are an excellent substitute. Look for good quality, sweet corn, and make sure to thaw it completely before cooking. You can do this by running it under cold water or letting it sit in the fridge. As a last resort, canned corn can work, but drain it very well and rinse off any excess sodium. Just be aware that its texture might be softer, and its natural sweetness slightly less vibrant than fresh or frozen.
Garlic
It’s not “Garlic Butter Corn” without the garlic! For maximum aromatic impact, fresh garlic cloves are non-negotiable in my kitchen. I typically use 4-6 cloves, minced finely, but feel free to adjust to your personal preference – some days call for extra garlic! The flavor profile of fresh garlic, gently sautéed in butter, is complex and essential to this recipe. While garlic powder can be a convenient substitute in a pinch, it won’t offer the same depth or pungency. If you must use powder, start with about 1 teaspoon and taste as you go, adding more if desired.
Butter
Ah, butter! The golden foundation of our sauce. I strongly recommend using unsalted butter. This gives you complete control over the saltiness of the finished dish, which is crucial when you’re also adding cheese. Good quality butter makes a noticeable difference in the richness and flavor. If you only have salted butter, simply reduce the amount of added salt later in the recipe.
Cheese
The “Cheesy” part of our title promises gooey, melty goodness! The beauty of this recipe is its versatility with cheese. My go-to is a blend of sharp cheddar and mozzarella. The cheddar brings a tangy, robust flavor, while the mozzarella ensures that irresistible, gooey stretch. Other fantastic options include Monterey Jack for its mild flavor and excellent melt, or a sprinkle of Parmesan cheese for a salty, nutty finish. For the best melt and flavor, I always recommend shredding your own cheese from a block rather than buying pre-shredded varieties, which often contain anti-caking agents that can hinder a smooth melt.
Seasonings & Herbs
- Salt and Black Pepper: These are your basic seasonings. Always taste and adjust!
- Fresh Parsley or Chives: A sprinkle of fresh, chopped parsley or chives at the end adds a beautiful pop of color and a touch of freshness that cuts through the richness.
- Optional additions: A pinch of red pepper flakes for a subtle kick, or a dash of smoked paprika for an earthy depth can also be wonderful.
Step-by-Step Instructions
Let’s get cooking! Creating this Cheesy Garlic Butter Corn is incredibly straightforward, promising maximum flavor with minimal fuss. Follow these steps to achieve that ultimate deliciousness.
Step 1: Prepare Your Ingredients
- Corn: If using fresh corn on the cob, husk them, remove the silks, and carefully slice the kernels off the cob into a bowl. If using frozen corn, ensure it’s fully thawed. If using canned corn, drain and rinse it thoroughly. You’ll want about 3-4 cups of kernels.
- Garlic: Mince your fresh garlic cloves finely. Remember, fresh garlic is key here!
- Cheese: If using block cheese, shred it now. Set aside about 1 to 1.5 cups.
- Herbs: Finely chop your fresh parsley or chives, if using, and set aside for garnish.
Step 2: Melt the Butter and Sauté the Garlic
- Grab a large skillet or a deep frying pan with a lid. Place it over medium heat.
- Add 4 tablespoons of unsalted butter to the pan. Allow it to melt completely.
- Once the butter is melted and slightly shimmering, add your minced garlic.
- Sauté the garlic for about 1-2 minutes, stirring frequently, until it becomes fragrant. Be very careful not to let the garlic brown or burn, as burnt garlic turns bitter very quickly. We’re looking for a lovely golden, aromatic infusion.
Step 3: Cook the Corn
- Add your prepared corn kernels to the skillet with the fragrant garlic butter.
- Stir well to coat all the corn in that delicious garlic butter mixture.
- Continue to cook the corn for about 5-7 minutes, stirring occasionally. You want the corn to become tender-crisp – still having a slight bite but cooked through. If using fresh corn, it might take slightly longer, while thawed frozen corn will cook faster. Canned corn only needs to be heated through.
Step 4: Add the Cheese
- Once the corn is perfectly cooked, reduce the heat to low.
- Sprinkle about ¾ of your shredded cheese over the corn. Save the remaining ¼ for layering or garnishing.
- Stir gently but continuously until the cheese begins to melt and coat the corn, creating a wonderfully creamy, cheesy sauce. This usually takes just 1-2 minutes.
- Once most of the cheese has melted, sprinkle the remaining cheese on top and you can cover the pan with a lid for another minute, allowing the residual heat to perfectly melt the top layer of cheese into a beautiful, gooey blanket.
Step 5: Season and Serve
- Remove the skillet from the heat.
- Taste the Cheesy Garlic Butter Corn and season generously with salt and freshly ground black pepper to your liking. Remember, the amount of salt needed will depend on whether you used salted butter and the saltiness of your cheese.
- If using, stir in half of your chopped fresh parsley or chives.
- Transfer the Cheesy Garlic Butter Corn to a serving bowl. Garnish with the remaining fresh herbs for a final flourish.
- Serve immediately and watch it disappear!
Tips & Suggestions
Achieving the “Ultimate Delicious” status for your Cheesy Garlic Butter Corn is all about paying attention to a few key details. Here are my top tips and suggestions to ensure every bite is pure perfection:
- Don’t Overcook the Corn: The beauty of this dish lies in the corn’s tender-crisp texture. Overcooking can make the corn mushy and dull its vibrant sweetness. Aim for that perfect al dente bite. If using fresh corn, cooking time will be slightly longer than for thawed frozen or canned corn.
- Mind Your Garlic: Garlic is a star, but a delicate one. Keep the heat on medium-low when sautéing and watch it like a hawk. Burnt garlic will impart a bitter, unpleasant taste to your entire dish, and there’s no going back from that! We want golden, fragrant, not brown and crispy.
- Shred Your Own Cheese: I can’t stress this enough! Pre-shredded cheeses often contain anti-caking agents (like cellulose) that can prevent them from melting smoothly and can give your sauce a slightly grainy texture. Shredding your own from a block ensures the best, creamiest, and most delicious melt.
- Layer Your Cheese: Instead of dumping all the cheese at once, add ¾ of it first, stir to melt, then sprinkle the remaining ¼ on top and cover for a minute. This creates layers of melted cheese – some incorporated into the sauce, and some beautifully gooey on top.
- Taste and Adjust Seasoning: Always taste your Cheesy Garlic Butter Corn before serving! The saltiness will vary depending on your butter and cheese. Adjust with more salt, pepper, or even a pinch of red pepper flakes for a kick.
- Serving Suggestions: This dish is incredibly versatile! It makes a fantastic side dish for almost any meal – grilled beef, roasted chicken, or fish. It’s also hearty enough to be a light vegetarian main course or a crowd-pleasing appetizer at a potluck or barbecue. You can even mix it into a grain bowl or serve it alongside tacos for a cheesy upgrade.
- Add-ins for Extra Flavor:
- Heat: A few finely diced jalapeños (seeded for less heat, or with seeds for more) added with the garlic, or a drizzle of your favorite hot sauce/sriracha at the end.
- Herbs: Beyond parsley and chives, fresh cilantro or even a touch of thyme can offer interesting flavor profiles.
- Smoky notes: A pinch of smoked paprika or a dash of liquid smoke can add a delicious depth, especially if you’re serving it with grilled meats.
- Onions: A tablespoon or two of finely diced shallots or sweet onion sautéed with the garlic can add another layer of aromatic flavor.
- Make it Creamier: For an even richer, creamier texture, you can stir in a tablespoon or two of cream cheese or a splash of heavy cream along with your shredded cheese.
Storage
While Cheesy Garlic Butter Corn is undoubtedly best enjoyed fresh, piping hot from the skillet, sometimes you might have a little leftover (though that’s a rare occurrence in my house!). Proper storage ensures you can savor its deliciousness later.
Cooling
Before storing, allow the Cheesy Garlic Butter Corn to cool completely to room temperature. This is crucial to prevent condensation from forming inside the container, which can lead to sogginess and affect its texture and shelf life.
Refrigeration
Once cooled, transfer the Cheesy Garlic Butter Corn to an airtight container. Store it in the refrigerator for up to 3-4 days. The flavors tend to meld even further, making it still very enjoyable.
Reheating
When you’re ready to enjoy your leftovers, there are a couple of excellent ways to reheat them:
- Stovetop (Recommended): This is my preferred method for maintaining the best texture and preventing the corn from becoming rubbery. Place the leftovers in a skillet over medium-low heat. Add a tiny splash of water or a small pat of butter to help prevent sticking and revive the creamy texture. Stir occasionally until heated through.
- Microwave: For a quick reheat, place the Cheesy Garlic Butter Corn in a microwave-safe dish. Heat on medium power for 1-2 minutes, stirring halfway through, until thoroughly warmed. Be careful not to overheat, as this can make the corn tough and the cheese oily.
You might find that the cheese isn’t quite as gooey and melty upon reheating as it was fresh. This is normal. If desired, you can sprinkle a tiny bit more fresh shredded cheese on top during the last minute of reheating on the stovetop to bring back some of that melt.
Freezing
While you can freeze cooked Cheesy Garlic Butter Corn, I generally don’t recommend it for optimal texture. Freezing and thawing can alter the texture of the corn, making it softer, and the cheese may separate or become grainy. However, if you absolutely must, transfer the cooled corn to a freezer-safe, airtight container or heavy-duty freezer bag, removing as much air as possible. It can be stored for up to 1-2 months. Thaw overnight in the refrigerator before reheating using the stovetop method.
Final Thoughts
I truly hope you’re as excited as I am to try Cheesy Garlic Butter Corn The Ultimate Delicious Recipe! I crafted this dish to be more than just a side; it’s an experience in pure comfort and flavor. The harmonious blend of sweet, tender corn, infused with the aromatic richness of garlic butter and crowned with gooey, melted cheese, creates a symphony for your taste buds. I genuinely believe that once you take that first bite, you’ll understand why I call it the ultimate. It’s the perfect way to elevate any meal, bringing a touch of deliciousness that everyone will remember. Get ready to savor every single bite!
Cheesy Garlic Butter Corn: The Ultimate Delicious Side!

This Cheesy Garlic Butter Corn is a show-stopping side dish that elevates any meal with its rich flavors and creamy texture. Bursting with sweet corn, aromatic garlic butter, and gooey melted cheese, it’s comfort food at its finest!
- Prep Time: 15 mins
- Cook Time: 15 mins
- Total Time: 30 minutes
- Yield: 4 servings 1x
- Category: Side Dish
- Method: Sautéing
- Cuisine: American
Ingredients
- 4–6 ears of fresh corn on the cob (or 3–4 cups of frozen corn kernels, thawed, or canned corn, drained and rinsed)
- 4–6 cloves of fresh garlic, minced
- 4 tablespoons of unsalted butter
- 1 to 1.5 cups of shredded sharp cheddar cheese
- 1 to 1.5 cups of shredded mozzarella cheese
- Salt and black pepper, to taste
- Fresh parsley or chives, chopped, for garnish
- Optional: red pepper flakes, for heat
- Optional: smoked paprika, for depth
Instructions
- Prepare your ingredients: Husk the fresh corn, remove the silks, and slice the kernels off the cob into a bowl. If using frozen corn, ensure it's fully thawed. If using canned corn, drain and rinse it thoroughly. Mince the fresh garlic cloves finely. Shred the cheese if using block cheese. Finely chop the fresh parsley or chives for garnish.
- Melt the butter and sauté the garlic: In a large skillet over medium heat, melt the unsalted butter completely. Once melted, add the minced garlic and sauté for about 1-2 minutes until fragrant, being careful not to let it brown.
- Cook the corn: Add the prepared corn kernels to the skillet and stir well to coat in the garlic butter. Cook for about 5-7 minutes, stirring occasionally, until the corn is tender-crisp.
- Add the cheese: Reduce the heat to low and sprinkle about ¾ of the shredded cheese over the corn. Stir gently until the cheese begins to melt and coat the corn, about 1-2 minutes. Sprinkle the remaining cheese on top and cover the pan for another minute to melt the top layer.
- Season and serve: Remove the skillet from heat and season with salt and freshly ground black pepper to taste. Stir in half of the chopped fresh parsley or chives, then transfer to a serving bowl and garnish with the remaining herbs. Serve immediately.
Nutrition
- Serving Size: 1 bowl
- Calories: 300
- Sugar: 5 g
- Sodium: 400 mg
- Fat: 18 g
- Saturated Fat: 10 g
- Unsaturated Fat: 6 g
- Trans Fat: 0 g
- Carbohydrates: 30 g
- Fiber: 3 g
- Protein: 10 g
- Cholesterol: 40 mg
Keywords: For the best flavor, use fresh ingredients. Shred your own cheese for a smoother melt, and adjust seasonings to your taste. This dish pairs well with grilled meats or can be enjoyed as a vegetarian main.