Candy Cane Ice Cream: the very words conjure up images of twinkling lights, cozy fireplaces, and the joyous spirit of the holiday season! But what if I told you that you could capture all of that festive magic in a single, delicious scoop? This isn’t just any ice cream; it’s a creamy, minty, and utterly irresistible treat that will transport you straight to Santa’s workshop.
While the exact origins of candy cane ice cream are shrouded in a bit of mystery, its inspiration is clear: the iconic candy cane itself. Legend has it that candy canes first appeared in the 17th century, when a choirmaster bent straight sugar sticks into the shape of a shepherd’s crook to represent the story of Christmas. Over time, they evolved into the peppermint-flavored, red-striped delights we know and love today. It’s only natural that someone, somewhere, decided to infuse that classic flavor into a frozen dessert!
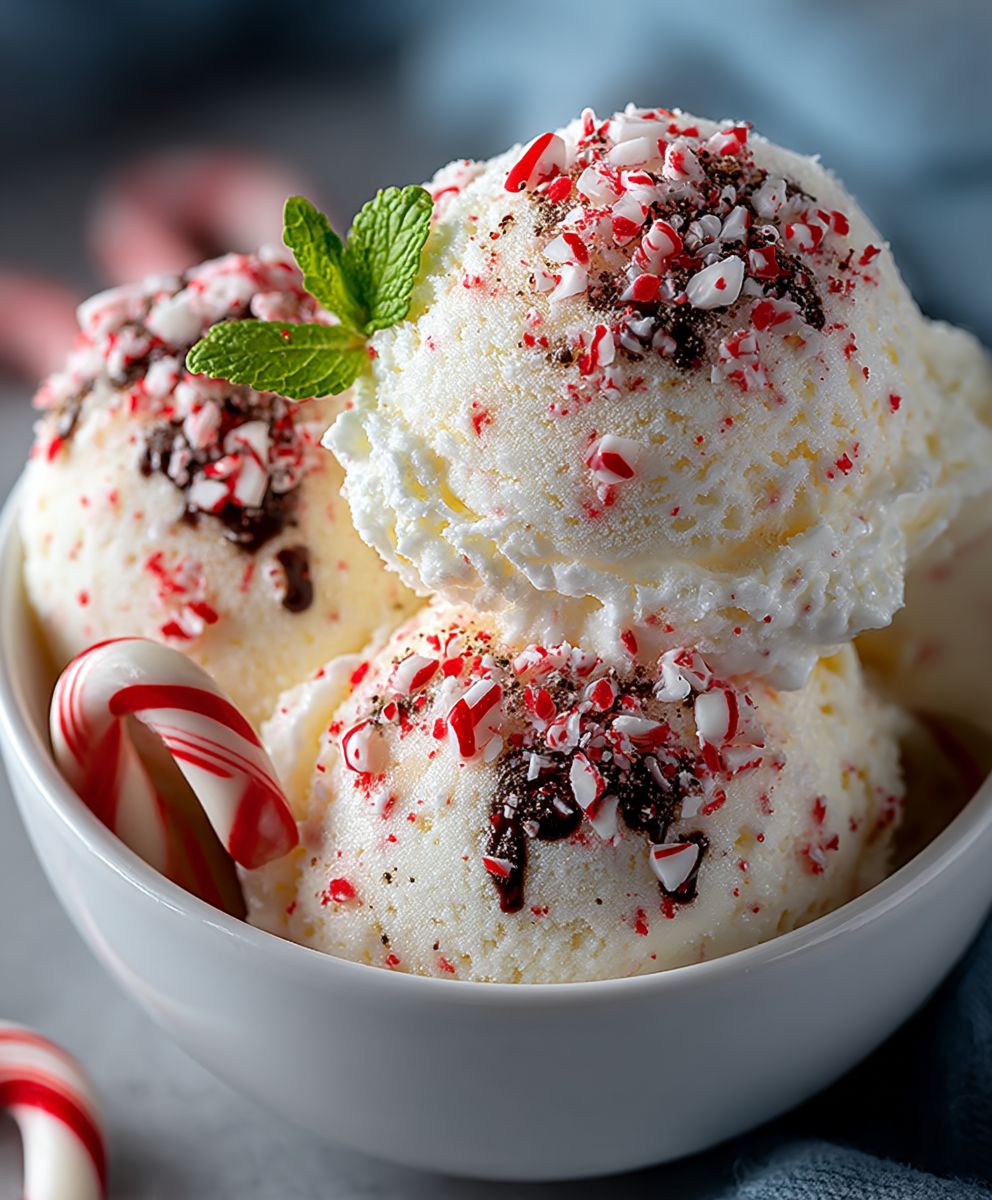
People adore candy cane ice cream for its delightful combination of cool creaminess and refreshing peppermint. The crunchy bits of candy cane add a delightful textural contrast, making each bite a symphony of sensations. Plus, it’s incredibly easy to make at home, allowing you to customize the sweetness and peppermint intensity to your liking. Whether you’re looking for a festive dessert to share with loved ones or simply a sweet treat to brighten a chilly winter evening, this candy cane ice cream is guaranteed to be a crowd-pleaser. So, grab your ice cream maker and let’s get started!

Ingredients:
- 1 pint (2 cups) heavy cream
- 1 cup whole milk
- ¾ cup granulated sugar
- ⅛ teaspoon salt
- 1 teaspoon pure vanilla extract
- ½ teaspoon peppermint extract (adjust to taste)
- 10-12 candy canes, unwrapped and crushed (about ½ cup crushed)
- Optional: Red food coloring (gel preferred)
Preparing the Ice Cream Base:
- Combine the Dairy: In a medium saucepan, whisk together the heavy cream, whole milk, granulated sugar, and salt. Make sure the sugar is evenly distributed to prevent burning.
- Heat the Mixture: Place the saucepan over medium heat. Stir constantly with a heat-resistant spatula or wooden spoon to prevent scorching. The goal is to dissolve the sugar completely and heat the mixture without boiling it.
- Monitor the Temperature: Continue heating until the mixture is warm to the touch and the sugar is fully dissolved. You should be able to rub a small amount of the mixture between your fingers without feeling any sugar granules. This usually takes about 5-7 minutes. Avoid bringing the mixture to a boil, as this can alter the texture of the ice cream.
- Infuse with Peppermint: Remove the saucepan from the heat. Stir in the vanilla extract and peppermint extract. Start with ½ teaspoon of peppermint extract and taste. If you prefer a stronger peppermint flavor, add a few drops more, but be careful not to overdo it, as too much peppermint extract can make the ice cream taste medicinal.
- Add Food Coloring (Optional): If you want to give your ice cream a festive red hue, add a few drops of red food coloring (gel food coloring is recommended for the best results). Stir until the color is evenly distributed throughout the mixture. Remember that a little goes a long way, so start with a small amount and add more until you achieve your desired shade of red.
- Chill the Base: Pour the ice cream base into an airtight container. Allow it to cool slightly at room temperature for about 30 minutes. Then, cover the container tightly and refrigerate for at least 4 hours, or preferably overnight. This chilling process is crucial for the ice cream to churn properly and develop a smooth, creamy texture. The colder the base, the better the ice cream will be.
Churning the Ice Cream:
- Prepare Your Ice Cream Maker: Follow the manufacturer’s instructions for your ice cream maker. Most ice cream makers require the freezing bowl to be pre-frozen for at least 24 hours before use. Ensure the bowl is thoroughly frozen solid before proceeding.
- Pour in the Base: Remove the chilled ice cream base from the refrigerator. Give it a quick stir to ensure the ingredients are well combined. Pour the base into the prepared ice cream maker bowl.
- Churn According to Instructions: Turn on the ice cream maker and churn the base according to the manufacturer’s instructions. The churning time will vary depending on your ice cream maker model, but it typically takes between 20 and 30 minutes. The ice cream is ready when it has thickened to the consistency of soft-serve ice cream.
- Monitor the Consistency: Keep an eye on the ice cream as it churns. You want it to be thick and creamy, but not too hard. If it becomes too hard, it will be difficult to incorporate the candy canes.
Adding the Candy Canes and Freezing:
- Prepare the Candy Canes: While the ice cream is churning, prepare the crushed candy canes. If you haven’t already, unwrap the candy canes and place them in a resealable plastic bag. Use a rolling pin or a meat mallet to crush the candy canes into small pieces. You can also use a food processor, but be careful not to over-process them into a powder. You want to have a mix of small pieces and some larger chunks for texture.
- Incorporate the Candy Canes: Once the ice cream has reached the soft-serve consistency, stop the ice cream maker. Quickly add the crushed candy canes to the ice cream maker bowl. Use a spatula to gently fold the candy canes into the ice cream, distributing them evenly throughout. Be careful not to overmix, as this can cause the ice cream to melt slightly.
- Transfer to a Freezer-Safe Container: Transfer the ice cream to a freezer-safe container. A loaf pan or a plastic container with a tight-fitting lid works well.
- Harden in the Freezer: Place the container of ice cream in the freezer and freeze for at least 2-3 hours, or preferably overnight, to allow it to harden completely. This will give the ice cream a firmer, more scoopable texture.
- Optional Layering: For a more visually appealing presentation, you can layer the ice cream and crushed candy canes in the container. Place a layer of ice cream in the container, sprinkle with some crushed candy canes, and repeat until all the ice cream and candy canes are used.
Serving and Storage:
- Scooping the Ice Cream: Before serving, let the ice cream sit at room temperature for a few minutes to soften slightly, making it easier to scoop.
- Serving Suggestions: Serve the candy cane ice cream in bowls or cones. You can garnish it with extra crushed candy canes, whipped cream, or a drizzle of chocolate sauce for an extra touch of indulgence.
- Storage: Store the leftover ice cream in the freezer in an airtight container. Properly stored, the ice cream will keep for up to 2 weeks. However, the texture may change slightly over time, becoming icier. To minimize ice crystal formation, press a piece of plastic wrap directly onto the surface of the ice cream before sealing the container.
- Tips for Success:
- Use High-Quality Ingredients: The quality of your ingredients will directly impact the flavor and texture of your ice cream. Use fresh, high-quality heavy cream and whole milk for the best results.
- Chill the Base Thoroughly: Chilling the ice cream base for at least 4 hours, or preferably overnight, is crucial for achieving a smooth, creamy texture.
- Don’t Overmix: When adding the crushed candy canes, be careful not to overmix, as this can cause the ice cream to melt slightly.
- Adjust Sweetness and Peppermint Flavor: Taste the ice cream base before churning and adjust the amount of sugar and peppermint extract to your liking.
- Experiment with Variations: Feel free to experiment with different variations of this recipe. You can add other mix-ins, such as chocolate chips, chopped nuts, or marshmallows.
Conclusion:
This Candy Cane Ice Cream isn’t just a dessert; it’s a holiday experience in a bowl! The refreshing coolness combined with the sharp, sweet peppermint is a flavor explosion that will transport you straight to a winter wonderland. I truly believe this recipe is a must-try because it’s surprisingly easy to make, requires minimal ingredients, and delivers maximum festive cheer. Forget store-bought ice cream this year; this homemade version is infinitely better, fresher, and allows you to control the sweetness and intensity of the peppermint flavor.
But the best part? It’s incredibly versatile! While it’s absolutely divine on its own, scooped into a waffle cone or a simple bowl, there are so many ways to elevate your Candy Cane Ice Cream experience. Imagine serving it alongside a warm, fudgy brownie for a delightful contrast of temperatures and textures. Or, for a truly decadent treat, try layering it with hot fudge sauce, whipped cream, and extra crushed candy canes in a festive sundae.
For a more sophisticated twist, consider pairing it with a rich chocolate cake or even a slice of pecan pie. The peppermint cuts through the richness beautifully, creating a balanced and unforgettable dessert. You could also use it to create a stunning ice cream cake for your next holiday gathering. Simply layer the ice cream between layers of chocolate cake or gingerbread, and frost with whipped cream or a peppermint buttercream.
And don’t be afraid to experiment with variations! If you’re a chocolate lover, add a swirl of chocolate ganache to the ice cream base before churning. Or, for a more intense peppermint flavor, steep fresh mint leaves in the cream and milk mixture before adding the candy canes. You could even try using different types of peppermint candies, like peppermint bark or peppermint patties, for a unique flavor profile.
Another fun variation is to add a splash of peppermint schnapps to the ice cream base for an extra kick. Just be sure to add it sparingly, as too much alcohol can prevent the ice cream from freezing properly. For a vegan version, simply substitute the heavy cream and milk with coconut cream and almond milk. The coconut cream will add a richness and creaminess that’s surprisingly similar to dairy-based ice cream.
I’m confident that once you try this recipe, you’ll be hooked. It’s the perfect way to celebrate the holidays and impress your friends and family. So, gather your ingredients, dust off your ice cream maker, and get ready to create a truly magical dessert.
I’m so excited for you to try this Candy Cane Ice Cream recipe! Please, please, please give it a go. And most importantly, I’d absolutely love to hear about your experience. Did you make any variations? What did your family think? Share your photos and stories in the comments below! Let’s spread the holiday cheer, one scoop of delicious ice cream at a time. Happy holidays and happy ice cream making! I can’t wait to see what you create!
Candy Cane Ice Cream: A Festive Holiday Treat
Festive, refreshing homemade peppermint ice cream with crushed candy canes. A creamy, holiday treat!
Ingredients
- 1 pint (2 cups) heavy cream
- 1 cup whole milk
- ¾ cup granulated sugar
- ⅛ teaspoon salt
- 1 teaspoon pure vanilla extract
- ½ teaspoon peppermint extract (adjust to taste)
- 10-12 candy canes, unwrapped and crushed (about ½ cup crushed)
- Optional: Red food coloring (gel preferred)
Instructions
- Combine the Dairy: In a medium saucepan, whisk together the heavy cream, whole milk, granulated sugar, and salt.
- Heat the Mixture: Place the saucepan over medium heat. Stir constantly to dissolve the sugar completely without boiling.
- Monitor the Temperature: Heat until warm to the touch and sugar is fully dissolved (5-7 minutes). Avoid boiling.
- Infuse with Peppermint: Remove from heat. Stir in vanilla and peppermint extract (start with ½ tsp and adjust to taste).
- Add Food Coloring (Optional): Add a few drops of red food coloring (gel recommended) for a festive hue. Stir until evenly distributed.
- Chill the Base: Pour into an airtight container. Cool slightly at room temperature (30 minutes). Refrigerate for at least 4 hours, or preferably overnight.
- Prepare Your Ice Cream Maker: Follow manufacturer’s instructions (freezing bowl pre-frozen for 24 hours).
- Pour in the Base: Remove chilled base from refrigerator, stir, and pour into the ice cream maker bowl.
- Churn According to Instructions: Churn for 20-30 minutes, or until soft-serve consistency.
- Monitor the Consistency: Keep an eye on the ice cream as it churns. You want it to be thick and creamy, but not too hard.
- Prepare the Candy Canes: Crush unwrapped candy canes in a bag using a rolling pin or mallet.
- Incorporate the Candy Canes: Stop the ice cream maker and gently fold in the crushed candy canes.
- Transfer to a Freezer-Safe Container: Transfer to a loaf pan or plastic container with a tight-fitting lid.
- Harden in the Freezer: Freeze for at least 2-3 hours, or preferably overnight.
- Optional Layering: Layer ice cream and crushed candy canes in the container for presentation.
- Scooping the Ice Cream: Let ice cream sit at room temperature for a few minutes to soften.
- Serving Suggestions: Serve in bowls or cones, garnish with extra candy canes, whipped cream, or chocolate sauce.
- Storage: Store in an airtight container in the freezer for up to 2 weeks. Press plastic wrap onto the surface to minimize ice crystals.
Notes
- Use high-quality ingredients for the best flavor and texture.
- Chilling the base thoroughly is crucial for a smooth, creamy texture.
- Don’t overmix when adding candy canes.
- Adjust sweetness and peppermint flavor to your liking.
- Experiment with variations like chocolate chips, nuts, or marshmallows.