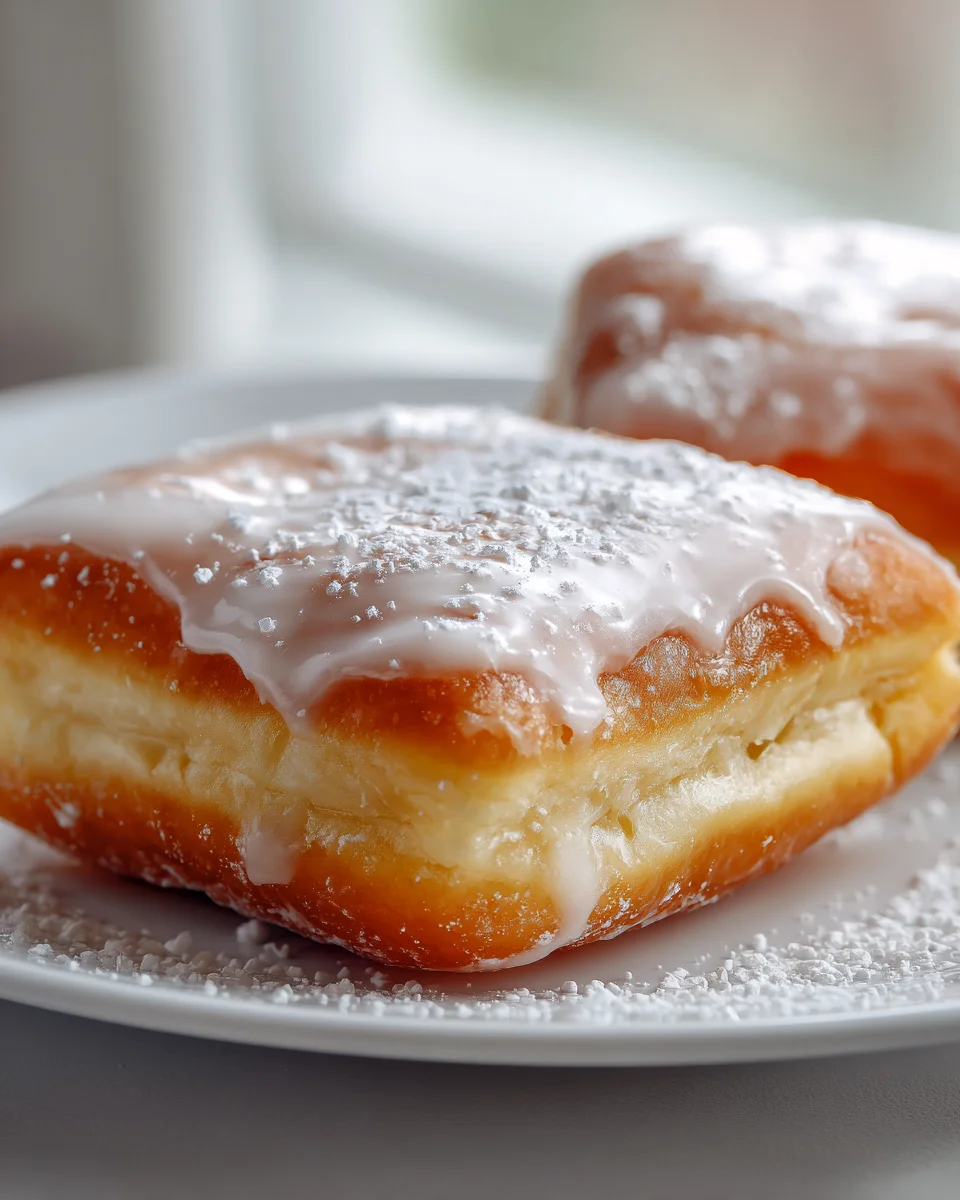
Buttermilk Beignet Square
Oh, prepare yourselves for a truly delightful treat! When I think of pure joy in food form, these Buttermilk Beignet Square immediately spring to mind. We’re not just making any old fried dough here; we’re crafting little squares of sunshine that are incredibly special. What sets these apart, you ask? Well, it’s all in the buttermilk! That secret ingredient lends an amazing tenderness and a subtle, delightful tang that balances the sweetness perfectly. And the shape – a charming square instead of the usual pillow – just adds to their unique appeal, making them feel both classic and wonderfully fresh. You, my friend, are going to absolutely adore these because they bring that iconic taste of a New Orleans morning right into your kitchen. Imagine sinking your teeth into a warm, airy pastry, lightly crispy on the outside, incredibly soft within, and generously dusted with powdered sugar. They’re perfect for a leisurely brunch, an indulgent breakfast, or even a cozy dessert. Get ready to fall in love with these easy-to-make, utterly irresistible little squares of happiness!

Welcome to the wonderful world of homemade Buttermilk Beignet Squares! There’s something incredibly satisfying about making these fluffy, cloud-like fried dough treats right in your own kitchen. While they might seem like a fancy dessert from a New Orleans cafe, I promise you, they’re surprisingly simple to master. The key is in the buttermilk, which gives them their signature tang and incredibly tender crumb. Get ready to create a batch of warm, pillowy squares dusted generously with powdered sugar that will transport you straight to the French Quarter with every bite!
Ingredient Notes
Crafting perfect Buttermilk Beignet Squares starts with understanding your ingredients. Each component plays a crucial role in achieving that light, airy texture and delightful flavor.
- All-Purpose Flour: This is the backbone of our beignets. I always recommend sifting your flour before measuring and adding it to the mixture. Sifting helps to aerate the flour, preventing a dense dough and ensuring those wonderfully light, pillowy squares we’re aiming for. You want a soft, tender bite, and properly handled flour is key to that.
- Active Dry Yeast: This is what gives our beignets their rise and characteristic airy structure. If you’re using active dry yeast, you’ll need to activate it first in warm liquid (usually water or milk) with a pinch of sugar. If you opt for instant yeast, you can often mix it directly with your dry ingredients, which is a convenient shortcut. Just be sure your yeast isn’t expired; fresh yeast is essential for a good rise!
- Buttermilk: The star of the show for these Buttermilk Beignet Squares! Buttermilk adds a distinctive tangy flavor and, more importantly, interacts with the leavening agents to create an incredibly tender and moist dough. If you don’t have buttermilk on hand, don’t fret! You can easily make a substitute by adding 1 tablespoon of lemon juice or white vinegar to a liquid measuring cup, then filling the rest of the cup with regular milk (any kind works, but whole milk yields a richer result) until it reaches 1 cup. Let it sit for 5-10 minutes until it slightly curdles. While this works in a pinch, I find that real buttermilk truly gives the best flavor and texture.
- Granulated Sugar: A modest amount of sugar goes into the dough itself, providing just enough sweetness to complement the tang of the buttermilk and helping with the browning process during frying.
- Eggs: I incorporate eggs into my beignet dough for richness, flavor, and to help bind the ingredients together. They contribute to the golden color of the fried beignets and add to their tender texture.
- Unsalted Butter: Melted butter adds a lovely richness and moisture to the dough. If you only have salted butter, simply reduce the amount of added salt in the recipe slightly.
- Salt: A pinch of salt is crucial. It balances the sweetness, enhances the other flavors, and helps to control the yeast activity. Don’t skip it!
- Neutral Frying Oil: For frying, you’ll want a neutral-flavored oil with a high smoke point. My go-to choices are canola oil, vegetable oil, or peanut oil. The goal is to let the beignet’s flavor shine through, not taste like your cooking oil. You’ll need enough to allow the beignets to float freely and fully submerge, ensuring even cooking.
- Powdered Sugar (Confectioners’ Sugar): This is for the glorious finishing touch! A generous dusting of powdered sugar after frying is iconic for beignets. I often dust them while they are still warm so the sugar adheres beautifully.
Step-by-Step Instructions
Making Buttermilk Beignet Squares is a delightful process, and I’m here to guide you through each step to ensure your success.
- Activate the Yeast: In a large mixing bowl, I usually combine my warm buttermilk (aim for around 105-115°F or 40-46°C – it should feel warm to the touch, not hot) with a teaspoon of the granulated sugar and sprinkle the active dry yeast over the top. Give it a gentle stir and let it sit for about 5-10 minutes. You’ll know it’s ready when it gets foamy and bubbly, indicating the yeast is active and happy. If you’re using instant yeast, you can skip this activation step and add it directly to the dry ingredients, but I still like to warm the buttermilk first.
- Combine Wet Ingredients: Into the activated yeast mixture, I whisk in the remaining granulated sugar, the beaten eggs, and the melted unsalted butter. Make sure the butter isn’t too hot, as it could kill the yeast. I also add a touch of vanilla extract here for an extra layer of flavor, making sure it’s a non-alcohol alternative if preferred.
- Add Dry Ingredients: Gradually, I add the sifted all-purpose flour and the salt to the wet mixture. I usually start with about half the flour, mix until just combined, then add the rest. Mix with a wooden spoon or a stand mixer with a dough hook until a shaggy dough forms.
- Knead the Dough: Turn the dough out onto a lightly floured surface (or continue with your stand mixer) and knead for about 5-8 minutes. I aim for a dough that is smooth, elastic, and slightly sticky to the touch. Avoid adding too much extra flour during kneading; a slightly sticky dough is what will give us tender beignets.
- First Rise: Lightly grease a clean large bowl with a little oil. I place the kneaded dough in the bowl, turn it once to coat, and cover it tightly with plastic wrap or a clean kitchen towel. I then let it rise in a warm, draft-free place for 1.5 to 2 hours, or until it has roughly doubled in size. This is a crucial step for developing flavor and texture.
- Roll and Cut: Once the dough has doubled, I gently punch it down to release the air. On a lightly floured surface, I roll out the dough to an even thickness, usually about 1/4 to 1/2 inch thick. Then, using a sharp knife or a pizza cutter, I carefully cut the dough into approximately 2-3 inch squares. Don’t worry about perfect uniformity; the charm of homemade beignets is their rustic appeal!
- Second Rest (Optional but Recommended): For even lighter beignets, I sometimes let the cut squares rest on a parchment-lined baking sheet for another 15-20 minutes while I heat the oil. This brief rest allows them to puff up slightly more before frying.
- Heat the Oil: In a large, heavy-bottomed pot or a deep fryer, I pour enough neutral frying oil to reach a depth of at least 3-4 inches. Heat the oil over medium-high heat until it reaches 350-375°F (175-190°C). A thermometer is your best friend here! If you don’t have one, you can test by dropping a small piece of dough into the oil; it should sizzle immediately and float to the surface, bubbling nicely.
- Fry the Beignets: Carefully drop a few Buttermilk Beignet Squares into the hot oil, making sure not to overcrowd the pot. I usually fry 3-4 at a time to maintain the oil temperature. Fry for about 1-2 minutes per side, or until they are puffed, golden brown, and cooked through.
- Drain and Dust: Using a slotted spoon or tongs, remove the fried beignets from the oil and transfer them to a wire rack lined with paper towels to drain any excess oil. While they are still warm, I generously dust them with powdered sugar using a sifter for an even coating.
- Serve Immediately: These Buttermilk Beignet Squares are absolutely best served fresh and warm!
Tips & Suggestions
To ensure your Buttermilk Beignet Squares are absolutely perfect, I’ve gathered some of my favorite tips and tricks:
- Don’t Over-Flour: When kneading your dough and rolling it out, resist the urge to add too much extra flour. A slightly sticky dough is desirable for a tender beignet. Too much flour will result in a dry, dense final product, which is the opposite of what we want for these light, airy squares.
- Maintain Oil Temperature: This is arguably the most critical tip for frying. If your oil is too hot, the beignets will brown too quickly on the outside and remain raw in the center. If it’s too cool, they’ll absorb too much oil and become greasy and heavy. I always use a deep-fry thermometer and adjust the heat as needed to keep it within the 350-375°F (175-190°C) range. Don’t rush it by overcrowding the pot, as this will drop the oil temperature significantly.
- Cut Uniform Squares: While a little rustic charm is lovely, cutting your Buttermilk Beignet Squares into similar sizes will ensure they cook evenly. Use a ruler if you want to be precise, or just eyeball it with a pizza cutter for quick work. The square shape is classic for beignets and provides good surface area for frying and sugar dusting.
- Dust While Warm: For the best coverage and adhesion, I always dust my Buttermilk Beignet Squares generously with powdered sugar while they are still warm, fresh out of the oil. The residual heat helps the sugar melt slightly and cling to the surface, creating that iconic sugary coating. A fine-mesh sieve or sifter is perfect for achieving an even, cloud-like layer.
- Add Flavor Enhancements: While traditional Buttermilk Beignet Squares are simple and wonderful, you can enhance their flavor! A teaspoon of vanilla extract in the dough adds a lovely warmth. You could also try a pinch of nutmeg or cinnamon for a subtle spice note. Just remember to use a non-alcohol alternative for any extracts if that’s your preference.
- Don’t Be Afraid to Experiment: Once you’ve mastered the basic recipe, feel free to get creative! Perhaps a little zest from a lemon or orange could be incorporated into the dough for a brighter flavor profile.
Storage
Buttermilk Beignet Squares are undoubtedly at their absolute best when served fresh, warm, and generously dusted with powdered sugar, right off the cooling rack. They are truly an experience meant to be enjoyed immediately.
- Short-Term Storage: If you happen to have any leftovers (which is rare in my house!), you can store them in an airtight container at room temperature for up to 1-2 days. However, I must warn you: they will lose their crispness and become softer, and the powdered sugar tends to absorb moisture, so they won’t have that fresh-from-the-fryer lightness.
- Reheating: To refresh leftover Buttermilk Beignet Squares, you can briefly warm them in a preheated oven at 300°F (150°C) for about 5-7 minutes, or even in an air fryer for 2-3 minutes. This will help them regain a bit of their warmth and a slightly crisper exterior. After reheating, I always give them another generous dusting of fresh powdered sugar. I don’t recommend microwaving them, as this tends to make them chewy and can cause the sugar to melt into a sticky mess.
- Freezing: I generally do not recommend freezing already fried Buttermilk Beignet Squares. The freezing and thawing process can significantly alter their delicate texture, making them soggy when defrosted. If you want to prepare ahead, you could consider freezing the uncooked dough after its first rise. Wrap it tightly in plastic wrap, then place it in a freezer-safe bag. Thaw it in the refrigerator overnight, then proceed with the rolling, cutting, and frying steps. However, for the very best results, I always suggest making these delightful squares fresh.
Final Thoughts
And there you have it – the delightful journey to crafting your very own Buttermilk Beignet Squares. I genuinely believe this recipe is a must-try for anyone seeking a truly special treat. What makes these particular squares so extraordinary is the buttermilk, which imparts not just a lovely subtle tang but also contributes significantly to their incredibly light, airy, and tender texture. Each square is a perfect little pillow, ready to be dusted generously with powdered sugar.
These Buttermilk Beignet Squares are more than just a pastry; they’re a moment of pure comfort and indulgence, whether you’re enjoying them for breakfast, brunch, or a delightful afternoon snack. I truly encourage you to step into your kitchen and experience the joy of making – and tasting! – these unique and utterly irresistible squares for yourself. You’re in for a real treat!
Buttermilk Beignet Squares: Fluffy, Golden Fried Delights!

Indulge in the delightful experience of making Buttermilk Beignet Squares, a treat that combines a tender, airy texture with a subtle tang. These charming squares are perfect for brunch or dessert, dusted generously with powdered sugar.
- Prep Time: 15 mins
- Cook Time: 30 mins
- Total Time: 45 minutes
- Yield: 4 servings 1x
- Category: Dessert
- Method: Frying
- Cuisine: American
Ingredients
- 2 cups All-Purpose Flour
- 2 teaspoons Active Dry Yeast
- 1 cup Buttermilk
- 2 tablespoons Granulated Sugar
- 2 large Eggs, beaten
- 4 tablespoons Unsalted Butter, melted
- 1/2 teaspoon Salt
- Neutral Frying Oil (for frying)
- Powdered Sugar (for dusting)
Instructions
- In a large mixing bowl, combine warm buttermilk (aim for around 105-115°F or 40-46°C) with a teaspoon of granulated sugar and sprinkle the active dry yeast over the top. Stir gently and let it sit for about 5-10 minutes until foamy.
- Whisk in the remaining granulated sugar, beaten eggs, and melted unsalted butter into the activated yeast mixture. Make sure the butter isn't too hot.
- Gradually add the sifted all-purpose flour and salt to the wet mixture. Start with half the flour, mix until just combined, then add the rest. Mix until a shaggy dough forms.
- Turn the dough out onto a lightly floured surface and knead for about 5-8 minutes until smooth, elastic, and slightly sticky.
- Lightly grease a clean large bowl with oil, place the kneaded dough in it, cover tightly with plastic wrap or a kitchen towel, and let it rise in a warm place for 1.5 to 2 hours until doubled in size.
- Gently punch down the dough to release air, then roll it out to about 1/4 to 1/2 inch thick on a floured surface. Cut into 2-3 inch squares.
- For lighter beignets, let the cut squares rest on a parchment-lined baking sheet for 15-20 minutes while heating the oil.
- In a large pot or deep fryer, heat enough neutral frying oil to reach a depth of 3-4 inches to 350-375°F (175-190°C).
- Carefully drop a few beignet squares into the hot oil, frying 3-4 at a time for about 1-2 minutes per side until puffed and golden brown.
- Remove the fried beignets with a slotted spoon and transfer to a wire rack lined with paper towels to drain. Dust generously with powdered sugar while still warm.
- Serve immediately for the best experience.
Nutrition
- Serving Size: 1 square
- Calories: 150
- Sugar: 5 g
- Sodium: 150 mg
- Fat: 7 g
- Saturated Fat: 4 g
- Unsaturated Fat: 2 g
- Trans Fat: 0 g
- Carbohydrates: 20 g
- Fiber: 1 g
- Protein: 3 g
- Cholesterol: 30 mg
Keywords: Avoid adding too much extra flour while kneading to keep the beignets tender. Maintain oil temperature for even frying, and dust with powdered sugar while warm for the best adhesion.