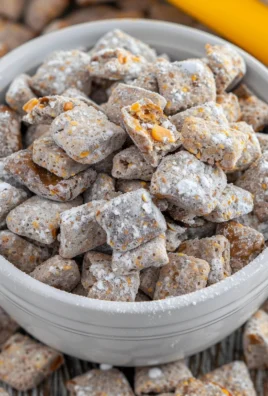
Butterfinger Puppy Chow takes a beloved, nostalgic snack and elevates it to an entirely new level of deliciousness. If you’ve ever found yourself irresistibly drawn to the classic powdered sugar-coated chocolate and peanut butter cereal treat, prepare to have your world (and your taste buds) rocked. Puppy Chow, also known as Muddy Buddies, has long been a staple at potlucks, holiday gatherings, and casual get-togethers across American homes, cherished for its simplicity and undeniable snackability. It’s a no-bake wonder that conjures up fond memories of childhood and easy, joyful indulgence.
What makes this particular rendition so extraordinary, you ask? It’s the ingenious incorporation of crushed Butterfinger candy bars. Imagine the familiar crunch of cereal and the sweet, rich coating, now infused with the iconic, crispy, peanut-buttery, and slightly salty notes of your favorite candy. This isn’t just a snack; it’s a flavor explosion, offering a symphony of textures from the crisp cereal to the smooth coating and the delightfully crumbly Butterfinger bits. People adore this Butterfinger Puppy Chow not only for its incredible taste—a perfect balance of sweet and savory—but also for its unparalleled convenience. It’s quick to prepare, incredibly addictive, and guaranteed to be the first dish to disappear from any party platter. Get ready to fall in love with your new favorite sweet treat!

Ingredients:
- 9 cups Chex cereal (I usually go for Rice Chex or Corn Chex, but a mix is delightful too!)
- 1 cup creamy peanut butter (make sure it’s the good, stir-well kind, not the natural runny type, unless you’re experienced with adjusting consistency!)
- 1 bag (12 ounces) semi-sweet chocolate chips (or milk chocolate, depending on your sweetness preference)
- 1/2 cup (1 stick) unsalted butter
- 1 teaspoon pure vanilla extract (a good quality one really makes a difference here)
- 1 1/2 cups powdered sugar (also known as confectioners’ sugar)
- 10-12 fun-size Butterfinger candy bars, or about 8 ounces of full-size Butterfinger candy bars (this is where the magic truly happens for our Butterfinger Puppy Chow!)
Equipment You’ll Need:
Having the right tools makes the process smoother and more enjoyable. Here’s what I recommend having on hand:
- A very large mixing bowl (the bigger, the better, trust me – you’ll appreciate the extra space when mixing all that cereal!)
- A microwave-safe bowl (preferably glass or ceramic, for melting the chocolate and peanut butter)
- A large heavy-duty Ziploc bag (gallon-sized works wonderfully for shaking the powdered sugar) or a large paper grocery bag
- A rubber spatula or sturdy spoon for stirring
- A rolling pin or a meat tenderizer for crushing the Butterfinger candy
- A large baking sheet or two, lined with parchment paper or wax paper (essential for setting the puppy chow without sticking)
- Measuring cups and spoons
Prepping Your Butterfinger Candy:
This is where we begin to infuse that distinctive Butterfinger crunch and flavor into our delightful snack. It’s a simple step, but crucial for the final texture and taste of your Butterfinger Puppy Chow.
- Unwrap the Butterfinger Bars: First things first, carefully unwrap all of your Butterfinger candy bars. Whether you’re using fun-size bars or full-size ones, make sure every piece is free from its wrapper. This might seem obvious, but it’s easy to miss a tiny bit of foil sometimes!
- Crush the Candy: Place the unwrapped Butterfinger candy bars into a large, heavy-duty Ziploc bag. A gallon-sized bag is ideal as it provides enough space for crushing without tearing. Once the candy is inside, seal the bag, making sure to remove as much air as possible to prevent it from popping open during the next step.
- Achieve the Perfect Texture: Lay the sealed bag on a sturdy surface, like a cutting board or your kitchen counter. Now, take your rolling pin, meat tenderizer, or even the bottom of a heavy skillet, and gently but firmly crush the Butterfinger candy. You’re aiming for a mixture of small crumbs and slightly larger, irregular pieces. Don’t pulverize it into a fine powder! We want those characteristic crunchy bits to remain, as they add incredible texture and bursts of flavor to every bite of the Butterfinger Puppy Chow. Continue crushing until you have a good range of textures – some fine dust, some small flakes, and some tiny, pea-sized chunks. This variety makes the finished product so much more interesting. Once crushed, set the bag aside. We’ll incorporate these golden, crunchy treasures later.
Crafting the Irresistible Chocolate-Peanut Butter Coating:
This is the heart of our Butterfinger Puppy Chow, where the rich, gooey coating comes to life. Getting this right is key to a perfectly coated, irresistible snack.
- Combine Wet Ingredients: In your large microwave-safe bowl, combine the semi-sweet chocolate chips, creamy peanut butter, and unsalted butter. These three ingredients will melt down into a luscious, smooth base for our coating.
- Microwave in Stages: Place the bowl in the microwave. Heat the mixture on high for 60 seconds. After 60 seconds, remove the bowl and stir the mixture vigorously with your rubber spatula. It won’t be fully melted yet, but stirring helps distribute the heat and prevents scorching the chocolate.
- Continue Melting and Stirring: Return the bowl to the microwave and heat for another 30 seconds. Remove and stir again. You’ll notice it’s much smoother now. If there are still a few stubborn lumps, microwave for additional 15-second intervals, stirring thoroughly after each, until the mixture is completely smooth, shiny, and lump-free. It’s important not to overheat the chocolate, as this can cause it to seize or become grainy. Patience and frequent stirring are your best friends here.
- Stir in Vanilla Extract: Once the chocolate-peanut butter mixture is perfectly smooth and glossy, stir in the vanilla extract. The vanilla adds a wonderful depth of flavor that complements the chocolate and peanut butter beautifully, elevating the overall taste profile of your Butterfinger Puppy Chow. Give it a good stir until the vanilla is fully incorporated. The aroma will be absolutely divine at this stage!
The Art of Mixing and Coating:
Now comes the crucial step of bringing the cereal and our decadent coating together. This is where your large mixing bowl truly shines. Proper coating ensures every piece of Chex cereal gets its share of that glorious chocolate-peanut butter goodness, which is essential for perfect Butterfinger Puppy Chow.
- Prepare the Cereal: Measure out your 9 cups of Chex cereal and gently pour it into your very large mixing bowl. I always advise using the biggest bowl you have to allow for easy, thorough mixing without spilling. Don’t compact the cereal; keep it light and airy.
- Pour the Coating: Carefully pour the warm, smooth chocolate-peanut butter mixture evenly over the cereal in the bowl. Try to distribute it as much as possible as you pour, rather than just dumping it all in one spot.
- Gentle Folding and Stirring: This is arguably the most delicate part. Using your rubber spatula or a sturdy spoon, gently fold and stir the cereal. The goal is to coat every single piece of Chex cereal with the chocolate mixture without crushing the cereal. Start by gently scooping from the bottom and folding it over the top, turning the bowl as you go. Be patient and take your time. It might look like there isn’t enough coating at first, but keep folding; the warm mixture will slowly spread. A well-coated cereal is the foundation for outstanding Butterfinger Puppy Chow. You’ll want to continue this gentle mixing until almost all the cereal pieces are thoroughly coated, appearing dark and glossy. This usually takes a few minutes of careful folding.
The Magical Transformation with Powdered Sugar:
This step is what gives puppy chow its iconic, snowy appearance and adds a delightful sweetness and melt-in-your-mouth texture. It’s a fun and slightly messy, but ultimately very rewarding, part of making Butterfinger Puppy Chow.
- Prepare Your Shaking Vessel: Get your large, heavy-duty gallon-sized Ziploc bag (or a clean paper grocery bag) ready. This bag will be your shaking chamber.
- Add Powdered Sugar: Pour the 1½ cups of powdered sugar into the bag. Spreading it out a bit at the bottom helps.
- Transfer the Coated Cereal: Carefully, using your spatula, transfer about half of your chocolate-peanut butter coated cereal into the bag with the powdered sugar. Do not overfill the bag, as you need room for shaking. If your bag is very large, you might manage to do it in one go, but usually, two batches work best to ensure even coating.
- Seal and Shake: Seal the Ziploc bag securely, making sure as much air as possible is trapped inside to create a puffy cushion for the cereal. Now, the fun begins! Shake the bag vigorously. Tumble it, roll it, flip it – the more motion, the better. You want the powdered sugar to adhere to every sticky surface of the cereal. Continue shaking for a good 2-3 minutes, or until each piece of cereal is completely covered in a beautiful, even layer of white powdered sugar. This is where your Butterfinger Puppy Chow gets its classic look!
- Repeat for Remaining Cereal: If you divided your cereal, transfer the first batch onto your prepared baking sheet (lined with parchment or wax paper) in a single layer to cool. Then, add the remaining coated cereal to the bag (you can reuse the same bag with the remaining powdered sugar in it, or add a little more if needed) and repeat the shaking process until it’s also perfectly coated. Spread this second batch onto the baking sheet as well.
Incorporating the Crunchy Butterfinger Goodness:
Now for the grand finale – adding those glorious crushed Butterfinger pieces that give our Butterfinger Puppy Chow its unique character and namesake flavor. This step truly elevates the snack from delicious to absolutely irresistible.
- Gather the Coated Cereal: Once all your cereal is beautifully coated in powdered sugar and spread out on your baking sheet(s), gently bring it together into a slight mound in the center of the sheet or carefully transfer it back into your very large mixing bowl. We want all the pieces close together for even distribution of the candy.
- Add Crushed Butterfinger: Take your bag of crushed Butterfinger candy that you prepared earlier. Generously sprinkle the crushed candy pieces all over the powdered-sugar-coated cereal. Make sure to distribute them as evenly as possible. You should see a lovely mix of white, chocolatey cereal and golden, crunchy Butterfinger bits.
- Gently Mix and Combine: Using your clean hands (or a very large, soft spatula), gently toss and mix the cereal with the crushed Butterfinger. The goal here is to evenly distribute the Butterfinger pieces throughout the puppy chow without breaking up the coated cereal too much. You want to ensure that almost every scoop of Butterfinger Puppy Chow you take will have some of that amazing candy crunch. Be careful not to rub off too much of the powdered sugar while mixing. It’s a gentle folding and tossing motion, rather than a vigorous stir.
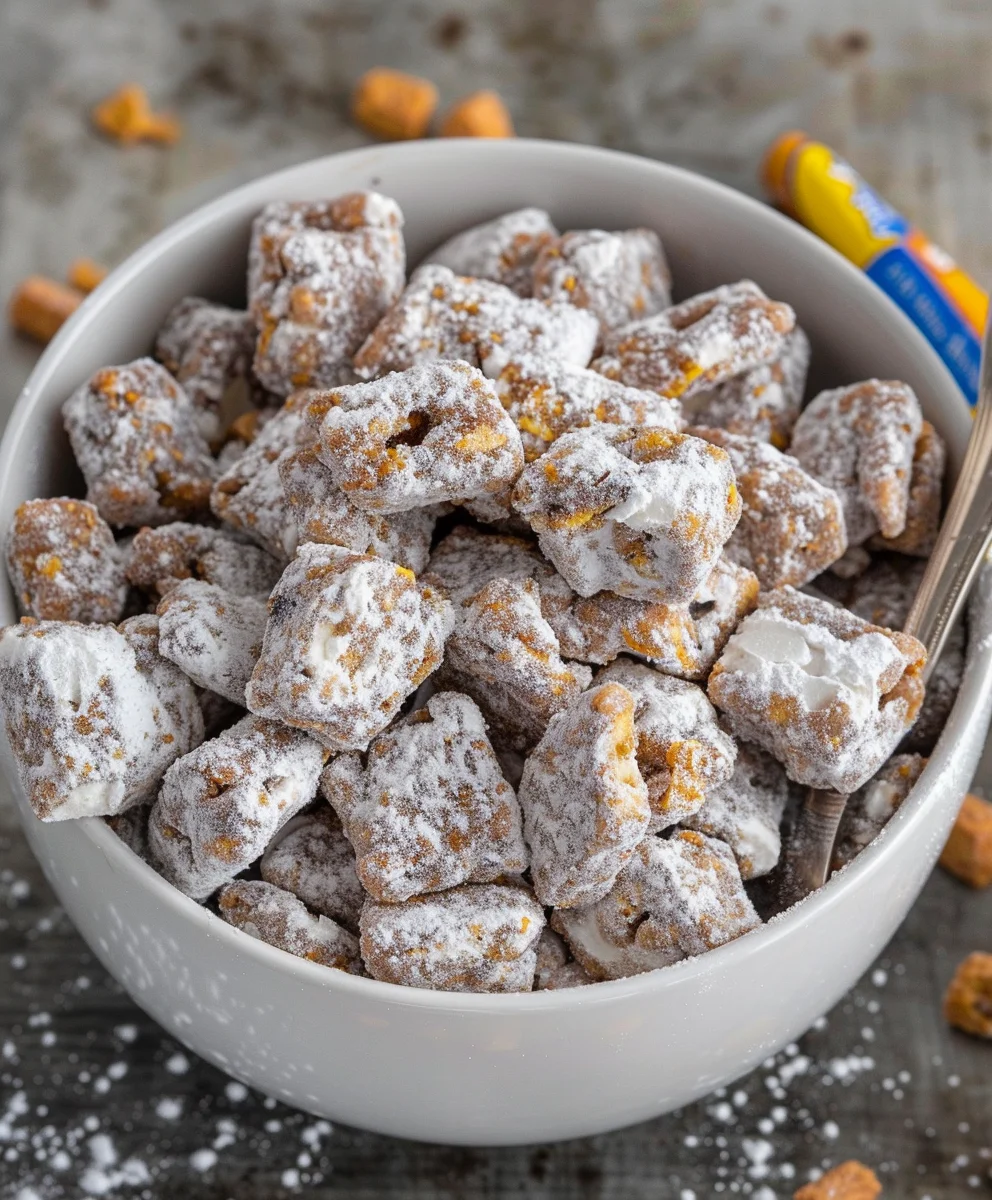
- Admire Your Work: Take a moment to appreciate the beautiful medley of textures and colors you’ve created! The vibrant orange and yellow hues of the Butterfinger against the snowy white powdered sugar and dark chocolatey cereal are simply stunning. This combination is what makes this particular puppy chow so special and undeniably addictive.
Setting and Serving Your Butterfinger Puppy Chow:
After all that careful preparation, it’s time to let your Butterfinger Puppy Chow set. This ensures the coating is firm, the powdered sugar is adhered, and the flavors meld beautifully, leading to the perfect snack experience.
- Spread for Setting: Once the Butterfinger pieces are evenly incorporated, spread the entire batch of Butterfinger Puppy Chow back out onto your prepared baking sheets in a single layer. This allows for maximum airflow and faster setting.
- Chill Time: Place the baking sheets in the refrigerator for at least 30 minutes. This chilling time is essential. It helps the chocolate-peanut butter coating firm up completely, preventing the puppy chow from being too sticky and ensuring that delightful, slightly crunchy texture that we all love. If you’re short on fridge space, you can also let it set at room temperature for an hour or two, but chilling speeds up the process and can make it a little less messy.
- Ready to Serve: Once thoroughly chilled and set, your Butterfinger Puppy Chow is ready to be devoured! You can break up any larger clumps with your hands if needed. Transfer it to a large serving bowl, and watch it disappear. This treat is perfect for parties, movie nights, or simply enjoying a sweet, crunchy snack whenever a craving strikes.
Tips for Perfect Butterfinger Puppy Chow:
Achieving the ultimate batch of Butterfinger Puppy Chow isn’t just about following the steps; it’s about understanding the nuances. Here are my favorite tips to ensure your puppy chow is nothing short of spectacular, delivering that perfect balance of crunch, sweetness, and distinct Butterfinger flavor every single time:
- Quality Ingredients Matter: While puppy chow is a forgiving recipe, using good quality chocolate chips and a reliable creamy peanut butter (Jif or Skippy are excellent choices for consistency) will significantly impact the final taste and texture. Don’t skimp on the vanilla extract either; a pure vanilla extract adds a lovely aromatic depth.
- Don’t Overheat the Chocolate: When melting the chocolate, peanut butter, and butter, it’s critical to use short bursts in the microwave and stir frequently. Overheating can cause the chocolate to seize, become grainy, or burn, ruining the smooth coating. Patience is key here. If your chocolate does seize, sometimes adding a teaspoon of vegetable oil or shortening and stirring vigorously can rescue it, but it’s best to avoid it in the first place.
- Gentle Mixing for Cereal: When coating the cereal with the chocolate mixture, be incredibly gentle. Use a folding motion rather than stirring aggressively, as Chex cereal is delicate and can break easily. You want whole, coated pieces for the best texture and appearance. A sturdy, large rubber spatula is ideal for this task.
- Shake, Shake, Shake!: For the powdered sugar coating, don’t be shy with the shaking! The more thoroughly you shake the cereal in the bag with the powdered sugar, the more evenly coated each piece will be. This prevents sticky spots and ensures that delightful, powdery finish. If you find the powdered sugar isn’t sticking well, your chocolate mixture might not have been warm enough during initial coating, or you might need a tiny bit more powdered sugar.
- Perfect Butterfinger Crush: When crushing the Butterfinger candy, aim for a variety of textures – some fine crumbs, some small flakes, and some tiny chunks. This mix provides different levels of crunch and flavor bursts throughout the Butterfinger Puppy Chow. Avoid turning it all into a fine powder; those small, distinct pieces are what make it truly “Butterfinger.”
- Prevent Sticking: Always spread the finished Butterfinger Puppy Chow onto parchment or wax paper-lined baking sheets for setting. This prevents it from sticking to the pan and makes cleanup a breeze.
- Chill for Best Results: While it can set at room temperature, chilling your Butterfinger Puppy Chow in the refrigerator for at least 30 minutes significantly helps the coating firm up, making it less sticky and much easier to handle and eat. It also enhances the overall crispness.
- Customize Your Candy: While this recipe focuses on Butterfinger, don’t hesitate to experiment with other crunchy candy bars if you’re feeling adventurous! Heath bars, Skor bars, or even Reese’s Peanut Butter Cups could offer interesting variations, though the unique texture of Butterfinger is truly unparalleled for this specific “puppy chow” recipe.
- Adjust Sweetness: If you prefer a less sweet treat, you can slightly reduce the amount of powdered sugar, perhaps down to 1 cup. However, the 1 1/2 cups typically provides that classic puppy chow sweetness that balances the rich chocolate and peanut butter.
- Make Ahead: This Butterfinger Puppy Chow is a fantastic make-ahead snack. It keeps well, making it ideal for preparing a day or two before an event. Just be sure to store it properly to maintain its freshness and crunch.
Storage Suggestions:
To keep your delicious Butterfinger Puppy Chow fresh, crunchy, and tasting its best, proper storage is key. Following these tips will ensure you can enjoy this delightful treat for days to come:
- Airtight Container is Essential: The absolute most important rule for storing puppy chow is to use an airtight container. Exposure to air is the enemy of freshness, causing the cereal to become stale and the coating to lose its crispness. A good quality plastic or glass container with a tight-fitting lid is perfect.
- Room Temperature Storage: For most environments, storing your Butterfinger Puppy Chow at cool room temperature is perfectly fine. It will maintain its texture and flavor for up to 3-4 days. Just make sure it’s away from direct sunlight or any heat sources, which could cause the chocolate to melt or become too soft. If your kitchen tends to be on the warmer side, you might consider refrigeration.
- Refrigeration for Extended Freshness: If you want to extend the shelf life, or if you live in a warm, humid climate, storing the puppy chow in the refrigerator is an excellent option. When stored in an airtight container in the fridge, it can stay fresh for up to 1 week. The cold temperature will keep the coating firm and prevent it from becoming sticky. Just be aware that when you first take it out of the fridge, there might be a very slight condensation, but this usually dissipates quickly. Some people even prefer the extra chill and crunch!
- Freezing for Long-Term Storage: Yes, you can freeze Butterfinger Puppy Chow! This is a great tip if you’ve made a huge batch or want to have some on hand for an unexpected craving or guest. Place the puppy chow in a freezer-safe, airtight container or a heavy-duty freezer bag, removing as much air as possible. It can be stored in the freezer for up to 1-2 months. When you’re ready to enjoy it, simply remove it from the freezer and let it sit at room temperature for about 15-30 minutes to thaw. It thaws surprisingly quickly and retains its texture wonderfully.
- Prevent Crushing: When storing, try to avoid packing the puppy chow too tightly or placing heavy items on top of the container, especially if it’s a softer container like a Ziploc bag. The Chex cereal can be delicate, and you want to preserve those perfectly coated pieces.
- Avoid Humidity: Humidity can cause the powdered sugar to dissolve or become sticky, and the cereal to lose its crunch. Always ensure your storage container is sealed tightly to protect it from moisture in the air. This is especially important for maintaining the distinctive texture of our Butterfinger Puppy Chow.
Why You’ll Love This Butterfinger Puppy Chow:
There’s something truly magical about puppy chow, and when you introduce the iconic crunch and flavor of Butterfinger, you create a snack that’s in a league of its own. This isn’t just another sweet treat; it’s an experience that awakens your taste buds and brings a wave of nostalgic joy with every single bite.
First and foremost, it’s the incredible texture that sets this Butterfinger Puppy Chow apart. You get the crispy, airy bite of the Chex cereal, perfectly enveloped in a rich, velvety smooth coating of chocolate and peanut butter. Then, just when you think you’ve got it figured out, you hit those delightful, irregular pieces of crushed Butterfinger candy. That signature, slightly flaky, super-crunchy texture of Butterfinger adds an extraordinary dimension. It’s a symphony of crunch and chew that makes you want to reach for just one more handful… then another, and another!
And let’s talk about the flavor profile. The classic combination of semi-sweet chocolate and creamy peanut butter is a time-honored favorite for a reason – it’s utterly delicious. But the Butterfinger candy brings in that unique, slightly salty, deeply satisfying, and wonderfully distinct flavor that only Butterfinger can provide. It’s a sweet and savory dance on your palate, with hints of roasted peanut and that characteristic caramel-like crispness. The powdered sugar adds a delicate sweetness and a melt-in-your-mouth finish, balancing the richness of the chocolate and peanut butter while ensuring the Butterfinger’s flavor still shines through as the star.
Furthermore, this Butterfinger Puppy Chow is incredibly versatile. It’s the ultimate crowd-pleaser for any occasion, whether you’re hosting a casual movie night, a game day party, a birthday celebration, or just need a comforting treat for yourself. It’s easy to make in large batches, making it perfect for sharing (if you can resist eating it all yourself!). It’s also a fantastic homemade gift, presented in a pretty jar or cellophane bag. The vibrant colors and inviting aroma make it visually appealing, promising a delightful culinary adventure even before the first bite.
Finally, there’s the sheer joy and simplicity of making and enjoying it. There’s no baking involved, making it a stress-free recipe perfect for all skill levels, and it’s a wonderfully fun activity, especially if you have little helpers in the kitchen. The process is straightforward, but the reward is immense – a generous batch of intensely flavorful, delightfully textured, and utterly addictive Butterfinger Puppy Chow. Trust me, once you try this version, you’ll understand why it quickly becomes a cherished favorite and a recipe you’ll return to again and again.
Conclusion:
Well, my friends, we’ve reached the sweet end of our culinary journey, and I genuinely hope you’re as excited as I am about what we’ve created today. This isn’t just another snack recipe; it’s a game-changer, a crowd-pleaser, and honestly, a little piece of crunchy, peanut buttery heaven that you simply have to experience. What truly makes this recipe a standout, a bona fide must-try in my humble opinion, is its masterful blend of textures and flavors. Imagine that perfectly crisp cereal, generously coated in a rich, velvety chocolate and peanut butter mixture, then dusted with a snowfall of powdered sugar, all punctuated by those unmistakable, delightful shards of Butterfinger candy. It’s a symphony of sweet, salty, and utterly satisfying crunch that will have everyone reaching for ‘just one more handful.’ I truly believe this Butterfinger Puppy Chow isn’t just a recipe; it’s an invitation to pure joy, an edible celebration perfect for any occasion, big or small. From the moment you taste that first piece, you’ll understand why I’m so passionate about it. It’s effortless to make, requires no baking, and the payoff in terms of flavor and smiles is absolutely enormous. This is the kind of treat that creates memories, sparks conversations, and quite frankly, disappears faster than you can say “more, please!” It embodies everything wonderful about homemade snacks – simple ingredients, incredible flavor, and boundless potential for sharing happiness.
Now, let’s talk about how you can share this incredible treat. While it’s tempting to hoard it all to yourself (and I wouldn’t blame you!), this delightful confection truly shines when shared. Picture this: a vibrant bowl of this tempting mixture gracing your next party spread, instantly becoming the star of the snack table. Or, for a more personalized touch, portion it into cute little individual bags, tied with a festive ribbon, to give as party favors or a thoughtful homemade gift. Think about surprising your co-workers with a batch, or bringing it along to a potluck – I guarantee you’ll be asked for the recipe before the bowl is half empty. For a cozy night in, it’s the ultimate movie night companion, far superior to plain popcorn. And if you’re feeling fancy, consider setting up a dessert bar where guests can scoop their own, perhaps alongside a bowl of fresh berries or a scoop of vanilla ice cream for a truly decadent experience. The possibilities for sharing this sweet creation are as endless as your imagination, making it a versatile staple for any event or simple daily indulgence.
But wait, there’s more! One of the things I love most about recipes like this is their incredible versatility. While the original Butterfinger Puppy Chow is perfection, I always encourage you to put your own spin on things, to experiment and make it uniquely yours.
Creative Twists for Your Puppy Chow Adventure:
If you’re feeling adventurous, why not try swapping out some of the Butterfinger for other crushed candy bars? Reese’s peanut butter cups would amplify the peanut butter goodness, M&M’s would add a burst of color and chocolate, or even Snickers for more caramel and nougat texture. You could also play with the base chocolate – dark chocolate for a richer, less sweet profile, or white chocolate for a creamier, milder flavor that really lets the Butterfinger shine. For those who love a salty-sweet combination, crushing up some pretzels and mixing them in would add an amazing textural contrast and a delightful savory kick. Mini marshmallows, chocolate chips, or even chopped nuts like pecans or walnuts could also be fantastic additions, lending different layers of flavor and chewiness. And for a seasonal twist, imagine adding a pinch of pumpkin pie spice mix during the fall, or a dash of peppermint extract around the holidays – the aroma alone would be heavenly! If you’re catering to dietary needs, remember that many brands now offer gluten-free rice square cereals, so you can easily adapt this recipe to be enjoyed by everyone. Don’t be afraid to let your culinary curiosity guide you; the kitchen is your playground! Each variation opens up a whole new world of taste, allowing you to tailor this fantastic snack to any preference or occasion you can dream up.
So, my dear readers, what are you waiting for? I’ve shared my passion, my tips, and my excitement for this incredibly addictive treat. Now it’s your turn to roll up your sleeves, gather your ingredients, and bring this magic to life in your own kitchen. I truly believe that the best recipes are those that you not only enjoy making but also love sharing, and this one ticks all those boxes with flying colors. I urge you to give this Butterfinger Puppy Chow a try. Experience that glorious crunch, that perfect balance of sweet and salty, and the sheer joy of creating something so utterly delicious with your own hands. And once you do, please, please come back and tell me all about it! I absolutely adore hearing about your kitchen adventures. Did you try a variation? Did your family go wild for it? Snap a photo, leave a comment, or share your feedback below. Your experiences inspire me and the entire community to keep exploring and creating. Let’s spread the joy of homemade treats, one glorious batch of Butterfinger Puppy Chow at a time. Happy snacking, everyone!
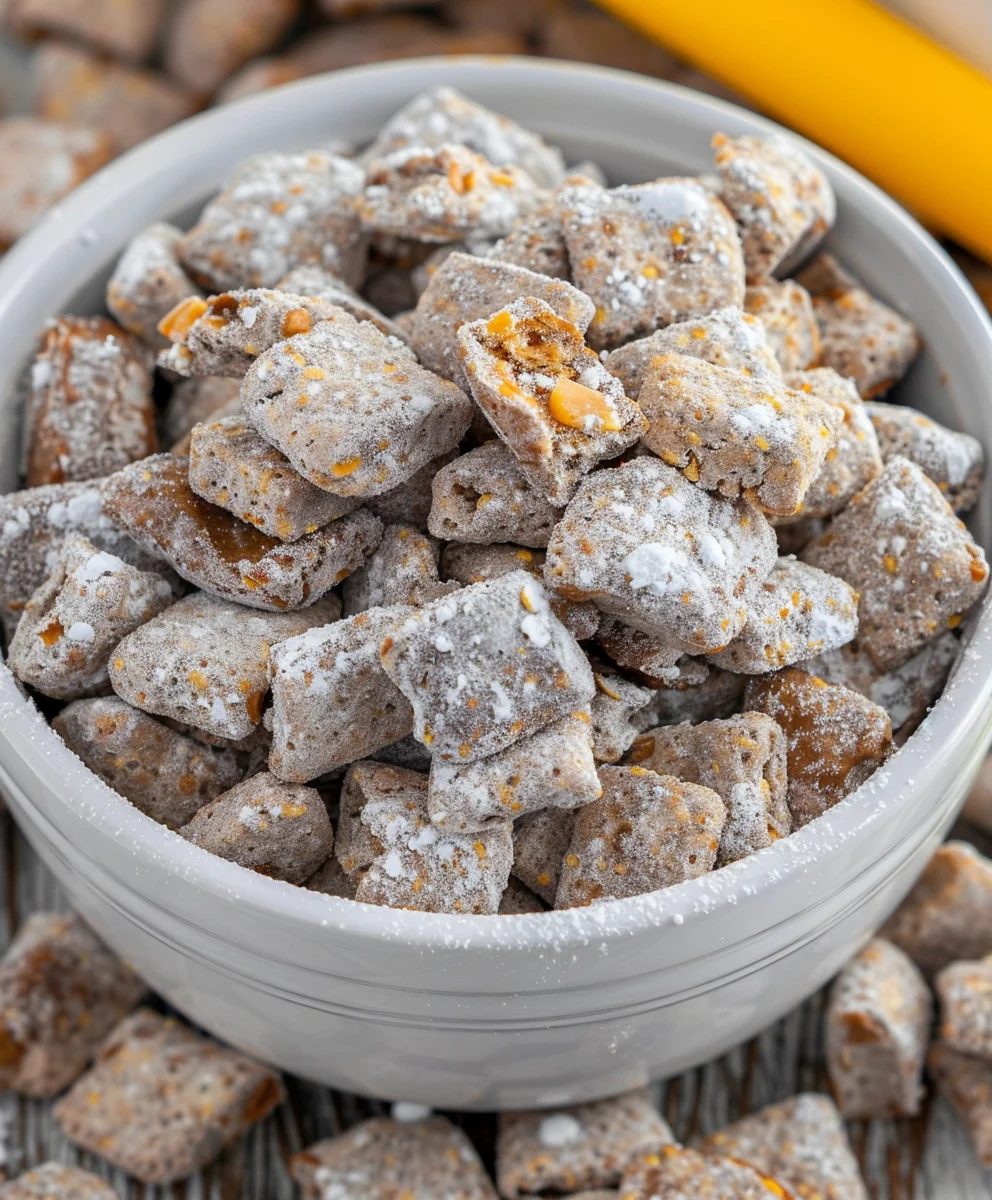
Butterfinger Puppy Chow
Butterfinger Puppy Chow takes a beloved, nostalgic snack and elevates it to an entirely new level of deliciousness. This isn’t just a snack; it’s a flavor explosion, offering a symphony of textures from the crisp cereal to the smooth coating and the delightfully crumbly Butterfinger bits.
Ingredients
-
7 cups Rice Chex Cereal
-
1 cup semi-sweet chocolate chips
-
½ cup creamy peanut butter
-
¼ cup salted butter
-
1 teaspoon pure vanilla extract
-
18 fun-size Butterfinger candy bars (15 crushed, 3 chopped for garnish)
-
1 ¼ cup powdered sugar, sifted
Instructions
-
Step 1
Unwrap all 18 Butterfinger bars. Place 15 bars in a heavy-duty Ziploc bag; crush with a rolling pin to a mixture of crumbs and small pieces. Chop the remaining 3 bars for garnish; set aside. -
Step 2
In a microwave-safe bowl, combine chocolate chips, peanut butter, and butter. Microwave for 60 seconds, stir, then heat in 30-second intervals, stirring until smooth and glossy. Stir in vanilla extract. -
Step 3
Pour 7 cups of Chex cereal into a very large mixing bowl. Pour the warm chocolate-peanut butter mixture evenly over the cereal. Gently fold with a spatula until all cereal pieces are thoroughly coated. -
Step 4
Add 1 ¼ cup powdered sugar to a large gallon-sized Ziploc bag. Transfer half of the coated cereal into the bag. Seal, trapping air, and shake vigorously for 2-3 minutes until cereal is evenly coated. Transfer to a parchment-lined baking sheet. Repeat with the remaining cereal. -
Step 5
Sprinkle the crushed Butterfinger (15 bars) over the powdered-sugar-coated cereal on the baking sheet. Gently toss to combine. Spread the puppy chow in a single layer and chill in the refrigerator for at least 30 minutes until set. Garnish with chopped Butterfinger (3 bars) before serving.
Important Information
Nutrition Facts (Per Serving)
It is important to consider this information as approximate and not to use it as definitive health advice.
Allergy Information
Please check ingredients for potential allergens and consult a health professional if in doubt.