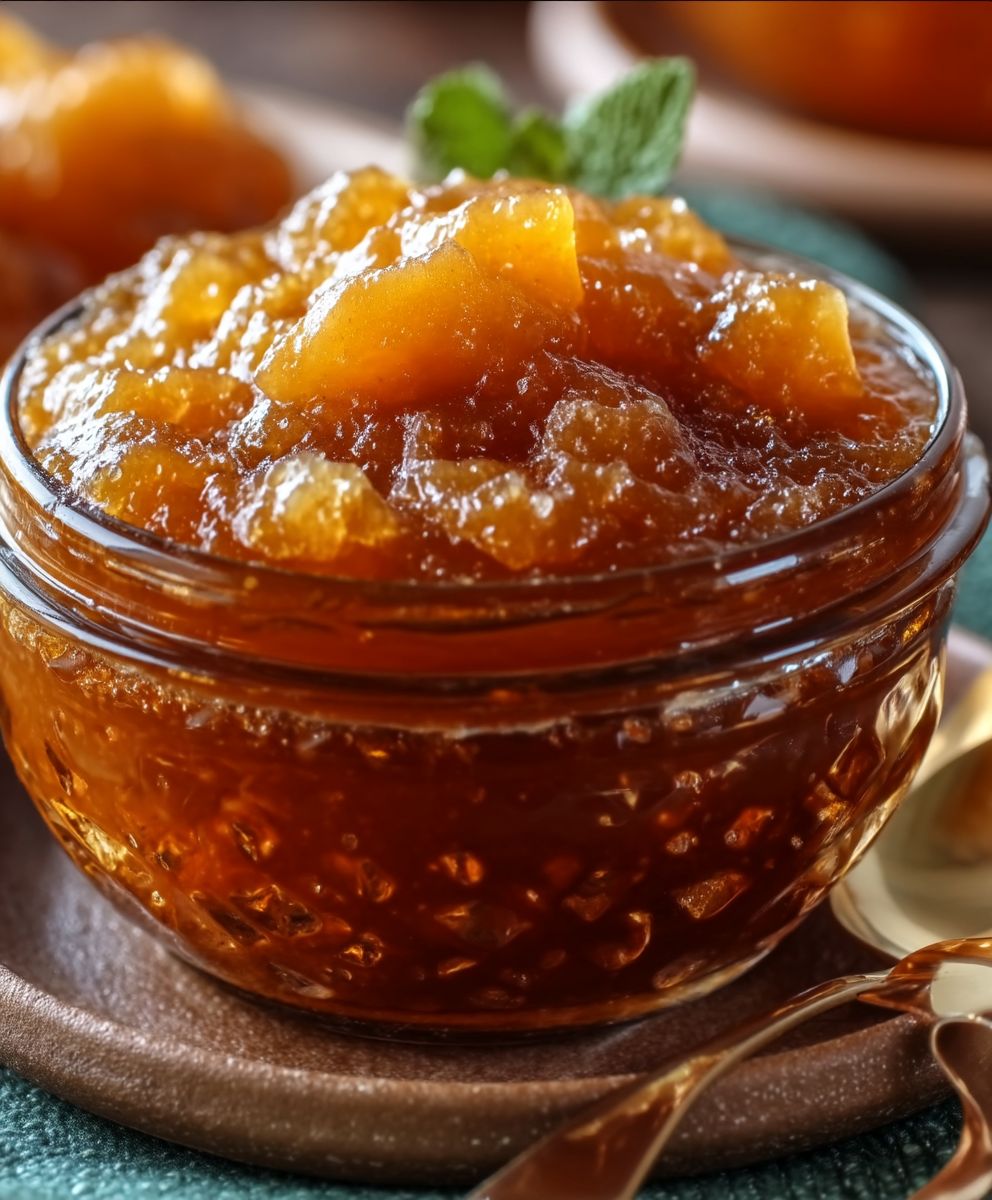
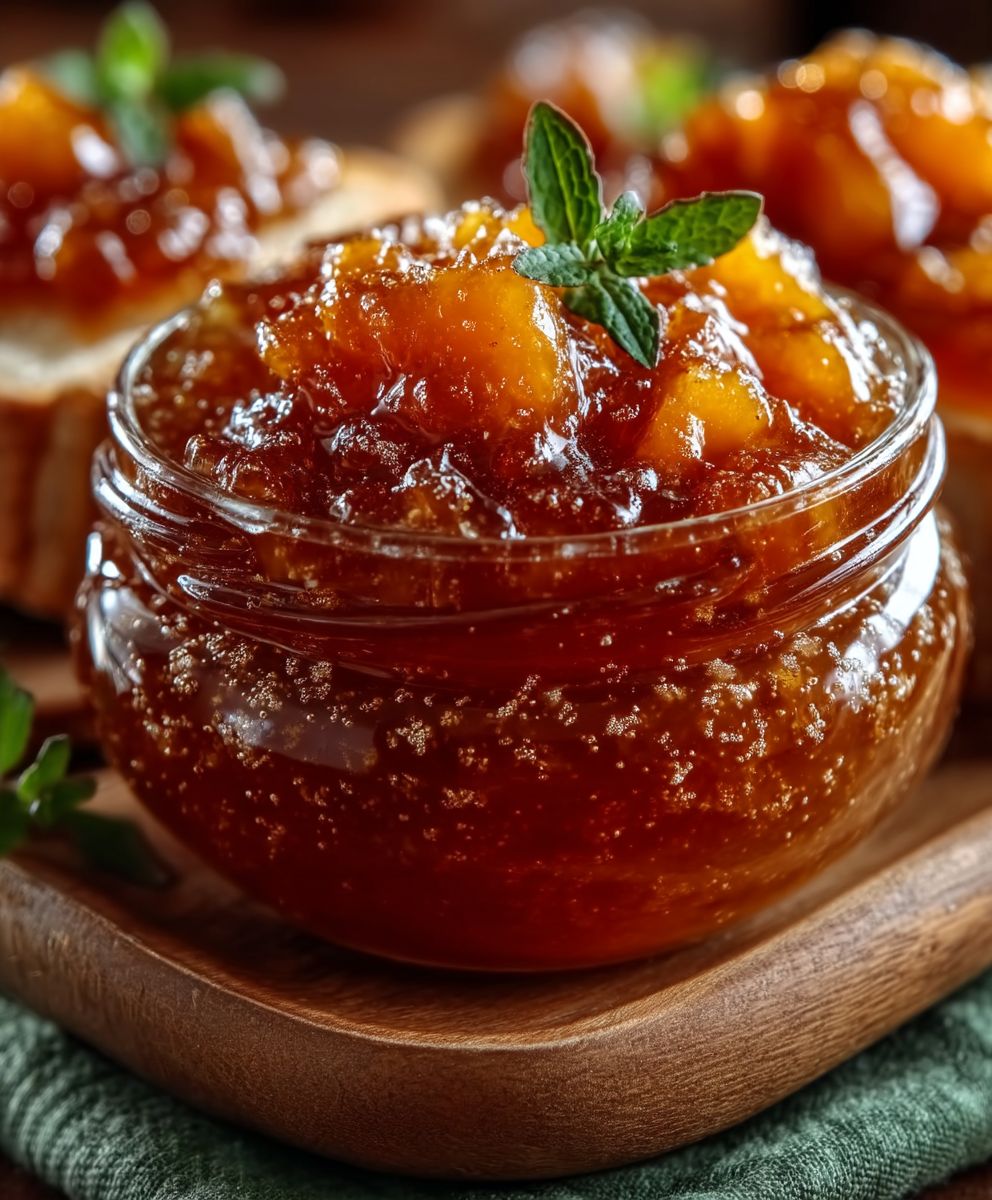
Bourbon Peach Jam: Prepare to be transported to a sun-drenched orchard with every spoonful of this delectable spread! Imagine the sweet, juicy burst of ripe peaches perfectly balanced with the warm, oaky notes of fine bourbon. It’s not just jam; it’s a taste of summer bottled and ready to brighten your day.
Peach preserves have a long and storied history, dating back centuries as a way to capture the fleeting flavors of the season. Adding bourbon, however, is a more modern twist, a nod to the American South where both peaches and bourbon whiskey are cherished traditions. This combination elevates the humble jam to something truly special.
What makes this Bourbon Peach Jam so irresistible? It’s the symphony of flavors, of course! The initial sweetness of the peaches gives way to a subtle warmth from the bourbon, creating a complex and satisfying taste. The texture is equally delightful – smooth and spreadable, with just enough body to cling to your toast or biscuit. But beyond the taste and texture, it’s the sheer versatility that makes this jam a winner. Spread it on your morning toast, swirl it into yogurt, glaze a pork tenderloin, or even use it as a filling for thumbprint cookies. The possibilities are endless! I know you’ll love this recipe as much as I do.
Ingredients:
- 6 cups peeled and chopped ripe peaches (about 3 pounds)
- 1/4 cup bottled lemon juice
- 1 (1.75 ounce) package powdered pectin
- 4 1/2 cups granulated sugar
- 1/4 cup bourbon (optional, but highly recommended!)
- 1/2 teaspoon butter or margarine (to reduce foaming)
Preparing the Peaches:
- First things first, let’s get those peaches ready! The key to a great jam is using perfectly ripe peaches. You want them to be fragrant and yield slightly to pressure. If they’re too firm, your jam won’t have that melt-in-your-mouth texture.
- Peeling the peaches: There are a couple of ways to peel peaches. My preferred method is to blanch them. Bring a large pot of water to a rolling boil. Score an “X” on the bottom of each peach with a sharp knife. This will help the skin peel off easily. Carefully drop the peaches into the boiling water for about 30-60 seconds. You’ll see the skin start to loosen around the “X”.
- Remove the peaches from the boiling water with a slotted spoon and immediately plunge them into a bowl of ice water. This stops the cooking process and makes the skin even easier to remove.
- Once the peaches are cool enough to handle, the skins should slip right off. If they’re stubborn, use a paring knife to gently peel them away.
- Chopping the peaches: Now, chop the peeled peaches into small, even pieces. Aim for pieces that are about 1/2 inch in size. This will ensure that the jam cooks evenly and has a nice texture. As you chop, discard the pits.
- Measure out 6 cups of chopped peaches and place them in a large, heavy-bottomed pot or Dutch oven. This is important because a heavy-bottomed pot will help prevent the jam from scorching.
Combining Ingredients and Initial Cooking:
- Add the lemon juice to the peaches. The lemon juice not only adds a bright, tangy flavor, but it also helps to preserve the jam and ensure that it sets properly.
- In a separate bowl, combine the powdered pectin and 1/4 cup of the sugar. This helps to prevent the pectin from clumping when you add it to the peaches.
- Sprinkle the pectin-sugar mixture over the peaches and stir well to combine. Make sure the pectin is evenly distributed throughout the peaches.
- Add the butter or margarine to the pot. This helps to reduce foaming during the cooking process, which can make the jam clearer and easier to manage.
- Place the pot over medium-high heat and bring the mixture to a full rolling boil that cannot be stirred down. This is a crucial step for activating the pectin.
Adding Sugar and Achieving the Set:
- Once the mixture is at a full rolling boil, quickly add the remaining sugar. Stir constantly to ensure that the sugar dissolves completely.
- Return the mixture to a full rolling boil that cannot be stirred down. Continue to cook, stirring constantly, for exactly 1 minute. It’s important to time this step carefully, as overcooking can result in a tough jam, and undercooking can result in a runny jam.
- Remove the pot from the heat and stir in the bourbon (if using). The bourbon adds a wonderful depth of flavor to the jam, complementing the sweetness of the peaches. Be careful when adding the bourbon, as it may cause the jam to bubble up slightly.
Testing for Set:
- The Cold Plate Test: This is the most reliable way to determine if your jam has reached the proper setting point. Before you start cooking the jam, place a couple of small plates in the freezer.
- To test the jam, remove one of the plates from the freezer and drop a small spoonful of jam onto the cold plate. Return the plate to the freezer for about 30 seconds.
- After 30 seconds, push the jam with your finger. If it wrinkles and forms a skin, the jam is ready. If it’s still runny, continue to cook the jam for another minute or two, and then test again.
- Using a Candy Thermometer: If you prefer to use a candy thermometer, the jam is ready when it reaches 220°F (104°C). However, keep in mind that altitude can affect the boiling point of liquids, so you may need to adjust the temperature accordingly.
Canning the Jam (Optional):
If you want to preserve your Bourbon Peach Jam for longer storage, you can can it using the water bath canning method. If you prefer to skip this step, you can store the jam in the refrigerator for up to 3 weeks or freeze it for up to 1 year.
- Prepare the Jars and Lids: Wash your canning jars, lids, and bands in hot, soapy water. Rinse them well. Sterilize the jars by placing them in a boiling water bath for 10 minutes. Keep the jars hot until you’re ready to fill them. You can also sterilize them in a dishwasher with a sanitizing cycle. Heat the lids in a small saucepan of simmering water. Do not boil the lids, as this can damage the sealing compound.
- Fill the Jars: Ladle the hot jam into the hot jars, leaving 1/4 inch headspace at the top. Headspace is the space between the top of the jam and the lid.
- Remove Air Bubbles: Use a non-metallic spatula or bubble remover to gently run around the inside of the jar to release any trapped air bubbles.
- Wipe the Jar Rims: Wipe the rims of the jars with a clean, damp cloth to remove any spills or drips. This will ensure a good seal.
- Place Lids and Bands: Place the lids on the jars and screw on the bands fingertip tight. Do not overtighten the bands, as this can prevent the jars from sealing properly.
- Process in a Water Bath Canner: Place the filled jars in a water bath canner. The water should cover the jars by at least 1 inch. Bring the water to a rolling boil and process the jars for 10 minutes. Adjust processing time for altitude.
- Cool the Jars: Turn off the heat and let the jars sit in the canner for 5 minutes before removing them. This helps to prevent siphoning. Carefully remove the jars from the canner and place them on a towel-lined surface to cool completely.
- Check the Seals: As the jars cool, you should hear a popping sound as the lids seal. After the jars have cooled completely (about 12-24 hours), check the seals by pressing down on the center of the lid. If the lid doesn’t flex, it’s sealed properly. If the lid flexes, the jar didn’t seal and should be reprocessed with a new lid or stored in the refrigerator.
- Store the Jars: Store the sealed jars in a cool, dark place for up to 1 year.
Serving and Storage:
If you didn’t can your jam, let it cool completely before transferring it to an airtight container. Store in the refrigerator for up to 3 weeks or freeze for up to 1 year.
This Bourbon Peach Jam is delicious on toast, biscuits, scones, or even as a glaze for grilled meats. Enjoy!
Conclusion:
Okay, friends, let’s be honest: you absolutely need this Bourbon Peach Jam in your life. I know, I know, I say that about a lot of recipes, but trust me on this one. The sweet, juicy peaches, the warm kiss of bourbon, and that hint of spice – it all comes together in a jar of pure sunshine. It’s not just jam; it’s an experience, a little taste of summer you can savor all year long.
Why is it a must-try? Because it’s incredibly easy to make! Seriously, even if you’ve never canned anything before, this recipe is totally approachable. And the flavor payoff is HUGE. Forget those bland, store-bought jams. This Bourbon Peach Jam is bursting with fresh, vibrant flavor that will elevate everything it touches.
But the best part? The versatility! Of course, it’s amazing slathered on toast, biscuits, or scones. But don’t stop there! Imagine a dollop of this jam on top of creamy brie, served with crackers for a sophisticated appetizer. Or how about using it as a glaze for grilled chicken or pork? The possibilities are endless!
Here are a few serving suggestions and variations to get your creative juices flowing:
- Breakfast Bliss: Swirl it into your morning yogurt or oatmeal for a burst of fruity sweetness.
- Baking Bonanza: Use it as a filling for thumbprint cookies or a topping for cheesecake.
- Savory Sensations: Pair it with sharp cheddar cheese on a grilled cheese sandwich for a sweet and savory delight.
- Boozy Boost: For an extra kick, try using a higher-proof bourbon or adding a splash of peach schnapps.
- Spice it Up: Add a pinch of red pepper flakes for a subtle heat that complements the sweetness of the peaches.
- Herbaceous Harmony: Infuse the jam with fresh thyme or rosemary for a more complex flavor profile.
I’m already dreaming of all the ways I’m going to use this jam! I’m thinking a Bourbon Peach Jam and goat cheese pizza is definitely in my future. And maybe some Bourbon Peach Jam-filled donuts? Oh, the possibilities!
So, what are you waiting for? Gather your peaches, grab your bourbon, and get jamming! I promise you won’t regret it. This recipe is a game-changer, and I can’t wait to hear what you think.
Seriously, I want to know! Did you try the recipe? What variations did you make? What’s your favorite way to enjoy this Bourbon Peach Jam? Share your photos and stories in the comments below! Let’s spread the jam love and inspire each other with delicious ideas. Happy canning!
Don’t forget to rate the recipe and share it with your friends! The more people who discover the joy of homemade Bourbon Peach Jam, the better!
I’m so excited for you to try this recipe. I know you’ll love it as much as I do. Happy jamming!
Bourbon Peach Jam: The Ultimate Guide to Making & Enjoying
Sweet and tangy homemade peach jam with a hint of bourbon. Perfect on toast, biscuits, or as a glaze!
Ingredients
- 6 cups peeled and chopped ripe peaches (about 3 pounds)
- 1/4 cup bottled lemon juice
- 1 (1.75 ounce) package powdered pectin
- 4 1/2 cups granulated sugar
- 1/4 cup bourbon (optional, but highly recommended!)
- 1/2 teaspoon butter or margarine (to reduce foaming)
Instructions
- Prepare the Peaches: Blanch peaches in boiling water for 30-60 seconds after scoring an “X” on the bottom. Immediately transfer to ice water. Peel off the skins and chop into 1/2-inch pieces. Measure 6 cups and place in a large, heavy-bottomed pot or Dutch oven.
- Combine Ingredients: Add lemon juice to the peaches. In a separate bowl, combine powdered pectin and 1/4 cup of the sugar. Sprinkle the pectin-sugar mixture over the peaches and stir well to combine. Add the butter or margarine to the pot.
- Initial Cooking: Place the pot over medium-high heat and bring the mixture to a full rolling boil that cannot be stirred down.
- Add Sugar and Achieve the Set: Once at a full rolling boil, quickly add the remaining sugar. Stir constantly until dissolved. Return to a full rolling boil that cannot be stirred down. Continue to cook, stirring constantly, for exactly 1 minute.
- Add Bourbon: Remove from heat and stir in the bourbon (if using).
- Test for Set:
- Cold Plate Test: Place a spoonful of jam on a frozen plate and return to the freezer for 30 seconds. If it wrinkles when pushed, it’s ready. If not, cook for another minute or two and test again.
- Candy Thermometer: The jam is ready when it reaches 220°F (104°C).
- Canning (Optional):
- Prepare jars and lids by washing, rinsing, and sterilizing. Keep jars hot. Heat lids in simmering water.
- Ladle hot jam into hot jars, leaving 1/4 inch headspace.
- Remove air bubbles with a non-metallic spatula.
- Wipe jar rims with a clean, damp cloth.
- Place lids on jars and screw on bands fingertip tight.
- Process in a water bath canner for 10 minutes, ensuring water covers jars by at least 1 inch. Adjust processing time for altitude.
- Turn off heat and let jars sit in canner for 5 minutes before removing.
- Cool jars completely on a towel-lined surface.
- Check seals after cooling (12-24 hours). Lids should not flex when pressed. Reprocess unsealed jars or refrigerate.
- Store sealed jars in a cool, dark place for up to 1 year.
- Serving and Storage (If not canning): Let jam cool completely before transferring to an airtight container. Store in the refrigerator for up to 3 weeks or freeze for up to 1 year.
Notes
- Use perfectly ripe peaches for the best flavor and texture.
- A heavy-bottomed pot prevents scorching.
- Lemon juice preserves the jam and ensures proper setting.
- Butter/margarine reduces foaming.
- The cold plate test is the most reliable way to check for set.
- Adjust processing time for canning based on your altitude.
- Bourbon adds a wonderful depth of flavor (optional).


