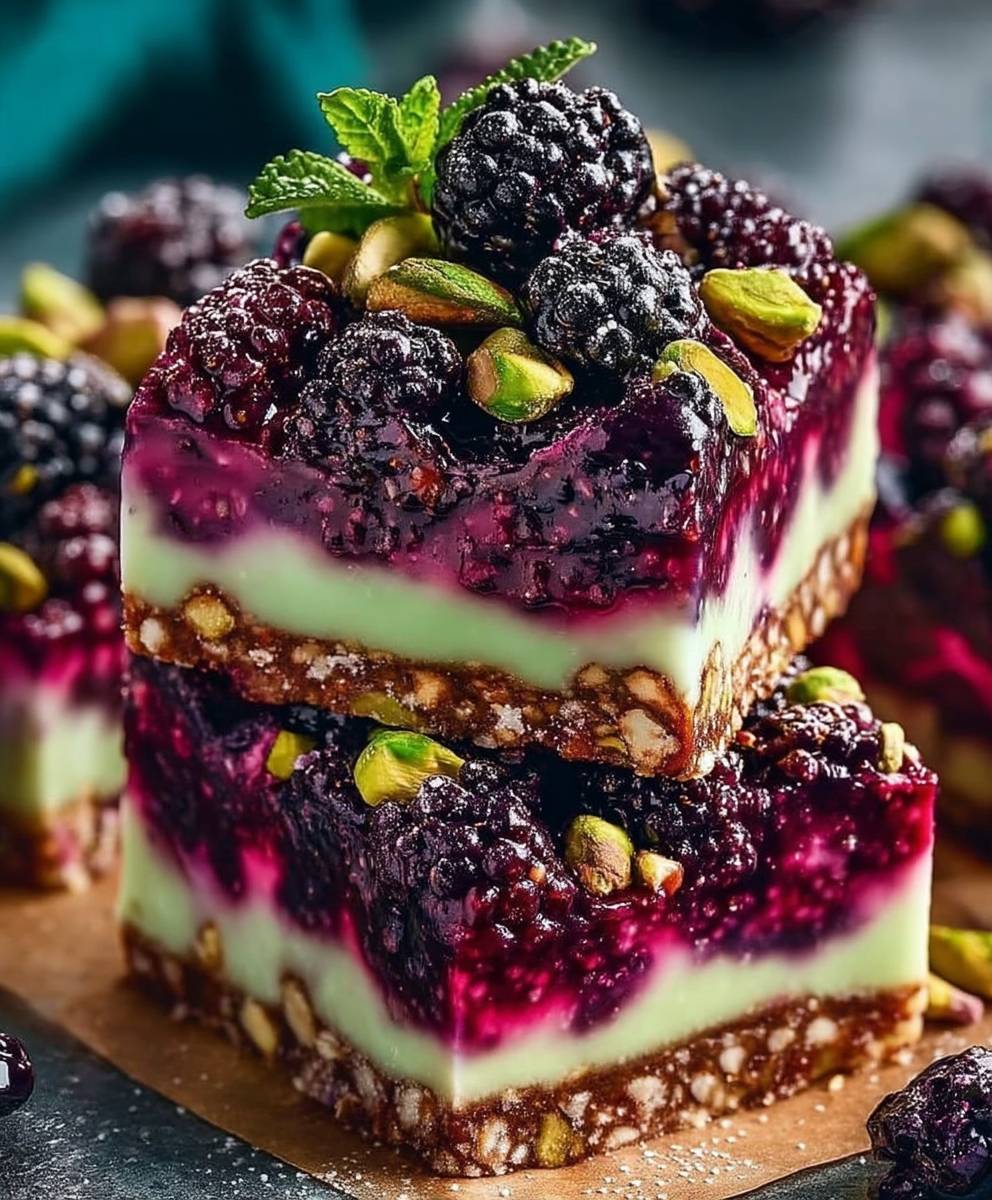
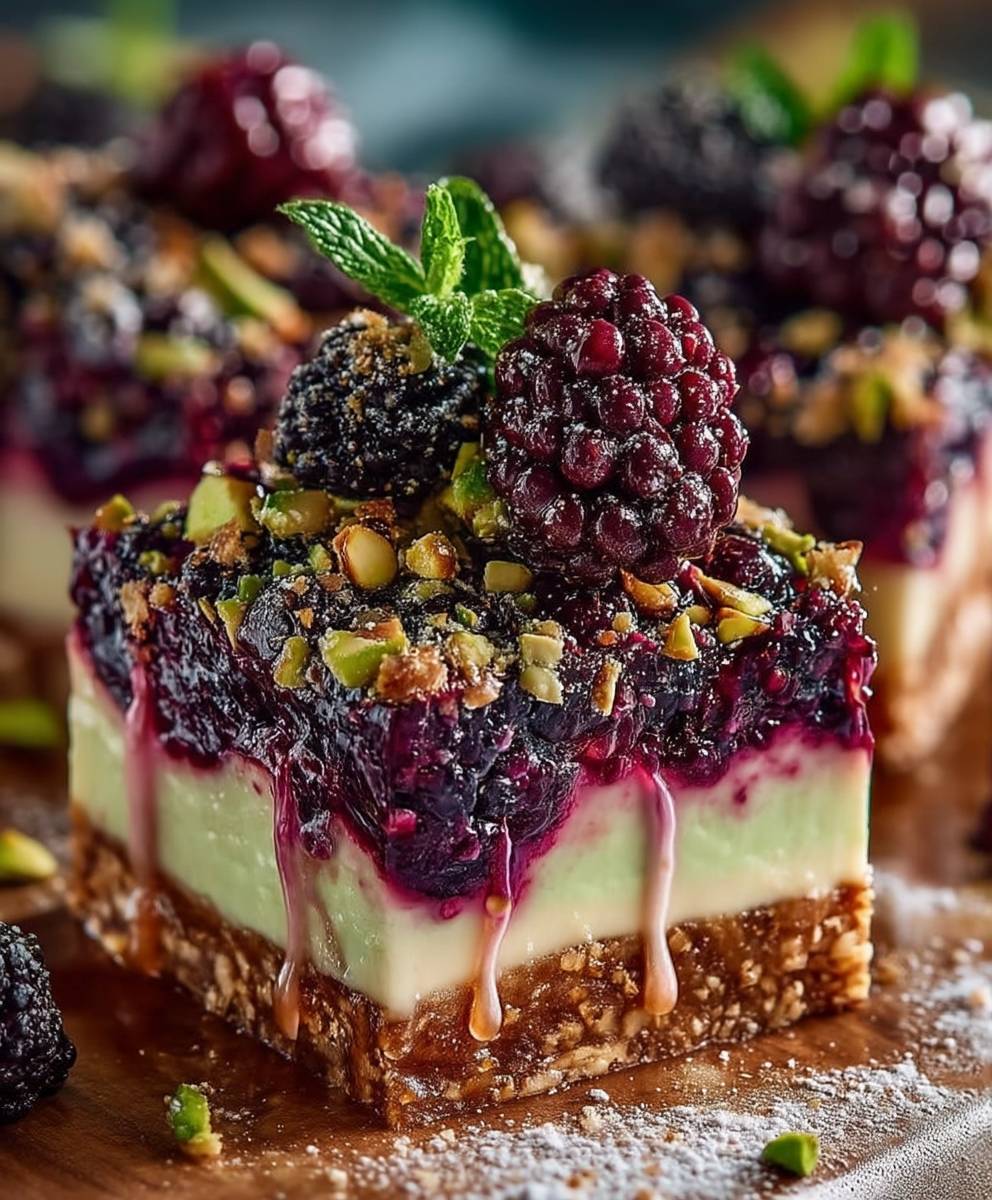
Blackberry Pistachio Dream Bars: Prepare to be transported to a realm of pure dessert bliss! Imagine sinking your teeth into a buttery, crumbly crust, followed by a layer of sweet and tart blackberry jam, all topped with a crunchy, nutty pistachio crumble. These bars aren’t just a treat; they’re an experience.
While the exact origins of fruit-filled dream bars are shrouded in a bit of mystery, similar baked goods have been enjoyed for generations across various cultures. Think of the classic fruit crumble or the jam-filled shortbread – these Blackberry Pistachio Dream Bars draw inspiration from these timeless favorites, adding a modern twist with the vibrant flavors of blackberry and pistachio.
What makes these bars so irresistible? It’s the perfect balance of textures and tastes. The buttery shortbread provides a comforting base, while the blackberry jam offers a burst of fruity sweetness with a hint of tartness. And then there’s the pistachio crumble – adding a delightful crunch and a subtle nutty flavor that complements the other ingredients beautifully. They are also incredibly convenient to make! Perfect for potlucks, bake sales, or simply a delightful afternoon treat, these bars are sure to be a crowd-pleaser. Get ready to bake up a batch of these dreamy delights!
Ingredients:
- For the Crust:
- 1 ½ cups all-purpose flour
- ½ cup (1 stick) unsalted butter, cold and cubed
- ½ cup granulated sugar
- ¼ teaspoon salt
- 1 large egg yolk
- 2-3 tablespoons ice water
- For the Blackberry Filling:
- 4 cups fresh blackberries
- ½ cup granulated sugar
- 2 tablespoons lemon juice
- 2 tablespoons cornstarch
- 1 teaspoon vanilla extract
- For the Pistachio Crumble Topping:
- ¾ cup all-purpose flour
- ½ cup granulated sugar
- ½ cup (1 stick) unsalted butter, cold and cubed
- ½ cup shelled, unsalted pistachios, coarsely chopped
- ¼ teaspoon salt
- Optional:
- Powdered sugar, for dusting
Preparing the Crust:
- Combine Dry Ingredients: In a large bowl, whisk together the flour, sugar, and salt. This ensures the salt is evenly distributed, which is crucial for flavor.
- Cut in the Butter: Add the cold, cubed butter to the flour mixture. Using a pastry blender or your fingertips (work quickly to keep the butter cold!), cut the butter into the flour until the mixture resembles coarse crumbs. You should still see small pieces of butter throughout. This is what creates a flaky crust.
- Add the Egg Yolk: In a small bowl, whisk the egg yolk with 2 tablespoons of ice water. Pour this mixture over the flour and butter mixture.
- Combine the Dough: Gently mix the ingredients together until the dough just comes together. If the dough seems too dry, add the remaining tablespoon of ice water, one teaspoon at a time, until it forms a cohesive ball. Be careful not to overmix, as this will develop the gluten and result in a tough crust.
- Chill the Dough: Flatten the dough into a disc, wrap it tightly in plastic wrap, and refrigerate for at least 30 minutes. This allows the gluten to relax and the butter to firm up, which will prevent the crust from shrinking during baking. I usually chill it for an hour, just to be safe.
- Preheat and Prepare Pan: Preheat your oven to 375°F (190°C). Grease and flour a 9×13 inch baking pan. You can also line the pan with parchment paper, leaving an overhang on the sides, for easy removal of the bars after baking.
- Press the Dough into the Pan: Remove the dough from the refrigerator and press it evenly into the bottom of the prepared baking pan. Use your fingers or the bottom of a measuring cup to create a smooth, even surface.
- Pre-bake the Crust: Prick the crust all over with a fork. This prevents it from puffing up during baking. Bake the crust for 15-20 minutes, or until it is lightly golden brown. Let it cool slightly while you prepare the blackberry filling.
Making the Blackberry Filling:
- Combine Blackberries and Sugar: In a medium saucepan, combine the fresh blackberries and sugar.
- Cook the Mixture: Cook over medium heat, stirring occasionally, until the blackberries release their juices and the mixture begins to simmer. This usually takes about 5-7 minutes.
- Add Lemon Juice: Stir in the lemon juice. The lemon juice brightens the flavor of the blackberries and helps to balance the sweetness.
- Thicken the Filling: In a small bowl, whisk together the cornstarch and 2 tablespoons of cold water to create a slurry. Pour the cornstarch slurry into the blackberry mixture and stir constantly until the filling thickens. This usually takes about 1-2 minutes.
- Add Vanilla Extract: Remove the saucepan from the heat and stir in the vanilla extract.
- Let Cool Slightly: Allow the blackberry filling to cool slightly before pouring it over the pre-baked crust. This prevents the crust from becoming soggy.
Preparing the Pistachio Crumble Topping:
- Combine Dry Ingredients: In a medium bowl, whisk together the flour, sugar, and salt.
- Cut in the Butter: Add the cold, cubed butter to the flour mixture. Using a pastry blender or your fingertips, cut the butter into the flour until the mixture resembles coarse crumbs.
- Add Pistachios: Stir in the coarsely chopped pistachios.
- Mix Well: Toss everything together until well combined. The mixture should be crumbly and slightly clumpy.
Assembling and Baking the Dream Bars:
- Pour Filling Over Crust: Pour the slightly cooled blackberry filling evenly over the pre-baked crust.
- Sprinkle with Crumble Topping: Sprinkle the pistachio crumble topping evenly over the blackberry filling. Make sure to distribute it well so every bite has a little crumble.
- Bake the Bars: Bake in the preheated oven for 30-35 minutes, or until the crumble topping is golden brown and the blackberry filling is bubbly.
- Cool Completely: Remove the bars from the oven and let them cool completely in the pan before cutting. This is important because the filling needs time to set up properly. I know it’s tempting to cut into them while they’re warm, but trust me, they’re much better when cooled.
- Cut and Serve: Once the bars are completely cool, cut them into squares or rectangles.
- Dust with Powdered Sugar (Optional): If desired, dust the bars with powdered sugar before serving. This adds a touch of sweetness and makes them look extra pretty.
Tips and Variations:
- Use Frozen Blackberries: If fresh blackberries are not available, you can use frozen blackberries. Be sure to thaw them completely and drain off any excess liquid before using them in the filling.
- Add Other Berries: Feel free to add other berries to the filling, such as raspberries, blueberries, or strawberries. A mixed berry filling would be delicious!
- Substitute Nuts: If you don’t have pistachios, you can substitute other nuts, such as almonds, pecans, or walnuts.
- Make it Gluten-Free: To make these bars gluten-free, use a gluten-free all-purpose flour blend in both the crust and the crumble topping.
- Add a Hint of Spice: For a little extra flavor, add a pinch of cinnamon or nutmeg to the crumble topping.
- Storage: Store the blackberry pistachio dream bars in an airtight container at room temperature for up to 3 days, or in the refrigerator for up to 5 days.
- Freezing: These bars can be frozen for up to 2 months. Wrap them tightly in plastic wrap and then place them in a freezer-safe bag or container. Thaw them completely before serving.
Enjoy your delicious Blackberry Pistachio Dream Bars!
Conclusion:
And there you have it! These Blackberry Pistachio Dream Bars are more than just a dessert; they’re an experience. The vibrant burst of blackberry, the satisfying crunch of pistachios, and the creamy, dreamy filling all come together in perfect harmony. I truly believe this recipe is a must-try for anyone looking to impress, indulge, or simply treat themselves to something special. The combination of flavors and textures is simply irresistible, and the relatively simple preparation makes it accessible even for beginner bakers.
What makes these bars so special? It’s the unexpected pairing of sweet and tart, the richness balanced by the nutty crunch, and the overall feeling of pure decadence. Forget those store-bought treats filled with artificial flavors and preservatives. These homemade bars are bursting with fresh, natural goodness that you can taste in every single bite. Plus, the beautiful presentation makes them perfect for any occasion, from a casual afternoon tea to a sophisticated dinner party.
But the best part? You can easily customize these bars to suit your own preferences! Feeling adventurous? Try adding a hint of lemon zest to the filling for an extra zing. Or, if you’re a chocolate lover, drizzle some melted dark chocolate over the top for an even more indulgent treat. For a vegan version, you can substitute the butter with a plant-based alternative and use a vegan cream cheese substitute for the filling. The possibilities are endless!
Serving Suggestions and Variations:
* Serve these bars chilled or at room temperature.
* Pair them with a scoop of vanilla ice cream or a dollop of whipped cream for an extra special treat.
* Dust them with powdered sugar for a beautiful presentation.
* Cut them into smaller squares for bite-sized treats.
* Add a layer of raspberry jam between the crust and the filling for an extra fruity flavor.
* Experiment with different nuts, such as almonds or walnuts, in place of the pistachios.
* For a gluten-free version, use a gluten-free flour blend for the crust.
I’m so confident that you’ll love these Blackberry Pistachio Dream Bars that I urge you to give them a try. Don’t be intimidated by the name; the recipe is surprisingly straightforward, and the results are well worth the effort. Imagine the look on your friends’ and family’s faces when you present them with these stunning and delicious bars. You’ll be the star baker in no time!
I’ve poured my heart and soul into perfecting this recipe, and I’m so excited to share it with you. Now it’s your turn to get creative in the kitchen and experience the magic of these Blackberry Pistachio Dream Bars for yourself.
And most importantly, I want to hear about your experience! Did you make any modifications to the recipe? What did your friends and family think? Share your photos and stories in the comments below. I can’t wait to see your creations and hear all about your baking adventures. Let’s spread the joy of baking and inspire others to try this amazing recipe. Happy baking, and enjoy every single bite of these delightful Blackberry Pistachio Dream Bars!
Blackberry Pistachio Dream Bars: A Delicious & Easy Recipe
Buttery shortbread bars filled with a sweet and tart blackberry filling and topped with a crunchy pistachio crumble.
Ingredients
- 1 ½ cups all-purpose flour
- ½ cup (1 stick) unsalted butter, cold and cubed
- ½ cup granulated sugar
- ¼ teaspoon salt
- 1 large egg yolk
- 2-3 tablespoons ice water
- 4 cups fresh blackberries
- ½ cup granulated sugar
- 2 tablespoons lemon juice
- 2 tablespoons cornstarch
- 1 teaspoon vanilla extract
- ¾ cup all-purpose flour
- ½ cup granulated sugar
- ½ cup (1 stick) unsalted butter, cold and cubed
- ½ cup shelled, unsalted pistachios, coarsely chopped
- ¼ teaspoon salt
- Powdered sugar, for dusting
Instructions
- In a large bowl, whisk together the flour, sugar, and salt.
- Cut in the cold, cubed butter using a pastry blender or your fingertips until the mixture resembles coarse crumbs.
- In a small bowl, whisk the egg yolk with 2 tablespoons of ice water. Pour this mixture over the flour and butter mixture.
- Gently mix until the dough just comes together. Add the remaining tablespoon of ice water if needed. Do not overmix.
- Flatten the dough into a disc, wrap in plastic wrap, and refrigerate for at least 30 minutes (or up to an hour).
- Preheat oven to 375°F (190°C). Grease and flour a 9×13 inch baking pan (or line with parchment paper).
- Press the dough evenly into the bottom of the prepared pan.
- Prick the crust all over with a fork. Bake for 15-20 minutes, or until lightly golden brown. Let cool slightly.
- In a medium saucepan, combine the blackberries and sugar.
- Cook over medium heat, stirring occasionally, until the blackberries release their juices and the mixture begins to simmer (5-7 minutes).
- Stir in the lemon juice.
- In a small bowl, whisk together the cornstarch and 2 tablespoons of cold water. Pour the cornstarch slurry into the blackberry mixture and stir constantly until the filling thickens (1-2 minutes).
- Remove from heat and stir in the vanilla extract.
- Let cool slightly before pouring over the pre-baked crust.
- In a medium bowl, whisk together the flour, sugar, and salt.
- Cut in the cold, cubed butter using a pastry blender or your fingertips until the mixture resembles coarse crumbs.
- Stir in the coarsely chopped pistachios.
- Toss everything together until well combined.
- Pour the slightly cooled blackberry filling evenly over the pre-baked crust.
- Sprinkle the pistachio crumble topping evenly over the blackberry filling.
- Bake in the preheated oven for 30-35 minutes, or until the crumble topping is golden brown and the blackberry filling is bubbly.
- Cool completely in the pan before cutting.
- Cut into squares or rectangles.
- Dust with powdered sugar (optional).
Notes
- Use cold butter for both the crust and crumble topping for best results.
- Don’t overmix the crust dough to avoid a tough crust.
- Chilling the crust is essential to prevent shrinking during baking.
- If using frozen blackberries, thaw and drain excess liquid before using.
- Store in an airtight container at room temperature for up to 3 days, or in the refrigerator for up to 5 days.
- Can be frozen for up to 2 months. Wrap tightly in plastic wrap and then place in a freezer-safe bag or container. Thaw completely before serving.
- Variations: Add other berries, substitute nuts, add a pinch of cinnamon or nutmeg to the crumble topping, or make it gluten-free by using a gluten-free all-purpose flour blend.

