Thanksgiving Stuffing Balls are the ultimate solution for anyone who loves the crispy edges and savory flavors of traditional stuffing but wishes it were just a little easier to serve – and enjoy! If you’ve ever found yourself meticulously scooping stuffing, trying to get that perfect ratio of moist interior to golden-brown exterior, then get ready for a game-changer. I’ve perfected a recipe that takes all the deliciousness of a classic Thanksgiving side and transforms it into individual, perfectly portioned spheres of joy.
Stuffing, in its various forms, has been a cornerstone of holiday meals for centuries, evolving from simple bread fillings to the rich, herb-infused concoction we cherish today. While the historical roots of stuffing are deep, these convenient balls represent a delightful modern evolution, solving the age-old dilemma of serving a beautiful, cohesive side dish. You’ll find that everyone at your table will adore these.
What makes these so incredibly popular? For starters, every single bite offers that ideal combination of a satisfyingly crisp crust and a wonderfully moist, flavorful interior – no more fighting over the corner pieces! They are incredibly easy to make ahead, simplifying your busy holiday schedule, and just as simple to serve as a stunning appetizer or a fuss-free side dish. Whether you’re looking to streamline your holiday meal prep or simply offer a unique twist on a beloved side, these Thanksgiving Stuffing Balls are guaranteed to be a hit, bringing smiles and deliciousness to your festive spread.

Ingredients:
- For the Bread Base:
- 1 (16-ounce) loaf day-old sturdy white bread or sourdough bread, cut into 1/2 to 3/4-inch cubes (about 10-12 cups) – I find that a good, sturdy bread holds its shape better, which is crucial for perfect Thanksgiving Stuffing Balls.
- Aromatics and Vegetables:
- 1 cup (2 sticks) unsalted butter, plus more for greasing
- 2 large yellow onions, finely diced
- 4 celery stalks, finely diced
- 2 large Granny Smith apples, peeled, cored, and finely diced (optional, but they add a lovely subtle sweetness and moisture)
- 8 ounces cremini or button mushrooms, thinly sliced (optional, for an earthy depth)
- 4 cloves garlic, minced
- Broth and Binders:
- 4 cups (32 ounces) low-sodium chicken or vegetable broth, plus more as needed
- 2 large eggs, lightly beaten
- Fresh Herbs and Seasonings:
- 1/2 cup fresh flat-leaf parsley, finely chopped
- 1/4 cup fresh sage, finely chopped
- 2 tablespoons fresh thyme leaves, picked and finely chopped
- 1 tablespoon fresh rosemary, finely chopped (optional, use sparingly)
- 1 teaspoon salt, or to taste
- 1/2 teaspoon freshly ground black pepper, or to taste
- 1/4 teaspoon ground nutmeg (a secret ingredient for warmth!)
- Pinch of cayenne pepper (for a very subtle kick, optional)
- Optional Mix-ins (for extra richness or flavor):
- 1 cup cooked crumbled sausage (breakfast sausage or Italian sausage works wonderfully)
- 1 cup toasted pecans or walnuts, roughly chopped
- 1/2 cup dried cranberries or cherries
Preparing the Bread Base for Your Thanksgiving Stuffing Balls
-
Cube and Dry Your Bread:
The foundation of truly exceptional Thanksgiving Stuffing Balls begins with the bread. You’ll want about 10-12 cups of cubed bread. I usually use a day-old sturdy white bread or sourdough, as these hold their shape wonderfully and absorb moisture without becoming mushy. Cut your chosen bread into uniform 1/2 to 3/4-inch cubes. Uniformity is key here for even drying and baking. Once cubed, spread the bread out in a single layer on two large baking sheets. This drying step is absolutely critical! It allows the bread to soak up all the flavorful liquids later without turning soggy. If your bread isn’t already day-old and slightly stale, you can dry it out in a low oven. Preheat your oven to 250°F (120°C) and bake the bread cubes for about 20-30 minutes, tossing them once halfway through, until they are dried out and lightly golden, but not toasted or crispy like croutons. You’re aiming for firm, slightly brittle cubes. Once dried, remove them from the oven and let them cool completely on the baking sheets. This drying process ensures your Thanksgiving Stuffing Balls will have that perfect texture – moist on the inside, slightly crisp on the outside – rather than a heavy, dense interior.
Sautéing the Aromatics and Building Flavor
-
Melt the Butter and Sauté the Onions and Celery:
In a very large skillet or Dutch oven, melt 1 cup (2 sticks) of unsalted butter over medium heat. Once the butter is shimmering, add the finely diced onions and celery. This step is where the magic really begins to happen, as these vegetables form the aromatic backbone of our Thanksgiving Stuffing Balls. Cook them gently, stirring occasionally, for about 8-10 minutes, or until they have softened considerably and become translucent. You don’t want them browned, just tender and sweet. The slow sautéing releases their natural sugars and creates a deeply flavorful base.
-
Incorporate Optional Ingredients:
If you’re using optional ingredients like diced apples or sliced mushrooms, now is the time to add them to the skillet with the softened onions and celery. Continue to cook for another 5-7 minutes. The apples will soften and release some of their tart-sweet juices, while the mushrooms will cook down and deepen in color, adding an earthy umami note that really elevates the stuffing. If using crumbled sausage, you’ll want to cook that separately until browned and drain any excess fat before adding it to the skillet with the vegetables for the last few minutes.
-
Add Garlic and Fresh Herbs:
Once your primary aromatics are tender, add the minced garlic to the skillet. Cook for just 1 minute more, stirring constantly, until fragrant. Be careful not to burn the garlic, as it can turn bitter very quickly. Immediately after, stir in your fresh chopped parsley, sage, thyme, and optional rosemary. Cooking the fresh herbs for a minute or two allows their essential oils to release and infuse the butter and vegetables with their vibrant flavors, intensifying their impact on the finished Thanksgiving Stuffing Balls.
-
Season and Deglaze:
Season the vegetable mixture with salt, black pepper, nutmeg, and a pinch of cayenne pepper if using. Stir well to combine. Pour in about 2 cups of the chicken or vegetable broth. Bring the mixture to a gentle simmer, scraping up any browned bits from the bottom of the pan – this is called deglazing, and it adds incredible depth of flavor. Let it simmer for 2-3 minutes to allow the flavors to meld. Remove the skillet from the heat.
Combining and Forming the Thanksgiving Stuffing Balls Mixture
-
Combine Wet and Dry Ingredients:
Transfer the dried bread cubes into a very large mixing bowl. Pour the hot vegetable and broth mixture over the bread cubes. Using a large spoon or your hands (once it’s cool enough to handle), gently toss the bread cubes with the wet ingredients until they are evenly coated. Be careful not to mash the bread; you want to preserve some of its structure. The heat from the mixture will help the bread absorb the liquid.
-
Incorporate Eggs and Remaining Broth:
In a separate small bowl, whisk the 2 lightly beaten eggs with the remaining 2 cups of broth. Pour this mixture over the bread and vegetable concoction. Gently fold everything together again. The eggs act as a binder, helping the Thanksgiving Stuffing Balls hold their shape during baking.
-
Adjust Moisture and Taste:
At this stage, it’s crucial to assess the moisture level. The bread should be thoroughly moistened but not swimming in liquid. It should feel like a dense, moldable dough. If the mixture seems too dry, add more broth, 1/4 cup at a time, mixing well after each addition, until you reach the desired consistency. Conversely, if it feels too wet or mushy, you can add a handful or two of extra dried bread cubes to absorb excess liquid. Taste the mixture and adjust seasonings (salt, pepper, herbs) as needed. Remember, flavors will mellow slightly during baking. If you’re using any optional mix-ins like toasted pecans or dried cranberries, fold them in now.
-
Let the Mixture Rest:
Cover the bowl and let the stuffing mixture rest for at least 15-20 minutes at room temperature. This resting period allows the bread to fully absorb all the liquids and flavors, resulting in a more cohesive and uniformly moist stuffing. It also gives the flavors a chance to really get to know each other.
-
Form the Thanksgiving Stuffing Balls:
Lightly grease your hands with a little butter or cooking spray. Scoop out portions of the stuffing mixture and gently roll them into compact balls, roughly 1 1/2 to 2 inches in diameter. The size is important here; too small, and they might dry out; too large, and they might not cook through evenly. You’re aiming for a consistent size for even baking. As you form each ball, give it a gentle squeeze to ensure it holds together well. Arrange the formed Thanksgiving Stuffing Balls on the prepared baking sheets, leaving a little space between each one to allow for air circulation and even browning. If you want a slightly crispier exterior, you can brush the tops of the balls with a little melted butter at this point.
Baking Your Perfect Thanksgiving Stuffing Balls
-
Preheat Your Oven:
Preheat your oven to 375°F (190°C). While the oven is heating, lightly grease two large baking sheets or line them with parchment paper. This will prevent your delicious Thanksgiving Stuffing Balls from sticking and make cleanup a breeze.
-
Bake the Stuffing Balls:
Place the baking sheets with your formed stuffing balls into the preheated oven. Bake for 25-35 minutes, rotating the baking sheets halfway through the cooking time, until the balls are golden brown and lightly crisp on the outside, and heated through to the center. The exact baking time will depend on the size of your balls and your oven’s calibration. If you prefer a softer texture, you can cover the baking sheets loosely with foil for the first 15-20 minutes, then uncover for the remaining time to achieve browning. You can also bake these in a large baking dish, spread out, for a more traditional casserole-style stuffing, but the individual balls really shine for presentation and crispy edges.
-
Check for Doneness:
To ensure your Thanksgiving Stuffing Balls are perfectly cooked, you can insert an instant-read thermometer into the center of one. It should register at least 165°F (74°C). Alternatively, cut one open to check that the center is moist and hot, with no raw bread dough visible. They should be tender and aromatic throughout.
-
Optional Finishing Touch:
For an extra golden and slightly crispier finish, you can turn on the broiler for the last 2-3 minutes of cooking. Keep a very close eye on them, as they can go from perfectly golden to burnt in a flash! This adds a beautiful texture that contrasts wonderfully with the moist interior.
Serving and Storing Your Delicious Thanksgiving Stuffing Balls
-
Rest Before Serving:
Once baked, remove the Thanksgiving Stuffing Balls from the oven and let them rest on the baking sheets for 5-10 minutes. This brief resting period allows them to firm up slightly and makes them easier to handle without crumbling.
-
Serve Warm:
These delightful little spheres are best served warm, straight from the oven. Arrange them artfully on a serving platter. They make a fantastic individual portion side dish, perfect for holiday gatherings, especially if you’re looking for an elegant way to serve stuffing. They’re also perfect for portion control!
-
Storage Instructions:
Leftover Thanksgiving Stuffing Balls can be stored in an airtight container in the refrigerator for up to 3-4 days. They also freeze beautifully! Once completely cooled, arrange them in a single layer on a baking sheet and freeze until solid (this prevents them from sticking together). Then transfer them to a freezer-safe bag or container for up to 2-3 months. Label with the date for easy tracking.
-
Reheating Tips:
To reheat refrigerated stuffing balls, place them on a baking sheet and warm them in a 300°F (150°C) oven for about 15-20 minutes, or until heated through. If reheating from frozen, you can bake them directly from frozen at 350°F (175°C) for 25-35 minutes, or until hot in the center, covering loosely with foil if they start to brown too much. A quick reheat in the microwave is also an option for a single serving, though it may not yield the same crispy exterior. These Thanksgiving Stuffing Balls are truly versatile and delicious even when reheated!

Conclusion:
I truly hope you’re as excited about this recipe as I am! We’ve journeyed through the steps of creating something truly special, a dish that transcends the ordinary and elevates any meal it graces. What makes this recipe a definite must-try, in my humble opinion, is its unparalleled combination of classic comfort and modern convenience. Gone are the days of dry, crumbly stuffing or the logistical nightmare of serving a large, unwieldy casserole at a bustling family gathering. This method ensures every single bite is perfectly moist, packed with incredible flavor, and boasts that delightful golden-brown exterior everyone craves. It’s a perfect solution for those who love the traditional flavors but want a more refined and manageable presentation.
Imagine the smiles around your table as guests discover these perfectly portioned, incredibly delicious morsels. It’s a game-changer, not just for the holiday season but for any time you want to impress with minimal fuss. The thoughtful blend of aromatic herbs, savory broth, and tender bread creates a symphony of taste that feels both familiar and excitingly new. It’s the kind of dish that garners compliments and requests for the recipe, making you feel like a culinary superstar. From the satisfying aroma that fills your kitchen as they bake to the sheer joy of tasting that first savory bite, this recipe delivers on every front. It’s more than just a side dish; it’s a centerpiece of comfort and flavor, simplifying your serving while maximizing enjoyment. And let’s be honest, for the ultimate festive meal, these Thanksgiving Stuffing Balls are truly unparalleled, offering a unique twist on a beloved classic that everyone will appreciate. They provide all the nostalgic flavors we adore, presented in an elegant and easy-to-serve format, making them an indispensable part of your holiday spread.
Serving Suggestions & Creative Variations
While these delectable spheres are utterly fantastic straight out of the oven, perhaps drizzled with a rich homemade gravy and nestled alongside your perfectly roasted turkey or chicken, their versatility extends far beyond that classic presentation. For a delightful appetizer, consider serving them on their own with a cranberry-orange dipping sauce – a vibrant and unexpected twist that will surely pique your guests’ interest. They also make an incredible accompaniment to a simple weeknight roast pork or even a sophisticated vegetarian main like a mushroom Wellington.
But why stop there? The beauty of this recipe lies in its adaptability. Feel free to experiment with different aromatic herbs; a mix of fresh sage, rosemary, and thyme adds a robust, earthy depth that’s simply divine. For a touch of sweetness and tartness, fold in some dried cranberries or finely diced apples into the mixture before forming the balls. If you’re a fan of a richer, more savory profile, sautéed mushrooms, crumbled sausage, or toasted pecans can be wonderful additions. For a cheesy delight, incorporate a handful of shredded Gruyère or sharp cheddar cheese into the mix; the cheese will melt beautifully, adding an extra layer of decadence. If you’re catering to dietary restrictions, simply swap out chicken broth for a good quality vegetable broth, and use a plant-based butter alternative to make them vegetarian or even vegan-friendly. You can also make these ahead of time by preparing the mixture, forming the balls, and refrigerating them overnight, baking just before serving. For longer storage, flash freeze the baked balls and then transfer to a freezer-safe bag, reheating gently when ready to enjoy. The possibilities are truly endless, allowing you to tailor this incredible recipe to suit any occasion or preference.
Your Culinary Adventure Awaits!
Now that you’re armed with all the tips, tricks, and inspiration, I wholeheartedly encourage you to roll up your sleeves and give this recipe a try. You won’t regret it, I promise! There’s a profound satisfaction that comes from creating something so delicious and seeing the joy it brings to those you share it with. This isn’t just about following instructions; it’s about embarking on a little culinary adventure and discovering how simple it can be to elevate your meals. I am genuinely excited for you to experience the ease, flavor, and sheer delight of these homemade treats.
Once you’ve whipped up your batch, I would absolutely love to hear about your experience! Did you stick to the classic recipe, or did you venture into one of the exciting variations? What did your family and friends think? Please, share your stories, your photos, and any brilliant modifications you came up with in the comments section below. Your insights not only inspire me but also help others in our cooking community. Let’s spread the joy of perfectly cooked, effortlessly served, and unbelievably tasty stuffing. Happy cooking, and I can’t wait to see your wonderful creations!
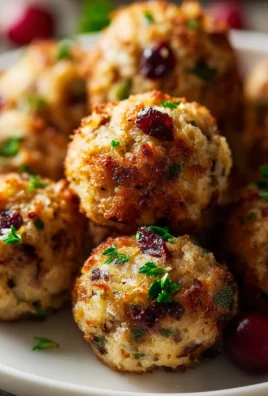
Thanksgiving Stuffing Balls
These Thanksgiving Stuffing Balls transform classic stuffing into individual, perfectly portioned spheres. Enjoy a satisfyingly crisp crust and a wonderfully moist, flavorful interior in every bite. Easy to prepare ahead and serve as a stunning appetizer or fuss-free side dish, they’re guaranteed to be a hit.
Ingredients
Instructions
Important Information
Nutrition Facts (Per Serving)
It is important to consider this information as approximate and not to use it as definitive health advice.
Allergy Information
Please check ingredients for potential allergens and consult a health professional if in doubt.