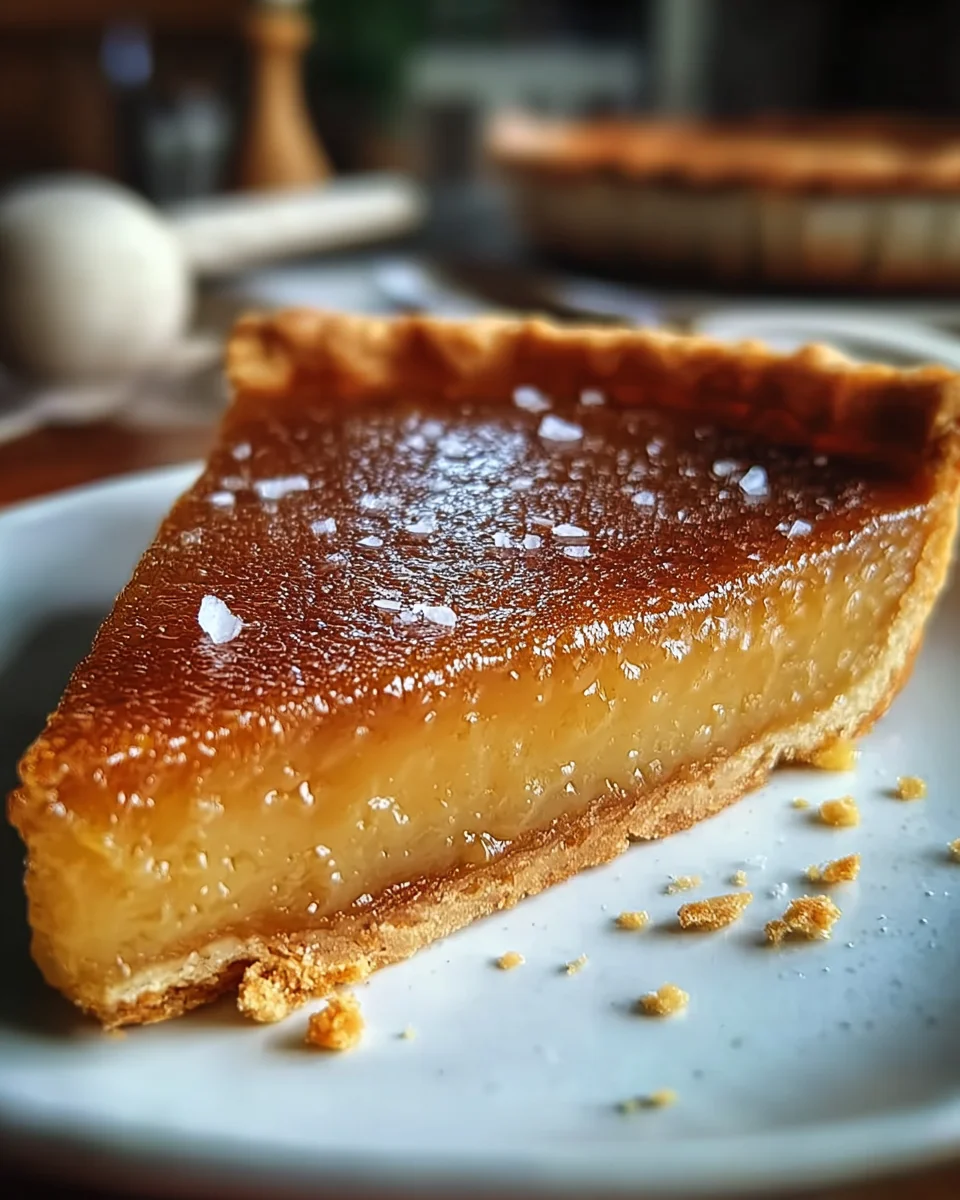
Salted Honey Pie—just the name itself conjures images of a dessert that promises something truly extraordinary. Have you ever encountered a treat that perfectly balances the familiar comfort of a classic with an unexpected, sophisticated twist? I’m thrilled to share a recipe that does precisely that, captivating palates with its unique blend of rich sweetness and a subtle, but essential, savory edge.
Why You’ll Fall in Love with Salted Honey Pie
While the tradition of baking with honey dates back centuries, evoking a timeless sense of rustic charm and wholesome goodness, the ingenious addition of salt elevates this humble ingredient to an art form. It’s not just a pie; it’s an experience. People adore this dish for its incredible depth of flavor—the creamy, almost custardy filling, infused with the golden warmth of honey, is brilliantly cut by the delicate sprinkle of sea salt. This creates a mesmerizing push-and-pull on your taste buds, ensuring every bite is as intriguing as it is satisfying. The flaky, buttery crust serves as the perfect vessel for this luxurious filling, making Salted Honey Pie a truly unforgettable dessert that feels both comforting and incredibly gourmet.

Ingredients:
-
For the All-Butter Pie Crust (or one 9-inch store-bought crust):
- 2 ½ cups (300g) all-purpose flour, plus more for dusting
- 1 teaspoon granulated sugar
- 1 teaspoon fine sea salt
- 1 cup (226g or 2 sticks) unsalted butter, very cold and cut into ½-inch cubes
- ½ cup (120ml) ice water, plus an extra tablespoon or two if needed
-
For the Salted Honey Pie Filling:
- 1 cup (340g) high-quality honey (I love using a local wildflower or clover honey for its nuanced flavor, which truly shines in this Salted Honey Pie)
- ½ cup (113g or 1 stick) unsalted butter, melted and cooled slightly
- ¾ cup (150g) granulated sugar
- ¼ cup (30g) all-purpose flour
- ½ teaspoon fine sea salt (in addition to the flaky salt for topping)
- 4 large eggs, at room temperature
- ½ cup (120ml) heavy cream, at room temperature
- 1 teaspoon vanilla extract
-
For Finishing:
- 1-2 teaspoons flaky sea salt (such as Maldon), for sprinkling
Preparing the Perfect Pie Crust for Your Salted Honey Pie
- Combine Dry Ingredients: In a large mixing bowl, or the bowl of a food processor, whisk together the 2 ½ cups of all-purpose flour, 1 teaspoon of granulated sugar, and 1 teaspoon of fine sea salt. This initial step ensures that all the dry ingredients are evenly distributed, laying the foundation for a perfectly seasoned crust that will complement the rich, sweet, and complex filling of your upcoming Salted Honey Pie. An even distribution of salt helps to enhance the butteriness of the crust itself, providing a subtle savory note that pairs beautifully with the final dish.
- Cut in the Butter: If using a food processor, add the very cold, cubed unsalted butter to the dry ingredients and pulse about 10-12 times until the butter is the size of small peas, with some larger pieces (about the size of a hazelnut) still visible. These larger pieces are absolutely crucial because they create pockets of steam during baking, which in turn results in that desirable flaky, tender crust that is so essential for a truly exceptional pie. If you’re opting for the traditional hand method, use a pastry blender or your fingertips to quickly cut the butter into the flour mixture until you achieve the same pea-sized consistency. The key here is to work quickly and keep the butter as cold as possible; warm butter will melt into the flour, leading to a tough, rather than flaky, crust. Avoid overworking the mixture at this stage.
- Add Ice Water: Gradually add the ½ cup of ice water, a tablespoon at a time, pulsing in the food processor or mixing with a fork, until the dough just begins to come together. The amount of water needed can vary slightly based on the humidity in your kitchen and the specific flour you’re using, so pay close attention to the dough’s consistency. You want the dough to be moist enough to hold together when squeezed gently, but it should not feel sticky or wet. You might not need all the water, or you might need an extra tablespoon or two. The goal is to hydrate the flour just enough to form a cohesive dough without over-developing the gluten, which would result in a tough crust. The cold water also helps to keep the butter firm, further contributing to the flakiness of the crust for your ultimate Salted Honey Pie experience.
- Form and Chill the Dough: Once the dough comes together, turn it out onto a lightly floured surface. Gently gather it into a disk shape. It’s incredibly important to avoid overworking the dough at this stage; excessive kneading will develop the gluten too much, which makes for a tough, chewy crust rather than the tender, flaky one we’re aiming for. Wrap the disk tightly in plastic wrap and refrigerate for at least 30 minutes, or ideally for 1-2 hours, or even up to 2 days. Chilling the dough is an absolutely vital step that cannot be skipped. It allows the gluten to relax, which makes the dough significantly easier to roll out without shrinking back. Furthermore, it solidifies the butter, ensuring that beautiful flaky texture once baked, providing a stable foundation for your creamy Salted Honey Pie filling.
- Roll Out the Dough: On a lightly floured surface, unwrap your chilled dough and roll it out into a 12-inch circle, aiming for a thickness of approximately ⅛-inch. To achieve an even thickness and prevent sticking, work from the center outwards, rotating the dough frequently. If the dough starts to crack or become difficult to roll, it might be getting too warm or the gluten is tightening up. In such a case, gently patch any tears, cover it loosely, and return it to the fridge for 10-15 minutes to chill again. Patience here will truly pay off with a well-formed crust.
- Transfer to Pie Plate: Carefully transfer the rolled-out dough to a standard 9-inch pie plate. The easiest way to do this is to gently roll the dough around your rolling pin, then unroll it smoothly over the pie plate. Alternatively, you can fold the dough into quarters, carefully lift it into the plate, and then unfold it. Gently press the dough into the bottom and up the sides of the plate, making sure there are no air bubbles trapped underneath – these can cause the crust to puff up unevenly during baking. Trim any excess dough around the edges, leaving about a ½-inch overhang.
- Crimp the Edges: Fold the ½-inch overhang under itself, creating a thicker, sturdy edge that rests neatly on the rim of the pie plate. Then, crimp the edges decoratively using your fingers or a fork. This not only makes your pie look beautifully professional but also serves a practical purpose: it helps to contain the liquid filling of your Salted Honey Pie and prevents the crust from shrinking too much during the baking process. There are many ways to crimp; find a style you enjoy and that makes you happy!
- Chill Again: Once your crust is snugly in its pie plate and beautifully crimped, place it back into the refrigerator for at least 30 minutes. This second chill is another critical step in ensuring a perfect crust. It further helps to prevent the crust from shrinking in the oven and sets those wonderfully crimped edges firmly in place, so they hold their shape during baking. For an even sturdier crust, or if you’re short on time, you can even pop it into the freezer for 15 minutes before baking.
- Preheat Oven and Prepare for Blind Baking: While the crust is having its final chill, preheat your oven to a robust 400°F (200°C). This higher initial temperature helps the crust to set quickly. Line the chilled pie crust with a piece of parchment paper or aluminum foil, making sure it extends up and over the sides of the crimped edge. Then, fill the lined crust with pie weights, dried beans, or uncooked rice. These weights are essential; they provide pressure that prevents the bottom of the crust from bubbling up and the sides from collapsing or shrinking during the blind baking process.
- Blind Bake the Crust: Bake the crust in your preheated oven for 15 minutes with the weights in. This initial bake, commonly known as blind baking or pre-baking, is absolutely essential for a custard-based pie like our Salted Honey Pie. It helps to dry out the crust, preventing it from becoming soggy once the wet filling is added. After 15 minutes, carefully remove the parchment paper and the pie weights. At this point, the crust should look somewhat dry and set. Prick the bottom of the crust all over with a fork; this helps steam escape and prevents bubbles from forming.
- Continue Blind Baking: Return the crust to the oven (without weights) and bake for another 8-10 minutes, or until the crust is lightly golden brown, looks dry, and feels firm to the touch. Keep a close eye on it during this stage to prevent it from over-browning, especially around the edges. If the edges are browning too quickly, you can loosely tent them with thin strips of aluminum foil. Once baked, remove the crust from the oven and let it cool completely on a wire rack while you prepare the glorious filling. Once the crust is done and cooling, remember to reduce your oven temperature to 350°F (175°C) for the subsequent baking of the filled pie.
Crafting the Irresistible Salted Honey Pie Filling
- Melt the Butter and Honey: In a medium saucepan over low heat, gently melt the 1 cup of high-quality honey and ½ cup of unsalted butter together. Stir occasionally with a whisk or spoon until the butter is fully melted and the mixture is smooth, homogenous, and beautifully combined. It’s important to keep the heat low and be careful not to boil the mixture; we just want it warmed enough to combine thoroughly. Remove the saucepan from the heat and allow the honey-butter mixture to cool slightly for about 5-10 minutes. This cooling step is crucial, as it prevents the mixture from cooking the eggs when they are added later, which is paramount for achieving a perfectly smooth and creamy custard filling. The choice of honey here will profoundly impact the final flavor profile of your Salted Honey Pie, so select one with a flavor you genuinely adore – local wildflower or a robust clover honey are always excellent choices.
- Whisk Dry Ingredients: In a large mixing bowl, whisk together the ¾ cup of granulated sugar, ¼ cup of all-purpose flour, and ½ teaspoon of fine sea salt. Whisking these dry ingredients very well at this stage ensures that there are no lumps in your final filling, contributing to that desirable silky-smooth texture. The flour in this mixture plays a vital role as a thickening agent and stabilizer, helping to set the pie and preventing it from becoming too runny or having an unset center. The additional fine sea salt here enhances the overall flavor balance, cutting through the sweetness of the honey even before the final flaky salt topping is applied.
- Add Wet Ingredients: To the bowl containing your whisked dry ingredients, add the 4 large eggs (ensuring they are at room temperature, which helps them incorporate more smoothly into the mixture), ½ cup of heavy cream (also at room temperature for better emulsification), and 1 teaspoon of pure vanilla extract. Whisk everything together thoroughly and vigorously until the mixture is completely smooth and uniform. This might take a couple of minutes of consistent whisking to ensure there are absolutely no streaks of egg white or unincorporated cream. A well-whisked base leads to a perfectly uniform custard.
- Combine Honey Mixture with Egg Mixture: Now, this is a critical step for a smooth custard. Gradually pour the slightly cooled honey-butter mixture into the egg mixture, whisking continuously and vigorously as you pour. Pouring slowly and whisking constantly prevents the eggs from scrambling due to residual heat from the honey mixture and ensures a perfectly emulsified, smooth, and lump-free filling for your exquisite Salted Honey Pie. Continue whisking until everything is fully incorporated and the filling is uniform in color and texture, without any separation.
- Strain the Filling (Optional, but Recommended): For an extra-silky smooth and truly professional-grade custard filling, I highly recommend passing the entire mixture through a fine-mesh sieve into a clean bowl or a large liquid measuring cup. This step effectively removes any tiny bits of cooked egg that might have formed despite your careful whisking, any unmixed flour granules, or other small impurities. It guarantees a luxuriously smooth and uniform custard texture in your finished Salted Honey Pie. It’s a small extra effort that makes a significant difference in the final sensory experience.
Baking and Finishing Your Delicious Salted Honey Pie
- Pour Filling into Crust: Carefully pour the prepared, silky-smooth Salted Honey Pie filling into the cooled, blind-baked pie crust. The crust should be completely cool before the filling goes in to prevent it from softening prematurely and becoming soggy. If your crust is still warm, the heat can also slightly cook the bottom layer of the filling, which we want to avoid for even baking.
- Bake the Pie: Transfer the pie to your preheated oven, now set at 350°F (175°C). Bake for 40-55 minutes. Baking time can vary significantly depending on your specific oven and the exact thickness of your filling, so it’s absolutely important to keep a close eye on it as it bakes. Avoid opening the oven door too frequently, especially in the first 30 minutes, as sudden temperature drops can cause the custard to crack.
- Check for Doneness: The pie is done when the edges are set and slightly puffed, but the center still has a slight, gentle wobble (like firm Jell-O) when you lightly shake the pie plate. An internal temperature of 175-180°F (79-82°C) in the very center, checked with an instant-read thermometer, is also an excellent indicator of doneness. Be very careful not to overbake, as this can lead to a dry, rubbery, or cracked filling, detracting from the creamy texture of your Salted Honey Pie. If the crust edges start to brown too quickly before the filling is set, you can loosely cover them with strips of aluminum foil to protect them.
- Cool Completely: Once baked to perfection, carefully remove the hot Salted Honey Pie from the oven and place it on a wire rack to cool completely at room temperature. This cooling process will take a significant amount of time, at least 2-3 hours, but ideally, you’ll want to chill it even longer. As the pie cools gradually, the custard filling will continue to set and firm up, transitioning from a warm liquid to a stable, sliceable delight. Resist the urge to slice into it too soon; patience is a virtue when making custard pies!
- Chill for Best Results: For the absolute best texture, cleanest slices, and optimal flavor development, transfer the completely cooled pie to the refrigerator and chill for at least 4 hours, or preferably overnight. Chilling allows the custard to fully set and firm up to its ideal consistency, creating those clean, beautiful slices that are a hallmark of a well-made pie. This extended chilling also allows the distinct honey flavor, the subtle richness of the butter, and the delicate balance of salt to fully meld and deepen, transforming your pie into an unforgettable dessert experience.
- Sprinkle with Flaky Sea Salt and Serve: Just before you are ready to serve your magnificent Salted Honey Pie, generously sprinkle 1-2 teaspoons of flaky sea salt (such as Maldon or another high-quality brand) over the top of the chilled pie. This finishing touch is not merely decorative; it provides that essential, delightful burst of salinity that perfectly balances and enhances the intense sweetness of the honey and the richness of the custard. Each bite becomes a harmonious symphony of sweet and salty, making this unique dessert truly sublime. Serve slices plain, or for an extra touch of indulgence, add a dollop of fresh, lightly sweetened whipped cream. Leftovers, if there are any, can be stored, covered, in the refrigerator for up to 3-4 days. Prepare to enjoy the utterly unforgettable experience of this unique and deeply satisfying dessert!
Conclusion:
I truly hope you’re as excited about this incredible dessert as I am! If there’s one recipe you absolutely must add to your baking repertoire this year, it’s this one. This isn’t just any pie; it’s a revelation, a perfect symphony of flavors that will undoubtedly become a treasured favorite in your household.
What makes this particular pie an absolute standout, a non-negotiable addition to your baking adventures? For starters, it’s the sheer genius of its flavor profile. We’re talking about that glorious moment when the rich, golden sweetness of honey meets the subtle, intriguing pop of sea salt, all cradled within a silken, custardy filling. It’s a delicate dance on the palate, perfectly balanced, never cloyingly sweet, but always deeply satisfying. Each bite of this phenomenal Salted Honey Pie offers a complex depth that simple desserts can only dream of. It’s elegant enough for a special occasion, yet comforting enough for a cozy evening in. Trust me when I say, once you experience the smooth, almost caramel-like texture and that unforgettable sweet-and-salty interplay, you’ll understand why it quickly becomes a legend. It’s a pie that transcends the ordinary, offering a sophisticated twist on classic comfort. The way the filling sets to a perfect, almost translucent amber, shimmering with promise, is visually stunning, making it a showstopper at any gathering. Furthermore, despite its gourmet appeal, I’ve designed this recipe to be approachable for bakers of all skill levels, ensuring that everyone can achieve this level of culinary brilliance.
Now, let’s talk about how to elevate your pie experience even further. While absolutely divine on its own, a slice of this pie truly sings when paired with a few thoughtful accompaniments. My personal favorite is a generous dollop of freshly whipped cream, perhaps infused with a hint of vanilla bean or a tiny splash of bourbon for an extra layer of warmth. For those who enjoy a bit of textural contrast, a scoop of good quality vanilla bean ice cream melting slightly over a warm slice is pure bliss. The coolness of the ice cream against the rich, sweet filling is simply heavenly. Don’t forget that final flourish: a tiny sprinkle of flaky sea salt right before serving can really amplify that signature sweet-salty magic, making each bite even more impactful. You could also try a delicate drizzle of warmed honey over the top, or even some candied pecans for a delightful crunch. But why stop there? This recipe is incredibly versatile! Imagine serving this masterpiece in individual ramekins as mini pies for a charming dinner party presentation – perfect for portion control and presentation. For a seasonal twist, consider infusing your honey with a cinnamon stick or a few star anise pods during the warming process, adding subtle spice notes that complement the honey beautifully, especially during the autumn months. A graham cracker crust instead of a traditional pastry crust could also offer a different texture and flavor profile, leaning into a more rustic, homey vibe. And for the adventurous, a tiny whisper of orange zest in the filling can brighten the flavors in an unexpected and delightful way.
My dear bakers, I cannot stress enough how much I encourage you to embark on this delicious journey. This Salted Honey Pie isn’t just a recipe; it’s an experience waiting to unfold in your kitchen. It’s an opportunity to create something truly special, something that will bring smiles and sighs of contentment to everyone who tastes it. Don’t hesitate, don’t overthink it—just dive in! You’ll be so glad you did. Baking is about joy, connection, and the sheer delight of creating something wonderful from simple ingredients, and this pie embodies all of that. Once you’ve whipped up your own perfect pie, I would absolutely love to hear about it! Please, please share your experiences with me. Did you try a variation? What was your favorite part? Did you serve it with ice cream or whipped cream? Share your photos on social media and tag me, or simply drop a comment below. Your feedback, your stories, and your beautiful creations inspire me endlessly. Let’s build a community of Salted Honey Pie lovers together. Happy baking, my friends, and get ready for a dessert that will truly knock your socks off!
Salted Honey Pie
A unique, unforgettable dessert balancing rich, golden honey sweetness with a crucial savory touch of sea salt, all nestled in a flaky, buttery crust. The creamy, custardy filling offers an intriguing flavor depth.
Ingredients
Instructions
Important Information
Nutrition Facts (Per Serving)
It is important to consider this information as approximate and not to use it as definitive health advice.
Allergy Information
Please check ingredients for potential allergens and consult a health professional if in doubt.