Chocolate Cheesecake Brownie Bars are not merely a dessert; they are an extraordinary culinary creation that perfectly marries the fudgy delight of a classic brownie with the rich, tangy creaminess of cheesecake. I am absolutely delighted to share this incredible recipe with you, as these bars represent the ultimate indulgence, offering a harmonious blend of textures and flavors that captivate from the very first bite. While the individual components — brownies and cheesecakes — boast long, cherished histories in their own right, the concept of swirling them together into a convenient bar form is a modern testament to our collective love for comforting, decadent treats.
People adore these bars for countless reasons. Beyond the sheer convenience of a grab-and-go dessert, it’s the symphony of tastes that truly stands out. You get the deep, intense chocolate notes from the brownie base, beautifully complemented by the bright, slightly tart profile of the cheesecake swirl, creating a sophisticated balance that’s incredibly satisfying. The contrast between the dense, chewy brownie and the smooth, velvety cheesecake filling is nothing short of pure bliss. Whether you’re looking for the perfect party treat or a luxurious personal indulgence, these Chocolate Cheesecake Brownie Bars are guaranteed to be a showstopper. I promise, one bite and you’ll understand why they’ve become such a beloved classic in modern baking.

Ingredients:
Oh, get ready, because these Chocolate Cheesecake Brownie Bars are going to be your new obsession! Before we dive into the deliciousness, let’s gather everything we need. Having all your ingredients prepped and ready to go makes the baking process so much smoother and more enjoyable. Trust me, you’ll thank yourself later when you’re not scrambling for that last teaspoon of vanilla!
-
For the Rich Brownie Layer:
- 1 cup (2 sticks or 226g) Unsalted Butter: I like to use unsalted so I can control the salt content precisely. Make sure it’s at room temperature if you’re creaming it, or melted if we’re going that route for a fudgier brownie.
- 1 ½ cups (300g) Granulated Sugar: This is going to give our brownies that lovely sweetness and contribute to their moist texture.
- 4 Large Eggs: Always best at room temperature. They emulsify better with the other ingredients, creating a smoother batter and a more consistent final product.
- 2 teaspoons Pure Vanilla Extract: Don’t skimp on the vanilla! It truly enhances the chocolate flavor and adds a wonderful aromatic depth.
- 1 cup (125g) All-Purpose Flour: Make sure to level your flour. Too much flour can lead to dry, cakey brownies, and we’re definitely aiming for fudgy!
- ¾ cup (75g) Unsweetened Cocoa Powder: For an intense chocolate flavor, I recommend using a good quality Dutch-processed cocoa powder. It makes a world of difference in the depth of flavor for your Chocolate Cheesecake Brownie Bars.
- ½ teaspoon Salt: Salt is crucial in baking! It balances the sweetness and brings out all the other flavors.
- 1 cup (170g) Semi-Sweet Chocolate Chips or Chunks (optional, but highly recommended): These melt into gooey pockets of chocolate goodness, adding an extra layer of decadence to our already amazing Chocolate Cheesecake Brownie Bars.
-
For the Dreamy Cheesecake Filling:
- 16 ounces (2 blocks or 452g) Cream Cheese: It is absolutely vital that your cream cheese is softened to room temperature. This is key to achieving a smooth, lump-free cheesecake filling. If it’s cold, you’ll end up with lumps, no matter how much you beat it!
- ½ cup (100g) Granulated Sugar: Just enough sweetness to complement the tang of the cream cheese without overpowering the chocolate.
- 1 Large Egg: Again, room temperature is best here. It helps bind the cheesecake mixture and adds to the creamy texture.
- 1 teaspoon Pure Vanilla Extract: A beautiful complement to the cream cheese, adding warmth and aroma.
Prepping Your Pan and Oven for Chocolate Cheesecake Brownie Bars
Before we even think about mixing, let’s get our workspace ready! This is a small but mighty step that prevents any baking day mishaps. Trust me, the last thing you want is your gorgeous Chocolate Cheesecake Brownie Bars sticking to the pan!
- Preheat Your Oven: First things first, go ahead and preheat your oven to 350°F (175°C). It’s always best to give your oven ample time to reach and maintain the correct temperature before introducing your baked goods. A properly preheated oven ensures even baking from the very beginning, which is essential for uniform Chocolate Cheesecake Brownie Bars.
- Prepare Your Baking Pan: Grab a 9×13 inch baking pan. For easy removal and clean-up, I always recommend lining it with parchment paper. Cut two strips of parchment paper; one to fit the length of the pan, leaving an overhang on the short sides, and another to fit the width, also leaving an overhang on the long sides. This creates a convenient sling that will allow you to lift the entire batch of Chocolate Cheesecake Brownie Bars out of the pan once they’re cooled. If you only have one roll of parchment, you can simply criss-cross two pieces, ensuring they cover the bottom and sides adequately. Lightly grease the pan before placing the parchment paper down – this helps the parchment stick and stay in place as you pour in the batter.
Crafting the Rich Brownie Layer for Your Chocolate Cheesecake Brownie Bars
Now for the heart of the matter – creating that incredibly fudgy and rich brownie layer that forms the perfect base for our Chocolate Cheesecake Brownie Bars. This isn’t just any brownie; it’s designed to be dense, chewy, and intensely chocolatey, providing a robust contrast to the creamy cheesecake swirl.
- Melt Butter and Chocolate (if using unsweetened chocolate, otherwise just butter): In a large, microwave-safe bowl or a medium saucepan over low heat, gently melt the unsalted butter. If you prefer an even deeper chocolate flavor and aren’t using cocoa powder as your primary chocolate source, you could melt 4 ounces of unsweetened or bittersweet chocolate along with the butter. However, for this recipe, we’re relying on cocoa powder for its intense flavor. So, for now, just melt the butter until it’s completely liquid. Once melted, remove it from the heat and let it cool slightly for a few minutes. You don’t want to cook your eggs in the next step!
- Whisk Wet Ingredients: In a large mixing bowl, combine the slightly cooled melted butter with the granulated sugar. Whisk them together vigorously until they are well combined and the mixture looks smooth and glossy. You’ll notice the sugar starts to dissolve slightly into the butter, creating a beautiful, almost caramel-like base. Now, crack in your four large, room-temperature eggs, one at a time, whisking well after each addition. This process incorporates air and helps create that wonderful chewy texture in our Chocolate Cheesecake Brownie Bars. Finally, stir in the two teaspoons of pure vanilla extract. The mixture should be lightened in color and significantly increased in volume from all that whisking. It should look creamy and luscious, ready for the dry ingredients.
- Combine Dry Ingredients: In a separate medium bowl, whisk together the all-purpose flour, unsweetened cocoa powder, and salt. It’s important to whisk these dry ingredients thoroughly before adding them to the wet mixture. This ensures that the cocoa powder and salt are evenly distributed throughout the flour, preventing pockets of unmixed ingredients in your final brownie batter. This step is crucial for consistent flavor and texture across all your Chocolate Cheesecake Brownie Bars.
- Gently Fold Dry into Wet: Now, add the dry ingredient mixture to the wet ingredient mixture. Using a spatula or wooden spoon, gently fold them together until just combined. This is a crucial step for fudgy brownies. Do not overmix! Overmixing develops the gluten in the flour, which leads to tough, cakey brownies, and we are absolutely aiming for rich, dense, fudgy Chocolate Cheesecake Brownie Bars. Stop mixing as soon as you see no more streaks of dry flour. A few small lumps are perfectly fine and even desirable.
- Stir in Chocolate Chips (Optional, but Delicious): If you’re using semi-sweet chocolate chips or chunks, now is the time to fold them into the batter. This adds an extra layer of gooey chocolate pockets throughout your brownies, making each bite even more satisfying. Just a few gentle folds until they are evenly distributed. This extra burst of chocolate really elevates these Chocolate Cheesecake Brownie Bars.
- Spread Brownie Batter: Pour about two-thirds of this rich, glorious brownie batter into your prepared 9×13 inch baking pan. Use your spatula to spread it evenly across the bottom. Don’t worry about being absolutely perfect, as the cheesecake layer will cover it. Reserve the remaining one-third of the brownie batter for swirling later.
Whipping Up the Dreamy Cheesecake Filling for Chocolate Cheesecake Brownie Bars
Now for the creamy, tangy counterpoint that makes these Chocolate Cheesecake Brownie Bars truly special. This cheesecake layer is designed to be smooth, bright, and perfectly balanced against the intense chocolate of the brownie. Remember, room temperature ingredients are your best friend here!
- Beat Softened Cream Cheese: In a medium-sized mixing bowl, place your two blocks of softened cream cheese. Using an electric mixer (either a stand mixer with a paddle attachment or a hand mixer), beat the cream cheese on medium speed for about 2-3 minutes until it is incredibly smooth and creamy, with no lumps whatsoever. This step is non-negotiable for a silky cheesecake filling. Take your time here; a well-beaten cream cheese base is the foundation of a fantastic cheesecake layer for your Chocolate Cheesecake Brownie Bars. Scrape down the sides of the bowl frequently to ensure everything gets incorporated.
- Add Sugar and Vanilla: Reduce the mixer speed to low. Gradually add the granulated sugar to the cream cheese, beating until it is just combined and the mixture is smooth again. Then, pour in the one teaspoon of pure vanilla extract and mix until just incorporated. The vanilla adds warmth and depth that really brings out the best in the cream cheese. Avoid overmixing once the sugar is in, as this can incorporate too much air, which we don’t want for a dense, rich cheesecake.
- Incorporate the Egg: Finally, add the single large, room-temperature egg to the cream cheese mixture. Beat on low speed until the egg is just combined and no streaks of yolk are visible. Again, do not overmix at this stage! Overmixing eggs in cheesecake can lead to a cracked top when baking, which, while not affecting flavor, isn’t ideal for presentation. We want that beautiful, creamy texture to remain for our Chocolate Cheesecake Brownie Bars. Scrape down the sides of the bowl one last time to ensure everything is perfectly blended. You should now have a wonderfully smooth, slightly thick, and utterly dreamy cheesecake filling.
Assembling and Swirling Your Chocolate Cheesecake Brownie Bars
This is where the magic happens! We’re going to layer these two incredible components – the rich brownie batter and the luscious cheesecake filling – and then create those beautiful, mesmerizing swirls that define these Chocolate Cheesecake Brownie Bars.
- Dollop the Cheesecake Filling: Carefully spoon or dollop the entire cheesecake filling mixture over the brownie batter in the pan. Try to distribute it somewhat evenly across the surface of the brownie layer. Don’t worry about spreading it perfectly smooth just yet; we’re going for rustic elegance here!
- Add Remaining Brownie Batter: Now, take the remaining one-third of your brownie batter. Using a spoon, dollop small spoonfuls of this reserved brownie batter over the cheesecake layer. Aim for random placements, creating pockets of rich chocolate goodness that will peek through the creamy cheesecake.
- Create the Iconic Swirls: This is the fun part! Grab a butter knife or a thin skewer. Gently drag the knife through the cheesecake and brownie layers, creating beautiful swirls. Be careful not to scrape the bottom of the pan; you just want to swirl the top two layers. Go back and forth, up and down, and in circular motions to create an attractive marbled pattern. The more you swirl, the more integrated the layers will become, but I personally love to leave some distinct patches of both brownie and cheesecake for a visually stunning effect in my Chocolate Cheesecake Brownie Bars.
Baking Your Irresistible Chocolate Cheesecake Brownie Bars
The moment of truth! Into the oven they go, where the heat will transform our batter and filling into perfectly set, mouth-watering Chocolate Cheesecake Brownie Bars. Baking them just right is key to achieving that perfect balance of fudgy brownie and creamy cheesecake.
- Bake to Perfection: Carefully transfer your baking pan to the preheated 350°F (175°C) oven. Bake for approximately 35-45 minutes. The baking time can vary depending on your oven, so keep a close eye on them. You’re looking for the edges of the brownie layer to be set, and the cheesecake layer to be mostly set but still have a slight jiggle in the very center when you gently shake the pan. The brownie portion should look cooked, and a toothpick inserted into the brownie section (not the cheesecake) should come out with moist crumbs attached, but not wet batter. The cheesecake swirls might develop a very light golden hue on top, which is perfectly normal and adds to the delicious crust.
- Avoid Overbaking: It’s absolutely crucial not to overbake these Chocolate Cheesecake Brownie Bars. Overbaking will lead to a dry, crumbly brownie layer and a tough, rubbery cheesecake layer. We want that signature fudgy brownie and creamy, tender cheesecake texture. When in doubt, err on the side of underbaking slightly, as they will continue to set as they cool. The internal temperature will continue to rise a bit after they’re pulled from the oven.
The Crucial Cooling and Chilling Phase for Perfect Chocolate Cheesecake Brownie Bars
Patience, my friend, is a virtue when it comes to these Chocolate Cheesecake Brownie Bars. This cooling and chilling phase is arguably just as important as the baking itself for achieving the perfect texture and allowing those flavors to meld beautifully.
- Cool Completely on a Wire Rack: Once your Chocolate Cheesecake Brownie Bars are out of the oven, resist the urge to cut into them immediately! Place the pan on a wire rack and let them cool at room temperature for at least 1-2 hours. During this time, the residual heat will continue to cook them gently, and the bars will firm up and settle. This gradual cooling prevents cracking in the cheesecake layer and ensures the brownie layer remains fudgy.
- The Essential Chill: This is where the magic truly happens for set cheesecake and firm brownies. Once cooled to room temperature, transfer the pan, uncovered, to the refrigerator. Allow the Chocolate Cheesecake Brownie Bars to chill for a minimum of 4 hours, but ideally overnight. This chilling step is absolutely non-negotiable for perfectly firm, sliceable bars. During chilling, the cheesecake layer fully sets and develops its creamy texture, and the brownie layer becomes dense and chewy. Trying to cut them before they are thoroughly chilled will result in a messy, crumbly disaster, and we definitely want beautiful, clean slices of our magnificent Chocolate Cheesecake Brownie Bars!
Cutting and Serving Your Delectable Chocolate Cheesecake Brownie Bars
After all that anticipation, it’s finally time to enjoy the fruits of your labor! Getting clean, beautiful cuts is the last step to presenting your stunning Chocolate Cheesecake Brownie Bars like a pro.
- Lift and Slice: Once fully chilled, use the parchment paper overhangs as handles to carefully lift the entire slab of Chocolate Cheesecake Brownie Bars out of the baking pan and onto a cutting board. This makes slicing so much easier!
- The Warm Knife Trick for Clean Cuts: For the neatest slices, I highly recommend using a sharp, thin knife. For each cut, dip your knife into a tall glass of hot water, wipe it clean and dry with a paper towel, and then make your cut. Repeat this process for every single slice. This warms the blade slightly, allowing it to glide through the dense brownie and creamy cheesecake without dragging or sticking, giving you perfectly clean edges every time. Cut the large slab into 24 even bars (4 rows by 6 rows works wonderfully) or into whatever size you prefer.
- Serve and Enjoy: Arrange your beautiful Chocolate Cheesecake Brownie Bars on a serving platter. These are absolutely perfect on their own, but if you want to be extra indulgent, consider serving them with a dusting of cocoa powder, a dollop of whipped cream, or even a scoop of vanilla bean ice cream. They are a true showstopper and a delight for any occasion.
- Storage: Any leftover Chocolate Cheesecake Brownie Bars should be stored in an airtight container in the refrigerator. They will stay fresh and delicious for up to 5-7 days. Though, honestly, I doubt they’ll last that long once people get a taste! The flavors tend to deepen even more the next day, making them an even more irresistible treat. Enjoy every single fudgy, creamy, chocolatey bite!

Conclusion:
Well, there you have it! We’ve journeyed through the steps of creating what I genuinely believe will become a new staple in your baking repertoire. This isn’t just another dessert; it’s an experience, a delightful fusion that brings together the best of two beloved classics into one irresistible package. I’m truly excited for you to discover the magic that happens when rich, fudgy brownie meets creamy, tangy cheesecake, all baked to perfection in an easy-to-manage bar form.
For me, this recipe for Chocolate Cheesecake Brownie Bars isn’t just about the incredible taste, though that’s certainly a huge part of it. It’s also about the joy of creation, the shared smiles, and the pure satisfaction of knowing you’ve made something truly special with your own hands. These bars are a testament to the fact that you don’t need a pastry chef’s degree to produce stunning, delectable treats that will have everyone asking for the recipe. They strike that perfect balance: impressive enough for a special occasion, yet comforting and simple enough for an afternoon pick-me-up. I promise you, once you taste that unique interplay of dense chocolate and silky cream cheese, you’ll understand exactly why these bars are an absolute must-try.
Now, let’s talk about how to make these incredible bars even more memorable once they’re out of the oven and cooled. While they are utterly fantastic on their own, a few simple additions can elevate the experience. My personal favorite way to serve them is slightly warmed, perhaps for 15-20 seconds in the microwave, alongside a scoop of good quality vanilla bean ice cream. The warm, gooey brownie and the melting ice cream create a symphony of textures and temperatures that is simply divine. Alternatively, for a lighter, refreshing touch, serve them chilled straight from the refrigerator, perhaps with a handful of fresh raspberries or sliced strawberries. The tartness of the berries provides a wonderful counterpoint to the richness of the chocolate and cheesecake. They also pair wonderfully with a strong cup of coffee or a delicate cup of Earl Grey tea, making them perfect for an afternoon treat or an after-dinner indulgence.
And for those of you who love to experiment, the possibilities for variations are practically endless! Feel free to customize your Chocolate Cheesecake Brownie Bars to suit your preferences. For a deeper, more intense chocolate flavor, try incorporating dark chocolate chunks or even a mix of dark and semi-sweet chocolate chips into the brownie batter. If you’re a fan of nuts, a cup of toasted walnuts or pecans folded into the brownie layer adds a delightful crunch and earthy note. You could also swirl in a tablespoon or two of raspberry or cherry preserves with the cream cheese mixture for a fruity twist, creating beautiful marbling and an extra layer of flavor. A sprinkle of flaky sea salt over the top before baking can also work wonders, enhancing the chocolate notes and adding a sophisticated touch. Don’t be afraid to get creative – that’s part of the fun of baking!
Seriously, if you’re looking for a dessert that’s guaranteed to impress, satisfy every sweet craving, and isn’t overly complicated to prepare, then this is the recipe for you.
I urge you, don’t just read about these Chocolate Cheesecake Brownie Bars – make them!
I truly believe they will bring so much joy to your kitchen and to anyone lucky enough to share them with you. There’s something incredibly rewarding about the process, from mixing the batter to seeing those beautiful swirls emerge, and finally, that first glorious bite. It’s a treat that feels both luxurious and comforting, perfect for any occasion from a casual get-together to a celebratory dessert table.
So, gather your ingredients, preheat your oven, and prepare to embark on a delicious adventure. I promise you won’t regret it. Once you’ve whipped up a batch, I would absolutely love to hear about your experience! Did you stick to the original recipe, or did you put your own unique spin on it? What were your favorite serving suggestions? Please don’t hesitate to share your thoughts, your successes, and even your creative variations in the comments below. Sharing our baking journeys is one of the best parts of being in this wonderful food community.
Go forth and bake, my friends! Enjoy every single fudgy, creamy, utterly delightful bite of your homemade Chocolate Cheesecake Brownie Bars. Happy baking!
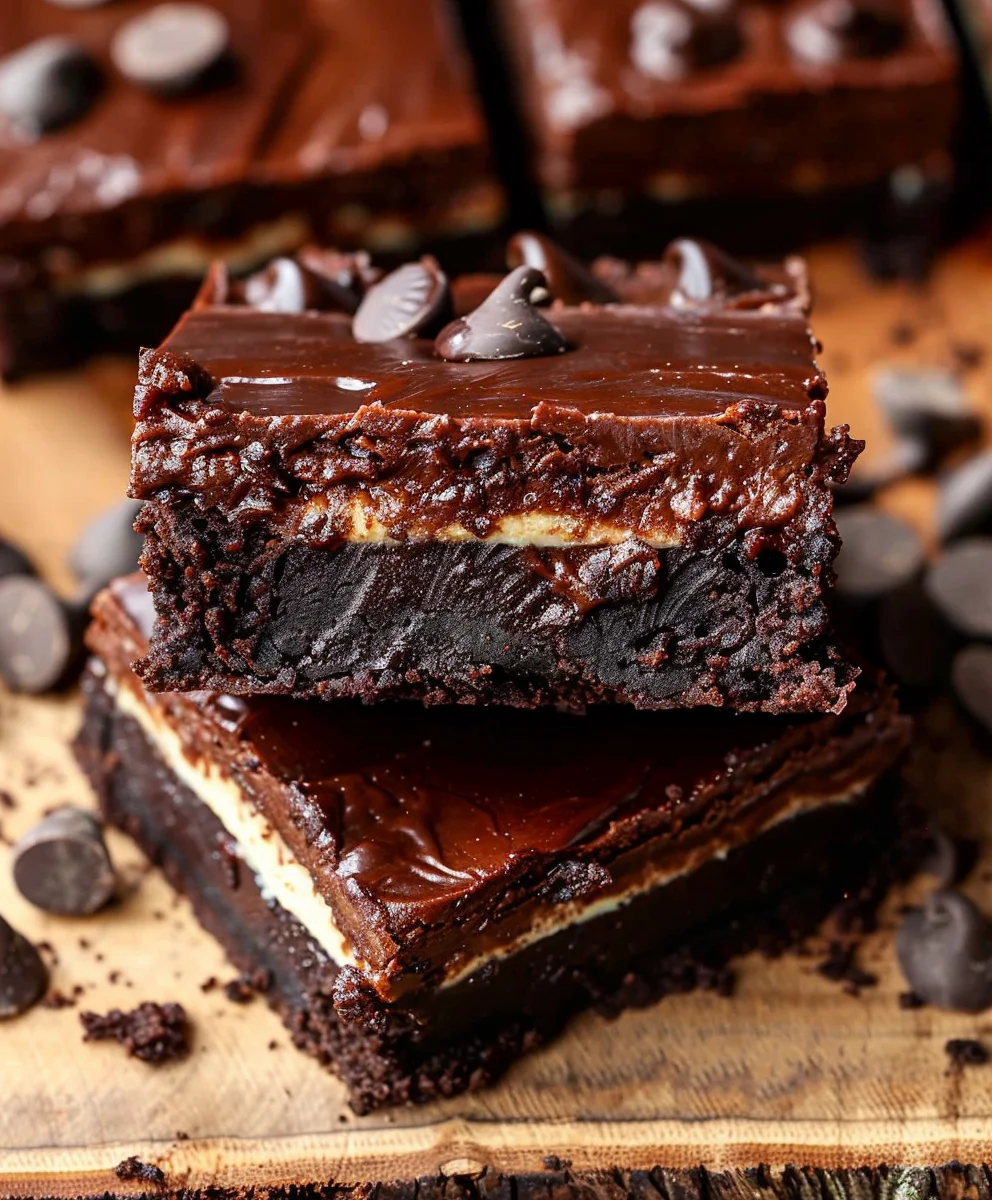
Chocolate Cheesecake Brownie Bars
Chocolate Cheesecake Brownie Bars are an extraordinary culinary creation that perfectly marries the fudgy delight of a classic brownie with the rich, tangy creaminess of cheesecake. These bars offer a harmonious blend of textures and flavors, with deep, intense chocolate notes and a bright, slightly tart cheesecake swirl. A perfect party treat or luxurious personal indulgence.
Ingredients
-
2 cups Oreo crumbs
-
4 tbsp Unsalted butter, melted
-
24 oz Cream cheese, room temperature
-
1 cup Granulated sugar
-
1/2 cup Dutch-processed unsweetened cocoa powder
-
8 oz Chocolate bar, melted (e.g., 70% dark chocolate)
-
1/2 cup Heavy cream, room temperature
-
1 tsp Pure vanilla extract
-
4 Large eggs, room temperature
-
1 cup Semi-sweet chocolate chips
-
1/2 cup Heavy cream (for optional topping or additional use)
Instructions
-
Step 1
Preheat oven to 350°F (175°C). Line a 9×13 inch baking pan with parchment paper, leaving an overhang, and lightly grease the pan. -
Step 2
In a bowl, combine 2 cups Oreo crumbs and 4 tbsp melted unsalted butter. Press the mixture firmly and evenly into the bottom of the prepared pan. -
Step 3
In a large mixing bowl, beat 24 oz room temperature cream cheese until incredibly smooth and lump-free (2-3 minutes). Scrape down bowl sides. Add 1 cup granulated sugar, 1/2 cup heavy cream, and 1 tsp pure vanilla extract; beat on low until just combined. Beat in 1/2 cup Dutch-processed unsweetened cocoa powder and 8 oz melted chocolate bar until well blended. Finally, beat in 4 large room temperature eggs, one at a time, until just combined. Do not overmix. -
Step 4
Pour the chocolate cheesecake filling over the Oreo crust in the pan. Evenly sprinkle 1 cup semi-sweet chocolate chips over the top. For a swirl effect, gently drag a butter knife or thin skewer through the cheesecake and chocolate chips to create a marbled pattern. -
Step 5
Carefully transfer the pan to the preheated oven. Bake for approximately 35-45 minutes. The edges should be set, and the center of the cheesecake should still have a slight jiggle. A toothpick inserted into the cheesecake should come out with moist crumbs. Avoid overbaking. -
Step 6
Remove from oven and let cool completely on a wire rack at room temperature for 1-2 hours. Once cooled, transfer the pan to the refrigerator and chill for a minimum of 4 hours, ideally overnight, to allow the bars to fully set. -
Step 7
Once thoroughly chilled, use the parchment paper overhangs to lift the entire slab onto a cutting board. For clean cuts, dip a sharp knife into hot water, wipe dry, and slice. Repeat for each cut. Cut into 24 even bars or your desired size. Serve plain or with additional toppings like whipped cream. -
Step 8
Store leftover Chocolate Cheesecake Brownie Bars in an airtight container in the refrigerator for up to 5-7 days. Flavors often deepen the next day.
Important Information
Nutrition Facts (Per Serving)
It is important to consider this information as approximate and not to use it as definitive health advice.
Allergy Information
Please check ingredients for potential allergens and consult a health professional if in doubt.