Apple Samoas represent a truly unique and delightful twist on two beloved classics, ingeniously combining the iconic flavor profile of a certain caramel-coconut-chocolate cookie with the comforting essence of crisp autumn apples. I am absolutely thrilled to share this recipe with you, as it has quickly become a standout favorite in my kitchen. Imagine the buttery shortbread base, the tender, spiced apple filling, all enrobed in a luscious caramel, toasted coconut, and a drizzle of rich chocolate – it’s a symphony of textures and tastes that evokes pure joy. This innovative dessert was born from a desire to celebrate the vibrant flavors of fall while honoring the irresistible charm of a cherished childhood treat. People adore this dish not only for its incredible taste and multi-layered textures – from the crumbly crust to the chewy topping – but also for the sheer novelty and nostalgic comfort it provides. Making Apple Samoas is an experience in itself, promising a dessert that is both familiar in its individual components and utterly surprising in its harmonious combination, making it perfect for gatherings, holidays, or simply a cozy evening in.

Ingredients:
-
For the All-Butter Tart Crust:
- 2 ½ cups (300g) all-purpose flour, plus more for dusting
- 1 teaspoon granulated sugar
- ½ teaspoon fine sea salt
- 1 cup (226g) unsalted butter, very cold and cut into ½-inch cubes
- ½ cup (120ml) ice water, plus 1-2 tablespoons more if needed
-
For the Spiced Apple Filling:
- 6 medium Granny Smith apples (about 2.5 lbs), peeled, cored, and sliced ¼-inch thick
- 2 tablespoons unsalted butter
- ⅓ cup (65g) granulated sugar (adjust to your apples’ tartness)
- 1 tablespoon fresh lemon juice
- 1 teaspoon ground cinnamon
- ½ teaspoon ground nutmeg
- ¼ teaspoon ground cloves
- 2 tablespoons all-purpose flour or cornstarch
-
For the Toasted Coconut Topping:
- 1 ½ cups (120g) sweetened shredded coconut
-
For the Homemade Salted Caramel Sauce:
- 1 cup (200g) granulated sugar
- ¼ cup (60ml) water
- 6 tablespoons (85g) unsalted butter, cut into 1-inch pieces, at room temperature
- ½ cup (120ml) heavy cream, warmed slightly
- ½ teaspoon sea salt, or to taste
- ½ teaspoon pure vanilla extract
-
For the Chocolate Drizzle:
- 4 ounces (113g) dark chocolate (60-70% cocoa), finely chopped
- 1 teaspoon coconut oil or vegetable oil (optional, for smoother drizzle)
Phase 1: Crafting the Flaky Tart Crust
- Prepare your workspace: Ensure your butter is exceedingly cold; I like to pop it in the freezer for about 15-20 minutes before I start. In a large mixing bowl, whisk together the flour, granulated sugar, and fine sea salt until well combined. This initial step ensures a homogeneous distribution of dry ingredients.
- Incorporate the butter: Add the very cold, cubed butter to the flour mixture. Using a pastry blender, two knives, or your fingertips, cut the butter into the flour until the mixture resembles coarse meal with some pea-sized pieces of butter remaining. This is crucial for a flaky crust, as these butter pieces create steam pockets during baking. Avoid overworking the dough, as warmth from your hands can melt the butter too quickly.
- Add ice water: Gradually add the ice water, one tablespoon at a time, mixing gently with a fork or your hands just until the dough comes together. Be careful not to add too much water; the dough should be just moist enough to hold its shape when pressed. You might not need all the water, or you might need a tiny bit more – humidity and flour type can vary.
- Form and chill the dough: Turn the dough out onto a lightly floured surface. Gently gather it into a cohesive disk, handling it as little as possible. Wrap the disk tightly in plastic wrap and refrigerate for at least 1 hour, or preferably 2 hours. Chilling the dough is essential; it allows the gluten to relax, preventing shrinkage during baking, and re-hardens the butter for optimal flakiness.
- Preheat and prepare the pan: Once the dough has chilled, preheat your oven to 375°F (190°C). Lightly flour a clean surface and your rolling pin. Take the chilled dough out of the fridge and roll it out into a 12-inch circle, about ⅛-inch thick. If the dough cracks, let it sit for a few minutes to warm up slightly, then continue rolling.
- Fit into the tart pan: Carefully transfer the rolled dough into a 9-inch tart pan with a removable bottom. Gently press the dough into the bottom and up the sides of the pan. Trim any excess dough from the edges using a sharp knife or by rolling your pin over the top of the pan. Prick the bottom of the tart shell all over with a fork; this prevents it from puffing up excessively during baking.
- Blind bake the crust: Line the tart shell with parchment paper or aluminum foil, making sure it extends over the edges. Fill the lined shell with pie weights, dried beans, or uncooked rice. Bake for 15 minutes. Carefully remove the parchment paper and weights, then continue baking for another 5-8 minutes, or until the crust is lightly golden brown and set. This process, known as blind baking, ensures a crisp crust that won’t get soggy once the filling is added. Remove from the oven and let it cool completely on a wire rack.
Phase 2: Preparing the Irresistible Apple Filling
- Prepare the apples: While your tart crust is chilling or blind baking, get those beautiful apples ready. Peel, core, and slice your Granny Smith apples into uniform ¼-inch thick pieces. I find Granny Smiths offer a wonderful tartness that balances the sweetness of the caramel and coconut in our Apple Samoas tart.
- Sauté the apples: In a large skillet or Dutch oven, melt the 2 tablespoons of unsalted butter over medium heat. Add the sliced apples to the pan, along with the granulated sugar, fresh lemon juice, ground cinnamon, ground nutmeg, and ground cloves. Toss everything gently to coat the apples evenly.
- Cook to tender-crisp: Cook the apples, stirring occasionally, for 8-12 minutes, or until they are tender-crisp. They should still hold their shape but yield slightly when pierced with a fork. You don’t want them mushy, as they’ll bake more in the oven. The lemon juice prevents them from browning too quickly and brightens their flavor.
- Thicken the filling: Sprinkle the 2 tablespoons of all-purpose flour or cornstarch over the apples and stir well. Continue to cook for another 1-2 minutes, allowing the flour/cornstarch to cook out and the juices to thicken. This ensures a beautifully set filling, preventing a runny tart. Remove the skillet from the heat and allow the apple filling to cool slightly while you prepare the other components.
Phase 3: Whipping Up the Rich Caramel Sauce and Toasted Coconut
Homemade Salted Caramel Sauce: The Heart of Your Apple Samoas Tart
- Prepare for caramel making: Have all your caramel ingredients measured and ready to go before you begin, as the process moves quickly. Make sure your heavy cream is slightly warmed; you can do this by microwaving it for 30 seconds or heating it gently in a small saucepan. This prevents the caramel from seizing when added.
- Start the sugar syrup: In a medium-sized, heavy-bottomed saucepan, combine the granulated sugar and water. Stir gently just to moisten the sugar. Place the saucepan over medium heat. Do not stir once it starts boiling.
- Watch for color change: Allow the sugar mixture to boil undisturbed until it turns a deep amber color. This usually takes about 8-12 minutes, but keep a very close eye on it. Swirl the pan occasionally if needed to ensure even cooking. Do not walk away from the stove during this step; caramel can go from perfect to burnt in seconds.
- Add butter: Once the caramel reaches that beautiful amber hue, immediately remove the pan from the heat. Carefully and slowly add the room temperature butter pieces, one at a time, whisking constantly. The mixture will bubble up vigorously, so be careful. Continue whisking until all the butter is fully incorporated and the mixture is smooth.
- Incorporate cream and salt: Very slowly and carefully pour in the warmed heavy cream, whisking constantly. Again, the mixture will bubble up. Continue whisking until the caramel is smooth and uniform. Stir in the sea salt and vanilla extract.
- Cool the caramel: Pour the finished caramel sauce into a heatproof jar or bowl and let it cool down slightly. It will thicken considerably as it cools. If it seems too thick after cooling, you can gently reheat it over low heat, adding a teaspoon of warm water or cream if necessary, to reach your desired pouring consistency.
Toasting the Sweet Coconut: Adding Texture and Aroma
- Oven method: Preheat your oven to 325°F (160°C). Spread the sweetened shredded coconut in a single layer on a baking sheet.
- Toast evenly: Bake for 5-10 minutes, stirring every 2-3 minutes, until the coconut is golden brown and fragrant. Watch it closely, as coconut can burn quickly.
- Cool: Remove from the oven and transfer the toasted coconut to a plate or bowl to cool completely. Cooling prevents it from continuing to cook on the hot baking sheet.
Phase 4: Assembling and Baking Your Apple Samoas Tart
- Layer the apple filling: Once your blind-baked tart crust is completely cool, spoon the cooled spiced apple filling evenly into the tart shell. Spread it out gently to create an even layer.
- Drizzle with caramel: Pour about ½ cup of your homemade salted caramel sauce over the apple filling. Use the back of a spoon to gently spread it across the apples, ensuring every bite gets that lovely caramel goodness. Reserve the remaining caramel for serving or later drizzling.
- Top with coconut: Generously sprinkle the toasted coconut over the caramel layer. Press it down lightly so it adheres to the caramel. This is where the “Samoas” magic truly begins to shine through!
- Prepare for baking: Place the assembled tart on a baking sheet (this makes it easier to transfer and catches any potential drips).
- Bake the tart: Bake the Apple Samoas tart in the preheated 375°F (190°C) oven for 25-35 minutes, or until the edges of the coconut are a deeper golden brown, the filling is bubbling slightly, and the tart feels set. If the coconut starts to brown too quickly, you can loosely tent the tart with aluminum foil.
- Cool before serving: Once baked, carefully remove the tart from the oven and place it on a wire rack. Allow the tart to cool completely for at least 2-3 hours before slicing. This cooling period is crucial for the filling to fully set, making for clean slices. Trying to slice it warm will likely result in a messy, crumbling tart.
Phase 5: The Final Touches: Chocolate Drizzle and Serving
Creating the Signature Chocolate Drizzle
- Melt the chocolate: Place the finely chopped dark chocolate in a microwave-safe bowl. If using, add the coconut oil or vegetable oil. Microwave in 30-second intervals, stirring well after each, until the chocolate is smooth and fully melted. Alternatively, you can use a double boiler: place the chocolate in a heatproof bowl set over a saucepan of simmering water (make sure the water doesn’t touch the bottom of the bowl), stirring until melted.
- Prepare for drizzling: Transfer the melted chocolate to a piping bag with a very small opening, a Ziploc bag with a tiny corner snipped off, or simply use a spoon.
- Drizzle with flair: Once your Apple Samoas tart has completely cooled, drizzle the melted chocolate in a decorative zig-zag pattern across the top of the toasted coconut. Have fun with this step; it’s what gives the tart its iconic Samoas look!
- Set the chocolate: Allow the chocolate to set for about 15-20 minutes at room temperature, or briefly in the refrigerator if you’re in a hurry.
Serving Your Masterpiece
- Slice and serve: Carefully remove the tart from its pan. Using a sharp, thin-bladed knife, slice the tart into wedges. Wipe the knife clean between each slice for the neatest presentation.
- Garnish and enjoy: Serve your stunning Apple Samoas tart as is, or with a dollop of whipped cream or a scoop of vanilla bean ice cream. For an extra treat, warm up any remaining caramel sauce and drizzle a little more over individual slices just before serving.
- Storage: Leftover tart can be stored at room temperature for up to 2 days, or in the refrigerator for up to 4 days, loosely covered. Bring it back to room temperature before serving for the best texture and flavor. This Apple Samoas tart is truly a unique and comforting dessert, perfect for any occasion where you want to impress!
Conclusion:
As we wrap up our delightful journey through this unique recipe, I sincerely hope you’re feeling as inspired as I am about creating something truly special in your own kitchen. This isn’t just another dessert; it’s an experience, a fusion of familiar comfort and exciting new flavors that will undoubtedly surprise and please everyone lucky enough to try it. I genuinely believe that once you’ve tasted the perfect balance of crisp, tender apple, the rich, buttery shortbread, and that iconic, decadent caramel-coconut drizzle, you’ll understand exactly why this recipe has become such a treasured staple in my home. It’s the kind of treat that transforms an ordinary evening into something extraordinary, making any gathering, no matter how small, feel like a special occasion. It truly is a game-changer for your dessert repertoire.
Think about the sheer joy of biting into something that offers layers of texture and taste – the subtle tartness of a perfectly baked apple slice, nestled within a crumbly, melt-in-your-mouth base, all crowned with that unmistakable combination of toasted coconut and luscious caramel. It’s an irresistible symphony of flavors designed to tantalize your taste buds and leave a lasting impression. This particular rendition of a classic concept brings a refreshing twist to traditional desserts, offering a comforting warmth with a tropical, sophisticated edge. It truly stands out from the crowd of everyday bakes, proving that sometimes, the most unexpected pairings lead to the most unforgettable culinary creations. I’m always on the hunt for recipes that offer both novelty and nostalgia, and this one hits every single mark with flying colors, delivering a dessert that feels both innovative and deeply satisfying.
The beauty of these Apple Samoas is not just in their incredible taste, but also in the relatively straightforward process to achieve such a gourmet-level dessert. Don’t let the intricate appearance fool you; I’ve broken down each step to ensure that even a novice baker can achieve stunning results. Imagine the compliments you’ll receive when you present these golden-brown beauties, each one a miniature masterpiece of flavor and artistry. They are truly a testament to how simple, quality ingredients, when thoughtfully combined, can elevate a humble fruit into something spectacular. It’s more than just a dessert; it’s a conversation starter, a delightful surprise, and a surefire way to bring smiles to faces around your table. I promise you, the effort, which is surprisingly minimal for such an impactful treat, is absolutely worth the reward. You’ll be amazed at how easily you can create something so impressive.
Now, let’s talk about how to truly make these your own, and how to best enjoy them. While utterly divine on their own, served at room temperature or slightly warm, the experience can be elevated further with a few simple additions. My absolute favorite way to serve them is warm, fresh out of the oven, with a generous scoop of premium vanilla bean ice cream slowly melting into the warm caramel and coconut. The contrast of hot and cold, creamy and chewy, is simply out of this world and creates an unparalleled sensory experience. Another fantastic option is a dollop of freshly whipped cream, perhaps infused with a hint of cinnamon or a splash of bourbon for an adult-friendly touch that adds another layer of warmth and complexity. For a more sophisticated pairing, consider serving them alongside a rich, dark roast coffee or a fragrant spiced chai tea – the flavors complement each other beautifully, making for a perfect afternoon treat, an elegant end to an evening meal, or even a decadent brunch item.
Beyond serving, don’t hesitate to explore variations to suit your preferences, seasonal availability, or what you have on hand. For instance, while Granny Smith apples offer that perfect tart counterpoint, feel free to experiment with other apple varieties like Honeycrisp, Braeburn, or even a mix of two for a more nuanced and sweeter profile. You could also introduce other spices into the apple filling – a pinch of nutmeg, allspice, or a touch of cardamom alongside the cinnamon can add another layer of autumnal warmth and aromatic depth. If you’re feeling adventurous, try swapping out a portion of the all-purpose flour in the shortbread base for almond flour to add a lovely nutty depth and a slightly softer crumb. For those with dietary restrictions, a high-quality gluten-free all-purpose flour blend can often be substituted successfully in the base, and for a vegan option, plant-based butter and a suitable dairy-free caramel sauce, along with coconut condensed milk for the topping, can create a similarly delightful treat. The possibilities are truly endless, limited only by your imagination and what delights your palate most!
So, what are you waiting for? I wholeheartedly encourage you to carve out some time this week to bring these incredible Apple Samoas to life in your kitchen. Trust me, the aroma alone as they bake will fill your home with an intoxicating sweetness that is utterly comforting and inviting, creating an atmosphere of warmth and anticipation. Don’t be afraid to put your own spin on them, to experiment with the flavors and presentations that resonate most with you. Baking is, after all, a wonderfully creative and personal endeavor, and I find immense joy in seeing how others interpret and enjoy my recipes, often discovering brilliant new ideas from your culinary adventures.
Once you’ve had the chance to bake and savor these delightful treats, I would absolutely love to hear about your experience. Did you add any unique twists? What was your favorite part of the process, and what did you find most satisfying? How did your family and friends react to this unexpected dessert, and what compliments did you receive? Please share your thoughts, your successes, and even your culinary adventures with me. Your feedback and stories are what truly make this community vibrant and inspiring, and I always learn so much from your ingenious ideas and creative modifications. Let’s celebrate the joy of baking together, one delicious bite at a time. Go forth and create some magic in your kitchen!
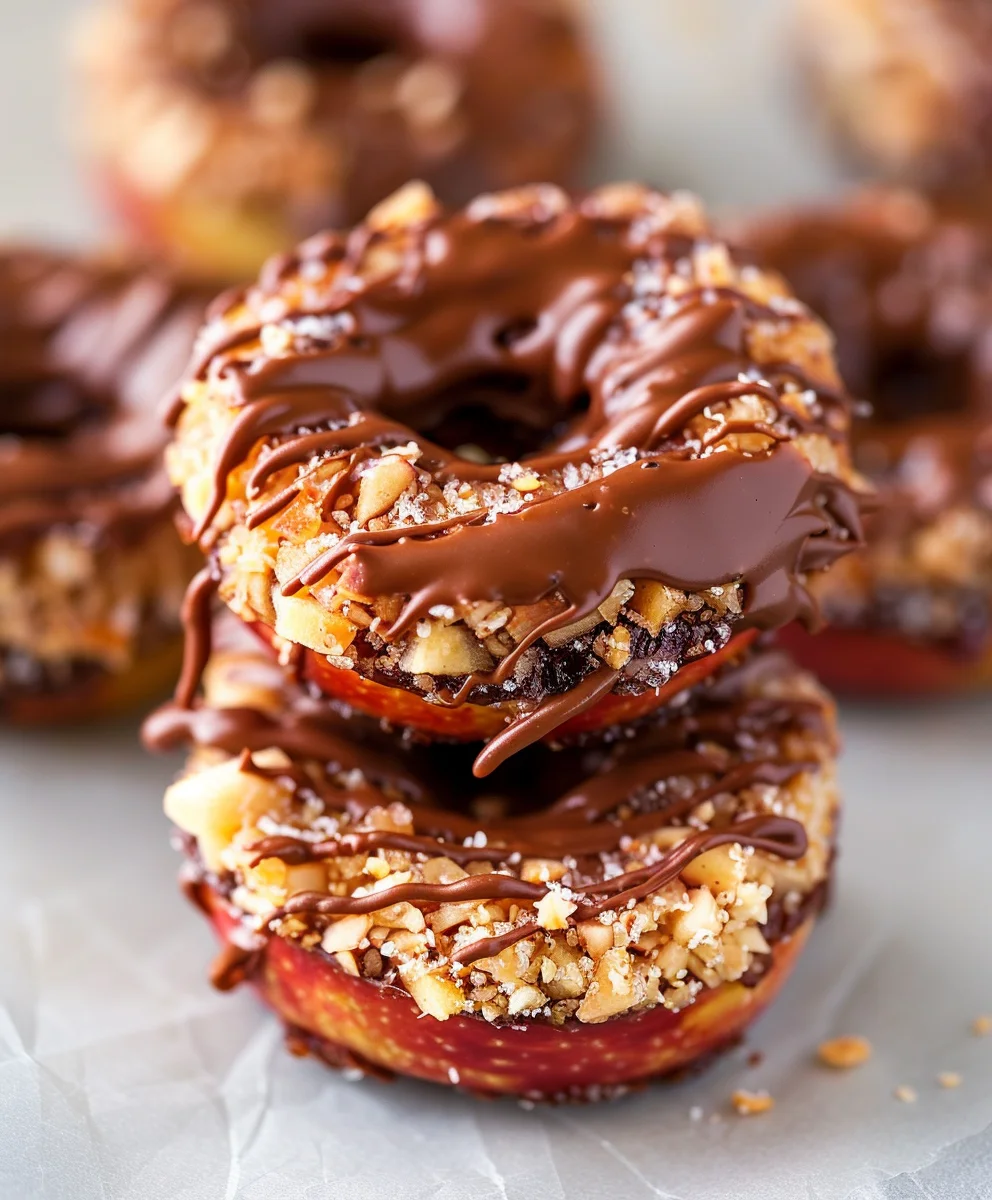
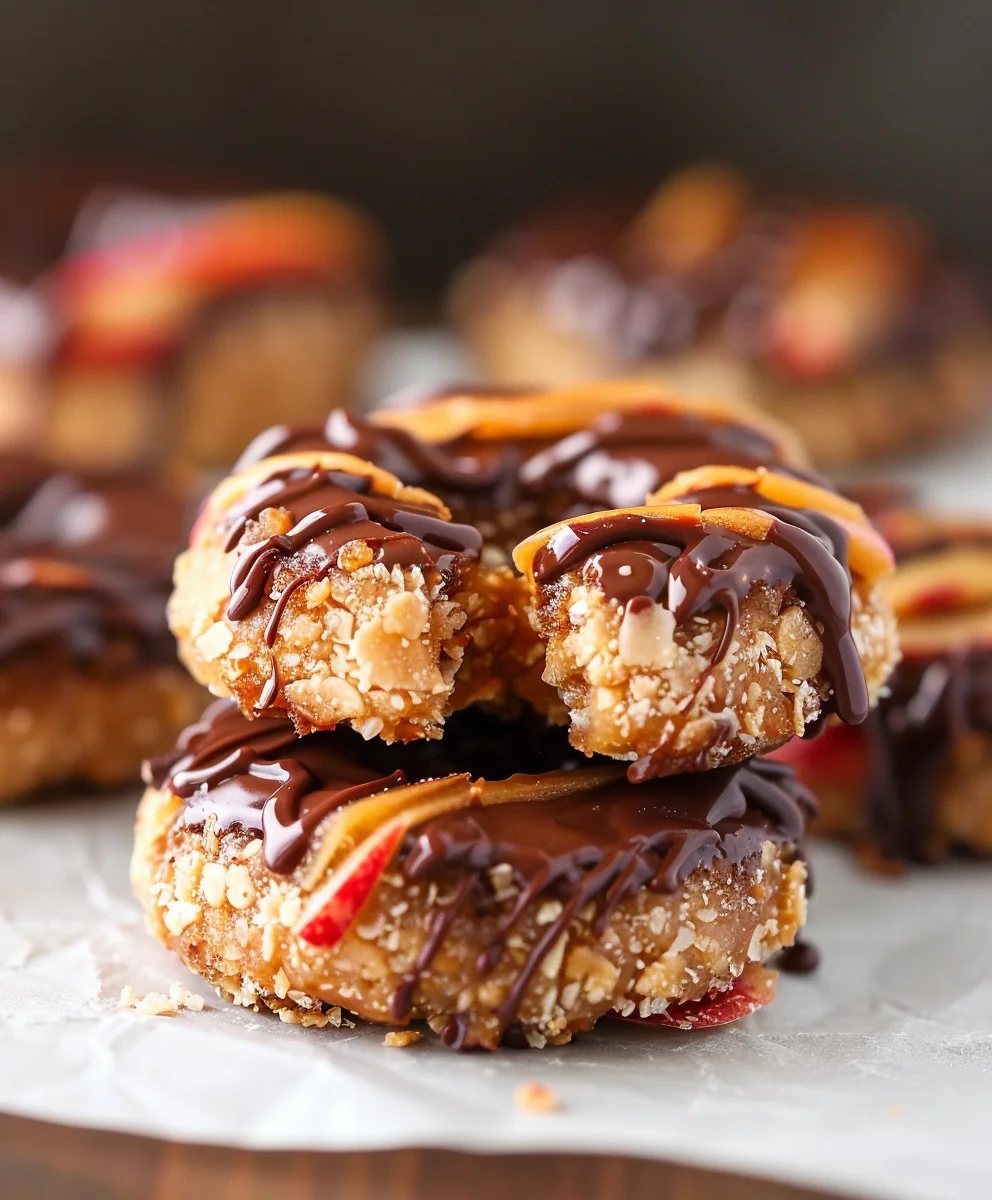
Apple Samoas Recipe: Caramel, Coconut & Cookie Delight!
Apple Samoas represent a truly unique and delightful twist on two beloved classics, ingeniously combining the iconic flavor profile of a certain caramel-coconut-chocolate cookie with the comforting essence of crisp autumn apples. This innovative snack features fresh apple slices topped with a ‘caramel’ spread, toasted coconut, and a rich chocolate drizzle, offering a symphony of textures and tastes for a standout favorite.
Ingredients
-
1 apple (Honeycrisp or Pink Lady)
-
⅓ cup unsweetened shredded coconut
-
3 Tablespoons almond butter (or cashew butter, or seed butter of choice)
-
½ Tablespoon maple syrup
-
2 Tablespoons chocolate chips
-
½ teaspoon coconut oil
Instructions
-
Step 1
Core and slice the apple into ¼-inch thick rings or wedges. -
Step 2
For enhanced flavor, lightly toast the shredded coconut in a dry skillet over medium-low heat for 2-3 minutes until golden and fragrant. Let cool. -
Step 3
In a small bowl, combine almond butter and maple syrup. Mix until smooth and well combined. -
Step 4
Evenly spread the almond butter mixture over each apple slice. Generously sprinkle the toasted coconut over the spread, gently pressing to adhere. -
Step 5
Melt chocolate chips with coconut oil in a microwave-safe bowl (microwave in 30-second intervals, stirring until smooth) or using a double boiler. -
Step 6
Drizzle the melted chocolate over the coconut-topped apple slices in a zig-zag pattern. Allow the chocolate to set for a few minutes before serving. Enjoy this delightful Apple Samoas snack!
Important Information
Nutrition Facts (Per Serving)
It is important to consider this information as approximate and not to use it as definitive health advice.
Allergy Information
Please check ingredients for potential allergens and consult a health professional if in doubt.