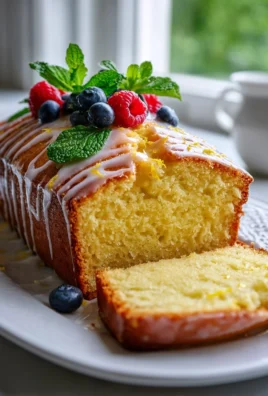
Apple Crisp Mini Cheesecakes are truly a revelation, bringing together two beloved dessert classics into one irresistible bite. Imagine the comforting warmth of a spiced apple crisp topping meeting the silky smooth indulgence of a creamy cheesecake, all perfectly portioned for individual enjoyment. This isn’t just a dessert; it’s a celebration of flavors and textures that dance on your palate. While traditional apple crisp evokes cozy autumn evenings and cheesecake signifies elegant celebrations, this innovative recipe masterfully bridges both worlds, offering a sophisticated yet approachable treat for any occasion. I’m thrilled to share a creation that combines the best of both worlds, making every bite a memorable experience.
Why You’ll Fall in Love with These Mini Delights
People adore these delightful creations for so many wonderful reasons. The crisp, buttery oat crumble provides a delightful textural contrast to the rich, tangy cheesecake base, while the tender, cinnamon-spiced apples add a burst of fruity freshness and autumnal charm. Plus, the individual mini cheesecake format makes serving an absolute breeze, eliminating the need for slicing and ensuring every guest receives their own perfectly composed dessert. Whether you’re hosting a dinner party or simply craving a special treat, these Apple Crisp Mini Cheesecakes promise to be a showstopper that will leave everyone asking for the recipe.

Ingredients:
-
For the Graham Cracker Crust:
- 1 ½ cups (about 180g) Graham Cracker Crumbs: You can buy pre-crushed crumbs or crush your own graham crackers. I find that a food processor makes quick work of this, giving you a fine, consistent crumb that forms the perfect base for our “Apple Crisp Mini Cheesecakes.”
- ¼ cup (50g) Granulated Sugar: Just a touch of sweetness to complement the graham crackers.
- ½ teaspoon Ground Cinnamon (optional, but highly recommended): This adds a warm, inviting spice note that harmonizes beautifully with the apple flavors we’ll be introducing later. It’s a small addition that makes a big difference.
- 6 tablespoons (85g) Unsalted Butter, melted: Unsalted butter gives us control over the salt content, and melting it helps bind the crumbs together into a cohesive crust.
- Pinch of Salt: Enhances all the flavors in the crust.
-
For the Velvety Cheesecake Filling:
- 24 ounces (680g) Full-Fat Cream Cheese, softened to room temperature: This is absolutely crucial! Room temperature cream cheese is the secret to a silky-smooth, lump-free cheesecake batter. Plan to take it out of the fridge at least 1-2 hours before you start.
- ¾ cup (150g) Granulated Sugar: Provides the primary sweetness for our rich cheesecake.
- ½ cup (120g) Full-Fat Sour Cream, softened to room temperature: Sour cream adds a wonderful tang and extra moisture, contributing to the cheesecake’s creamy texture and preventing it from being too dense.
- 1 tablespoon Pure Vanilla Extract: Use the best quality vanilla you can find; it really shines through in a simple, creamy filling like this.
- 2 large Eggs, room temperature: Like the cream cheese, room temperature eggs emulsify better with the other ingredients, leading to a smoother batter and a more even bake.
- 1 tablespoon fresh Lemon Juice (optional, for brightness): A small touch of lemon juice can brighten the flavors and cut through the richness, but it’s entirely up to your preference.
-
For the Irresistible Apple Topping:
- 2 medium Apples (about 300-350g total), peeled, cored, and finely diced: I love using a mix of sweet-tart apples like Honeycrisp, Gala, or Fuji. They hold their shape well when cooked and offer a balanced flavor.
- 2 tablespoons (28g) Unsalted Butter: For sautéing the apples and building flavor.
- ¼ cup (50g) Light Brown Sugar, packed: Adds a deeper, caramel-like sweetness to the apples.
- 1 tablespoon Granulated Sugar: A bit of extra sweetness to perfectly balance the tartness of the apples.
- 1 teaspoon Ground Cinnamon: The quintessential spice for apples, creating that classic warm apple pie flavor.
- ¼ teaspoon Ground Nutmeg: Complements the cinnamon and adds another layer of spice.
- Pinch of Ground Cloves or Allspice (optional): For an extra layer of complexity and warmth in your “Apple Crisp Mini Cheesecakes.”
- 2 tablespoons Water or Apple Cider: Helps to create a sauce and soften the apples.
- 1 teaspoon Cornstarch dissolved in 1 tablespoon cold water (cornstarch slurry): This will help thicken our apple topping to a luscious, spoonable consistency.
-
For the Buttery Crisp Crumble:
- ½ cup (60g) All-Purpose Flour: The base for our crumble.
- ½ cup (45g) Old-Fashioned Rolled Oats: Don’t use instant oats here; the old-fashioned kind provides the perfect chewy texture.
- ¼ cup (50g) Light Brown Sugar, packed: For that signature rich, molasses-y crumble flavor.
- 2 tablespoons (25g) Granulated Sugar: Adds a little extra sweetness and crunch.
- ½ teaspoon Ground Cinnamon: Ties the crumble flavor in with the apple topping and cheesecake base.
- ¼ cup (56g) Cold Unsalted Butter, cut into small cubes: Keeping the butter cold is key to achieving a perfectly crumbly, not greasy, topping.
-
Optional Garnish:
- Caramel sauce drizzle
- Whipped cream
- Extra sprinkle of cinnamon
Preparing the Graham Cracker Crust:
- Preheat and Prep: First things first, let’s get our oven ready. Preheat your oven to 325°F (160°C). Then, line a standard 12-cup muffin tin with paper liners. I like to use sturdy foil liners if I have them, as they hold their shape really well, ensuring our “Apple Crisp Mini Cheesecakes” come out perfectly formed. This step is crucial for easy removal and neat presentation.
- Combine Dry Ingredients: In a medium bowl, combine your graham cracker crumbs, granulated sugar, the optional ground cinnamon, and that tiny pinch of salt. Give them a good stir with a fork or whisk to ensure everything is evenly distributed. You want those warm, spicy notes to be present in every bite of the crust.
- Add Melted Butter: Now, pour in the melted unsalted butter. Using a fork, mix thoroughly until the crumbs are evenly moistened and resemble wet sand. You should be able to press a small amount between your fingers and have it hold its shape. This indicates that your butter is perfectly incorporated, ready to create a sturdy crust.
- Form the Crusts: Divide the graham cracker mixture evenly among the 12 prepared muffin cups. I usually use a tablespoon or a small cookie scoop to ensure consistent portions. Here’s a little trick: use the bottom of a small glass, a tart tamper, or even your thumb to firmly press the crumbs into an even layer at the bottom of each liner. Pressing firmly is essential – this creates a compact, stable crust that won’t crumble apart when you bite into your delicious “Apple Crisp Mini Cheesecakes.”
- Pre-bake for Foundation: Transfer the muffin tin to your preheated oven and bake the crusts for just 5-7 minutes. This short pre-bake helps to set the crust, making it less likely to get soggy once the cheesecake filling is added. It also enhances that lovely toasted graham cracker flavor. Once baked, remove them from the oven and let them cool completely on a wire rack while you prepare the filling. This cooling step prevents the cheesecake batter from becoming too warm when poured over the crusts.
Crafting the Velvety Cheesecake Filling:
- Cream Cheese Bliss: In the bowl of a stand mixer fitted with the paddle attachment, or using a large bowl and a hand mixer, place your softened full-fat cream cheese. Beat the cream cheese on medium speed for about 2-3 minutes, scraping down the sides of the bowl frequently. The goal here is to achieve an incredibly smooth, creamy, and lump-free consistency before adding anything else. This initial whipping incorporates a little air and ensures a luxurious texture in your finished “Apple Crisp Mini Cheesecakes.”
- Sweeten it Up: Gradually add the granulated sugar to the cream cheese, beating on medium-low speed until it’s just incorporated and the mixture is smooth, about 1-2 minutes. Continue to scrape down the sides and bottom of the bowl to ensure no sugar crystals are left untouched. We want a perfectly homogenous base.
- Tangy Goodness: Reduce the mixer speed to low and add the room temperature sour cream, pure vanilla extract, and the optional lemon juice. Mix until just combined. The sour cream adds a delightful tangy counterpoint to the rich sweetness of the cheesecake and contributes to its ultra-creamy texture. Be careful not to overmix at this stage; we’re just bringing the ingredients together.
- Egg Integration (Gently!): This is a critical step for preventing cracks in your “Apple Crisp Mini Cheesecakes.” Add the eggs one at a time, mixing on the lowest speed possible. After each egg, mix just until the yellow yolk disappears into the batter. Do not overmix! Overmixing eggs incorporates too much air into the batter, which can cause the cheesecake to puff up too much during baking and then collapse and crack as it cools. We’re aiming for a dense, creamy texture, not an airy one. Scrape the bowl once more to ensure everything is perfectly blended.
Simmering the Irresistible Apple Topping & Preparing the Buttery Crisp Crumble:
Creating the Luscious Apple Topping:
- Sauté the Apples: In a medium skillet, melt the 2 tablespoons of unsalted butter over medium heat. Add your finely diced apples to the skillet. Cook, stirring occasionally, for 3-5 minutes until the apples begin to soften slightly and turn a beautiful translucent color. You want them tender-crisp, not mushy. This step brings out their natural sweetness and starts the caramelization process.
- Flavor Infusion: Stir in the light brown sugar, granulated sugar, ground cinnamon, ground nutmeg, and the optional pinch of ground cloves or allspice. Continue to cook for another 2-3 minutes, stirring constantly, until the sugars have melted and coated the apples. The aroma filling your kitchen right now will be absolutely heavenly – a preview of the delicious “Apple Crisp Mini Cheesecakes” to come!
- Thicken the Sauce: Pour in the 2 tablespoons of water or apple cider. Bring the mixture to a gentle simmer. Now, slowly whisk in your cornstarch slurry (1 teaspoon cornstarch dissolved in 1 tablespoon cold water). Continue to cook, stirring constantly, for about 1-2 minutes until the sauce thickens and becomes glossy. It should be spoonable and cling to the apples. Remove the skillet from the heat and allow the apple topping to cool completely before using. This prevents it from melting the cheesecake during assembly.
Crafting the Buttery Crisp Crumble:
- Combine Dry Ingredients: In a separate medium bowl, combine the all-purpose flour, old-fashioned rolled oats, light brown sugar, granulated sugar, and ground cinnamon. Whisk them together until they are well combined.
- Cut in the Butter: Add the cold unsalted butter cubes to the dry ingredients. Using a pastry blender, two knives, or your fingertips, cut the butter into the flour mixture until it resembles coarse crumbs with some pea-sized pieces of butter remaining. The key here is to work quickly so the butter stays cold. These little pieces of cold butter will create that wonderfully flaky, crispy texture in our “Apple Crisp Mini Cheesecakes” topping.
- Chill (Optional, but Recommended): For an even crispier crumble, you can place the bowl of crumble mixture in the refrigerator for about 15-20 minutes while the cheesecakes bake. This helps prevent the butter from melting too quickly in the oven.
Assembling and Baking Your Apple Crisp Mini Cheesecakes:
- Fill the Cups: Once your graham cracker crusts are completely cool, pour the prepared cheesecake filling over them. Fill each cup about two-thirds full. I find using a liquid measuring cup with a spout, or a large spoon, helps to distribute the filling neatly.
- Release Air Bubbles: Gently tap the muffin tin on your countertop a few times. This helps to release any trapped air bubbles in the cheesecake batter, which can contribute to cracks during baking. You want a smooth, even surface.
- Bake to Perfection: Carefully place the muffin tin back into your preheated 325°F (160°C) oven. Bake for approximately 20-25 minutes. You’ll know they’re ready when the edges are set and appear slightly puffed, but the very center of each cheesecake still has a slight jiggle to it when you gently shake the pan. It’s crucial not to overbake them, as this is another common cause of cracks and a dry texture. They will continue to set as they cool.
- Gentle Cooling (The Crack Prevention Secret!): Once baked, turn off the oven but leave the cheesecakes inside with the oven door propped open slightly (using a wooden spoon works perfectly). Let them cool in the gradually cooling oven for at least 30 minutes, or even an hour. This slow, gradual cooling process helps prevent drastic temperature changes that can lead to cracks in your beautiful “Apple Crisp Mini Cheesecakes.”
- Final Cool Down: After the oven cooling period, remove the muffin tin from the oven and transfer it to a wire rack. Allow the cheesecakes to cool completely to room temperature on the wire rack. This might take another 1-2 hours. Resist the urge to rush this step!
The Grand Finale: Chilling and Serving Your Apple Crisp Mini Cheesecakes:
- Add the Topping: Once your mini cheesecakes are completely cool to the touch, it’s time for the star of the show! Gently spoon a generous amount of the cooled apple topping over the top of each cheesecake. You can mound it slightly to create a beautiful, inviting look.
- Sprinkle the Crumble: Now, for that delightful texture contrast, sprinkle a generous amount of the buttery crisp crumble over the apple topping on each cheesecake. Don’t be shy here; the crumble adds so much to the “Apple Crisp Mini Cheesecakes” experience.
- Bake the Crumble (Optional, but Recommended for Extra Crispness): If you want your crumble extra crispy, you can place the cheesecakes back in the oven at 350°F (175°C) for about 5-7 minutes, just until the crumble is golden brown and fragrant. Keep a close eye on them to prevent burning. This step really brings out the nutty, buttery notes of the oats and butter.
- The Importance of Chilling: This is arguably the most important step for any cheesecake, especially these “Apple Crisp Mini Cheesecakes.” Cover the muffin tin loosely with plastic wrap and transfer it to the refrigerator. Chill the cheesecakes for at least 4-6 hours, but ideally overnight. Proper chilling allows the cheesecakes to fully set, develop their full flavor, and achieve that perfect dense, creamy texture we all love. Trying to serve them too soon will result in a soft, messy cheesecake. Patience is key!
- Remove and Garnish: Once thoroughly chilled, carefully remove the mini cheesecakes from the muffin tin. Gently peel off the paper liners. If desired, you can add a final flourish with a drizzle of warm caramel sauce, a dollop of fresh whipped cream, or an extra sprinkle of cinnamon right before serving.
- Serve and Enjoy: Arrange your magnificent “Apple Crisp Mini Cheesecakes” on a platter and watch them disappear! They are best served chilled and make for a perfect individual dessert for any occasion.
Expert Tips for Perfect Apple Crisp Mini Cheesecakes:
- Room Temperature Ingredients are Non-Negotiable: I cannot stress this enough! For the absolute smoothest, creamiest cheesecake batter, ensure your cream cheese, sour cream, and eggs are at true room temperature. Cold ingredients will lead to lumps in your batter and an inconsistent texture. Plan ahead and take them out of the fridge at least an hour or two before you begin mixing. This small effort yields huge results for your “Apple Crisp Mini Cheesecakes.”
- Do Not Overmix the Batter: When adding the eggs, mix only until the yolks disappear. Overmixing at this stage incorporates too much air into the batter, which causes the cheesecake to puff up dramatically in the oven and then inevitably crack as it cools. We want a dense, rich consistency, not an airy one. Mix just enough to combine, and then stop!
- Gentle Baking and Cooling for Crack-Free Cheesecakes: Cheesecake is sensitive to sudden temperature changes. Bake at a moderate temperature and, most importantly, allow your “Apple Crisp Mini Cheesecakes” to cool slowly inside the turned-off oven with the door slightly ajar. This gradual cooling process prevents the sudden contraction that often leads to cracks. Think of it as gently easing them into their final form.
- Choose Your Apples Wisely: For the apple topping, opt for firm, sweet-tart apples that hold their shape well during cooking. Varieties like Honeycrisp, Gala, Fuji, or Granny Smith (if you prefer more tartness) are excellent choices. Avoid overly mealy or soft apples, as they will turn to mush.
- The Power of the Crisp Crumble: Don’t underestimate the role of the crisp crumble! It adds an essential textural contrast to the smooth, creamy cheesecake and soft apple topping. Using cold butter and old-fashioned oats ensures a wonderfully crumbly and chewy topping that makes these “Apple Crisp Mini Cheesecakes” truly special.
- Patience is a Virtue (Especially for Chilling!): I know it’s hard to wait, but allowing the “Apple Crisp Mini Cheesecakes” to chill for at least 4-6 hours, or even better, overnight, is critical. This time in the refrigerator allows the cheesecake to fully set, firm up, and allows all the wonderful flavors to meld together perfectly. A well-chilled cheesecake is much easier to handle, slice (if they weren’t mini!), and tastes infinitely better.
- Make-Ahead Marvels: These “Apple Crisp Mini Cheesecakes” are absolutely perfect for making ahead! You can prepare the entire recipe a day or two in advance and keep them covered in the refrigerator. This makes them an ideal dessert for parties, holidays, or when you simply want to enjoy a stress-free treat. The flavors actually deepen and improve with a little time in the fridge.
- Storage: Store any leftover “Apple Crisp Mini Cheesecakes” in an airtight container in the refrigerator for up to 3-4 days. They are best enjoyed within the first couple of days for optimal freshness and texture.
-
Flavor Variations for Your Apple Crisp Mini Cheesecakes:
- Caramel Drizzle: A luscious caramel sauce drizzled over the top just before serving takes these to an even more decadent level.
- Nutty Crumble: Add finely chopped pecans or walnuts to your crisp crumble for an extra layer of flavor and crunch.
- Spiced Up: Experiment with additional spices in your apple topping like a pinch of cardamom or a touch of ginger for a different twist.
- Boozy Apples: For an adult version, add a tablespoon of brandy, rum, or Calvados (apple brandy) to your apple topping while it simmers for a sophisticated flavor. Make sure to cook it down for a minute or two to burn off the alcohol.

Conclusion:
Well, my friends, we’ve reached the sweet finale of our culinary adventure, and I truly hope you’re as excited as I am about what we’ve just discussed! If there’s one recipe you absolutely must add to your baking repertoire this season, it’s these delightful Apple Crisp Mini Cheesecakes. Seriously, they are a game-changer. Imagine the creamy, dreamy texture of a classic cheesecake, perfectly portioned into individual servings, then crowned with a warmly spiced, tender apple filling, and finally, a crunchy, buttery oat crisp topping. It’s a symphony of textures and flavors that will dance on your palate. I honestly believe this recipe embodies the best of both worlds – the sophisticated elegance of a cheesecake combined with the comforting, rustic charm of a fruit crisp. It’s not just a dessert; it’s an experience, a little moment of pure joy that’s surprisingly straightforward to create in your own kitchen. I’ve poured my heart into perfecting this balance, ensuring each bite delivers that ideal blend of tart apple, sweet crunch, and velvety creaminess. They’re visually stunning, too, making them an impressive treat for any gathering, yet simple enough for a cozy night in. Truly, these are set to become a new favorite for anyone who tries them.
Now, while these mini cheesecakes are utterly perfect on their own, a little embellishment never hurt anyone, right? For an extra touch of decadence, I highly recommend serving them slightly chilled, perhaps with a generous dollop of freshly whipped cream. You could even swirl in a touch of maple syrup or a dash of cinnamon into that whipped cream for an added layer of flavor. Another fantastic option is a drizzle of warm caramel sauce, which really plays up the apple notes beautifully, or a sprinkle of toasted pecans or walnuts for an additional textural crunch. If you’re feeling adventurous and want to put your own spin on things, consider experimenting with different fruit crisp toppings. Imagine a pear and ginger crisp topping, or even a mixed berry crisp – though I must say, the classic apple truly shines here. For a truly autumnal twist, a tiny scoop of vanilla bean ice cream melting gently alongside these beauties would be divine. And don’t forget the presentation! A dusting of powdered sugar over the crisp topping, or a tiny sprig of fresh mint, can elevate these treats from delicious to absolutely show-stopping. They are fantastic served at room temperature, but I personally prefer the slight chill on the cheesecake base contrasting with the warmer notes of the crisp, offering a delightful temperature play that enhances the overall enjoyment. They’re also perfect alongside a hot cup of coffee or a cozy chai latte for an afternoon treat.
So, what are you waiting for? I’ve given you all the tools, tips, and encouragement you need to embark on this delicious journey. I genuinely encourage you to roll up your sleeves, gather your ingredients, and give this Apple Crisp Mini Cheesecakes recipe a try this week. Don’t be intimidated; the process is incredibly rewarding, and the end result is something you’ll be immensely proud of. I promise you, the aroma alone as they bake will fill your home with such a comforting, inviting scent that you’ll be counting down the minutes until they’re ready. Once you’ve experienced the magic of these individual desserts, I would absolutely love to hear about it! Please, share your baking triumphs, your photos, and your personal twists with me. Did you try a different fruit? Did you find a unique serving suggestion? Your feedback and creativity inspire me and our entire community of home bakers. Tag me on social media, or simply drop a comment below this article to let me know how your batch turned out. Let’s create a vibrant space where we all share our love for baking and, specifically, for these irresistible little marvels. I can’t wait to see your creations and hear all about your delicious experiences. Happy baking, my friends!

Apple Crisp Mini Cheesecakes
These Apple Crisp Mini Cheesecakes bring together the comforting warmth of spiced apples with the silky smooth indulgence of creamy cheesecake, all perfectly portioned for individual enjoyment. A sophisticated yet approachable treat for any occasion, these mini delights offer a delightful combination of flavors and textures.
Ingredients
-
3/4 cup graham cracker crumbs
-
1 1/2 tablespoons sugar
-
1/2 teaspoon cinnamon
-
3 tablespoons unsalted butter, melted
-
10 oz cream cheese, softened
-
6 tablespoons sugar
-
1 1/2 teaspoons vanilla
-
2 teaspoons all-purpose flour
-
1 egg
-
2 medium-small apples, peeled and finely chopped
-
2 teaspoons freshly squeezed lemon juice
-
1 1/2 teaspoons cinnamon
-
1/4 teaspoon nutmeg
-
2 tablespoons light brown sugar
-
1 1/2 teaspoons cornstarch
Instructions
-
Step 1
Preheat oven to 325°F (160°C). Line a 12-cup muffin tin with paper liners. In a medium bowl, combine graham cracker crumbs, 1 1/2 tbsp sugar, 1/2 tsp cinnamon, and 3 tbsp melted unsalted butter. Mix until moistened. Press mixture evenly into the bottom of each prepared muffin liner. Bake for 5-7 minutes, then remove and cool completely. -
Step 2
In a mixer, beat softened cream cheese until smooth. Gradually add 6 tbsp sugar and beat until just combined. Mix in 1 1/2 tsp vanilla and 2 tsp all-purpose flour. Add the egg and mix on the lowest speed just until the yolk disappears. Do not overmix. -
Step 3
In a medium skillet, cook 2 finely chopped apples over medium heat until slightly softened. Stir in 2 tsp lemon juice, 1 1/2 tsp cinnamon, 1/4 tsp nutmeg, and 2 tbsp light brown sugar; cook for 2-3 minutes. Dissolve 1 1/2 tsp cornstarch in 1 tbsp cold water to create a slurry. Stir slurry into the apples and cook for 1-2 minutes until thickened and glossy. Remove from heat and cool completely. -
Step 4
Once crusts are cool, pour cheesecake filling over them, filling each cup about two-thirds full. Gently tap the muffin tin to release air bubbles. Bake at 325°F (160°C) for 20-25 minutes, or until edges are set but the center still slightly jiggles. Do not overbake. -
Step 5
After baking, turn off the oven but leave cheesecakes inside with the oven door propped open for 30-60 minutes. Remove to a wire rack and cool completely to room temperature (1-2 hours). -
Step 6
Once completely cool, spoon a generous amount of the cooled apple topping over each cheesecake. Cover loosely and refrigerate for at least 4-6 hours, ideally overnight, to fully set. Carefully remove from tin, peel liners, and serve chilled.
Important Information
Nutrition Facts (Per Serving)
It is important to consider this information as approximate and not to use it as definitive health advice.
Allergy Information
Please check ingredients for potential allergens and consult a health professional if in doubt.