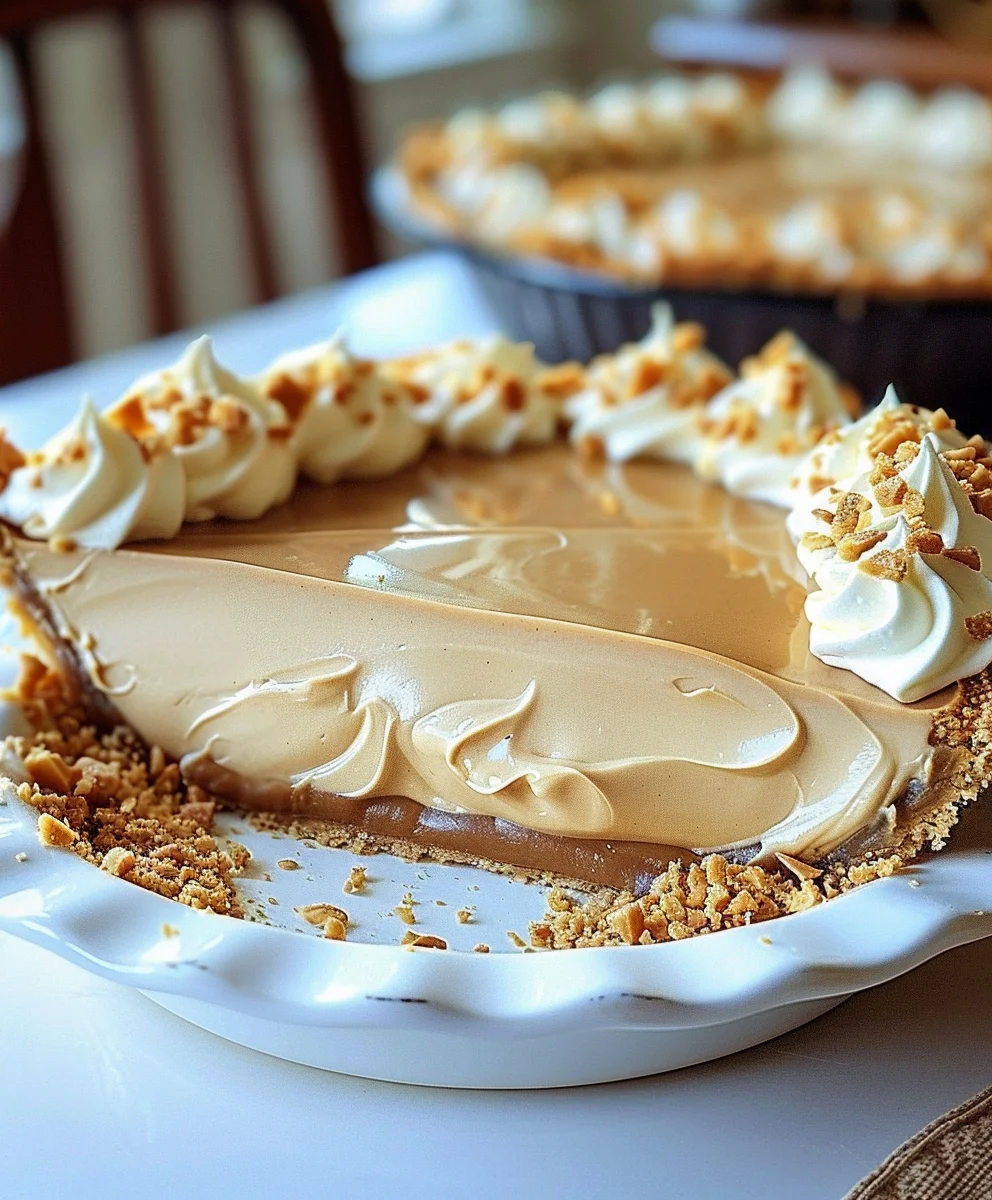
Amish Peanut Butter Cream Pie is more than just a dessert; it’s a slice of pure, unadulterated comfort that transports you straight to the heart of traditional American baking. I’m absolutely delighted to share this beloved recipe with you today, a treat that has charmed generations with its simplicity and incredible flavor profile. Imagine a rich, creamy, and irresistibly smooth peanut butter filling nestled in a crisp, sweet pie crust, all crowned with a delicate layer of whipped topping. It’s a symphony of textures and tastes that truly defines indulgence, promising to be a new family favorite from the very first bite.
This particular pie carries with it a beautiful legacy, deeply rooted in the culinary traditions of the Amish and Pennsylvania Dutch communities. Known for their focus on wholesome ingredients and hearty, comforting dishes, the Amish have perfected the art of turning humble pantry staples into extraordinary delights. This pie embodies that spirit, showcasing how a few simple components can combine to create something truly spectacular.
It’s a testament to the power of classic, uncomplicated recipes that stand the test of time.
What makes people utterly fall in love with this Amish Peanut Butter Cream Pie? Beyond its nostalgic charm, it’s the exquisite balance of sweet and salty, the velvety-smooth texture of the filling that melts in your mouth, and the satisfying crunch of the crust. It’s often a no-bake wonder, making it a perfect, convenient option for potlucks, family gatherings, or simply when you crave a decadent dessert without the fuss. Every bite is a journey back to simpler times, making it a guaranteed crowd-pleaser that leaves everyone asking for the recipe.

Ingredients:
-
For the Homemade Flaky Pie Crust:
- 2 ½ cups (300g) all-purpose flour, plus extra for dusting your work surface. I always prefer using unbleached flour for the best texture and flavor in my baked goods.
- 1 teaspoon fine sea salt. This little bit of salt is crucial for enhancing the flavor of the crust itself, providing a lovely contrast to the sweet filling.
- 1 cup (226g) unsalted butter, very cold and cut into ½-inch cubes. The colder the butter, the flakier your crust will be. I often put my cubed butter in the freezer for about 10-15 minutes before I start mixing.
- ½ cup (120ml) ice water, plus an additional 1-2 tablespoons if needed. Keeping the water as cold as possible helps prevent the butter from melting too quickly.
- Alternatively, one pre-baked 9-inch pie crust. While a store-bought crust saves time, making your own truly elevates this Amish Peanut Butter Cream Pie to another level of deliciousness!
-
For the Rich Amish Peanut Butter Cream Filling:
- 1 ½ cups (300g) granulated sugar. This forms the sweet backbone of our luscious filling.
- ½ cup (60g) all-purpose flour. This acts as a gentle thickener, giving our cream pie that perfect, spoonable consistency without being overly dense.
- ½ teaspoon fine sea salt. Again, a pinch of salt here balances the sweetness and really brings out the peanut butter flavor.
- 3 cups (720ml) whole milk. Whole milk lends unparalleled richness and creaminess to the filling. I find that skim or low-fat milk just doesn’t deliver the same decadent result for this Amish Peanut Butter Cream Pie.
- 4 large egg yolks. These contribute to the filling’s beautiful golden color and add an incredible silkiness and richness. Separate them carefully, reserving the whites for another use if you wish!
- 2 teaspoons pure vanilla extract. Use good quality vanilla; it makes a noticeable difference in the overall flavor profile.
- 1 cup (256g) creamy peanut butter. I strongly recommend a classic, processed creamy peanut butter (like Jif or Skippy) for the best texture and flavor consistency in this particular recipe. Natural peanut butter can sometimes separate and create an oily texture in the filling.
- ½ cup (113g) unsalted butter, softened. This is incorporated at the end, adding a final touch of richness and making the filling incredibly smooth and luxurious.
-
For the Fluffy Whipped Topping:
- 2 cups (480ml) heavy cream, very cold. Like the butter for the crust, cold cream is essential for achieving stiff peaks.
- ½ cup (60g) powdered sugar (confectioners’ sugar). This sweetens the topping without adding a gritty texture.
- 1 teaspoon pure vanilla extract. Enhances the creamy flavor.
- Optional Garnish: Finely chopped roasted peanuts, chocolate shavings, or a drizzle of chocolate syrup for an extra touch of indulgence.
Preparation of the Homemade Flaky Pie Crust:
- Combine Dry Ingredients: In a large mixing bowl, whisk together the 2 ½ cups of all-purpose flour and 1 teaspoon of fine sea salt. This ensures even distribution of the salt throughout the flour, contributing to a consistently seasoned crust.
- Incorporate Cold Butter: Add the 1 cup of very cold, cubed unsalted butter to the flour mixture. Using a pastry blender, two knives, or even your fingertips, cut the butter into the flour until the mixture resembles coarse meal with some pea-sized pieces of butter remaining. It’s crucial not to overmix here; those tiny pockets of butter are what create the flaky layers in your crust. I often work quickly, trying to handle the butter as little as possible to keep it cold.
- Add Ice Water Gradually: Gradually add the ½ cup of ice water, one tablespoon at a time, mixing lightly with a fork until the dough just begins to come together. You might not need all of the water, or you might need an extra tablespoon or two. The goal is for the dough to be moist enough to hold together when pressed, but not sticky or wet. Over-hydrating the dough can lead to a tough crust.
- Form and Chill the Dough: Turn the dough out onto a lightly floured surface. Gently gather it into a cohesive disk. Do not knead it, as this develops gluten and will make your crust tough. Wrap the dough disk tightly in plastic wrap and refrigerate it for at least 30 minutes, or up to 2 days. Chilling the dough allows the gluten to relax and the butter to firm up, making it easier to roll and resulting in a flakier crust.
- Roll Out the Dough: On a lightly floured surface, roll out the chilled dough into a 12-inch circle, about ⅛-inch thick. If the dough cracks, let it sit for a few minutes to warm up slightly, or gently patch it together. I often rotate the dough a quarter turn after each roll to ensure an even thickness.
- Transfer to Pie Plate: Carefully transfer the rolled-out dough to a 9-inch pie plate. Trim the edges, leaving about a ½-inch overhang. Fold the overhang under and crimp the edges decoratively using your fingers or a fork.
- Chill Again (Important!): Place the prepared pie crust back into the refrigerator or freezer for at least 15-20 minutes. This second chill helps prevent the crust from shrinking during baking.
- Blind Bake the Crust: Preheat your oven to 425°F (220°C). Line the chilled pie crust with parchment paper or aluminum foil, making sure the paper extends over the edges. Fill the lined crust with pie weights, dried beans, or rice. These weights prevent the bottom of the crust from puffing up.
- Bake and Cool: Bake for 15 minutes, then carefully remove the parchment paper and pie weights. Continue baking for another 8-12 minutes, or until the crust is golden brown and appears dry. Keep a close eye on it, as ovens vary. Once baked, remove the pie crust from the oven and let it cool completely on a wire rack. A fully cooled crust is essential before adding the filling to prevent a soggy bottom for our amazing Amish Peanut Butter Cream Pie!
Crafting the Irresistible Amish Peanut Butter Cream Filling:
- Whisk Dry Ingredients: In a medium-sized heavy-bottomed saucepan, whisk together the 1 ½ cups of granulated sugar, ½ cup of all-purpose flour, and ½ teaspoon of fine sea salt. This step is important to ensure there are no lumps of flour in your finished custard.
- Gradually Add Milk: Slowly pour in the 3 cups of whole milk, whisking constantly to prevent lumps from forming. The mixture should be smooth before you even turn on the heat.
- Cook the Custard Base: Place the saucepan over medium heat. Cook, stirring constantly with a whisk or a wooden spoon, until the mixture thickens and comes to a boil. This continuous stirring is key to prevent scorching the bottom and to achieve a perfectly smooth, lump-free custard. Once it starts to boil, continue cooking and stirring for 1-2 minutes to ensure the flour is fully cooked through and the mixture is thick. It should coat the back of a spoon.
- Temper the Egg Yolks: While the custard is cooking, in a separate small bowl, lightly whisk the 4 large egg yolks. Once the milk mixture has thickened and boiled, remove it from the heat. Gradually drizzle about ½ cup of the hot milk mixture into the whisked egg yolks, whisking constantly. This process, called tempering, slowly brings the temperature of the egg yolks up, preventing them from scrambling when added to the hot custard.
- Combine Egg Yolks with Custard: Pour the tempered egg yolk mixture back into the saucepan with the remaining hot custard. Return the saucepan to medium-low heat. Cook for another 1-2 minutes, stirring constantly, until the filling is very thick and glossy. Do not let it boil vigorously after adding the egg yolks, as this can cause the eggs to curdle.
- Remove from Heat and Add Flavorings: Remove the saucepan from the heat. Stir in the 2 teaspoons of pure vanilla extract and the 1 cup of creamy peanut butter. Whisk vigorously until the peanut butter is completely melted and smoothly incorporated into the custard. The mixture should now be beautifully golden brown and smell absolutely incredible – that signature “Amish Peanut Butter Cream Pie” aroma!
- Enrich with Butter: Add the ½ cup of softened unsalted butter to the hot peanut butter filling. Stir until the butter is fully melted and blended, making the filling extra rich and velvety smooth. This step gives the filling its luxurious mouthfeel.
- Cool the Filling: Transfer the peanut butter cream filling to a clean bowl. Cover the surface of the filling directly with plastic wrap to prevent a skin from forming. Allow it to cool at room temperature for about 30 minutes, then refrigerate for at least 1-2 hours, or until completely chilled and firm. Chilling is paramount for the filling to set properly before assembling the Amish Peanut Butter Cream Pie.
Preparing the Fluffy Whipped Topping:
- Chill Your Equipment: For the best results, place your mixing bowl (preferably a metal one) and whisk attachment (if using a stand mixer) or beaters (if using a hand mixer) in the freezer for 10-15 minutes before you begin. Cold equipment helps the cream whip up faster and hold its shape better.
- Whip the Cream: Pour the 2 cups of very cold heavy cream into the chilled bowl. Begin whipping on medium-low speed, gradually increasing to medium-high speed.
- Add Sweetener and Vanilla: As the cream starts to thicken and soft peaks begin to form (this usually takes about 2-3 minutes), gradually add the ½ cup of powdered sugar and 1 teaspoon of pure vanilla extract.
- Whip to Stiff Peaks: Continue whipping until stiff peaks form. When you lift the whisk, the peaks should hold their shape firmly. Be careful not to over-whip, or you’ll end up with butter! The whole process typically takes about 4-6 minutes, depending on your mixer and the temperature of your cream. This light and airy topping is the perfect complement to the rich Amish Peanut Butter Cream Pie filling.
Assembling Your Amish Peanut Butter Cream Pie:
- Prepare the Pie Shell: Ensure your homemade (or store-bought) pre-baked pie crust is completely cool. A warm crust can melt the filling, leading to a runny pie.
- Fill the Crust: Once the peanut butter cream filling is thoroughly chilled and firm, spoon it evenly into the cooled pie crust. Use an offset spatula or the back of a spoon to smooth out the top, creating an even surface. I like to make sure it’s spread right to the edges for a beautiful presentation.
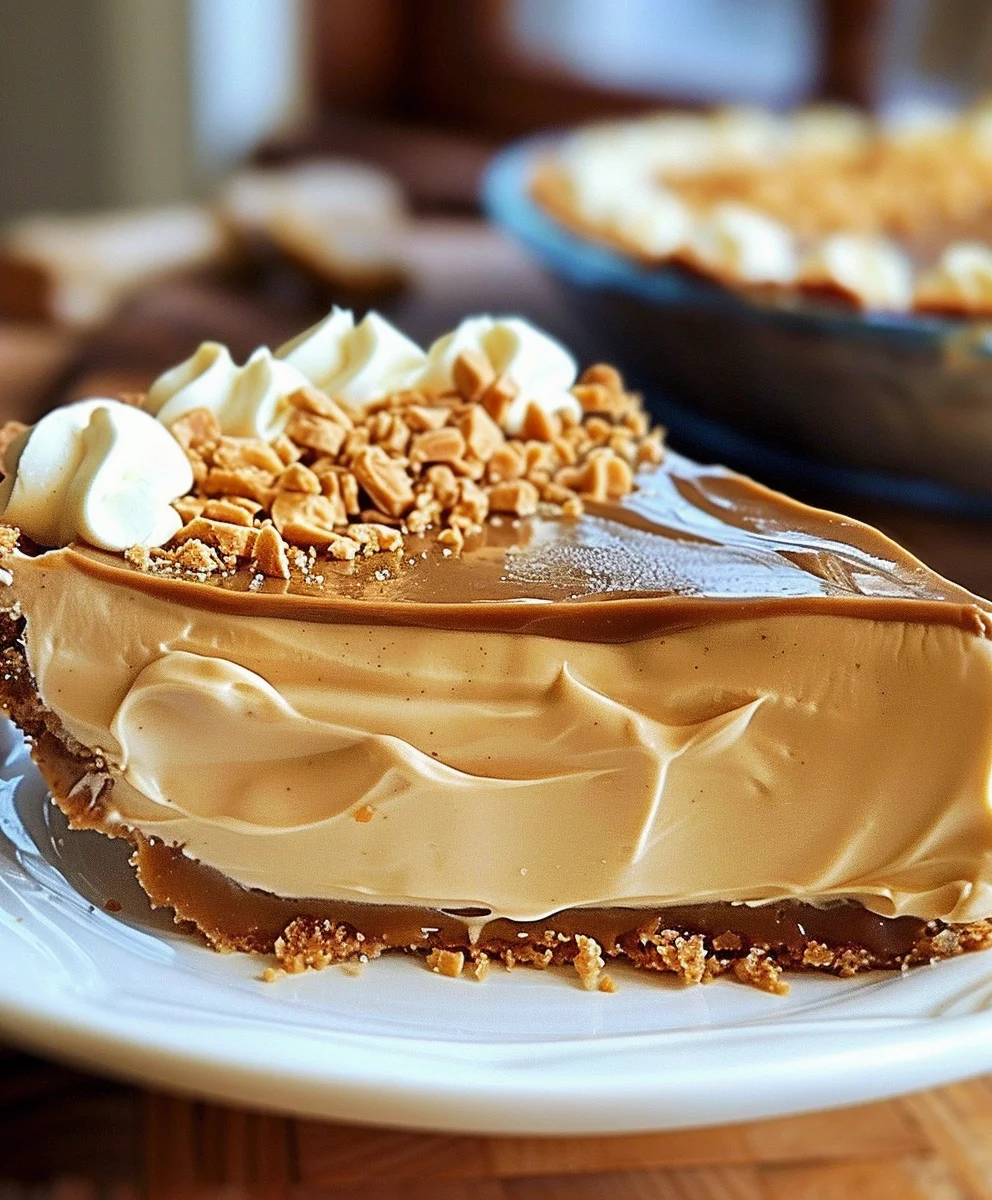
- Top with Whipped Cream: Gently dollop or spread the freshly made whipped topping over the peanut butter filling. You can create decorative swirls with an offset spatula, or use a piping bag with a star tip for a more elegant look. Don’t be shy with the whipped cream; it’s a generous and delightful component of any good Amish Peanut Butter Cream Pie!
- Add Optional Garnish: If desired, sprinkle the top of your pie with finely chopped roasted peanuts, chocolate shavings, or a light drizzle of chocolate syrup. These garnishes not only add visual appeal but also enhance the textural and flavor experience.
Chilling and Serving Your Delightful Amish Peanut Butter Cream Pie:
- Final Chill: For the best consistency and to allow all the flavors to meld beautifully, return the assembled Amish Peanut Butter Cream Pie to the refrigerator for at least another 2-4 hours before serving. I often make mine the day before to ensure it’s perfectly set. A well-chilled pie is easier to slice and tastes absolutely divine!
- Slice and Serve: When you’re ready to serve, use a sharp, thin knife dipped in hot water and wiped clean between each slice for the cleanest cuts. This helps prevent the whipped topping from sticking and keeps your slices looking pristine.
- Enjoy the Experience: Serve generous slices of your homemade Amish Peanut Butter Cream Pie to delighted family and friends. This pie is a true crowd-pleaser, perfect for potlucks, holidays, or simply as a comforting dessert on any given day. Its creamy texture and rich peanut butter flavor, perfectly balanced by the light whipped topping and flaky crust, make it an unforgettable treat.
- Storage: Leftover Amish Peanut Butter Cream Pie should be stored in an airtight container in the refrigerator for up to 3-4 days. While it’s best enjoyed within a day or two for peak freshness, it remains delicious for several days. I find it rarely lasts that long in my house!
Conclusion:
And there you have it, my friends! We’ve journeyed through the simple yet profound steps of creating a truly unforgettable dessert. This isn’t just another pie recipe; it’s a passport to pure, unadulterated comfort and joy. What makes this particular creation a phenomenal must-try for everyone, from seasoned bakers to complete novices, is its incredible balance of flavors and textures. Imagine a lusciously smooth, unbelievably creamy filling, bursting with that irresistible sweet and salty peanut butter essence, all nestled within a perfectly flaky, golden crust. It’s a symphony for your taste buds, a delightful dance between the rich, nutty notes and a melt-in-your-mouth consistency that truly defines indulgence. Every single bite is a testament to the fact that sometimes, the simplest ingredients, when combined with a touch of love and the right technique, can produce something extraordinarily memorable.
I genuinely believe that once you experience the magic of this pie, it will quickly become a cherished staple in your culinary repertoire. It’s the kind of dessert that elicits gasps of delight and requests for the recipe every single time you serve it. The beauty of it lies not just in its exquisite taste, but also in its approachable preparation. You don’t need fancy equipment or advanced skills to achieve perfection here. Just a few common pantry ingredients and a little patience, and you’ll be rewarded with a dessert that looks like it came straight from a gourmet bakery, but with that special homemade touch that only you can provide. Trust me when I say, this recipe for Amish Peanut Butter Cream Pie is an absolute game-changer, a dessert that truly delivers on its promise of rich flavor and delightful simplicity, making it the perfect sweet ending to any meal or a spectacular centerpiece for any celebration.
Elevate Your Pie Experience: Serving Suggestions & Creative Twists
While this pie is absolutely divine enjoyed plain, straight from the fridge, there are so many delightful ways to enhance its appeal and truly make it your own. For a classic presentation, a generous dollop of freshly whipped cream, perhaps lightly sweetened with vanilla, is always a welcome addition. The light, airy cream provides a beautiful contrast to the pie’s rich density. If you’re a chocolate lover, consider drizzling a bit of melted chocolate ganache or even some simple chocolate syrup over each slice just before serving. The combination of peanut butter and chocolate is, after all, a match made in heaven!
For those who crave an extra textural element, a sprinkle of finely crushed roasted peanuts or even some miniature peanut butter cups atop the whipped cream will add both visual appeal and a satisfying crunch. Don’t be afraid to experiment with your crust either! While a traditional flaky pastry crust is wonderful, an Oreo cookie crust or a graham cracker crust can introduce new dimensions of flavor and texture that are equally delicious. Think about serving a slice alongside a small scoop of vanilla bean ice cream for an ultimate indulgent treat, or with a steaming mug of coffee for a comforting afternoon pick-me-up. For a hint of freshness, a few fresh raspberries or sliced bananas on the side can offer a lovely counterpoint to the pie’s sweetness, creating a balanced and visually stunning dessert plate. These simple variations allow you to customize this already incredible pie to suit your mood, your guests, or the occasion, ensuring it never ceases to impress.
Your Culinary Adventure Awaits!
Now that you have all the tools and inspiration, it’s truly your turn to step into the kitchen and bring this incredible recipe to life. Don’t hesitate, don’t overthink it; just gather your ingredients and embark on this delicious journey. I promise you, the reward of seeing that perfect slice, tasting that unparalleled flavor, and witnessing the smiles on the faces of those you share it with, is immensely satisfying. There’s a unique joy that comes from creating something so delicious with your own hands, and this pie offers that in abundance.
I am genuinely excited for you to experience the sheer delight of this dessert. Once you’ve whipped up your very own version, I would absolutely love to hear all about your experience! Did you stick to the classic recipe, or did you venture into some of the suggested variations? Perhaps you even came up with a unique twist of your own that you’re eager to share. Please, take a moment to leave a comment below, share a photo on your favorite social media platform, or simply tell your friends and family about your baking triumph. Your feedback, your stories, and your culinary creations are what make this community so vibrant and inspiring. So go forth, bake with passion, and prepare to fall head over heels for your new favorite dessert!
Amish Peanut Butter Cream Pie
A slice of pure, unadulterated comfort, this Amish Peanut Butter Cream Pie transports you straight to the heart of traditional American baking. Inspired by Pennsylvania Dutch communities, it’s a no-bake wonder (for the filling) with old-fashioned charm, featuring a rich, creamy peanut butter filling in a crisp pie crust, topped with fluffy whipped cream. Perfect for potlucks, holidays, or any time you crave a decadent, soul-satisfying dessert.
Ingredients
-
2 ½ cups (300g) all-purpose flour
-
1 teaspoon fine sea salt (for crust)
-
1 cup (226g) unsalted butter, very cold, cubed (for crust)
-
½ cup (120ml) ice water, plus 1-2 tablespoons if needed (for crust)
-
1 ½ cups (300g) granulated sugar (for filling)
-
½ cup (60g) all-purpose flour (for filling)
-
½ teaspoon fine sea salt (for filling)
-
3 cups (720ml) whole milk
-
4 large egg yolks
-
2 teaspoons non-alcoholic vanilla flavoring (for filling)
-
1 cup (256g) creamy peanut butter
-
½ cup (113g) unsalted butter, softened (for filling)
-
2 cups (480ml) heavy cream, very cold
-
½ cup (60g) powdered sugar (for topping)
-
1 teaspoon non-alcoholic vanilla flavoring (for topping)
-
Optional Garnish: Finely chopped roasted peanuts, chocolate shavings, or chocolate syrup
Instructions
- Step 1: Preparation of the Homemade Flaky Pie Crust
- Combine 2 ½ cups flour and 1 tsp salt in a large bowl. Cut in 1 cup cold cubed butter until mixture resembles coarse meal.
- Gradually add ½ cup ice water, mixing lightly with a fork until the dough just begins to come together. Do not overmix.
- Gather dough into a cohesive disk, wrap tightly in plastic, and refrigerate for at least 30 minutes.
- On a lightly floured surface, roll dough into a 12-inch circle. Carefully transfer to a 9-inch pie plate. Trim edges, fold under, and crimp decoratively.
- Chill the prepared crust in the refrigerator or freezer for at least 15–20 minutes.
- Preheat oven to 425°F (220°C). Line the chilled crust with parchment paper or foil, fill with pie weights.
- Bake for 15 minutes, then carefully remove parchment and weights. Continue baking for another 8–12 minutes until golden brown and dry. Cool completely on a wire rack.
- Step 2: Crafting the Irresistible Amish Peanut Butter Cream Filling
- In a medium heavy-bottomed saucepan, whisk together 1 ½ cups granulated sugar, ½ cup flour, and ½ tsp salt. Gradually pour in 3 cups whole milk, whisking constantly until smooth.
- Cook over medium heat, stirring constantly, until the mixture thickens and comes to a boil. Continue cooking and stirring for 1–2 minutes, then remove from heat.
- In a separate small bowl, lightly whisk 4 egg yolks. Gradually drizzle about ½ cup of the hot milk mixture into the egg yolks, whisking constantly to temper.
- Pour the tempered egg yolks back into the saucepan with the remaining hot custard. Return to medium-low heat and cook for another 1–2 minutes, stirring constantly, until very thick and glossy. Do not boil vigorously.
- Remove the saucepan from heat. Stir in 2 tsp non-alcoholic vanilla flavoring and 1 cup creamy peanut butter. Whisk until the peanut butter is completely melted and smoothly incorporated.
- Add ½ cup softened unsalted butter to the hot filling. Stir until fully melted and blended, making the filling extra rich and velvety smooth.
- Transfer the filling to a clean bowl. Cover the surface directly with plastic wrap to prevent a skin from forming. Refrigerate for at least 1–2 hours until completely chilled and firm.
- Step 3: Preparing the Fluffy Whipped Topping
- Chill your mixing bowl and whisk attachment (or beaters) in the freezer for 10–15 minutes.
- Pour 2 cups very cold heavy cream into the chilled bowl. Begin whipping on medium-low speed, gradually increasing to medium-high.
- As the cream starts to thicken and soft peaks form (about 2–3 minutes), gradually add ½ cup powdered sugar and 1 tsp non-alcoholic vanilla flavoring.
- Continue whipping until stiff peaks form. Be careful not to over-whip.
- Step 4: Assembling Your Amish Peanut Butter Cream Pie
- Ensure your pre-baked pie crust is completely cool. Spoon the thoroughly chilled peanut butter cream filling evenly into the crust and smooth the top.
- Gently dollop or spread the freshly made whipped topping over the peanut butter filling.
- Optionally, garnish the top with finely chopped roasted peanuts, chocolate shavings, or a drizzle of chocolate syrup for a decorative finish.
- Step 5: Chilling and Serving Your Delightful Amish Peanut Butter Cream Pie
- Refrigerate the assembled pie for at least another 2–4 hours before serving to allow it to fully set and develop the best consistency and flavor.
- When ready to serve, use a sharp, thin knife dipped in hot water and wiped clean between each slice for perfectly clean cuts.
- Store any leftover pie in an airtight container in the refrigerator for up to 3–4 days to maintain freshness.
Important Information
Nutrition Facts (Per Serving)
It is important to consider this information as approximate and not to use it as definitive health advice.
Allergy Information
Please check ingredients for potential allergens and consult a health professional if in doubt.