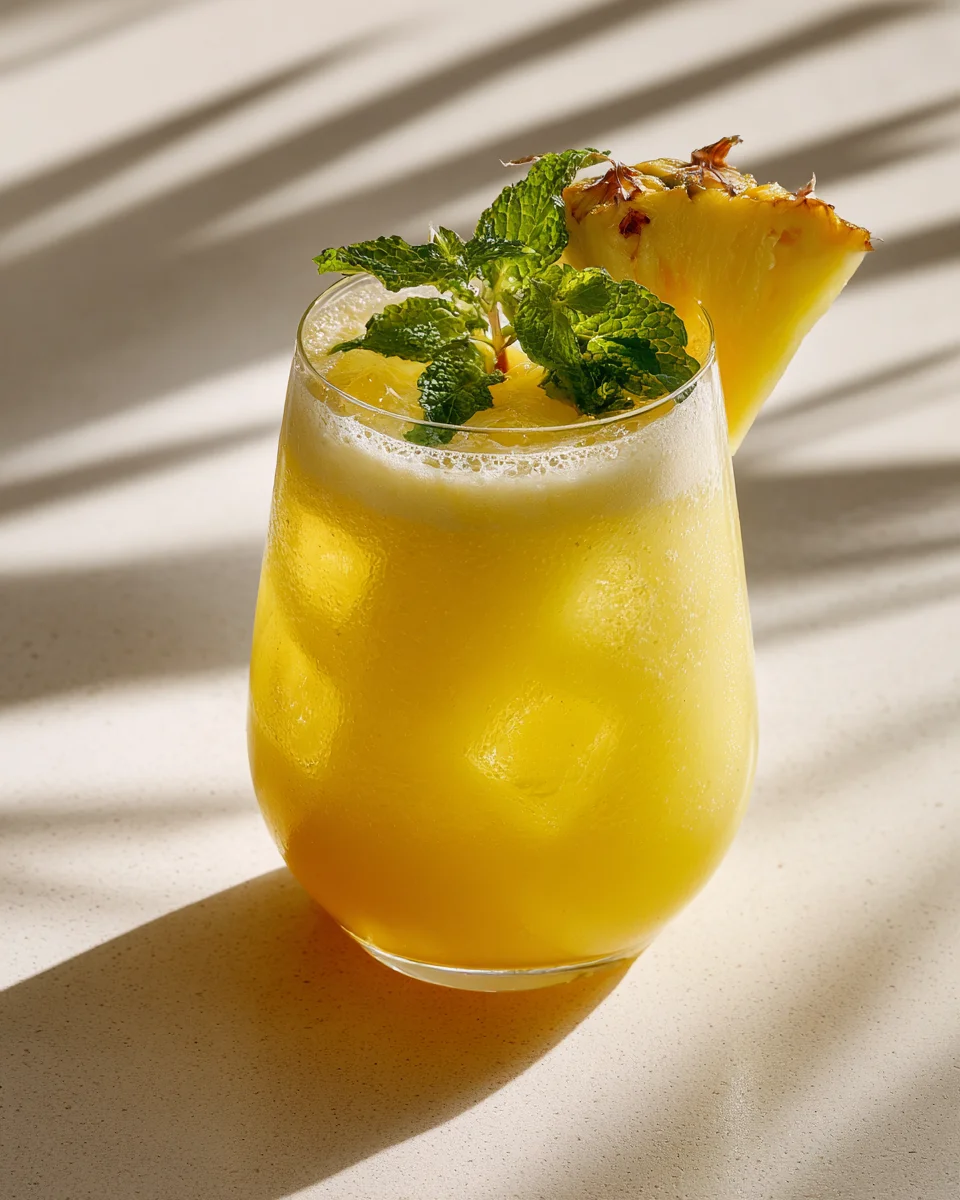
Pineapple Coconut Cooler
Oh my goodness, get ready to discover your new favorite way to beat the heat and transport yourself straight to a sun-drenched beach! This Pineapple Coconut Cooler isn’t just a drink; it’s a mini-vacation in a glass, and I promise you’re going to fall head over heels for it. What makes it so special? It’s the perfect harmony of sweet, tangy pineapple and rich, creamy coconut, a combination that just screams “tropical paradise” and delivers pure refreshment with every sip.
You’ll love how incredibly easy it is to whip up this vibrant, non-alcoholic delight, whether you’re hosting a backyard BBQ, enjoying a quiet afternoon on the porch, or simply craving something fantastically refreshing. It’s naturally sweet, wonderfully hydrating, and absolutely bursting with flavor – a total crowd-pleaser that everyone, from kids to adults, can enjoy. Imagine sipping on this smooth, chilled concoction, feeling the tropical vibes wash over you with every delicious gulp. It’s the perfect escape without even needing a passport!

Ingredient Notes
Creating the perfect Pineapple Coconut Cooler truly begins with understanding the core ingredients. This isn’t just a simple blend; it’s a symphony of tropical flavors designed to refresh and delight. I’ve found that using high-quality ingredients makes all the difference in achieving that vibrant, authentic taste we’re aiming for.
Pineapple
- Fresh Pineapple: This is my absolute top recommendation. The natural sweetness, tang, and freshness of ripe pineapple chunks are unparalleled. When you cut it yourself, you get that fantastic aroma and juicy texture that processed pineapple just can’t match. Look for pineapples that smell sweet at the base and have a slight give when squeezed. For this cooler, I suggest about 2 cups of chopped pineapple.
- Frozen Pineapple Chunks: A fantastic alternative, especially if you want an extra frosty drink without diluting it too much with ice. Using frozen pineapple gives your cooler a thicker, creamier, and much colder consistency right from the blender. It’s also incredibly convenient. If using frozen, you might need a tiny bit more liquid to get it going in the blender.
- Pineapple Juice: While fresh is best, a good quality 100% pure pineapple juice (not from concentrate, if possible) can work in a pinch or to supplement. It helps adjust the consistency and adds more pineapple punch. However, rely on it too heavily, and you might miss the texture and fiber of actual fruit. I usually add a splash or two if my cooler is too thick.
Coconut
- Full-Fat Canned Coconut Milk: This is the secret to the cooler’s luscious creaminess. The richness and subtle coconut flavor are essential. Don’t be tempted to use light coconut milk here, as it won’t provide the same velvety texture or depth of flavor. Give the can a good shake before opening to emulsify the cream and water.
- Coconut Water: A lighter, hydrating alternative to coconut milk, or used in conjunction with it. Coconut water helps thin the cooler to your desired consistency without sacrificing that tropical essence. It adds natural electrolytes and a refreshing, subtle sweetness. It’s perfect for balancing the richness of the coconut milk.
- Cream of Coconut: While not strictly necessary if you prefer a less sweet drink, cream of coconut (often found near cocktail mixers, but it’s non-alcoholic!) adds an incredible sweetness and even more creamy texture. It’s essentially sweetened, thickened coconut milk. If you love pina coladas, you’ll love what this does for our cooler. Start with a tablespoon or two and adjust to your taste.
Sweeteners & Acids
- Fresh Lime Juice: A squeeze of fresh lime juice is crucial! It brightens all the flavors, cutting through the sweetness and richness of the pineapple and coconut. It really brings the whole cooler to life. Please, use fresh lime juice; bottled just doesn’t compare.
- Natural Sweeteners: If your pineapple isn’t super sweet or you just prefer a sweeter drink, I recommend a touch of agave nectar, maple syrup, or a simple syrup you’ve made yourself (equal parts sugar and water, heated until dissolved). These dissolve easily and won’t leave a grainy texture. I always taste first before adding any extra sweetness.
Optional Additions & Substitutions
- Fresh Mint Leaves: A few leaves blended in or muddled beforehand can add a wonderfully refreshing herbaceous note. It’s a game-changer for presentation too!
- Ginger: A small knob of fresh ginger, peeled and sliced, adds a zesty, spicy kick that complements the tropical flavors beautifully. Start with a small piece, as it can be quite potent.
- Vanilla Extract: Just a tiny splash of pure vanilla extract can deepen the overall flavor profile, adding a subtle warmth that surprisingly enhances the tropical notes.
- For a Sparkler: If you want some fizz, you can replace a portion of the coconut water with sparkling water or club soda after blending, just before serving. This creates a lighter, effervescent drink.
Step-by-Step Instructions
Making this Pineapple Coconut Cooler is incredibly simple, and the best part is it comes together in minutes. Here’s how I get that perfect, refreshing blend every time:
- Prepare Your Ingredients: First things first, get all your ingredients ready. If you’re using fresh pineapple, peel and core it, then chop it into rough 1-inch chunks. If your lime juice isn’t already squeezed, do that now. Gather your coconut milk, coconut water, and any optional sweeteners or additions.
- Load the Blender: I find it best to add the liquids first to help the blender blades get going, especially if you’re using frozen fruit. So, pour in your full-fat coconut milk, coconut water, fresh lime juice, and any cream of coconut or other liquid sweeteners you’re using.
- Add the Solids: Next, add your pineapple chunks (fresh or frozen) to the blender. If you’re incorporating fresh mint leaves or ginger, add them in now too.
- Blend Until Smooth: Secure the lid on your blender and start blending on a low setting, gradually increasing to high. Blend until the mixture is completely smooth and creamy. There should be no visible chunks of pineapple. Depending on your blender’s power, this might take anywhere from 30 seconds to a minute or two. Scrape down the sides with a spatula if needed to ensure everything gets incorporated.
- Taste and Adjust: This is a crucial step! Pour a small amount into a spoon and taste it. Does it need more sweetness? Add a bit more agave or maple syrup and blend again briefly. Could it use more tang? A splash more lime juice will do the trick. Is it too thick? Add a little more coconut water or pineapple juice. Too thin? A few more frozen pineapple chunks or a bit more ice will thicken it right up.
- Add Ice (Optional, for Extra Chill): If you used fresh pineapple and want an icier, colder drink, now is the time to add a handful of ice cubes to the blender. Blend again until the ice is crushed and fully incorporated, making the cooler extra frosty.
- Serve Immediately: Pour your beautifully blended Pineapple Coconut Cooler into chilled glasses. I love a tall glass for this!
- Garnish (Highly Recommended!): This cooler practically begs for a garnish. A fresh lime wheel, a wedge of pineapple on the rim, a sprig of fresh mint, or a sprinkle of toasted coconut flakes really elevates the experience. Enjoy right away!
Tips & Suggestions
I’ve made my fair share of Pineapple Coconut Coolers, and over time, I’ve picked up a few tricks that make them even more delightful. These tips are all about maximizing flavor, texture, and presentation for your ultimate refreshment!
- Chill Your Ingredients: For the coldest, most refreshing cooler possible, I always try to use chilled coconut milk, coconut water, and even store my fresh pineapple in the fridge beforehand. This minimizes the amount of ice you need, preventing a watered-down taste.
- Freeze Your Pineapple: As mentioned in the ingredient notes, using frozen pineapple chunks instead of fresh ones (or a mix of both) is a fantastic way to achieve an incredibly thick, frosty, and creamy consistency without relying heavily on ice. It makes for a truly luxurious texture.
- Sweetness is Personal: Everyone’s palate is different. My advice is to always taste your cooler before adding extra sweetener. The ripeness of your pineapple can drastically affect the natural sweetness, so adjust the agave, maple syrup, or cream of coconut to your personal preference.
- Don’t Skip the Lime: Seriously, fresh lime juice is the unsung hero of this drink. It brightens every single flavor, cuts through the richness, and prevents the cooler from tasting overly sweet or flat. A little goes a long way, but it’s absolutely essential.
- Make it a Mocktail Bar: If you’re hosting, consider setting up a mocktail bar! Have different garnishes available: lime wedges, pineapple spears, maraschino cherries (non-alcoholic, of course!), fresh mint, and even small bowls of toasted coconut flakes for sprinkling. Guests can customize their own delicious drink.
- Experiment with Spices: For an unexpected twist, try adding a tiny pinch of ground cardamom or a whisper of cayenne pepper (yes, really!) to your blender. Cardamom enhances the tropical notes, while cayenne adds a subtle, intriguing warmth that’s surprisingly good with pineapple.
- Thick vs. Thin: If you prefer a thicker, almost smoothie-like consistency, use more frozen pineapple and less liquid. For a thinner, more drinkable cooler, increase the coconut water or add a splash of plain water or unsweetened pineapple juice.
- Serve in Chilled Glasses: This might seem minor, but serving your cooler in glasses that have been chilling in the freezer for 10-15 minutes makes a huge difference in keeping your drink cold and enjoyable for longer.
- Consider a Rim: For an extra festive touch, moisten the rim of your serving glass with a lime wedge, then dip it into a shallow dish of toasted coconut flakes or finely shredded unsweetened coconut. It adds both visual appeal and a lovely textural element.
Storage
While this Pineapple Coconut Cooler is undoubtedly at its best when enjoyed freshly made and ice-cold, I understand that sometimes you might have leftovers or want to prepare a batch slightly ahead of time. Here’s what I’ve learned about storing it:
- Refrigeration: You can store any leftover Pineapple Coconut Cooler in an airtight container or a covered pitcher in the refrigerator for up to 24 hours. I wouldn’t recommend much longer than that, as the flavors and freshness will start to diminish, and the texture can change.
- Separation is Normal: Don’t be alarmed if you notice some separation of the ingredients after a few hours in the fridge. This is completely normal, especially with drinks containing coconut milk. The coconut fats may solidify slightly, and the fruit pulp might settle. Simply give it a very good stir or a quick re-blend for a few seconds before serving to emulsify everything again.
- Losing the “Cooler” Factor: Keep in mind that when you store it in the fridge, it won’t have that frosty, ice-cold texture you get from blending with ice. If you’re serving it the next day, I recommend pouring it over fresh ice or giving it a quick blitz in the blender with a few new ice cubes to bring back that delightful chill and frothiness.
- Freezing into Popsicles: This is my favorite way to “store” any leftover cooler! Pour the mixture into popsicle molds and freeze them until solid. These Pineapple Coconut Cooler popsicles are an absolutely delightful treat on a hot day, and they’re a great way to enjoy the flavors in a different form. They’ll keep well in the freezer for a couple of weeks.
- Best Served Fresh: Honestly, for the ultimate experience, I really encourage you to make this cooler fresh right before you plan to drink it. The vibrant flavors, the creamy texture, and the frosty temperature are all at their peak immediately after blending. It’s so quick to make, that it’s worth the minimal effort for maximum enjoyment!
Final Thoughts
Well, there you have it! We’ve journeyed through creating the most delightful tropical escape in a glass. This Pineapple Coconut Cooler isn’t just a drink; it’s a mini-vacation for your taste buds, a burst of sunshine on even the cloudiest day. I truly believe the Pineapple Coconut Cooler is a must-try for anyone craving something truly refreshing and uniquely delicious.
Its perfect balance of sweet, tangy pineapple and creamy, exotic coconut creates a symphony of flavors that is both invigorating and incredibly satisfying. It’s so simple to whip up, yet it delivers such a sophisticated, resort-style experience without any alcohol, making it perfect for everyone to enjoy.
So, whether you’re looking for the perfect sip to cool down on a warm afternoon, a vibrant treat to share with friends, or just a little something special to brighten your day, the Pineapple Coconut Cooler is your answer. Give it a try – I promise, you won’t be disappointed. It’s pure liquid joy, ready to transport you to a tropical paradise with every single gulp!
Best Pineapple Coconut Cooler Recipe: Quick & Easy Refreshment

Beat the heat with this refreshing Pineapple Coconut Cooler, a delightful blend of sweet pineapple and creamy coconut. Perfect for any occasion, this non-alcoholic drink transports you to a tropical paradise with every sip.
- Prep Time: 15 mins
- Cook Time: 0 mins
- Total Time: 15 minutes
- Yield: 4 servings 1x
- Category: Beverage
- Method: Blending
- Cuisine: Tropical
Ingredients
- 2 cups of chopped fresh pineapple
- Frozen pineapple chunks (as needed)
- Pineapple juice (as needed)
- 1 can of full-fat canned coconut milk
- Coconut water (as needed)
- Cream of coconut (1-2 tablespoons, optional)
- Fresh lime juice (to taste)
- Agave nectar, maple syrup, or simple syrup (to taste)
- Fresh mint leaves (optional)
- Fresh ginger (small knob, optional)
- Vanilla extract (a tiny splash, optional)
- Ice cubes (optional, for extra chill)
Instructions
- Prepare Your Ingredients: Peel and core the fresh pineapple, then chop it into rough 1-inch chunks. Squeeze fresh lime juice if not already done. Gather coconut milk, coconut water, and any optional sweeteners or additions.
- Load the Blender: Pour in the full-fat coconut milk, coconut water, fresh lime juice, and any cream of coconut or other liquid sweeteners you're using.
- Add the Solids: Add the pineapple chunks (fresh or frozen) to the blender. If using fresh mint leaves or ginger, add them now too.
- Blend Until Smooth: Secure the lid and blend on low, gradually increasing to high until completely smooth and creamy. Scrape down the sides if needed.
- Taste and Adjust: Pour a small amount into a spoon and taste. Adjust sweetness with agave or maple syrup, add more lime juice for tang, or thicken with more frozen pineapple or ice.
- Add Ice (Optional, for Extra Chill): If using fresh pineapple, add ice cubes and blend until crushed and fully incorporated.
- Serve Immediately: Pour the cooler into chilled glasses.
- Garnish (Highly Recommended!): Garnish with a lime wheel, a wedge of pineapple, a sprig of fresh mint, or toasted coconut flakes.
Nutrition
- Serving Size: 1 glass
- Calories: 200
- Sugar: 30 g
- Sodium: 50 mg
- Fat: 10 g
- Saturated Fat: 9 g
- Unsaturated Fat: 1 g
- Trans Fat: 0 g
- Carbohydrates: 30 g
- Fiber: 2 g
- Protein: 2 g
- Cholesterol: 0 mg
Keywords: Chill your ingredients for the coldest cooler. Using frozen pineapple chunks can achieve a thick, creamy consistency without relying heavily on ice. Always taste before adding sweeteners, and don't skip the fresh lime juice for brightness.