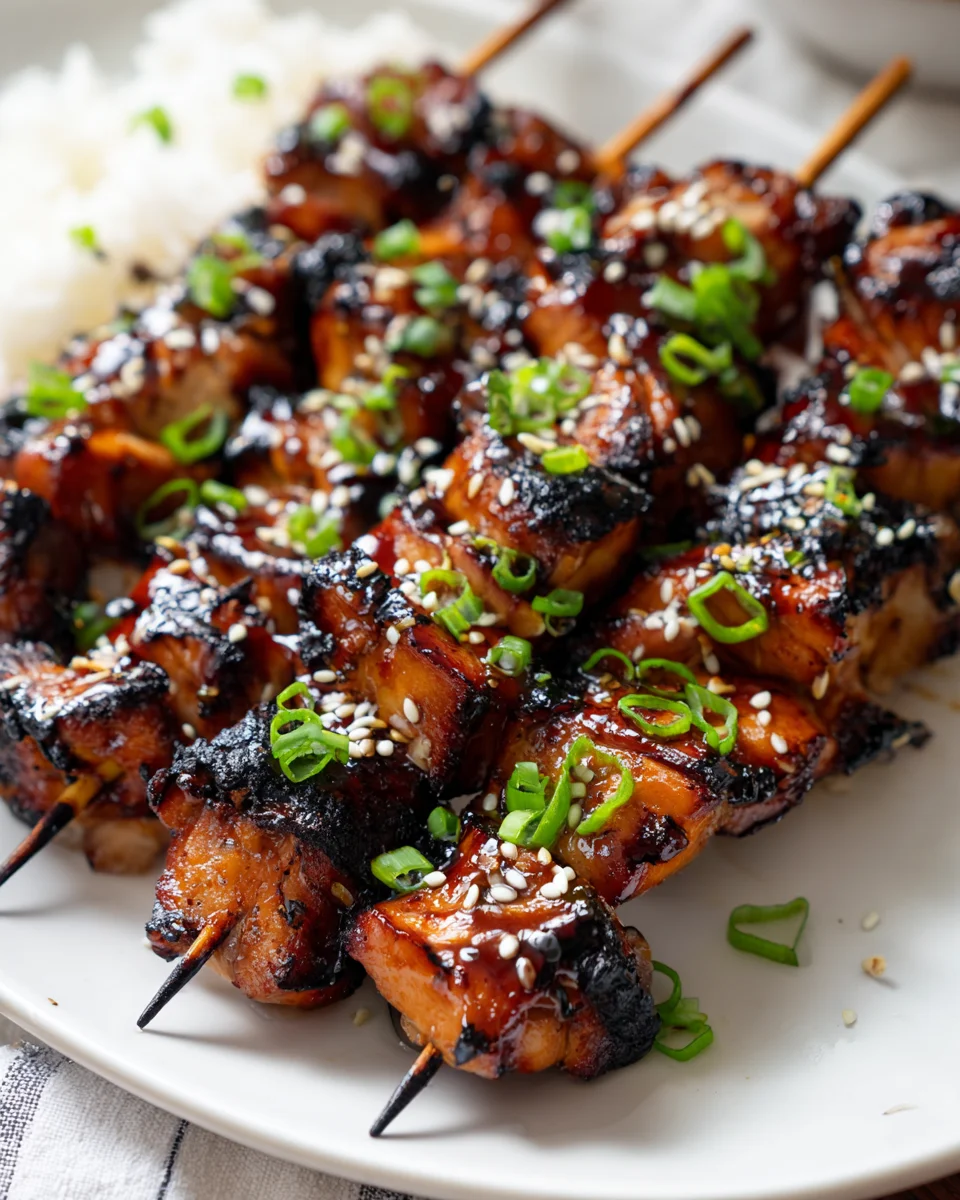
Teriyaki Chicken Skewers
Hey there, fellow food lovers! Get ready to discover a recipe that’s about to become your new favorite. I’m talking about Teriyaki Chicken Skewers, a dish that truly hits all the right notes for flavor, fun, and ease!
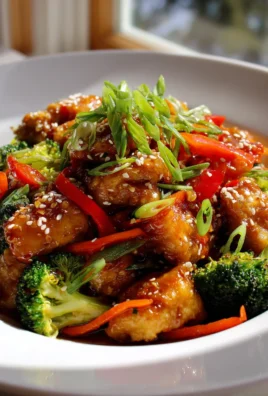
What makes this recipe so special, you ask? For me, it’s the incredible balance of sweet and savory that comes from that iconic, glossy teriyaki glaze. The chicken becomes wonderfully tender and juicy, absorbing all those fantastic flavors, and then gets beautifully caramelized, whether you’re firing up the grill or baking them in the oven. There’s something undeniably satisfying about that sticky, glistening coating!
You’ll absolutely love making these because they’re surprisingly simple to prepare but deliver maximum impact. They’re a total crowd-pleaser, perfect for a casual backyard BBQ, an easy weeknight dinner, or even as a standout appetizer for your next gathering. Who can resist perfectly cooked, bite-sized pieces of chicken coated in an irresistible sauce?
In a nutshell, we’ll be marinating succulent pieces of chicken, threading them onto skewers, and then cooking them to perfection while basting with a rich, umami-packed teriyaki sauce (and yes, you can easily use non-alcoholic mirin or your favorite sake alternative for that authentic depth!). The result? Little parcels of joy that are bursting with flavor in every single bite. Let’s get cooking!

Ingredient Notes
Crafting perfect Teriyaki Chicken Skewers begins with understanding your core ingredients. I find that using high-quality components truly makes a difference in the final flavor of these delicious skewers.
The Chicken
- Chicken Thighs: For skewers, I almost exclusively recommend boneless, skinless chicken thighs. They are incredibly forgiving, remaining juicy and tender even when grilled to perfection. Their higher fat content ensures they don’t dry out, which is a common pitfall with grilling. Cut them into 1-inch to 1.5-inch cubes, ensuring they are roughly uniform in size for even cooking.
- Chicken Breast (Substitution): If you prefer chicken breast, it can certainly be used! However, it’s leaner, so I suggest cutting it into slightly smaller pieces (around 1-inch cubes) and being extra mindful not to overcook it. Marinating for at least 30 minutes, or even an hour, becomes even more critical to infuse moisture and flavor.
The Teriyaki Sauce
The heart and soul of this dish! While a good quality store-bought teriyaki sauce works wonders for convenience, I often make my own. Here are the key components:
- Soy Sauce: The salty, umami backbone. I usually opt for a low-sodium version to control the saltiness myself. For a gluten-free option, tamari is an excellent substitute, or even coconut aminos for a soy-free alternative.
- Sweetener: Brown sugar or honey are my go-to choices. They provide the classic sweetness that balances the soy sauce and helps achieve that beautiful glaze. Maple syrup can also be used for a slightly different, but equally delicious, flavor profile.
- Non-Alcoholic Alternative for Mirin/Sake: Traditionally, teriyaki sauce uses mirin (sweet rice wine) or sake (Japanese rice wine). For a non-alcoholic version, I find that a combination of rice vinegar and a pinch of extra sugar (or honey) works wonderfully to mimic the nuanced sweetness and tang. You can also find specific non-alcoholic mirin substitutes in many Asian markets.
- Aromatics: Freshly grated ginger and minced garlic are non-negotiable for me. They infuse the sauce with incredible depth and zest. Don’t skimp on these!
- Thickener (Optional): A little cornstarch slurry (cornstarch mixed with a small amount of cold water) can be added at the end of cooking the sauce if you want a thicker, more syrupy glaze for basting.
Skewering Vegetables
This is where you can really play around and add color and nutrition! My favorites include:
- Bell Peppers: Red, yellow, orange – they add vibrant color and a sweet crunch. Cut them into 1-inch squares.
- Red Onion: Its sharp flavor mellows beautifully when grilled, becoming sweet and tender. Cut into wedges or 1-inch pieces.
- Zucchini or Yellow Squash: These grill up nicely and add a fresh element. Slice into thick half-moons or 1-inch chunks.
- Pineapple Chunks: A fantastic addition! The sweetness of grilled pineapple perfectly complements the savory teriyaki chicken.
Remember to cut all your vegetables to roughly the same size as your chicken pieces so everything cooks evenly.
Step-by-Step Instructions
Let’s get cooking! These Teriyaki Chicken Skewers are incredibly fun and relatively simple to make, perfect for a weeknight dinner or a weekend BBQ. I’ll guide you through my process for achieving tender chicken and perfectly grilled veggies.
Step 1: Prepare Your Ingredients
- Chicken: First, pat your boneless, skinless chicken thighs dry with paper towels. This helps the marinade adhere better. Cut the chicken into uniform 1 to 1.5-inch cubes. Uniformity is key for even cooking.
- Vegetables: Wash and chop your chosen vegetables (bell peppers, red onion, zucchini, pineapple) into pieces roughly the same size as your chicken cubes.
- Skewers: If you’re using wooden skewers, immerse them in water for at least 30 minutes prior to assembly. This prevents them from burning on the grill. If you’re using metal skewers, no soaking is needed.
Step 2: Marinate the Chicken
- Make the Marinade: In a medium bowl, whisk together your teriyaki sauce ingredients. If you’re making it from scratch, combine soy sauce (or tamari), sweetener (brown sugar/honey), non-alcoholic mirin substitute (rice vinegar + sugar), grated fresh ginger, and minced garlic.
- Marinate: Add the cut chicken pieces to the bowl with the teriyaki marinade. Toss to ensure all the chicken is thoroughly coated. Cover the bowl and refrigerate for at least 30 minutes, or ideally 2-4 hours. You can even marinate overnight for maximum flavor, but I wouldn’t go beyond 12 hours as the acid can start to break down the chicken’s texture.
Step 3: Assemble the Skewers
- Thread: Once your chicken is marinated, it’s time to assemble! Take your soaked wooden or metal skewers. Begin by threading a piece of chicken, then alternate with your chosen vegetables (e.g., bell pepper, onion, zucchini), and finish with another piece of chicken or a pineapple chunk. Don’t pack the ingredients too tightly; leave a little space between each piece. This allows heat to circulate, ensuring everything cooks evenly and gets a nice char. Aim for about 5-6 pieces of food per skewer, depending on their size.
Step 4: Cook Your Skewers
I find grilling to be the absolute best method for these skewers, but baking or pan-frying are also great options!
- Grilling (Recommended): Preheat your grill to medium-high heat (around 375-400°F or 190-200°C). Lightly oil the grill grates to prevent sticking. Place the skewers on the hot grill. Cook for 8-12 minutes, turning them every 2-3 minutes, until the chicken is cooked through and the vegetables are tender-crisp with nice grill marks. During the last few minutes of cooking, you can baste the skewers with a fresh batch of teriyaki sauce (never use the raw chicken marinade as a glaze unless it’s been boiled separately!). The internal temperature of the chicken should reach 165°F (74°C).
- Baking: Preheat your oven to 400°F (200°C). Line a baking sheet with parchment paper or foil for easy cleanup, and lightly grease it. Arrange the skewers in a single layer. Bake for 20-25 minutes, flipping them halfway through, until the chicken is cooked through and lightly browned. Baste with fresh sauce during the last 5-10 minutes.
- Pan-Frying/Broiling: You can also cook skewers under a broiler or in a large skillet. For broiling, place them about 6 inches from the heat source, turning frequently. For pan-frying, cook in a lightly oiled pan over medium-high heat, turning as needed.
Step 5: Rest and Serve
- Once cooked, remove the skewers from the grill or oven and let them rest for 5 minutes. This allows the juices in the chicken to redistribute, keeping it tender and moist.
- Garnish with a sprinkle of sesame seeds and sliced green onions for a beautiful presentation and a little extra flavor. Serve immediately!
Tips & Suggestions
After making countless batches of these Teriyaki Chicken Skewers, I’ve picked up a few tricks that I love to share to help you achieve the best possible results. These tips are all about maximizing flavor, texture, and ease of cooking!
For the Best Skewers:
- Cut Uniformly: This is a golden rule for skewers! Ensure your chicken pieces and vegetable chunks are roughly the same size. This guarantees that everything cooks evenly, preventing some pieces from being undercooked while others are overcooked and dry.
- Don’t Overcrowd: When threading your ingredients onto the skewers, resist the urge to pack them too tightly. Leave a small gap between each piece. This allows the hot air or direct heat to circulate around all sides, ensuring everything gets nicely browned and cooked through, preventing steaming.
- Mix Your Veggies Wisely: Choose vegetables that cook at similar rates. Bell peppers, onions, zucchini, and pineapple are excellent choices because they become tender-crisp around the same time the chicken cooks. Firmer vegetables like carrots or potatoes might need a pre-blanch or to be cut much smaller.
- The Marinade Rule: Always reserve a portion of your fresh teriyaki sauce before adding the raw chicken to it. This reserved sauce is what you’ll use for basting during the final stages of cooking or as an extra serving sauce. Never baste with marinade that has come into contact with raw meat, unless it’s been boiled separately to kill any bacteria.
- High Heat for Sear, Medium for Cook: Start your skewers over slightly higher heat to get a beautiful sear and caramelization on the outside of the chicken and veggies. Then, if your grill or oven allows, reduce the heat slightly or move them to a cooler part of the grill to allow the interior to cook through without burning the exterior glaze.
- Test for Doneness: The easiest way to tell if chicken is done is with an instant-read meat thermometer. Insert it into the thickest part of a chicken piece; it should read 165°F (74°C). The vegetables should be tender-crisp, still holding their shape but easy to bite into.
- Consider Separate Skewers: If you have some picky eaters or just want more control over the cooking of different components, consider making separate skewers for just chicken and skewers for just vegetables. This allows you to remove the vegetables when they’re perfectly tender-crisp, even if the chicken needs a few more minutes.
Serving Suggestions:
- Rice: Teriyaki Chicken Skewers are fantastic served over a bed of fluffy white or brown rice to soak up all that delicious sauce.
- Noodles: A side of lo mein or simple ramen noodles would also be a great pairing.
- Salad: For a lighter meal, serve them alongside a crisp green salad with a light vinaigrette.
- Extra Sauce: Always have a little extra fresh teriyaki sauce on the side for dipping or drizzling.
Variations:
- Spicy Kick: Add a pinch of red pepper flakes or a dash of sriracha to your teriyaki marinade for a little heat.
- Sesame Oil: A tiny drizzle of toasted sesame oil in the marinade or over the finished skewers adds a wonderful nutty aroma.
Storage
I find Teriyaki Chicken Skewers are best enjoyed fresh off the grill or out of the oven, but I totally understand the need for meal prepping or simply having leftovers for a quick lunch the next day! Here’s how I handle storing them to keep them tasting great.
Refrigeration:
- Cool Down Quickly: Once you’ve finished eating, allow any leftover skewers to cool down to room temperature for no more than two hours. It’s really important for food safety to get them into the fridge promptly.
- Airtight Container: I usually remove the chicken and vegetables from the skewers for easier storage. Place them in an airtight container. This prevents them from drying out and absorbing odors from other foods in your refrigerator.
- Shelf Life: Properly stored, cooked Teriyaki Chicken Skewers (or the components) will last for 3-4 days in the refrigerator.
Reheating:
Reheating can sometimes be tricky with chicken, as it has a tendency to dry out. Here are my preferred methods:
- Oven: This is my top choice for reheating these skewers if I want to maintain the texture. Preheat your oven to 300°F (150°C). Place the chicken and vegetables (still on the skewers or off) on a baking sheet, cover loosely with foil, and heat for 10-15 minutes, or until just heated through. The foil helps retain moisture.
- Microwave: For a quick reheat, the microwave works, but be careful not to overcook. Place the chicken and vegetables in a microwave-safe dish. Add a tablespoon or two of water or a little extra teriyaki sauce, and cover with a microwave-safe lid or damp paper towel. Heat on medium power in 1-minute intervals, stirring or flipping, until warmed through. This method is faster but can sometimes make the chicken a bit tougher if overdone.
- Stovetop: You can also reheat the chicken and veggies in a skillet over medium heat with a tiny bit of oil or water. This method allows you to get a bit of a fresh sear back on the pieces if you like, and it’s great for preventing sogginess.
Freezing:
- Cooked Skewers: Yes, you can freeze cooked Teriyaki Chicken Skewers! I recommend removing the chicken and vegetables from the skewers first. Lay them in a single layer on a baking sheet and freeze until solid (this is called flash freezing). Once frozen, transfer them to a freezer-safe airtight container or heavy-duty freezer bag. This prevents them from sticking together.
- Shelf Life in Freezer: Cooked chicken and vegetables can be stored in the freezer for up to 2-3 months.
- Thawing and Reheating: When you’re ready to enjoy, thaw the frozen chicken and vegetables overnight in the refrigerator. Then, reheat using one of the methods mentioned above (oven or stovetop are best for frozen and thawed items) until thoroughly heated through.
I always make sure to label my freezer bags or containers with the date so I know exactly how long they’ve been stored!
Final Thoughts
So there you have it – my absolute favorite recipe for these incredibly delicious Teriyaki Chicken Skewers. I truly believe this dish is a must-try for anyone looking to add a burst of amazing flavor to their table with minimal fuss. The perfect marriage of sweet and savory, with that irresistible sticky glaze caramelizing beautifully on tender chicken, makes every bite a memorable experience. Whether you’re planning a backyard gathering, a cozy family dinner, or simply craving something delightful, these Teriyaki Chicken Skewers are wonderfully versatile and always hit the spot. I promise you’ll be impressed by how effortlessly they come together and how universally adored they’ll be. Get ready to enjoy a fantastic, flavorful meal that brings smiles all around – I know you’ll absolutely love making and devouring these sensational Teriyaki Chicken Skewers!
Grilled Teriyaki Chicken Skewers – Perfect BBQ Flavor

These Grilled Teriyaki Chicken Skewers are a delightful blend of sweet and savory flavors, perfect for any BBQ or weeknight dinner. Tender chicken pieces marinated in a rich teriyaki sauce are grilled to perfection with colorful vegetables.
- Prep Time: 30 mins
- Cook Time: 15 mins
- Total Time: 45 minutes
- Yield: 4 servings
- Category: Dinner
- Method: Grilling
- Cuisine: Japanese
Ingredients
- Boneless, skinless chicken thighs
- Chicken breast (optional substitution)
- Soy sauce (or tamari for gluten-free)
- Brown sugar or honey (for sweetener)
- Rice vinegar (for non-alcoholic mirin substitute)
- Grated fresh ginger
- Minced garlic
- Cornstarch (optional thickener)
- Bell peppers (red, yellow, orange)
- Red onion
- Zucchini or yellow squash
- Pineapple chunks
- Wooden or metal skewers
Instructions
- Step 1: Prepare Your Ingredients – Pat the chicken thighs dry and cut them into uniform 1 to 1.5-inch cubes. Wash and chop the vegetables into pieces roughly the same size as the chicken cubes. Soak wooden skewers in water for at least 30 minutes if using.
- Step 2: Marinate the Chicken – Whisk together the teriyaki sauce ingredients in a medium bowl. Add the chicken pieces to the marinade, ensuring they are thoroughly coated. Cover and refrigerate for at least 30 minutes, ideally 2-4 hours.
- Step 3: Assemble the Skewers – Thread a piece of chicken onto the skewer, alternating with vegetables and finishing with another piece of chicken or a pineapple chunk. Leave space between each piece for even cooking.
- Step 4: Cook Your Skewers – For grilling, preheat the grill to medium-high heat. Lightly oil the grates and place the skewers on the grill, cooking for 8-12 minutes, turning every 2-3 minutes. For baking, preheat the oven to 400°F, arrange skewers on a baking sheet, and bake for 20-25 minutes, flipping halfway through.
- Step 5: Rest and Serve – Let the skewers rest for 5 minutes after cooking. Garnish with sesame seeds and sliced green onions before serving.
Nutrition
- Serving Size: 1 skewer
- Calories: 250
- Sugar: 10 g
- Sodium: 600 mg
- Fat: 12 g
- Saturated Fat: 3 g
- Unsaturated Fat: 8 g
- Trans Fat: 0 g
- Carbohydrates: 20 g
- Fiber: 2 g
- Protein: 20 g
- Cholesterol: 70 mg
Keywords: Ensure uniform size for chicken and vegetables for even cooking. Reserve some teriyaki sauce before marinating for basting later. Consider separate skewers for chicken and vegetables for better control over cooking times.