Bakery Style Pumpkin Bread Recipe (perfect Slice Every Time)
Oh, autumn! There’s nothing quite like the crisp air, falling leaves, and that irresistible aroma of pumpkin spice wafting through the kitchen. And let me tell you, this Bakery Style Pumpkin Bread Recipe (perfect Slice Every Time) is about to become your new fall obsession. Forget those dry, crumbly attempts of the past; I’ve cracked the code to achieving that ultra-moist, perfectly spiced, professional-bakery quality right in your own home.
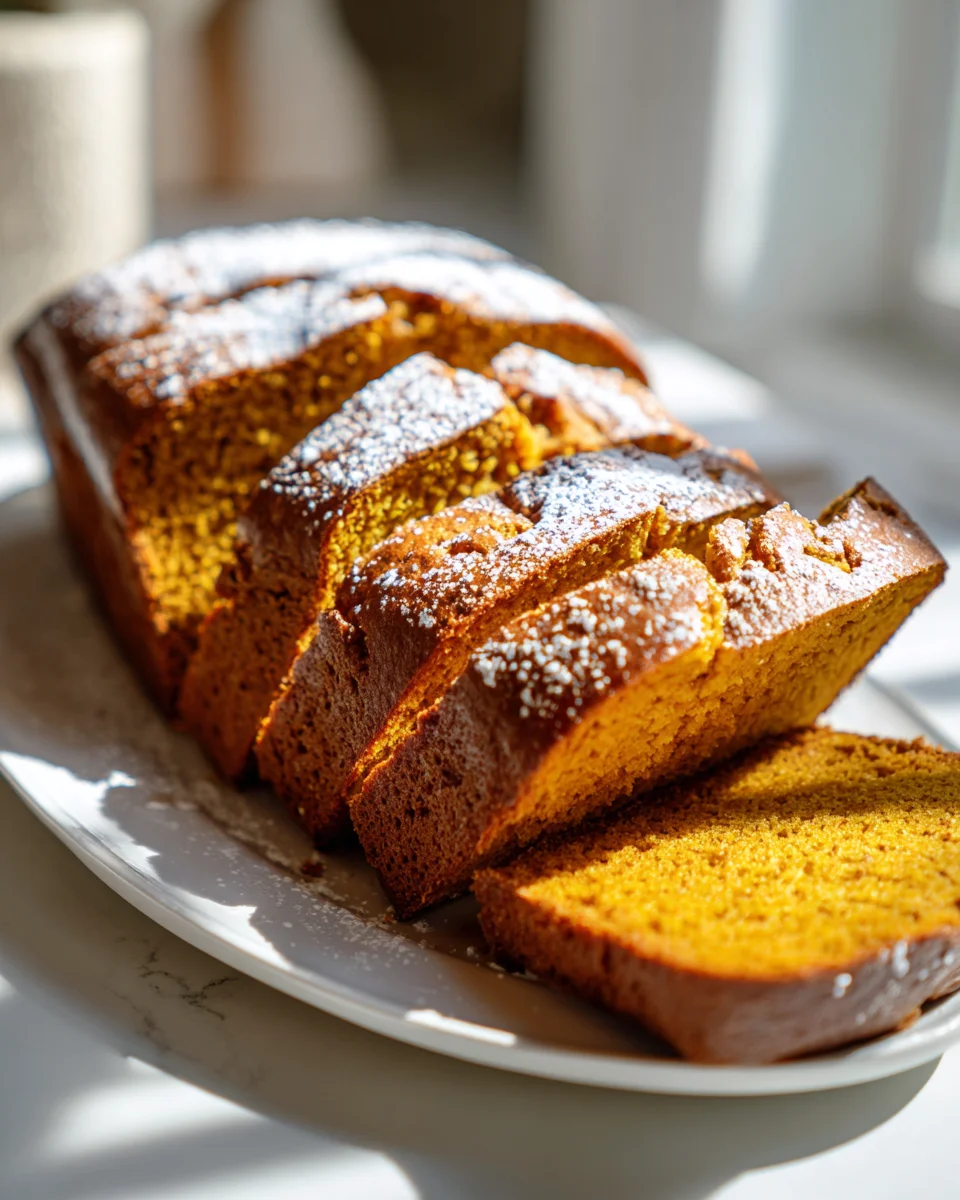
What makes this recipe so incredibly special? It’s all in the details. We’re talking about a rich, tender crumb that melts in your mouth, bursting with genuine pumpkin flavor and a harmonious blend of warming spices – think cozy cinnamon, nutmeg, ginger, and a hint of clove. But the real magic, and why you’ll absolutely adore it, is the “perfect slice every time” promise. This isn’t just a claim; it’s a guarantee that each slice will be beautifully intact, elegant, and ready for its close-up, whether you’re serving it for a cozy breakfast, an afternoon snack, or a delightful dessert. You’ll love the feeling of accomplishment when you pull this golden-brown loaf from your oven, knowing you’ve created something truly extraordinary. Get ready to impress yourself and everyone lucky enough to grab a piece of this autumnal perfection!

Ingredient Notes
Creating that truly bakery-style pumpkin bread, the kind with an incredibly moist crumb and a perfect slice every time, really hinges on a few key ingredients. Let me walk you through what I’ve found makes all the difference.
- Pumpkin Puree: This is the heart of our bread, of course! Always use 100% pure pumpkin puree, not pumpkin pie filling. Pie filling has added sugars and spices that will throw off the balance of our recipe. The pure stuff ensures a rich, authentic pumpkin flavor and contributes significantly to the bread’s moist texture.
- Vegetable Oil: Here’s a secret for that bakery-quality moisture and tender crumb: oil! Unlike butter, which can make quick breads denser and prone to drying out faster, vegetable oil (or canola oil) stays liquid at room temperature, keeping your bread incredibly moist for days. It also gives the bread a finer, more consistent crumb, which is essential for a clean, perfect slice. I wouldn’t recommend substituting butter if you’re aiming for that lasting moisture and perfect slice.
- Brown Sugar (Light or Dark): I love using a mix of granulated sugar and brown sugar. The brown sugar not only adds a wonderful molasses-rich depth of flavor that complements the pumpkin beautifully, but its moisture content also helps keep the bread tender and moist. You can use light or dark brown sugar; dark will give a slightly richer, chewier result.
- All-Purpose Flour: Standard all-purpose flour works perfectly here. Make sure to measure it correctly, either by weight (my preferred method for accuracy) or by spooning it into your measuring cup and leveling it off. Too much flour will result in a dry, crumbly loaf that won’t slice cleanly.
- Pumpkin Pie Spice: This convenient blend of cinnamon, nutmeg, ginger, and cloves is a time-saver and provides that classic autumnal warmth. If you don’t have it, you can make your own blend: I usually go for 1.5 teaspoons cinnamon, 0.5 teaspoon ginger, 0.25 teaspoon nutmeg, and a tiny pinch of cloves.
- Leavening Agents (Baking Soda & Baking Powder): We use both for a reason! Baking soda reacts with the acidity in the pumpkin puree, while baking powder provides an extra lift, ensuring our loaf rises beautifully and has that lovely light-yet-dense bakery texture. Don’t skip either.
- Eggs: Large eggs act as a binder, providing structure and richness. Make sure they’re at room temperature; this helps them emulsify better with the other ingredients, leading to a smoother batter and a more uniform crumb.
- Vanilla Extract: A good quality vanilla extract always enhances the overall flavor profile, adding warmth and depth.
- Milk (Optional, but Recommended for Extra Tenderness): Sometimes I add a splash of milk (dairy or non-dairy like almond or oat milk works great) if my batter feels a little too thick. This can help achieve an even more tender crumb.
Step-by-Step Instructions
Achieving that perfect bakery-style pumpkin bread is all about technique. Follow these steps carefully, and you’ll be rewarded with a loaf that slices like a dream.
- Prepare Your Pan: Preheat your oven to 350°F (175°C). For the easiest release and cleanest slices, I highly recommend greasing and flouring a 9×5-inch loaf pan, then lining it with parchment paper so that the ends hang over the sides like a sling. This makes lifting the baked loaf out incredibly simple.
- Combine Dry Ingredients: In a large bowl, whisk together the all-purpose flour, granulated sugar, brown sugar, pumpkin pie spice, baking soda, baking powder, and a pinch of salt. Whisking ensures everything is evenly distributed, which is crucial for uniform texture and rise.
- Mix Wet Ingredients: In a separate medium bowl, whisk together the pumpkin puree, vegetable oil, room-temperature eggs, and vanilla extract until well combined and smooth.
- Combine Wet and Dry: Pour the wet ingredients into the dry ingredients. Using a spatula or wooden spoon, gently mix until just combined. This is a critical step: do not overmix! Overmixing develops the gluten in the flour too much, leading to a tough, dense bread. A few lumps are perfectly fine. If adding mix-ins like chocolate chips or nuts, fold them in now.
- Fill the Loaf Pan: Pour the batter evenly into your prepared loaf pan. I like to gently tap the pan on the counter a couple of times to release any large air bubbles.
- Bake: Place the loaf pan in the preheated oven. Bake for 55-65 minutes, or until a wooden skewer or toothpick inserted into the center comes out clean or with just a few moist crumbs attached. Every oven is different, so start checking at 50 minutes. If the top is browning too quickly, you can loosely tent it with aluminum foil.
- Cool in Pan: Once baked, remove the loaf from the oven and let it cool in the pan on a wire rack for at least 15-20 minutes. This allows the bread to set and prevents it from falling apart when removed.
- Transfer to Rack: After 15-20 minutes, use the parchment paper sling to gently lift the pumpkin bread out of the pan. Place it directly on the wire rack to cool completely.
- The Secret to a Perfect Slice: This is perhaps the most important instruction for a perfect slice: do not slice the bread until it has cooled completely, preferably for at least 2-3 hours, or even overnight! Slicing warm bread will result in a crumbly, messy slice. Cooling allows the starches to set, the moisture to redistribute, and the flavors to fully develop, giving you that clean, even, perfect bakery-style slice every single time.
Tips & Suggestions
Beyond the basic steps, I’ve picked up a few tricks over the years that truly elevate this pumpkin bread to bakery-level perfection and ensure that coveted perfect slice.
- Don’t Overmix the Batter: I cannot stress this enough! Overmixing develops gluten, leading to a tough, dry bread. Mix until just combined – a few lumps are fine. This contributes greatly to a tender crumb that slices cleanly.
- Room Temperature Ingredients: Especially for eggs, having them at room temperature helps them incorporate more smoothly into the batter, creating a more uniform emulsion and ultimately a better texture.
- Parchment Paper Sling: As mentioned in the instructions, lining your loaf pan with parchment paper that overhangs the sides is a game-changer. It makes lifting the fully baked loaf out of the pan effortless, preventing any damage that could mar your perfect slices.
- The Cooling Period is Non-Negotiable: Seriously, resist the urge to slice it warm! Let it cool completely on a wire rack for several hours, or even overnight. This allows the internal structure to stabilize and moisture to redistribute, making for a neat, intact, perfect slice.
- Achieve that Signature Crack: For that classic bakery look with a beautiful crack on top, try scoring the top of your batter down the middle with a butter knife or the back of a spoon before baking. As the bread rises, it will split along this line, creating a lovely defined crack.
- Add Your Favorite Mix-ins: While delicious on its own, this bread is fantastic with additions!
- Chocolate Chips: White, semi-sweet, or dark chocolate chips are always a hit.
- Nuts: Toasted pecans or walnuts add a delightful crunch.
- Dried Fruit: Dried cranberries or chopped dried apricots can add a pleasant chewiness and tartness.
I usually fold in about 1 cup of mix-ins.
- Testing for Doneness: Use a wooden skewer or toothpick, not just your finger. It should come out clean or with a few moist crumbs, but no wet batter. An internal temperature of 200-205°F (93-96°C) is ideal for quick breads.
- Slicing Technique: Once fully cooled, use a serrated bread knife with a gentle sawing motion to get the cleanest cuts. This prevents squishing the loaf and gives you those picture-perfect slices.
Storage
Properly storing your Bakery Style Pumpkin Bread ensures it stays moist, delicious, and maintains its perfect slice quality for as long as possible. We want to keep that lovely texture we worked so hard for!
- Room Temperature: Once your pumpkin bread has completely cooled, wrap it tightly in plastic wrap or aluminum foil. I sometimes do both for extra protection. You can also place it in an airtight container. Stored this way, it will stay fresh and moist on your counter at room temperature for 3-4 days. For optimal texture and slicing, I often leave the loaf whole and only slice off pieces as needed. This helps prevent the cut surfaces from drying out.
- Refrigeration: While not strictly necessary, if you want to extend its freshness for a bit longer, you can refrigerate the tightly wrapped bread for up to a week. Just be aware that refrigeration can sometimes alter the texture of quick breads slightly, making them a little denser. To serve, I recommend letting it come back to room temperature or gently warming a slice in the microwave for a few seconds.
- Freezing for Longer Storage: This pumpkin bread freezes beautifully!
- Whole Loaf: Once completely cooled, wrap the entire loaf tightly in plastic wrap, then an additional layer of aluminum foil. Place it in a freezer-safe bag. It can be frozen for up to 3 months.
- Individual Slices: If you prefer to have single servings on hand, slice the completely cooled bread. Arrange the slices on a baking sheet and freeze for about an hour until firm. Then, transfer the frozen slices to a freezer-safe bag or airtight container, separating layers with parchment paper to prevent sticking. This method allows you to grab just one slice at a time.
- Thawing Frozen Bread:
- Whole Loaf: To thaw, simply unwrap the loaf and let it sit at room temperature for several hours or overnight until fully thawed.
- Individual Slices: Thaw individual slices at room temperature for 30-60 minutes, or warm them directly from frozen in a toaster oven or microwave for a quick treat.
Always make sure the bread is completely thawed before serving to enjoy its full flavor and texture.
Final Thoughts
Well, there you have it! My hope is that you’ve found joy and inspiration in this journey to create something truly special. This isn’t just any pumpkin bread; it’s the Bakery Style Pumpkin Bread Recipe (perfect Slice Every Time), designed to bring that professional touch right into your kitchen. I’m so confident that once you experience the unbelievably moist crumb, the rich, warm spices, and yes, that perfect, clean slice, you’ll understand why this recipe is a game-changer. It’s the kind of comforting treat that warms your home and your heart, making every single bite a pure delight. Trust me, you absolutely have to try this one – it’s destined to become a beloved staple in your autumn baking repertoire!
Bakery Style Pumpkin Bread: Perfect Slices, Easy Recipe!

Experience the ultimate autumn treat with this Bakery Style Pumpkin Bread that guarantees perfect slices every time. Moist, flavorful, and bursting with pumpkin spice, it’s sure to become a seasonal favorite!
- Prep Time: 15 mins
- Cook Time: 65 mins
- Total Time: 1 hour 20 minutes
- Yield: 1 loaf 1x
- Category: Dessert
- Method: Baking
- Cuisine: American
Ingredients
- 1 cup pumpkin puree
- 1/2 cup vegetable oil
- 1/2 cup granulated sugar
- 1/2 cup brown sugar (light or dark)
- 1 1/2 cups all-purpose flour
- 1 teaspoon pumpkin pie spice
- 1 teaspoon baking soda
- 1 teaspoon baking powder
- 1/2 teaspoon salt
- 2 large eggs (room temperature)
- 1 teaspoon vanilla extract
- 1/4 cup milk (optional, but recommended for extra tenderness)
Instructions
- Preheat your oven to 350°F (175°C). Grease and flour a 9×5-inch loaf pan, then line it with parchment paper so that the ends hang over the sides.
- In a large bowl, whisk together the all-purpose flour, granulated sugar, brown sugar, pumpkin pie spice, baking soda, baking powder, and a pinch of salt.
- In a separate medium bowl, whisk together the pumpkin puree, vegetable oil, room-temperature eggs, and vanilla extract until well combined and smooth.
- Pour the wet ingredients into the dry ingredients. Using a spatula or wooden spoon, gently mix until just combined. Do not overmix!
- Pour the batter evenly into your prepared loaf pan and gently tap the pan on the counter a couple of times to release any large air bubbles.
- Place the loaf pan in the preheated oven and bake for 55-65 minutes, or until a wooden skewer or toothpick inserted into the center comes out clean or with just a few moist crumbs attached.
- Once baked, remove the loaf from the oven and let it cool in the pan on a wire rack for at least 15-20 minutes.
- After 15-20 minutes, use the parchment paper sling to gently lift the pumpkin bread out of the pan and place it directly on the wire rack to cool completely.
- Do not slice the bread until it has cooled completely, preferably for at least 2-3 hours, or even overnight.
Nutrition
- Serving Size: 1 slice
- Calories: 200
- Sugar: 12 g
- Sodium: 150 mg
- Fat: 8 g
- Saturated Fat: 1 g
- Unsaturated Fat: 6 g
- Trans Fat: 0 g
- Carbohydrates: 30 g
- Fiber: 2 g
- Protein: 3 g
- Cholesterol: 30 mg
Keywords: Avoid overmixing the batter to ensure a tender crumb. Use room temperature ingredients for better emulsification, and always let the bread cool completely before slicing for the best results.