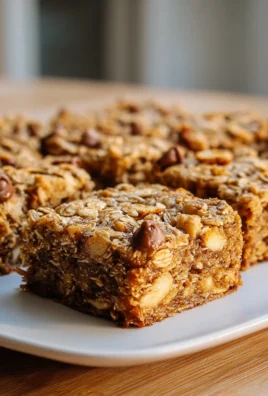
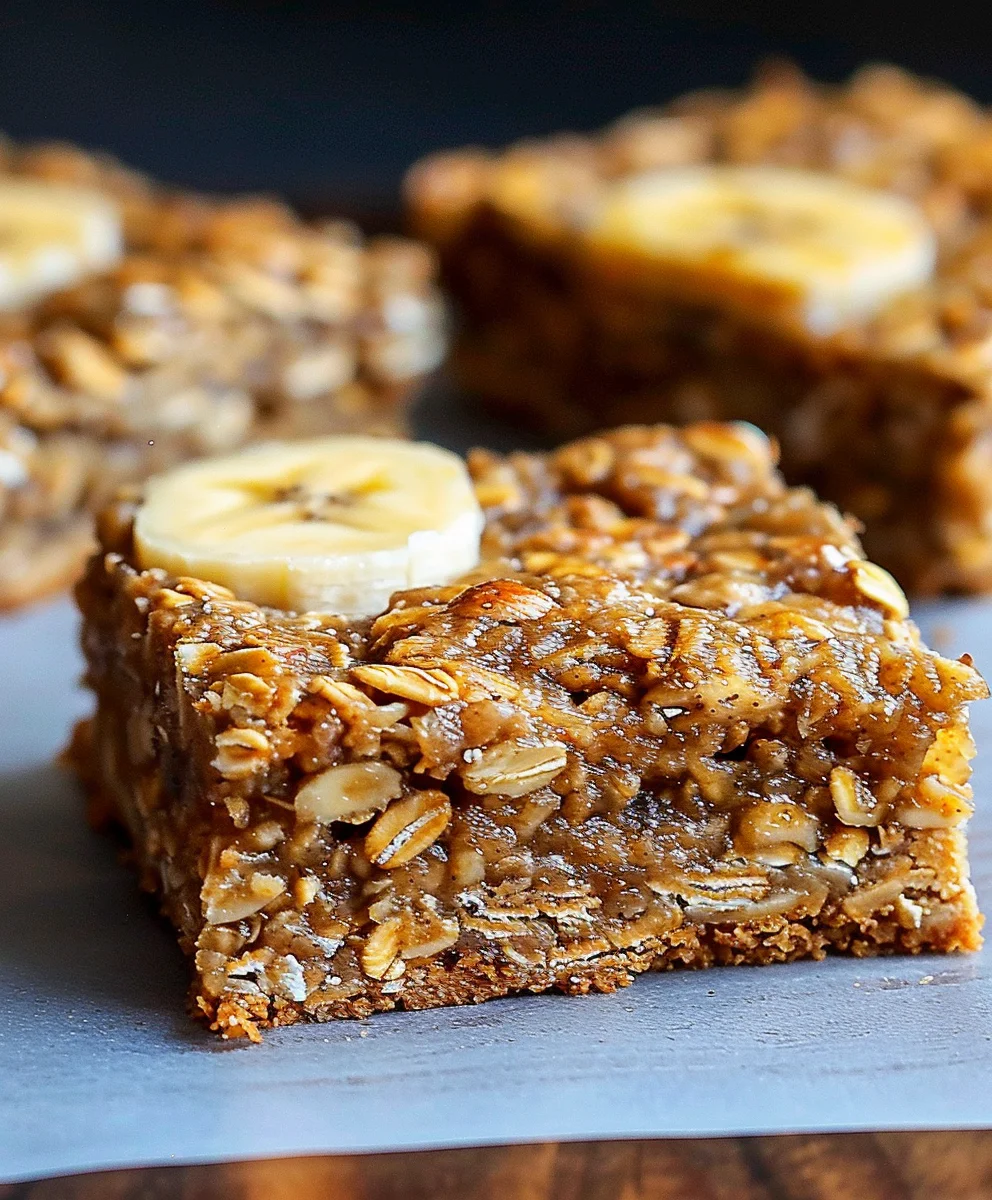
Irresistible Banana Oatmeal Bars For Healthy Snacking are about to transform your approach to wholesome treats. I understand the daily challenge: you’re constantly seeking that perfect snack – something genuinely satisfying, effortlessly convenient, and crucially, aligned with your healthy eating aspirations. Imagine a delightful bite that perfectly balances the comforting goodness of hearty oats with the natural sweetness of ripe bananas, all packaged into a portable, no-fuss bar. That’s precisely what these bars deliver, offering a fantastic solution for those moments when cravings strike but health goals remain paramount.
There’s a reason why people absolutely fall in love with this recipe. It’s not merely about their fantastic taste – a perfect harmony of subtle sweetness and a wonderfully chewy texture – but also their incredible versatility and the sheer convenience they offer for any occasion. Whether you’re fueling a busy morning, combating an afternoon slump, or simply need a guilt-free indulgence, these bars are a brilliant solution. They stand as a testament to the idea that healthy eating doesn’t mean sacrificing flavor or enjoyment.
Discover the Joy of Smart Snacking!
The beauty of making your own snacks lies in knowing exactly what goes into them, making these Irresistible Banana Oatmeal Bars For Healthy Snacking a smart choice for conscious eaters. They offer sustained energy, are packed with beneficial fiber, and are easily customizable with your favorite additions, from dark chocolate chips to chopped nuts or even a sprinkle of cinnamon. Prepare to make these a cherished staple in your kitchen!

Ingredients:
- For the Dry Mixture:
- 2 cups (180g) old-fashioned rolled oats (not instant or quick oats, as these will result in a gummier texture and less satisfying chew)
- 1 cup (120g) whole wheat flour (or all-purpose flour for a slightly less dense bar, but whole wheat adds a wonderful nuttiness and fiber)
- 1/2 cup (100g) packed light brown sugar (you can reduce this slightly if your bananas are very ripe, or swap for coconut sugar for a refined sugar-free option)
- 1 teaspoon baking powder (this is crucial for a little lift and tenderness)
- 1/2 teaspoon ground cinnamon (the warmth of cinnamon perfectly complements banana and oat flavors)
- 1/4 teaspoon fine sea salt (enhances all the other flavors and balances the sweetness)
- For the Wet Mixture:
- 3 large, very ripe bananas (the riper, the sweeter and more flavorful your bars will be – look for brown spots!)
- 1/2 cup (120ml) milk of choice (dairy, almond, soy, or oat milk all work beautifully)
- 1/4 cup (60ml) melted coconut oil (or unsalted butter, or any neutral-flavored oil like avocado oil; coconut oil adds a lovely subtle tropical note)
- 1 teaspoon vanilla extract (a must-have for depth of flavor)
- Optional Mix-ins (highly recommended for customization and extra deliciousness):
- 1/2 cup chocolate chips (dark, semi-sweet, or even white chocolate work well)
- 1/2 cup chopped nuts (walnuts, pecans, or almonds add a fantastic crunch and healthy fats)
- 1/4 cup dried fruit (raisins, chopped dried cranberries, or apricots for an extra chew and burst of flavor)
- 2 tablespoons shredded unsweetened coconut (for a tropical twist)
Phase 1: Gathering and Prepping Your Ingredients for Perfection
Before we dive into the delightful process of creating these Irresistible Banana Oatmeal Bars For Healthy Snacking, it’s always a good idea to gather all your ingredients and do a little prep work. This concept, often called “mise en place” in professional kitchens, simply means having everything ready before you start mixing. Trust me, it makes the entire baking experience so much more enjoyable and less stressful. I find that when I’m organized, I actually enjoy the cooking process even more.
- Preheat Your Oven and Prep Your Pan: First things first, let’s get that oven ready. Preheat your oven to 375°F (190°C). While it’s heating up, grab a 9×13 inch baking pan. I like to line mine with parchment paper, leaving an overhang on the sides. This isn’t just for easy removal of the baked bars; it also makes clean-up a breeze. If you don’t have parchment, you can lightly grease and flour the pan, ensuring every corner is covered to prevent sticking.
- Select Your Oats Wisely: For these bars, old-fashioned rolled oats are truly your best friend. They provide the perfect chewy texture and hold their shape beautifully during baking. Avoid instant or quick oats, as they tend to absorb too much liquid and can make the bars mushy or gummy. Steel-cut oats are also not suitable here as they require a much longer cooking time and would remain too tough.
- Embrace the Ripe Bananas: This is arguably the most critical ingredient for flavor and natural sweetness. You’ll want three large bananas that are past their prime – those with plenty of brown spots and even some black patches. These extra-ripe bananas are naturally sweeter and have a more intense banana flavor, which means you can even reduce the added sugar slightly if you wish. The riper they are, the easier they are to mash, which saves you effort later on.
- Measure with Precision: While baking can sometimes feel like an art, it also has a scientific side. Precise measurements, especially for dry ingredients like flour and baking powder, are important for the success of your bars. I always recommend using proper measuring cups and spoons, leveling off dry ingredients with the back of a knife. For wet ingredients like milk and oil, liquid measuring cups at eye level work best.
Phase 2: Mixing the Dry Ingredients for a Harmonious Foundation
Now that our ingredients are prepped, let’s create the dry foundation for our Irresistible Banana Oatmeal Bars For Healthy Snacking. This step is about ensuring all the dry components are well-distributed, which guarantees uniform flavor and texture in every bite. It’s a simple step, but don’t rush it!
- Combine Oats and Flour: In a large mixing bowl, the kind that gives you plenty of room to stir comfortably, add your 2 cups of old-fashioned rolled oats and 1 cup of whole wheat flour. I personally love whole wheat flour here because it imparts a lovely rustic flavor and boosts the fiber content, making these bars even healthier. If you prefer a lighter texture or don’t have whole wheat flour, all-purpose flour works just as well.
- Incorporate the Sweetness and Leavening: Next, add the 1/2 cup of packed light brown sugar. I love brown sugar for its moistness and subtle caramel notes, which pair wonderfully with banana. Follow this with 1 teaspoon of baking powder, which is our leavening agent responsible for giving the bars a nice tender lift, preventing them from being too dense.
- Season with Spices and Salt: Sprinkle in the 1/2 teaspoon of ground cinnamon. Oh, the aroma of cinnamon and banana baking together is just heavenly! It’s a classic pairing for a reason. Finally, add the 1/4 teaspoon of fine sea salt. Don’t skip the salt! It doesn’t make the bars salty; rather, it brightens and enhances all the other flavors, making the sweetness and spice truly pop.
- Whisk Until Fully Combined: Grab a whisk or a sturdy spoon and mix these dry ingredients thoroughly. You want to ensure that the baking powder and salt are evenly distributed throughout the flour and oats. This prevents pockets of unmixed ingredients and guarantees a consistent rise and flavor in every single bar. Give it a good minute or two of whisking to be absolutely sure. This creates a homogeneous dry mixture, ready to welcome our wet ingredients.
Phase 3: Preparing the Wet Mixture for Maximum Flavor and Moisture
With our dry ingredients patiently waiting, it’s time to bring together the wet components. This phase is all about extracting the maximum natural sweetness from our star ingredient – the bananas – and combining it with other liquids to create a moist and flavorful base for our Irresistible Banana Oatmeal Bars For Healthy Snacking.
- Mash Those Bananas: In a separate, medium-sized bowl, place your three very ripe bananas. This is where those brown spots really shine! Using a fork or a potato masher, begin to mash the bananas until they are mostly smooth with only a few small lumps remaining. I personally love a few small lumps as they add a nice textural interest to the finished bars, but feel free to mash them as smooth as you like. The riper the bananas, the easier this step will be, and the less effort you’ll have to put in!
- Add the Milk and Oil: To the mashed bananas, pour in 1/2 cup of your chosen milk. Any milk works well here, so use what you have on hand or what fits your dietary preferences. I often use almond milk, but whole dairy milk adds a richness that is undeniably delicious. Next, add the 1/4 cup of melted coconut oil. Coconut oil not only contributes moisture but also a subtle, delightful tropical aroma. If you’re not a fan of coconut, melted unsalted butter or a neutral oil like canola or avocado oil are excellent substitutes. Ensure the coconut oil isn’t too hot if you’ve just melted it, as we don’t want to accidentally cook the bananas!
- Introduce the Vanilla Extract: Finish off the wet mixture with 1 teaspoon of vanilla extract. Vanilla is a magical ingredient that enhances almost any baked good. It adds a layer of depth and warmth that complements the banana and cinnamon beautifully. Don’t underestimate its power to elevate the overall flavor profile of these irresistible treats.
- Whisk Until Well Combined: Using a whisk or the same fork you used for mashing, mix all the wet ingredients together thoroughly. You want a consistent, creamy mixture where the milk, oil, and vanilla are fully incorporated into the mashed banana. This might take a minute or two of good whisking. Scrape down the sides of the bowl to ensure everything is mixed evenly. This ensures that every bite of your baked bars will have that consistent, wonderful banana-vanilla flavor.
Phase 4: Bringing it All Together (The Batter) and Adding Optional Delights
This is where the magic really starts to happen! Combining the dry and wet ingredients will transform them into the delicious batter for our Irresistible Banana Oatmeal Bars For Healthy Snacking. This step also allows for customization with those optional mix-ins that can truly make these bars your own.
- Combine Wet and Dry Mixtures: Carefully pour the entire wet banana mixture into the bowl containing your dry ingredients. I like to make a well in the center of the dry ingredients before pouring to help prevent flour from flying everywhere.
- Gently Fold Until Just Combined: Using a spatula or a large spoon, begin to fold the wet and dry ingredients together. Start from the bottom of the bowl and bring the mixture up, turning the bowl as you go. The key here is to mix until just combined. You’re looking for no visible streaks of dry flour, but a few lumps are perfectly fine and even desirable in a quick bread or bar batter. Overmixing can develop the gluten in the flour too much, leading to tough, rubbery bars instead of the tender, chewy texture we’re aiming for. Stop mixing as soon as everything is moistened.
- Fold in Your Optional Mix-ins (Highly Recommended!): Now for the fun part – customization! If you’re using any of the optional mix-ins like chocolate chips, chopped nuts, dried fruit, or shredded coconut, gently fold them into the batter now. I often go for chocolate chips and walnuts; the combination of sweet chocolate and crunchy nuts is just heavenly in these bars. Distribute them evenly throughout the batter with a few more gentle folds. This ensures that every bite offers a delightful surprise and adds another layer of texture and flavor to your healthy snack. Don’t be shy here; these additions truly elevate the bars!
Phase 5: Baking Your Irresistible Banana Oatmeal Bars to Golden Perfection
Our batter is ready, the oven is preheated, and the anticipation is building! This phase focuses on getting the batter into the pan and baking it to create those perfectly golden and flavorful Irresistible Banana Oatmeal Bars For Healthy Snacking.
- Transfer Batter to the Prepared Pan: Carefully spoon the entire batter into your parchment-lined 9×13 inch baking pan. The batter might seem a bit thick and sticky, which is exactly what we want!
- Evenly Spread the Batter: Using the back of your spoon or a spatula, gently spread the batter evenly across the bottom of the pan. Pay attention to the corners and edges to ensure a consistent thickness. This guarantees that your bars bake evenly and that you don’t end up with some thin, crispy edges and thick, undercooked centers. Take your time to get it as level as possible. You can even lightly tap the pan on your counter a few times to help settle the batter and release any large air bubbles.
- Bake Until Golden Brown: Place the baking pan into your preheated 375°F (190°C) oven. Bake for approximately 25-30 minutes. Baking times can vary slightly depending on your oven, so keep an eye on them. You’ll know the bars are ready when the edges are lightly golden brown, the center is set, and a toothpick inserted into the center comes out clean or with just a few moist crumbs attached. The aroma filling your kitchen will be another wonderful indicator – a warm, sweet, banana-oat fragrance that is truly irresistible! If you added chocolate chips, they will be beautifully melted and gooey on top.
- Avoid Overbaking: While we want them cooked through, be careful not to overbake these bars. Overbaking can lead to dry, crumbly bars instead of the moist and chewy texture we’re aiming for. As soon as that toothpick comes out clean, or they reach that perfect golden hue, it’s time to take them out.
Phase 6: Cooling, Cutting, and Storing Your Healthy Snack Gems
The hard part is over! Your kitchen smells amazing, and your Irresistible Banana Oatmeal Bars For Healthy Snacking are fresh out of the oven. This final phase covers the essential cooling process, how to cut them perfectly, and tips for storing them to maintain their freshness.
- Cool in the Pan First: This step is critical for structure. Once you remove the bars from the oven, resist the urge to cut into them immediately. Allow them to cool in the baking pan on a wire rack for at least 15-20 minutes. During this time, the bars will continue to set up and firm up, making them much easier to handle and preventing them from crumbling when you cut them. The residual heat in the pan also helps to finish the cooking process gently.
- Lift and Cool Completely: After the initial cooling period in the pan, use the parchment paper overhang to carefully lift the entire slab of bars out of the pan and transfer it to the wire rack. Now, let them cool completely, preferably for at least an hour, or even longer, until they reach room temperature. Patience is key here! Cutting warm bars will often result in a messy, crumbly outcome. When they are fully cooled, they will hold their shape beautifully and be much easier to slice into neat portions.
- Slice into Bars: Once completely cooled, place the slab of bars on a cutting board. Using a sharp knife, trim the edges if desired for a super neat presentation (I often skip this, as I love the rustic look!). Then, slice them into your preferred size. I typically cut them into 12-16 individual bars, depending on how large I want each serving to be. For a truly healthy snacking option, I find smaller bars are perfect for portion control throughout the week.
- Storage for Maximum Freshness:
- Room Temperature: These banana oatmeal bars are best enjoyed within 2-3 days when stored at room temperature. Place them in an airtight container to keep them fresh and prevent them from drying out.
- Refrigeration: For longer storage, you can keep them in an airtight container in the refrigerator for up to a week. The texture might become slightly firmer, but they’ll still be absolutely delicious.
- Freezing: These bars freeze wonderfully! Wrap individual bars tightly in plastic wrap, then place them in a freezer-safe bag or container. They can be frozen for up to 2-3 months. To enjoy, simply thaw them at room temperature for an hour or two, or pop them in the microwave for 15-30 seconds for a warm, comforting treat. Freezing is a fantastic way to have a ready-made healthy snack on hand whenever a craving strikes.
- Enjoy Your Delicious Creation: Now, all that’s left is to savor your homemade Irresistible Banana Oatmeal Bars For Healthy Snacking! They are perfect for breakfast on the go, a midday pick-me-up, or a satisfying dessert. The combination of chewy oats, sweet banana, and any delightful mix-ins you chose makes them a true pleasure to eat.
Conclusion:
If there’s one recipe I urge you to add to your repertoire, it’s this one. I truly believe that once you experience the delightful taste and incredible convenience of these homemade bars, you’ll wonder how you ever managed without them. They are, without a doubt, a game-changer for anyone looking to maintain a balanced diet without sacrificing flavor or feeling deprived. We’ve all been there, reaching for a quick snack only to find ourselves navigating a minefield of processed sugars and artificial ingredients. That’s precisely why I poured my heart into perfecting this recipe. It’s designed to be your dependable ally, providing sustained energy and satisfying your sweet cravings in the most wholesome way possible.
What makes this particular recipe a true must-try is its remarkable simplicity coupled with its profound impact on your daily routine. Imagine waking up knowing you have a batch of these waiting for you – a perfect grab-and-go breakfast on a hectic morning, a wholesome mid-afternoon pick-me-up, or even a guilt-free dessert after dinner. The natural sweetness from ripe bananas, the fiber-rich goodness of oats, and the comforting warmth of a hint of cinnamon combine to create a symphony of flavors and textures that is both deeply satisfying and incredibly nourishing. This isn’t just another recipe; it’s a commitment to a healthier, happier you, delivered in a convenient, delicious package. I’ve found that having these on hand dramatically reduces the temptation for less healthy options, making healthy snacking an effortless joy rather than a conscious effort. It’s the kind of healthy indulgence that truly supports your well-being.
Get Creative: Elevate Your Bars
One of the aspects I adore most about these bars is their incredible versatility. While they are absolutely divine as is, fresh out of the oven or cooled to perfection, there are so many ways to customize them to suit your mood or what you have in your pantry. For an extra boost of protein, I sometimes stir in a scoop of my favorite vanilla protein powder with the dry ingredients. If you’re a chocolate lover (and who isn’t?), a handful of dark chocolate chips added before baking takes them to an entirely new level of decadence – a truly satisfying twist that still keeps them firmly in the healthy snacking category. A sprinkle of shredded coconut offers a tropical flair, while chopped nuts like walnuts or pecans can add a wonderful crunch and healthy fats. Don’t hesitate to play with spices either; a pinch of nutmeg or allspice can add an extra layer of warmth, especially during cooler months. For serving, try crumbling a bar over a bowl of Greek yogurt with some fresh berries for a wholesome breakfast parfait, or warm one slightly and serve it with a dollop of nut butter for an even richer experience. The possibilities are truly endless, allowing you to tailor each batch to your specific tastes and needs. This adaptability ensures that you’ll never get bored, and each time you bake them, you can discover a new favorite variation.
Your Turn: Share Your Experience!
Now, it’s your turn to experience the magic! I truly hope you’ll set aside some time this week to whip up a batch of these fantastic treats. The aroma filling your kitchen alone is worth the effort, and the first bite? Pure bliss. I am genuinely excited for you to discover firsthand why I consider these the Irresistible Banana Oatmeal Bars For Healthy Snacking. Don’t just take my word for it; bake them, taste them, and then tell me all about your experience! Did you add any unique ingredients? What’s your favorite way to serve them? I absolutely love hearing from you and seeing how you make these recipes your own. Your feedback and creativity inspire me, and our community thrives on shared culinary adventures. Please, share your pictures and stories in the comments below, or on your favorite social media platforms. Let’s spread the joy of healthy, homemade goodness together. Happy baking, my friends!
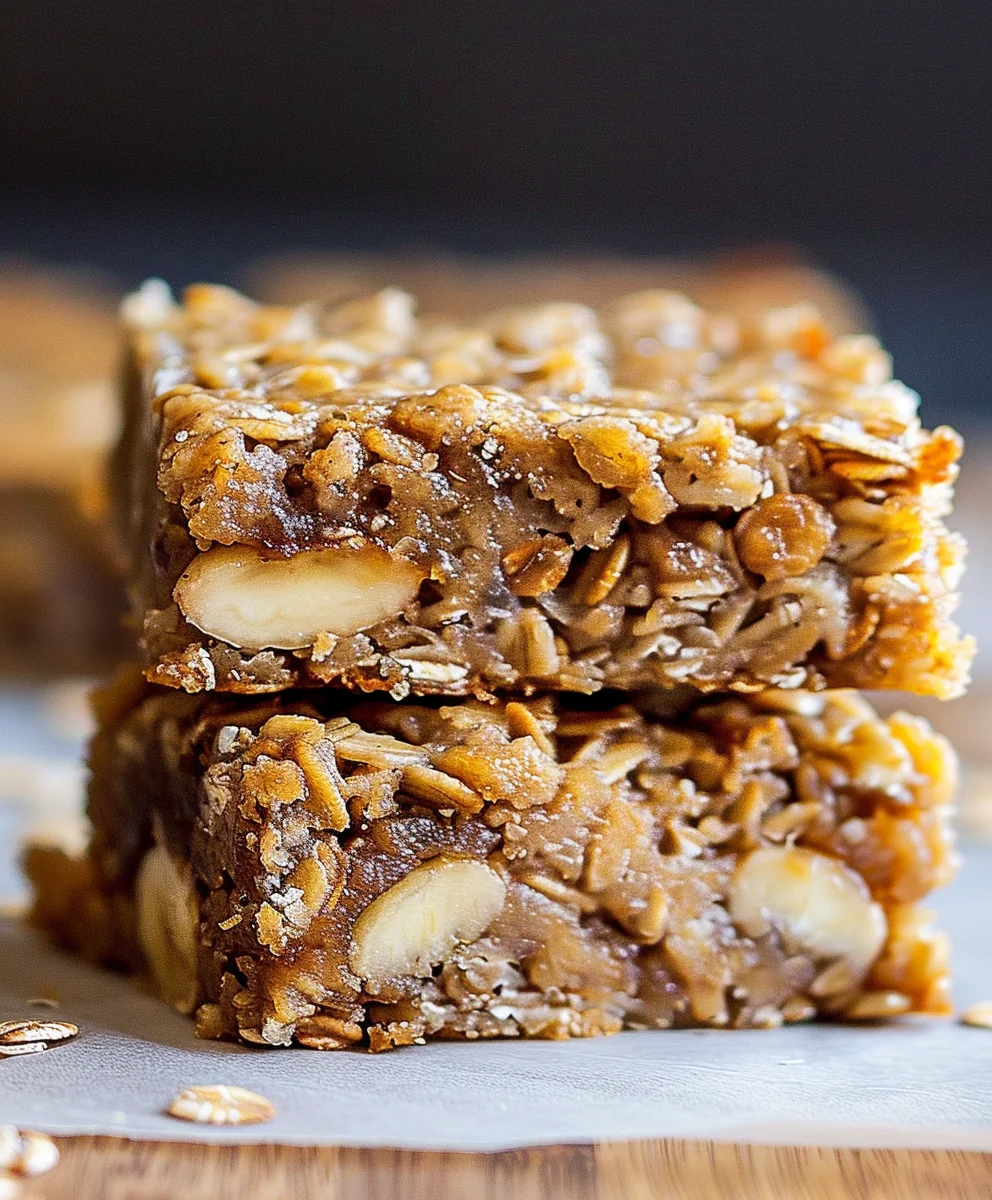
Irresistible Banana Oatmeal Bars
Transform your approach to wholesome treats with these delightful Banana Oatmeal Bars. Perfectly balancing hearty oats with the natural sweetness of ripe bananas, these bars are a satisfying, convenient, and healthy snack solution for any occasion.
Ingredients
-
3 ripe bananas (about 1 ½ cups mashed)
-
2 cups rolled oats
-
⅓ cup honey or pure maple syrup
-
2 large eggs
-
1 tsp baking powder
-
1 tsp vanilla extract
Instructions
-
Step 1
Preheat your oven to 375°F (190°C). Line a 9×13 inch baking pan with parchment paper, leaving an overhang for easy removal. -
Step 2
In a medium-sized bowl, mash the ripe bananas until mostly smooth. Add the honey or pure maple syrup, large eggs, and vanilla extract. Whisk these wet ingredients together until well combined. -
Step 3
To the wet mixture, add the rolled oats and baking powder. Stir gently with a spatula or spoon until just combined and no dry streaks remain. Avoid overmixing. -
Step 4
Transfer the batter evenly into the prepared baking pan, spreading it to the corners. Bake for 25-30 minutes, or until the edges are lightly golden brown, the center is set, and a toothpick inserted comes out clean or with just a few moist crumbs attached. -
Step 5
Allow the bars to cool in the pan on a wire rack for at least 15-20 minutes. Use the parchment paper overhang to lift the entire slab onto the wire rack to cool completely, about 1 hour or more. Once fully cooled, slice into 12-16 individual bars (e.g., 14 bars). -
Step 6
Store the banana oatmeal bars in an airtight container at room temperature for 2-3 days. For longer storage, refrigerate for up to a week or freeze for 2-3 months. Thaw frozen bars at room temperature or warm briefly in the microwave.
Important Information
Nutrition Facts (Per Serving)
It is important to consider this information as approximate and not to use it as definitive health advice.
Allergy Information
Please check ingredients for potential allergens and consult a health professional if in doubt.