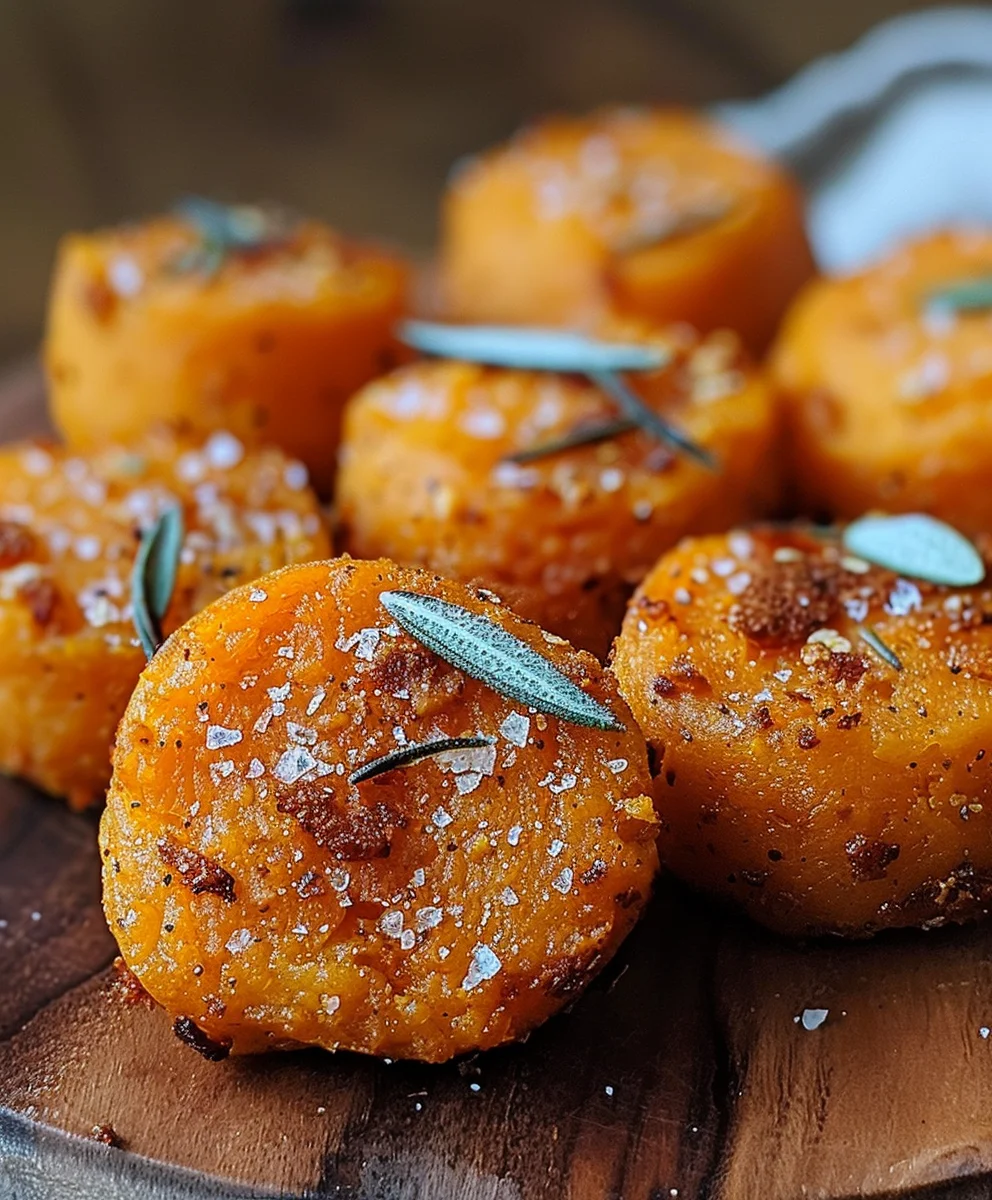
Sweet Potato Bliss Bites The Ultimate Snack Recipe is more than just a catchy name; it’s my personal promise of pure, wholesome delight. Have you ever found yourself yearning for a treat that beautifully satisfies your sweet cravings without compromising your healthy lifestyle? Then, my friend, you’ve arrived at the perfect place!
I find sweet potatoes absolutely fascinating, with their incredible history tracing back millennia, cherished by ancient civilizations and celebrated in countless global cuisines today. They aren’t just vibrant and naturally sweet; they’re a nutritional powerhouse, packed with essential vitamins and fiber. What I truly believe makes our Sweet Potato Bliss Bites so universally appealing is their remarkable versatility, the delightfully chewy texture, and that deeply comforting, inherent sweetness that feels like a warm, culinary hug. This isn’t just a snack; it’s a mindful indulgence that perfectly balances goodness with gratification.
Why You’ll Love These Bliss Bites
Whether you’re seeking a quick, energizing breakfast component, a post-workout refuel, or a wholesome treat that both children and adults will adore, these bites are your answer. I am genuinely excited for you to discover how incredibly easy they are to prepare and how they will effortlessly elevate your snacking game. Get ready to transform your daily routine with what I believe truly embodies Sweet Potato Bliss Bites The Ultimate Snack Recipe for optimal well-being and pure enjoyment.

Ingredients:
Creating these delightful Sweet Potato Bliss Bites, truly The Ultimate Snack Recipe, begins with gathering a wonderful assortment of fresh, wholesome ingredients. I always find that starting with quality produce and pantry staples makes all the difference in the final taste and texture of these nourishing treats.
- For the Sweet Potato Base:
- 2 large Sweet Potatoes (about 2-2.5 lbs total): I prefer vibrant orange-fleshed varieties like Beauregard or Jewel, as they offer the best balance of sweetness and moisture when roasted. Look for firm, unblemished sweet potatoes. These will form the heart of our bliss bites, providing natural sweetness and a creamy texture.
- Dry Ingredients for the Bliss Bites:
- 1 cup Rolled Oats (Old-Fashioned): Not instant oats! Old-fashioned oats provide a fantastic chewiness and contribute to the structural integrity of the bites. They also add a lovely wholesome, nutty flavor. I often lightly toast mine before adding them to enhance their aroma, but it’s optional.
- 1/2 cup Almond Flour: This is my go-to for adding a delicate texture and a boost of protein and healthy fats. It helps bind everything together beautifully without making the bites too dense. You can use blanched or unblanched, though blanched gives a smoother texture.
- 1/4 cup Desiccated Coconut (Unsweetened): This adds a lovely tropical aroma and a subtle chew. Make sure it’s unsweetened to control the overall sweetness of the bites. If you only have sweetened, you might want to slightly reduce other sweeteners.
- 2 tablespoons Chia Seeds: These tiny powerhouses are excellent binders and add a wonderful nutritional punch, packed with omega-3s and fiber. They absorb moisture, helping to create the perfect consistency.
- 1 teaspoon Ground Cinnamon: A warm, comforting spice that pairs exquisitely with sweet potatoes. It brings out their natural sweetness and adds depth to the flavor profile. I sometimes add a pinch of nutmeg or allspice too!
- 1/2 teaspoon Ground Ginger: Adds a subtle zing and warmth, complementing the cinnamon beautifully. Freshly ground is always best if you have a spice grinder.
- 1/4 teaspoon Fine Sea Salt: Crucial for balancing the sweetness and enhancing all the other flavors. Don’t skip it; a little salt makes sweet things taste even sweeter and more complex.
- Wet Ingredients & Sweeteners:
- 1/4 cup Maple Syrup (Pure Grade A Dark, Robust Taste): My preferred natural sweetener. It offers a rich, complex sweetness that marries perfectly with the sweet potato and spices. Always opt for pure maple syrup for the best flavor. Honey or agave nectar can be substituted if needed, but maple syrup truly shines here.
- 2 tablespoons Coconut Oil (Melted and Cooled Slightly): This provides healthy fats and helps achieve a tender texture. It also adds a very subtle hint of coconut flavor. Make sure it’s melted but not hot, as hot oil could start to cook the other ingredients prematurely.
- 1 teaspoon Vanilla Extract (Pure): A staple in almost any sweet recipe! It deepens the flavors and adds a lovely aromatic quality. Always use pure vanilla extract, not imitation.
- Optional Mix-ins/Garnishes (Choose 1-2 for extra texture and flavor):
- 1/4 cup Chopped Pecans or Walnuts: For a delightful crunch and nutty flavor. I often toast them lightly before chopping.
- 1/4 cup Dried Cranberries or Golden Raisins: Adds little bursts of tangy sweetness.
- Zest of 1 Orange: A fantastic way to brighten the flavors and add a citrusy aroma.
- For the Optional Drizzle/Coating:
- 2 tablespoons Melted Dark Chocolate (70% or higher): For an indulgent finish.
- 1 tablespoon Coconut Butter (Melted): For a creamy, slightly sweet glaze.
- Extra Desiccated Coconut or Chopped Nuts: For sprinkling.
Phase 1: Preparing the Sweet Potatoes for Blissful Sweetness
The foundation of our Sweet Potato Bliss Bites The Ultimate Snack Recipe relies on perfectly cooked sweet potatoes. I find that roasting truly brings out their natural sugars and deepens their flavor, resulting in a more intense and delicious bite. However, I’ll walk you through my preferred roasting method, along with a couple of alternatives.
- Preheat Your Oven and Prepare Sweet Potatoes: My first step is always to preheat my oven to 400°F (200°C). While the oven warms up, I grab my sweet potatoes. I give them a good scrub under cold running water to remove any dirt. There’s no need to peel them at this stage; the skin helps protect the flesh and makes for easier handling after cooking.
- Puncture and Roast for Flavor: Using a fork, I generously prick each sweet potato several times all over. This allows steam to escape during baking, preventing them from bursting. Then, I place the pricked sweet potatoes directly onto a baking sheet, sometimes lining it with parchment paper for easier cleanup, although it’s not strictly necessary if you don’t mind a bit of a baked-on residue.
- The Roasting Process: I slide the baking sheet into the preheated oven and let the magic happen. The roasting time will vary depending on the size of your sweet potatoes, but typically it takes anywhere from 45 to 70 minutes. I know they’re perfectly tender when I can easily pierce them with a fork all the way to the center, and they feel soft and yielding when squeezed (carefully, with oven mitts!). You’ll also notice some caramelization around the edges and often a bit of sticky, sweet juice oozing out – that’s a good sign of concentrated sweetness!
- Cooling and Preparing for Mashing: Once roasted to perfection, I carefully remove the sweet potatoes from the oven and let them cool down for about 10-15 minutes, or until they’re cool enough to handle comfortably. This brief cooling period helps them firm up slightly and makes the next step much easier. After cooling, I slice each sweet potato lengthwise down the middle.
- Scoop and Mash: Now for the fun part! Using a spoon, I scoop out the wonderfully soft, sweet flesh into a large mixing bowl. The skin is usually quite easy to separate and can be discarded (or saved for compost, as I often do!). Once all the flesh is in the bowl, I use a potato masher, a large fork, or even a sturdy whisk to thoroughly mash the sweet potatoes until they are completely smooth. This is a critical step for achieving a uniform texture in our bliss bites. Make sure there are no lumps remaining, as lumps can make the bites crumbly. If you prefer, you can also use a food processor for an incredibly smooth puree, but I find mashing by hand is perfectly adequate and less cleanup.
- Alternative Cooking Methods (Quick Notes):
- Steaming: Peel and cube the sweet potatoes (about 1-inch pieces). Steam for 15-20 minutes until very tender. This method preserves nutrients well and results in a lighter texture, but you might miss some of the deep caramelization from roasting.
- Boiling: Peel and cube, then boil in lightly salted water for 15-20 minutes until fork-tender. Drain very well to avoid watery bites. This is the fastest method but can lead to a less concentrated flavor.
Regardless of the cooking method, ensure your mashed sweet potato is free of lumps and has cooled down to at least room temperature before proceeding to the next phase. Warm sweet potato can affect the texture of the mixture and make it difficult to form the bites.
Phase 2: Crafting the Sweet Potato Bliss Bite Base
Now that our sweet potato base is ready and waiting, it’s time to infuse it with all the wonderful flavors and textures that make these Sweet Potato Bliss Bites The Ultimate Snack Recipe so satisfying. This is where the magic really starts to happen, as we combine our mashed sweet potato with the carefully chosen dry and wet ingredients.
- Combining Dry Ingredients: In a separate, medium-sized bowl, I start by whisking together all my dry ingredients. This includes the 1 cup of rolled oats, 1/2 cup of almond flour, 1/4 cup of unsweetened desiccated coconut, 2 tablespoons of chia seeds, 1 teaspoon of ground cinnamon, 1/2 teaspoon of ground ginger, and 1/4 teaspoon of fine sea salt. Whisking them thoroughly ensures that all these lovely spices and binding agents are evenly distributed, so every bite has a consistent flavor profile. You don’t want a clump of cinnamon in one bite and plain oat in another!
- Preparing Wet Ingredients: In a small bowl or measuring cup, I combine my wet ingredients: 1/4 cup of pure maple syrup, 2 tablespoons of melted (and slightly cooled) coconut oil, and 1 teaspoon of pure vanilla extract. I give these a quick stir to ensure they are well mixed. It’s important that the coconut oil isn’t hot, as mentioned before; just warm enough to be liquid.
- Integrating Dry into Wet (and Sweet Potato!): Now, I add the whisked dry ingredient mixture directly into the large bowl with the mashed, cooled sweet potato. I use a sturdy spoon or a rubber spatula to start folding them together. As I’m doing this, I also pour in the wet ingredient mixture (maple syrup, coconut oil, and vanilla extract).
- Mixing for Uniformity: I continue to mix everything very thoroughly until no dry streaks of flour or oats remain, and the mixture is completely uniform. It might seem a bit stiff at first, but with persistent mixing, it will come together into a wonderfully cohesive, slightly sticky, and very fragrant dough-like consistency. The key here is to mix until just combined, overmixing can sometimes lead to a tougher texture in baked goods, though less of a concern with this type of “dough.”
- Adding Optional Mix-ins: If I’m using any of the optional mix-ins, such as chopped pecans or walnuts, dried cranberries or golden raisins, or orange zest, this is the perfect time to fold them in gently. I usually add about 1/4 cup of whichever I choose. They add fantastic pops of texture and flavor, truly elevating these to The Ultimate Snack Recipe status. Ensure they are evenly distributed throughout the mixture.
Phase 3: Shaping the Perfect Bliss Bites
Once our delightful sweet potato base is mixed, the next step is to transform it into individual, snackable bites. This phase is all about precision and a bit of patience to ensure our Sweet Potato Bliss Bites The Ultimate Snack Recipe look as good as they taste.
- Prepare Your Baking Sheet: I always start by lining a large baking sheet with parchment paper. This prevents sticking and makes cleanup a breeze. If you don’t have parchment paper, you can lightly grease the baking sheet, but I highly recommend parchment for these types of sticky recipes.
- Portioning the Mixture: I find using a small cookie scoop (about 1.5 to 2 tablespoons capacity) is the easiest and most consistent way to portion the mixture. If you don’t have a scoop, simply use a regular tablespoon measure. Consistency in size ensures even baking. I scoop out portions and place them onto the prepared baking sheet, leaving a little space between each one.
- Forming the Bites: Now, using clean hands, I gently roll each scooped portion between my palms to form a smooth, round ball. You can make them as round or as oval as you like – I often go for a slightly flattened sphere, about 1-inch in diameter, which makes them easy to pop into your mouth. The mixture should be firm enough to hold its shape without crumbling. If it feels too sticky, you can slightly dampen your hands with water or lightly grease them with a tiny bit of coconut oil. This step is important for presentation and even cooking.
- Chilling for Firmness (Highly Recommended!): Once all the bliss bites are formed and arranged on the baking sheet, I place the entire tray into the refrigerator to chill for at least 30 minutes, or even up to an hour. This chilling step is crucial! It allows the chia seeds to fully hydrate and the coconut oil to firm up, which helps the bites hold their shape beautifully during baking and prevents them from spreading too much. It truly makes a difference in the final texture and structure of these Sweet Potato Bliss Bites.
Phase 4: Baking or Air Frying for Golden Perfection
With our chilled sweet potato bliss bites ready, it’s time to introduce them to some heat! Whether you prefer the oven or an air fryer, both methods will result in wonderfully tender insides and slightly firm exteriors, making them truly The Ultimate Snack Recipe. I’ll guide you through both, but my go-to is usually baking for a larger batch.
- Preheat Your Appliance:
- For Baking (Oven): Preheat your oven to 350°F (175°C). This slightly lower temperature than roasting the sweet potatoes helps to cook the bites through without burning the outsides.
- For Air Frying: Preheat your air fryer to 325°F (160°C). Air fryers cook faster and more intensely, so a slightly lower temperature is key to prevent over-browning.
- Baking Instructions (Oven):
- Once the oven is preheated, I carefully transfer the baking sheet with the chilled bliss bites from the refrigerator directly into the oven. I ensure there’s enough space around each bite for even heat circulation.
- Bake for 18-25 minutes. The exact time will depend on the size of your bites and your oven’s calibration.
- Around the 10-12 minute mark, I usually rotate the baking sheet 180 degrees to ensure even baking.
- The bliss bites are done when they are lightly golden brown around the edges and feel firm to the touch. They should still be slightly soft in the center, but not mushy. Don’t overbake them, or they can become dry! I’m looking for a nice, gentle firmness.
- Air Frying Instructions (Alternative):
- If I’m using my air fryer, I place the chilled bliss bites in a single layer in the air fryer basket. Do not overcrowd the basket! You might need to cook them in batches. Overcrowding will steam them instead of crisping them.
- Air fry for 10-15 minutes.
- About halfway through, at the 5-7 minute mark, I gently shake the basket or use tongs to flip the bites to ensure even browning on all sides.
- They are ready when they are golden brown and have a slightly crisp exterior. Again, they should be tender but not raw in the middle.
- Cooling the Bites: Whether baked or air-fried, once cooked, I remove the bliss bites from the oven or air fryer. I let them cool on the baking sheet for about 5-10 minutes before carefully transferring them to a wire rack to cool completely. They will firm up considerably as they cool. Resist the urge to move them too soon, as they will be delicate when hot. Allowing them to cool completely on a wire rack is essential for achieving the perfect texture.
Phase 5: Adding the Finishing Touches (Optional Glaze or Coating)
While these Sweet Potato Bliss Bites The Ultimate Snack Recipe are absolutely delicious on their own, a little optional glaze or coating can take them to the next level, adding an extra layer of flavor and visual appeal. This is where you can truly personalize them!
- Preparing a Simple Chocolate Drizzle:
- If I’m feeling a little indulgent, I’ll prepare a dark chocolate drizzle. I melt about 2 tablespoons of high-quality dark chocolate (70% cocoa or higher). I do this either in a small microwave-safe bowl in 15-second intervals, stirring between each, or over a double boiler. The goal is smooth, glossy melted chocolate, not burnt!
- Once melted, I let it cool for just a minute or two to thicken slightly. Then, using a spoon, I drizzle the melted chocolate artfully over the cooled bliss bites. You can create zig-zags, swirls, or just random lines – whatever looks appealing to you!
- Creating a Creamy Coconut Butter Glaze:
- For a more subtle, creamy, and slightly healthier option, I love a coconut butter glaze. I warm about 1 tablespoon of coconut butter (sometimes called coconut manna) in a small bowl until it’s liquid and smooth. This is usually very quick in the microwave (10-15 seconds) or over a warm water bath.
- If the coconut butter seems too thick, I might add a tiny drop (1/4 teaspoon) of maple syrup or plant-based milk to thin it slightly, whisking until smooth.
- Then, similar to the chocolate, I drizzle this creamy glaze over the cooled bliss bites. It solidifies beautifully as it cools, giving a lovely, slightly opaque finish and an extra hint of coconut flavor.
- Adding Extra Texture with Sprinkles:
- While the chocolate or coconut butter drizzle is still wet, this is the perfect moment to add any extra garnishes. I sometimes sprinkle a tiny bit more desiccated coconut for a tropical look, or a pinch of finely chopped nuts (like pistachios or more pecans) for added crunch and color.
- Even a tiny sprinkle of flaky sea salt on the chocolate-drizzled bites can be an absolute game-changer, enhancing the chocolate’s depth!
Phase 6: Cooling, Storing, and Enjoying Your Blissful Creation
The final phase is all about making sure our Sweet Potato Bliss Bites The Ultimate Snack Recipe are perfectly set, properly stored, and ready to be savored. This ensures maximum enjoyment and keeps them fresh for as long as possible.
- Allowing Glaze to Set (If Applicable): If you’ve added a chocolate or coconut butter drizzle, it’s important to let it set completely. I usually place the wire rack with the glazed bites back into the refrigerator for another 10-15 minutes. This helps the glazes firm up quickly, preventing them from being messy when handled. Once set, the glazes will be firm and dry to the touch.
- Final Cooling: After any glazes have set, or if you skipped the glaze, ensure the bliss bites are completely cool before storing them. They will continue to firm up slightly as they cool down to room temperature, achieving that ideal chewy-but-tender texture. Patience here is rewarded!
- Storage for Freshness:
- Room Temperature (Short-term): If you plan to devour these within a day or two, you can store them in an airtight container at room temperature. However, because they contain fresh sweet potato and coconut oil (which can soften at warmer temps), I generally prefer refrigeration for best results.
- Refrigerator (Preferred): For optimal freshness and to maintain their texture, I recommend storing your Sweet Potato Bliss Bites in an airtight container in the refrigerator. They will keep beautifully for up to 5-7 days this way. Chilled, they develop an even firmer and chewier texture, which I personally love. They are absolutely delightful straight from the fridge!
- Freezer (Long-term): These bliss bites are also freezer-friendly! To freeze, place the fully cooled bites in a single layer on a parchment-lined baking sheet and freeze until solid (about 1-2 hours). Once frozen, transfer them to a freezer-safe bag or container, separating layers with parchment paper to prevent sticking. They can be stored in the freezer for up to 2-3 months. To enjoy, simply thaw them in the refrigerator overnight or at room temperature for an hour or so. They make for a fantastic grab-and-go snack!
- Serving Suggestions: These Sweet Potato Bliss Bites are incredibly versatile and perfect for so many occasions. I love them as:
- A quick and energizing breakfast on the go.
- A satisfying mid-morning or afternoon snack.
- A wholesome addition to a packed lunch.
- A healthier dessert option after dinner.
- A post-workout refuel thanks to the natural carbs and protein.
I hope you enjoy making and savoring these Sweet Potato Bliss Bites The Ultimate Snack Recipe as much as I do. They are truly a testament to how delicious and nourishing a simple, homemade snack can be!
Conclusion:
Well, my friends, we’ve reached the end of our journey through this delightful recipe, and I truly hope you’re as excited as I am about what you’ve learned! This isn’t just another recipe; it’s an invitation to elevate your snack game, to embrace a healthier, more vibrant way of eating without ever sacrificing flavor or satisfaction. What makes this recipe an absolute must-try, in my humble opinion, is its unparalleled blend of simplicity, nutritional value, and sheer deliciousness. Forget those processed, sugar-laden treats that leave you feeling sluggish and guilty. These bites are packed with natural goodness, harnessing the inherent sweetness and creamy texture of sweet potatoes, complemented by a thoughtful array of ingredients that offer sustained energy and essential nutrients. They’re proof that wholesome eating can be incredibly indulgent and utterly convenient. I’ve found that even the most skeptical eaters in my life, those who typically shy away from anything labeled “healthy,” can’t resist these little bundles of joy. They’re quick to prepare, forgiving to a fault, and yield a substantial batch that can keep you going for days. It’s the kind of recipe that makes you feel good about what you’re putting into your body, all while treating your taste buds to a truly memorable experience.
But the magic doesn’t stop once they’re baked; the possibilities for enjoying these wonderful creations are endless!
Serving Suggestions & Creative Variations:
For a quick pick-me-up, I love to grab a couple of these straight from the fridge as an afternoon snack, especially when that 3 PM slump hits. They’re fantastic pre-workout fuel, giving you that clean energy boost without weighing you down, and equally excellent for post-workout recovery. Don’t hesitate to serve them as a charmingly rustic dessert alongside a scoop of vanilla bean ice cream (dairy or non-dairy!), or crumble them over your morning Greek yogurt or oatmeal for an extra layer of flavor and texture. For a delightful breakfast on the go, I sometimes pair them with a strong cup of coffee or a green smoothie. They truly shine in any context.
And now for the fun part – making them your own! This recipe is incredibly adaptable. Feeling adventurous? Try adding a pinch of ground ginger or cardamom to the mix for a warmer, spicier note, or a tiny dash of cayenne pepper if you enjoy a subtle heat to balance the sweetness. A handful of mini chocolate chips, dark chocolate preferred, can transform them into an even more decadent treat, perfect for satisfying those serious chocolate cravings. For an extra boost of fiber and omega-3s, consider folding in a tablespoon of chia seeds or ground flaxseed.
The texture can also be customized:
If you prefer a chewier bite, bake them for a few extra minutes; for a softer, melt-in-your-mouth experience, keep a closer eye on them and pull them out just as the edges begin to turn golden. You could even press the mixture into a parchment-lined square pan, bake it, and then slice it into bars for a different presentation. Drizzle them with a homemade cashew cream or a light lemon glaze for an elegant touch when serving guests. The beauty of this recipe lies in its flexibility, allowing you to tailor it perfectly to your family’s tastes and your pantry’s contents.
So, what are you waiting for? My biggest hope is that you’ll carve out a little time in your busy schedule to give this incredible recipe a try. I promise you, the rewards far outweigh the minimal effort involved. Imagine that satisfying aroma filling your kitchen as these golden-brown gems bake to perfection, and then the pure joy of biting into one, knowing you’ve created something both delicious and genuinely good for you. This is more than just a recipe; it’s an experience, a small act of self-care that pays dividends in pure enjoyment. Once you’ve whipped up your own batch of Sweet Potato Bliss Bites The Ultimate Snack Recipe, I would absolutely love to hear about your experience! Did you stick to the recipe, or did you add your own unique twist? Please don’t hesitate to share your thoughts, your successes, and even your creative variations in the comments below. Your feedback and personal touches inspire me and countless other home cooks. Happy baking, and enjoy every single delightful bite!
Sweet Potato Bliss Bites: Ultimate Healthy Snack Recipe
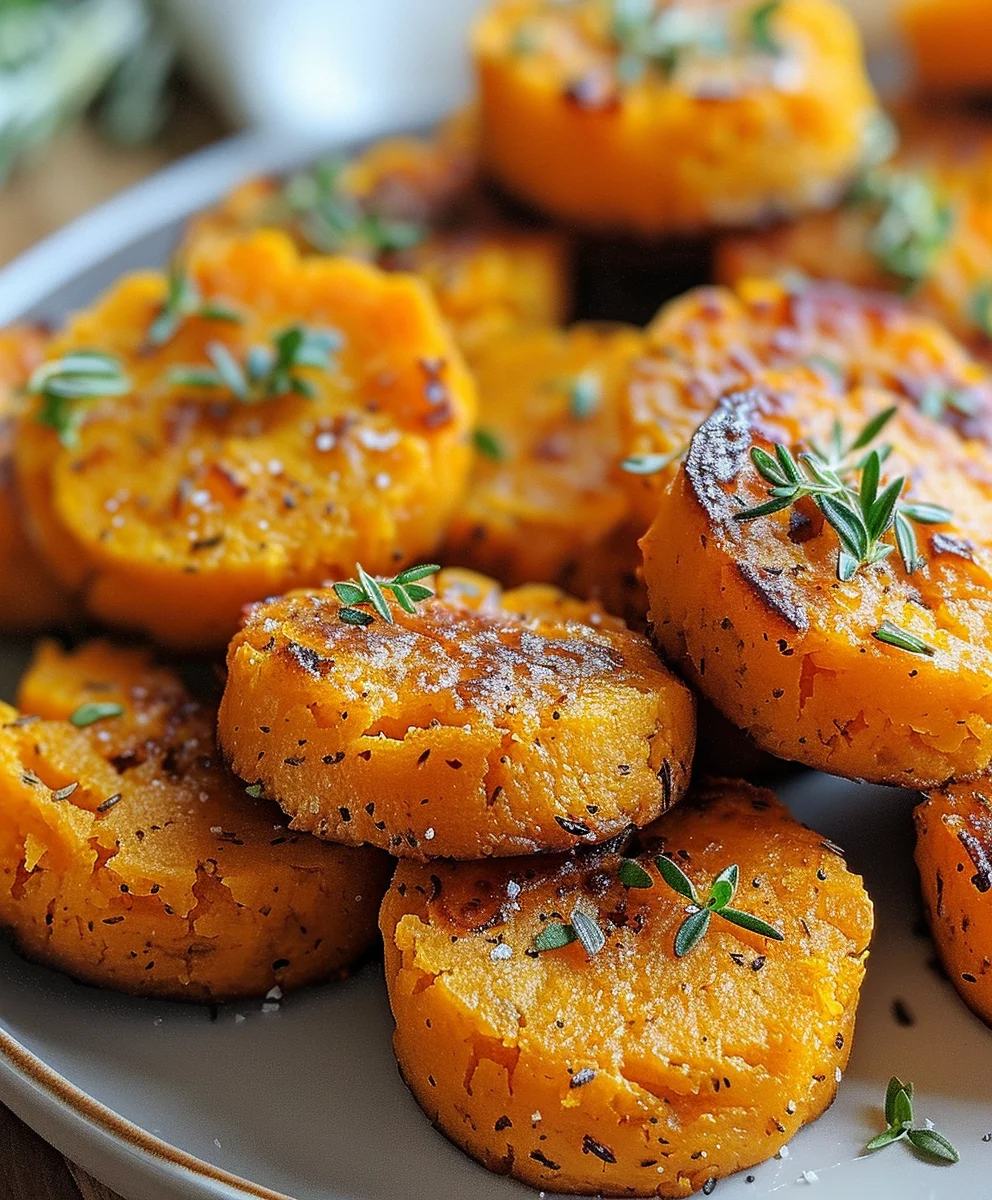
These Sweet Potato Bliss Bites are a wholesome, naturally sweet snack, perfect for satisfying cravings without compromising a healthy lifestyle. Packed with essential vitamins and fiber, they offer a delightful chewy texture and comforting sweetness, suitable as an energizing breakfast, post-workout refuel, or healthy treat for all ages.
Ingredients
-
2 large Sweet Potatoes (about 2-2.5 lbs total)
-
1 cup Rolled Oats (Old-Fashioned)
-
1/2 cup Almond Flour
-
1/4 cup Desiccated Coconut (Unsweetened)
-
2 tablespoons Chia Seeds
-
1 teaspoon Ground Cinnamon
-
1/2 teaspoon Ground Ginger
-
1/4 teaspoon Fine Sea Salt
-
1/4 cup Maple Syrup (Pure Grade A Dark, Robust Taste)
-
2 tablespoons Coconut Oil (Melted and Cooled Slightly)
-
1 teaspoon Vanilla Extract (Pure)
-
Optional Mix-ins: 1/4 cup Chopped Pecans or Walnuts
-
Optional Mix-ins: 1/4 cup Dried Cranberries or Golden Raisins
-
Optional Mix-ins: Zest of 1 Orange
-
Optional Drizzle/Coating: 2 tablespoons Melted Dark Chocolate (70% or higher)
-
Optional Drizzle/Coating: 1 tablespoon Coconut Butter (Melted)
-
Optional Drizzle/Coating: Extra Desiccated Coconut or Chopped Nuts
Instructions
- Step 1
Preheat oven to 400°F (200°C). Scrub and prick sweet potatoes. Roast on a baking sheet for 45-70 minutes until tender. Cool for 10-15 minutes, then scoop flesh into a large bowl and mash until smooth. Ensure no lumps remain. - Step 2
In a separate medium bowl, whisk 1 cup rolled oats, 1/2 cup almond flour, 1/4 cup unsweetened desiccated coconut, 2 tablespoons chia seeds, 1 teaspoon ground cinnamon, 1/2 teaspoon ground ginger, and 1/4 teaspoon fine sea salt. In a small bowl, combine 1/4 cup pure maple syrup, 2 tablespoons melted coconut oil, and 1 teaspoon pure vanilla extract. Add both mixtures to the mashed sweet potato. Mix thoroughly until uniform and cohesive. Fold in optional mix-ins (chopped nuts, dried fruit, or orange zest) if desired. - Step 3
Line a large baking sheet with parchment paper. Using a small cookie scoop (1.5-2 tbsp), portion the mixture and roll each into a smooth, round 1-inch ball between your palms. Arrange on the baking sheet. Chill the formed bites in the refrigerator for at least 30-60 minutes to firm up. - Step 4
For Baking: Preheat oven to 350°F (175°C). Bake chilled bites for 18-25 minutes until lightly golden brown and firm to the touch. Rotate baking sheet halfway through. For Air Frying: Preheat air fryer to 325°F (160°C). Place bites in a single layer (cook in batches) and air fry for 10-15 minutes, shaking or flipping halfway, until golden brown with a crisp exterior. Cool cooked bites on the baking sheet for 5-10 minutes, then transfer to a wire rack to cool completely. - Step 5
Once cooled, drizzle bites with 2 tablespoons melted dark chocolate or 1 tablespoon melted coconut butter. While the drizzle is still wet, sprinkle with extra desiccated coconut, chopped nuts, or a pinch of flaky sea salt for added texture and flavor. - Step 6
If glazed, refrigerate for 10-15 minutes to set the drizzle. Ensure bites are completely cool before storing. Store in an airtight container in the refrigerator for 5-7 days. For longer storage, freeze solid on a baking sheet, then transfer to a freezer-safe container for up to 2-3 months. Thaw in the refrigerator or at room temperature.
Important Information
Nutrition Facts (Per Serving)
It is important to consider this information as approximate and not to use it as definitive health advice.
Allergy Information
Please check ingredients for potential allergens and consult a health professional if in doubt.