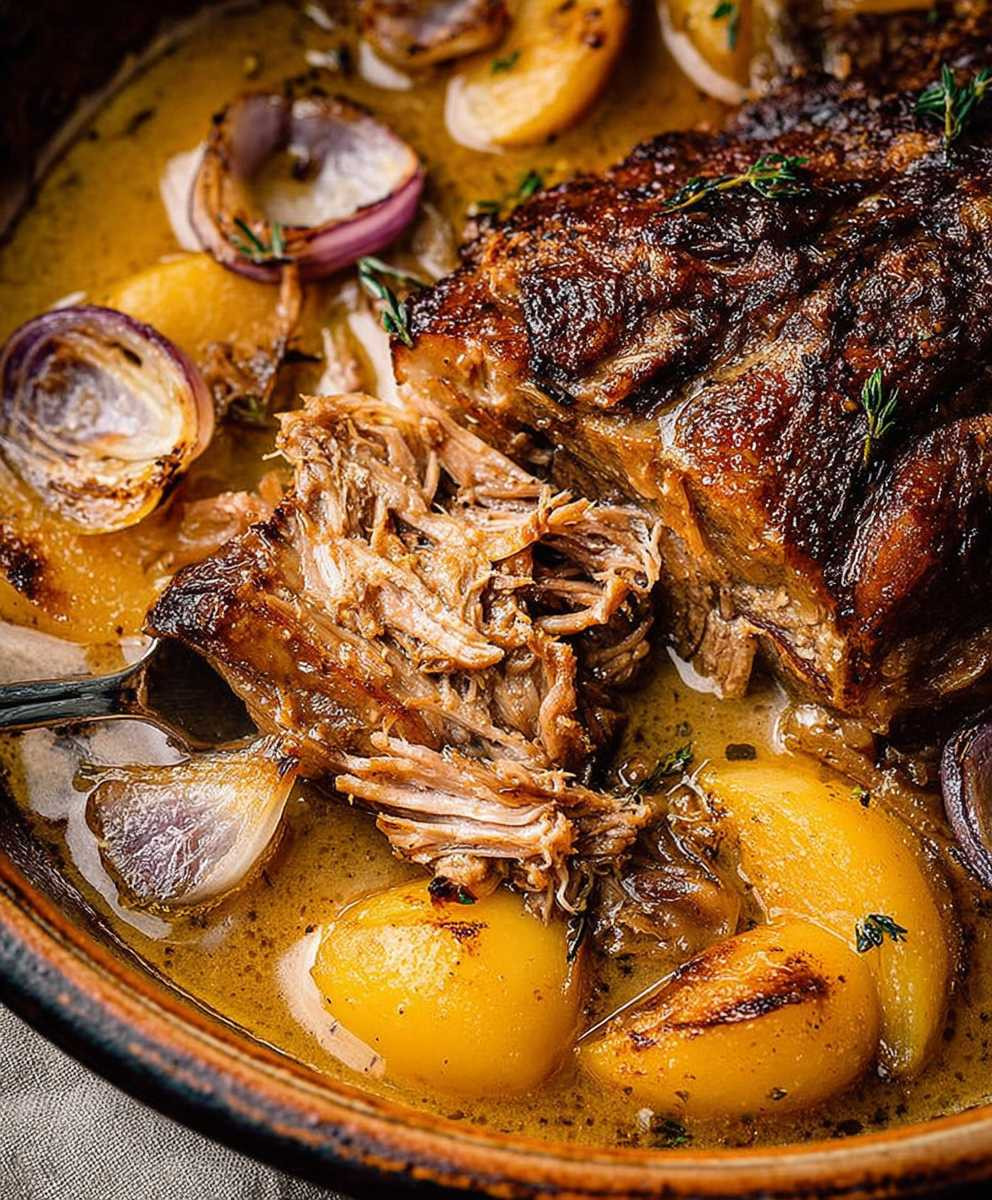
Apple Cider Braised Pork Shoulder: Imagine sinking your teeth into tender, fall-apart pork, infused with the sweet and tangy flavors of apple cider and warming spices. This isn’t just dinner; it’s an experience, a comforting hug on a chilly evening. I’m so excited to share this recipe with you!
Braised pork shoulder, in its various forms, has been a staple in cuisines around the world for centuries. The beauty of braising lies in its ability to transform a tougher cut of meat into something incredibly succulent and flavorful. This particular version, featuring the quintessential autumn flavors of apple cider, elevates the classic technique to new heights. The sweetness of the cider complements the richness of the pork, creating a harmonious balance that’s simply irresistible.
People adore this Apple Cider Braised Pork Shoulder for several reasons. First, the taste is phenomenal – the pork becomes incredibly tender and juicy, practically melting in your mouth. The apple cider adds a subtle sweetness and acidity that cuts through the richness of the pork, preventing it from being too heavy. Second, the aroma that fills your kitchen as it simmers is pure bliss. Finally, while it requires a bit of time, the process is largely hands-off, making it perfect for a weekend gathering or a cozy weeknight dinner. You can easily prepare this Apple Cider Braised Pork Shoulder ahead of time, making it a stress-free option for entertaining. Get ready to impress your family and friends with this unforgettable dish!

Ingredients:
- Pork Shoulder: 4-5 pound boneless pork shoulder, excess fat trimmed
- Apple Cider: 4 cups good quality apple cider
- Onion: 1 large yellow onion, chopped
- Apples: 2 large apples (such as Honeycrisp or Granny Smith), peeled, cored, and chopped
- Garlic: 4 cloves garlic, minced
- Apple Cider Vinegar: 2 tablespoons
- Dijon Mustard: 2 tablespoons
- Brown Sugar: 2 tablespoons packed light brown sugar
- Dried Thyme: 1 tablespoon
- Dried Rosemary: 1 teaspoon
- Bay Leaves: 2 bay leaves
- Chicken Broth: 1 cup low-sodium chicken broth
- Olive Oil: 2 tablespoons
- Salt: 2 teaspoons, or to taste
- Black Pepper: 1 teaspoon, or to taste
- All-Purpose Flour: 2 tablespoons (for thickening the sauce, optional)
- Water: 2 tablespoons (for thickening the sauce, optional)
Preparing the Pork Shoulder:
Before we dive into the braising process, let’s get the pork shoulder ready. This step is crucial for developing a rich, flavorful crust that will enhance the overall taste of the dish. Trust me, it’s worth the extra few minutes!
- Pat the Pork Dry: Use paper towels to thoroughly pat the pork shoulder dry. This is essential for achieving a good sear. Moisture is the enemy of browning!
- Season Generously: In a small bowl, combine the salt and pepper. Generously season the entire pork shoulder with this mixture. Don’t be shy! You want to make sure every part of the meat is seasoned well. Press the seasoning into the meat to help it adhere.
Searing the Pork:
Searing the pork is where the magic begins. This step creates a beautiful, flavorful crust that locks in the juices and adds depth to the braising liquid. Don’t skip this step!
- Heat the Oil: In a large Dutch oven or heavy-bottomed pot, heat the olive oil over medium-high heat. You want the oil to be shimmering hot, but not smoking.
- Sear the Pork: Carefully place the pork shoulder in the hot Dutch oven. Sear it for 4-5 minutes per side, until it’s deeply browned and crusty. Resist the urge to move the pork around while it’s searing; you want to allow it to develop a good crust. If your pork shoulder is too large to fit comfortably in the pot, you may need to sear it in batches.
- Remove the Pork: Once the pork is nicely seared on all sides, remove it from the Dutch oven and set it aside on a plate.
Building the Flavor Base:
Now it’s time to build the flavor base for our braising liquid. This is where the onions, apples, and garlic come into play, creating a sweet and savory foundation for the pork to simmer in.
- Sauté the Onions: Add the chopped onion to the Dutch oven and cook over medium heat, stirring occasionally, until softened and translucent, about 5-7 minutes. Scrape up any browned bits from the bottom of the pot – these are packed with flavor!
- Add the Apples and Garlic: Add the chopped apples and minced garlic to the Dutch oven and cook for another 3-5 minutes, until the apples are slightly softened and the garlic is fragrant. Be careful not to burn the garlic, as it can become bitter.
- Deglaze the Pot: Pour in the apple cider vinegar and use a wooden spoon to scrape up any remaining browned bits from the bottom of the pot. This process, called deglazing, adds a ton of flavor to the sauce.
Braising the Pork:
This is the heart of the recipe – the slow, gentle braising process that transforms the pork shoulder into a tender, flavorful masterpiece. Patience is key here!
- Add the Remaining Ingredients: Pour in the apple cider and chicken broth. Stir in the Dijon mustard, brown sugar, dried thyme, and dried rosemary. Add the bay leaves.
- Return the Pork to the Pot: Place the seared pork shoulder back into the Dutch oven, nestled among the apples and onions. The liquid should come about halfway up the side of the pork. If necessary, add a little more chicken broth to reach this level.
- Bring to a Simmer: Bring the liquid to a simmer over medium heat.
- Cover and Braise: Cover the Dutch oven tightly with a lid. Reduce the heat to low and braise for 3-4 hours, or until the pork is fork-tender and easily shreds. The exact braising time will depend on the size and thickness of your pork shoulder. Check the pork periodically during the braising process to ensure that the liquid hasn’t evaporated too much. If it has, add a little more chicken broth.
Shredding the Pork and Finishing the Sauce:
Once the pork is fall-apart tender, it’s time to shred it and finish the sauce. This is where we’ll concentrate the flavors and create a delicious, glossy sauce to coat the shredded pork.
- Remove the Pork: Carefully remove the pork shoulder from the Dutch oven and place it on a cutting board. Let it rest for about 10-15 minutes before shredding. This allows the juices to redistribute, resulting in more tender and flavorful pork.
- Shred the Pork: Use two forks to shred the pork into bite-sized pieces. Discard any large pieces of fat or gristle.
- Skim the Fat: While the pork is resting, skim off any excess fat from the surface of the braising liquid in the Dutch oven. A ladle or a fat separator works well for this.
- Reduce the Sauce: Bring the braising liquid to a simmer over medium heat and cook, uncovered, for about 15-20 minutes, or until it has reduced and thickened slightly. This will concentrate the flavors and create a richer sauce.
- Thicken the Sauce (Optional): If you prefer a thicker sauce, you can make a slurry by whisking together the all-purpose flour and water in a small bowl until smooth. Gradually whisk the slurry into the simmering sauce and cook for another 2-3 minutes, or until the sauce has thickened to your desired consistency.
- Return the Pork to the Sauce: Add the shredded pork back to the Dutch oven and stir to coat it evenly with the sauce.
- Simmer Briefly: Simmer the pork in the sauce for another 5-10 minutes, allowing the flavors to meld together.
- Taste and Adjust Seasoning: Taste the pork and sauce and adjust the seasoning as needed. You may want to add a little more salt, pepper, or brown sugar to taste.
- Remove Bay Leaves: Before serving, be sure to remove the bay leaves.
Serving Suggestions:
Now that your Apple Cider Braised Pork Shoulder is ready, it’s time to serve it up! Here are a few of my favorite ways to enjoy this delicious dish:
- Pulled Pork Sandwiches: Pile the shredded pork onto toasted buns with your favorite toppings, such as coleslaw, pickles, or barbecue sauce.
- Over Mashed Potatoes: Serve the pork over a bed of creamy mashed potatoes for a comforting and satisfying meal.
- With Roasted Vegetables: Pair the pork with roasted root vegetables, such as carrots, parsnips, and sweet potatoes, for a healthy and flavorful side dish.
- In Tacos or Burritos: Use the shredded pork as a filling for tacos or burritos, topped with your favorite salsa, guacamole, and sour cream.
- As a Pizza Topping: Get creative and use the shredded pork as a topping for homemade pizza.
No matter how you choose to serve it, I’m confident that you’ll love this Apple Cider Braised Pork Shoulder. It’s a flavorful, comforting, and versatile dish that’s perfect for any occasion. Enjoy!
Conclusion:
Well, there you have it! This Apple Cider Braised Pork Shoulder recipe is more than just a meal; it’s an experience. From the tantalizing aroma that fills your kitchen as it simmers to the melt-in-your-mouth tenderness of the pork, every step of the process is a delight. I truly believe this recipe is a must-try for anyone looking to elevate their comfort food game. It’s the perfect dish for a cozy Sunday dinner, a festive gathering, or even just a weeknight treat when you need a little something special.
But why is this particular recipe so special? It’s the harmonious blend of sweet and savory flavors, the simplicity of the ingredients, and the sheer versatility of the final product. The apple cider infuses the pork with a subtle sweetness that perfectly complements the richness of the meat, while the braising process ensures that it becomes incredibly tender and juicy. It’s a dish that’s both impressive and approachable, making it ideal for both seasoned cooks and kitchen novices alike.
And the best part? There are so many ways to enjoy this Apple Cider Braised Pork Shoulder! Serve it shredded on toasted brioche buns with a dollop of creamy coleslaw for a mouthwatering pulled pork sandwich. Or, pair it with creamy mashed potatoes and roasted root vegetables for a classic comfort food feast. For a lighter option, try serving it over a bed of quinoa or brown rice with a side of steamed green beans.
Looking for variations? Get creative! Add a pinch of red pepper flakes to the braising liquid for a touch of heat. Incorporate some dried cranberries or chopped apples for an extra burst of sweetness. Or, experiment with different herbs and spices to create your own unique flavor profile. A bay leaf or two adds depth, while a sprig of fresh thyme brings a touch of earthiness. Don’t be afraid to experiment and make it your own!
Here are a few more serving suggestions to get your creative juices flowing:
* Tacos: Shred the pork and use it as a filling for tacos, topped with your favorite salsa, cilantro, and a squeeze of lime.
* Nachos: Layer tortilla chips with shredded pork, cheese, jalapenos, and all your favorite nacho toppings.
* Shepherd’s Pie: Use the braised pork as the base for a hearty shepherd’s pie, topped with mashed potatoes and baked until golden brown.
* Pasta Sauce: Shred the pork and toss it with your favorite pasta sauce for a rich and flavorful meal.
* Pizza Topping: Use the shredded pork as a topping for homemade or store-bought pizza.
I’m so excited for you to try this recipe and experience the magic of Apple Cider Braised Pork Shoulder for yourself. I truly believe it will become a new favorite in your household.
So, what are you waiting for? Gather your ingredients, put on some music, and get ready to create something delicious. And most importantly, don’t forget to share your experience with me! I’d love to hear how it turned out, what variations you tried, and what your family and friends thought. Leave a comment below or tag me on social media – I can’t wait to see your culinary creations! Happy cooking!
Apple Cider Braised Pork Shoulder: The Ultimate Fall Comfort Food
Tender pork shoulder braised in apple cider with apples, onions, and herbs. Great for sandwiches, tacos, or over mashed potatoes.
Ingredients
- 4-5 pound boneless pork shoulder, excess fat trimmed
- 4 cups good quality apple cider
- 1 large yellow onion, chopped
- 2 large apples (such as Honeycrisp or Granny Smith), peeled, cored, and chopped
- 4 cloves garlic, minced
- 2 tablespoons apple cider vinegar
- 2 tablespoons Dijon mustard
- 2 tablespoons packed light brown sugar
- 1 tablespoon dried thyme
- 1 teaspoon dried rosemary
- 2 bay leaves
- 1 cup low-sodium chicken broth
- 2 tablespoons olive oil
- 2 teaspoons salt, or to taste
- 1 teaspoon black pepper, or to taste
- 2 tablespoons all-purpose flour (for thickening the sauce, optional)
- 2 tablespoons water (for thickening the sauce, optional)
Instructions
- Pat the pork shoulder dry with paper towels. In a small bowl, combine salt and pepper. Generously season the entire pork shoulder with the salt and pepper mixture, pressing it into the meat.
- In a large Dutch oven or heavy-bottomed pot, heat olive oil over medium-high heat. Carefully place the pork shoulder in the hot Dutch oven and sear for 4-5 minutes per side, until deeply browned and crusty. Remove the pork from the Dutch oven and set aside on a plate.
- Add the chopped onion to the Dutch oven and cook over medium heat, stirring occasionally, until softened and translucent, about 5-7 minutes. Scrape up any browned bits from the bottom of the pot. Add the chopped apples and minced garlic and cook for another 3-5 minutes, until the apples are slightly softened and the garlic is fragrant.
- Pour in the apple cider vinegar and use a wooden spoon to scrape up any remaining browned bits from the bottom of the pot.
- Pour in the apple cider and chicken broth. Stir in the Dijon mustard, brown sugar, dried thyme, and dried rosemary. Add the bay leaves. Place the seared pork shoulder back into the Dutch oven, nestled among the apples and onions. The liquid should come about halfway up the side of the pork. If necessary, add a little more chicken broth to reach this level. Bring the liquid to a simmer over medium heat. Cover the Dutch oven tightly with a lid. Reduce the heat to low and braise for 3-4 hours, or until the pork is fork-tender and easily shreds. Check the pork periodically during the braising process to ensure that the liquid hasn’t evaporated too much. If it has, add a little more chicken broth.
- Carefully remove the pork shoulder from the Dutch oven and place it on a cutting board. Let it rest for about 10-15 minutes before shredding. Use two forks to shred the pork into bite-sized pieces. Discard any large pieces of fat or gristle.
- Skim off any excess fat from the surface of the braising liquid in the Dutch oven. Bring the braising liquid to a simmer over medium heat and cook, uncovered, for about 15-20 minutes, or until it has reduced and thickened slightly.
- If you prefer a thicker sauce, whisk together all-purpose flour and water in a small bowl until smooth. Gradually whisk the slurry into the simmering sauce and cook for another 2-3 minutes, or until the sauce has thickened to your desired consistency.
- Add the shredded pork back to the Dutch oven and stir to coat it evenly with the sauce. Simmer the pork in the sauce for another 5-10 minutes, allowing the flavors to meld together.
- Taste the pork and sauce and adjust the seasoning as needed. Remove bay leaves before serving. Serve as pulled pork sandwiches, over mashed potatoes, with roasted vegetables, in tacos or burritos, or as a pizza topping.
Notes
- Patting the pork shoulder dry is crucial for achieving a good sear.
- Don’t be shy with the seasoning! Make sure every part of the meat is seasoned well.
- Resist the urge to move the pork around while it’s searing; you want to allow it to develop a good crust.
- Scrape up any browned bits from the bottom of the pot – these are packed with flavor!
- Be careful not to burn the garlic, as it can become bitter.
- The exact braising time will depend on the size and thickness of your pork shoulder.
- Let the pork rest for about 10-15 minutes before shredding. This allows the juices to redistribute, resulting in more tender and flavorful pork.