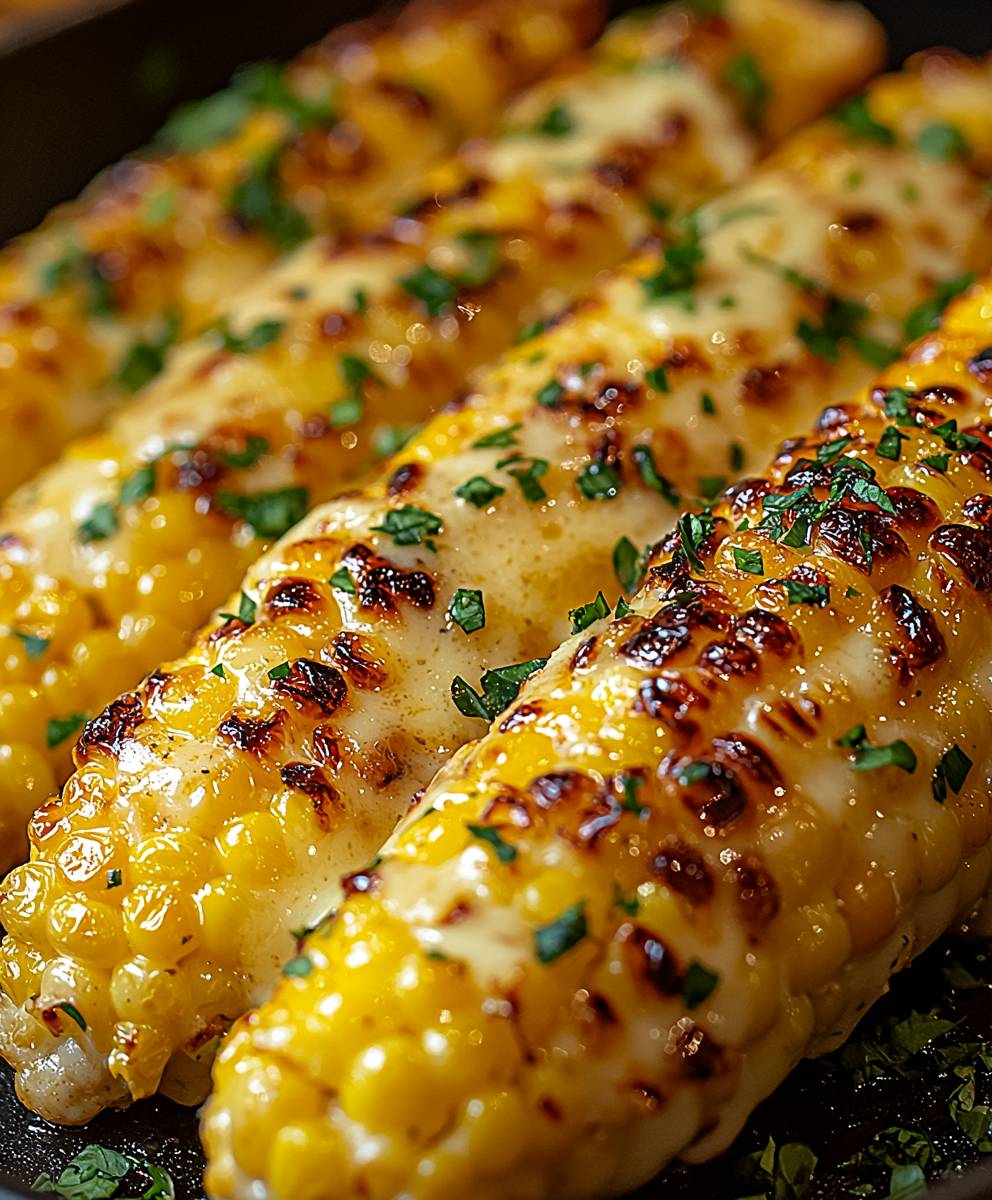
Cheesy Garlic Butter Corn: Prepare to experience a flavor explosion that will redefine your love for corn! Imagine biting into sweet, juicy corn kernels, each one coated in a luscious blend of melted butter, fragrant garlic, and a generous blanket of gooey, melted cheese. This isn’t just corn; it’s an experience.
While the exact origins of this decadent combination are somewhat shrouded in mystery, the concept of enhancing corn with rich flavors has been around for centuries. Corn, a staple in many cultures, has always been a versatile canvas for culinary creativity. From simple butter and salt to more elaborate spice blends, people have long sought ways to elevate the humble corn on the cob. This particular iteration, Cheesy Garlic Butter Corn, likely evolved from a desire to combine the comforting flavors of garlic bread with the sweetness of corn, creating a truly irresistible side dish.
So, why do people adore this dish? It’s simple: the taste is phenomenal! The sweetness of the corn is perfectly balanced by the savory garlic and the richness of the butter and cheese. The texture is also a key factor – the juicy kernels, the creamy sauce, and the slightly crispy cheese create a symphony of sensations in your mouth. Plus, it’s incredibly easy and quick to make, making it perfect for weeknight dinners, barbecues, or any occasion where you want a crowd-pleasing dish with minimal effort. Get ready to make some memories with this amazing recipe!

Ingredients:
- 6 ears of fresh corn, husks and silk removed
- 1 cup (2 sticks) unsalted butter, softened
- 6 cloves garlic, minced
- 1 cup shredded cheddar cheese
- 1/2 cup grated Parmesan cheese
- 1/4 cup chopped fresh parsley
- 1 tablespoon lemon juice
- 1 teaspoon garlic powder
- 1/2 teaspoon onion powder
- 1/4 teaspoon red pepper flakes (optional)
- Salt and freshly ground black pepper to taste
Preparing the Cheesy Garlic Butter:
Alright, let’s get started by making the star of the show – the cheesy garlic butter! This is where all the magic happens, and trust me, it’s incredibly easy.
- Cream the Butter: In a medium-sized bowl, add your softened butter. Make sure it’s nice and soft, but not melted. You want it to be easily creamed. Using a fork or a hand mixer, cream the butter until it’s light and fluffy. This will help all the other ingredients incorporate smoothly.
- Add the Garlic: Now, toss in your minced garlic. I’m a big fan of garlic, so I usually use a generous amount. If you’re not as keen on garlic, feel free to adjust the quantity to your liking. Mix the garlic into the butter until it’s evenly distributed. You should start to smell that wonderful garlic aroma already!
- Incorporate the Cheeses: Next, add the shredded cheddar cheese and grated Parmesan cheese to the bowl. I love the combination of these two cheeses – the cheddar gives it a nice, sharp flavor, while the Parmesan adds a salty, nutty dimension. Mix everything together until the cheeses are well combined with the butter and garlic. Don’t worry if it’s not perfectly smooth; a little texture is perfectly fine.
- Add the Parsley and Lemon Juice: Time to add some freshness! Stir in the chopped fresh parsley and lemon juice. The parsley adds a pop of color and a subtle herbaceous flavor, while the lemon juice brightens up the whole mixture and cuts through the richness of the butter and cheese. Mix well.
- Season with Spices: Now for the flavor boosters! Add the garlic powder, onion powder, and red pepper flakes (if using) to the bowl. Season with salt and freshly ground black pepper to taste. Remember to start with a little salt and pepper and then adjust as needed. You can always add more, but you can’t take it away! Mix everything together thoroughly until all the spices are evenly distributed.
- Taste and Adjust: This is the most important step! Give your cheesy garlic butter a taste. Does it need more salt? More garlic? A little extra kick from the red pepper flakes? Now’s the time to adjust the flavors to your liking. Don’t be afraid to experiment and make it your own!
Cooking the Corn:
Now that our amazing cheesy garlic butter is ready, let’s move on to cooking the corn. You have a few options here, and I’ll walk you through each one.
Option 1: Grilling
Grilling the corn gives it a wonderful smoky flavor that pairs perfectly with the cheesy garlic butter.
- Prepare the Grill: Preheat your grill to medium heat. Make sure the grates are clean and lightly oiled to prevent the corn from sticking.
- Grill the Corn: Place the corn directly on the grill grates. Grill for about 10-15 minutes, turning occasionally, until the kernels are tender and slightly charred. You’ll want to see some nice grill marks on the corn.
- Remove from Grill: Once the corn is cooked through, remove it from the grill and let it cool slightly before handling.
Option 2: Boiling
Boiling is a quick and easy way to cook the corn, especially if you’re short on time.
- Bring Water to a Boil: Fill a large pot with water and bring it to a rolling boil.
- Cook the Corn: Carefully add the corn to the boiling water. Cook for about 5-7 minutes, or until the kernels are tender.
- Remove from Water: Use tongs to remove the corn from the boiling water and place it on a plate to cool slightly.
Option 3: Steaming
Steaming is a gentle way to cook the corn, preserving its natural sweetness and moisture.
- Prepare the Steamer: Fill a pot with about an inch of water and bring it to a boil. Place a steamer basket inside the pot, making sure the water doesn’t touch the bottom of the basket.
- Steam the Corn: Place the corn in the steamer basket. Cover the pot and steam for about 8-10 minutes, or until the kernels are tender.
- Remove from Steamer: Carefully remove the corn from the steamer basket and let it cool slightly.
Assembling the Cheesy Garlic Butter Corn:
Alright, the moment we’ve all been waiting for! It’s time to slather that delicious cheesy garlic butter all over the cooked corn.
- Spread the Butter: While the corn is still warm (but cool enough to handle), generously spread the cheesy garlic butter all over each ear of corn. Make sure to get into all the nooks and crannies between the kernels. I like to use a butter knife or a small spatula for this.
- Serve Immediately: Serve the cheesy garlic butter corn immediately while it’s still warm and the butter is melted and gooey. You can sprinkle a little extra chopped parsley on top for garnish, if desired.
Tips and Variations:
Here are a few extra tips and variations to take your cheesy garlic butter corn to the next level:
- Add Some Heat: If you like a little spice, add a pinch of cayenne pepper or a dash of hot sauce to the cheesy garlic butter.
- Use Different Cheeses: Feel free to experiment with different types of cheeses. Monterey Jack, pepper jack, or even a little bit of blue cheese would be delicious.
- Add Herbs: Try adding other fresh herbs like chives, cilantro, or basil to the cheesy garlic butter.
- Make it Vegan: Use vegan butter and vegan cheese to make this recipe vegan-friendly.
- Grill in the Husk: For extra smoky flavor, grill the corn in the husk. Soak the corn in water for about 30 minutes before grilling to prevent the husks from burning.
- Make it Ahead: You can prepare the cheesy garlic butter ahead of time and store it in the refrigerator for up to a week. Just bring it to room temperature before using.
- Leftovers: Leftover cheesy garlic butter corn can be stored in the refrigerator for up to 3 days. Reheat in the microwave or oven.
Enjoy your amazing Cheesy Garlic Butter Corn! I hope you love it as much as I do!
Conclusion:
Okay, friends, let’s be honest – if you’ve made it this far, you’re already halfway to experiencing the pure joy that is Cheesy Garlic Butter Corn. And trust me, you absolutely need this in your life. Why? Because it’s ridiculously easy, incredibly flavorful, and guaranteed to be a crowd-pleaser. We’re talking about sweet, juicy corn kernels swimming in a decadent bath of garlic butter, elevated to cheesy perfection. What’s not to love?
This isn’t just another side dish; it’s a flavor explosion that will have everyone reaching for seconds (and maybe even thirds!). The combination of the sweet corn, savory garlic, rich butter, and melty cheese is simply irresistible. It’s the kind of dish that makes you close your eyes and savor every single bite. It’s comfort food elevated, and it’s perfect for everything from casual weeknight dinners to backyard barbecues.
But the best part? It’s so versatile! Looking for serving suggestions? Serve this alongside grilled chicken or steak for a complete and satisfying meal. It’s also fantastic with fish tacos or pulled pork sandwiches. For a vegetarian option, pair it with a black bean burger or a hearty salad. And if you’re feeling adventurous, try these variations:
- Spice it up: Add a pinch of red pepper flakes or a dash of your favorite hot sauce for a little kick.
- Herb it up: Fresh herbs like parsley, cilantro, or chives add a bright and fresh flavor.
- Cheese it up even more: Experiment with different cheeses! Parmesan, Monterey Jack, or even a sprinkle of crumbled feta would be delicious.
- Grill it: Grill the corn on the cob before cutting off the kernels for a smoky flavor.
Seriously, the possibilities are endless! Don’t be afraid to get creative and make this recipe your own. I’ve tried so many variations, and honestly, they’ve all been amazing. The key is to start with a good base – the garlic butter and cheese – and then let your imagination run wild.
So, what are you waiting for? Gather your ingredients, preheat your oven (or fire up your grill!), and get ready to experience the magic of Cheesy Garlic Butter Corn. I promise you won’t regret it. It’s a recipe that’s destined to become a family favorite, and it’s one that you’ll find yourself making again and again.
I’m so excited for you to try this recipe! And I’d absolutely love to hear about your experience. Did you make any variations? What did you serve it with? What did your family and friends think? Share your photos and comments below! Let’s spread the cheesy, garlicky, buttery love and inspire others to try this amazing dish. Happy cooking!
Don’t forget to rate the recipe and share it with your friends! The more people who discover the joy of Cheesy Garlic Butter Corn, the better! Let’s make the world a cheesier, more delicious place, one kernel at a time.
Cheesy Garlic Butter Corn: The Ultimate Delicious Recipe
Sweet corn slathered in a rich, cheesy garlic butter. Grilled, boiled, or steamed, this corn is an irresistible side dish!
Ingredients
- 6 ears of fresh corn, husks and silk removed
- 1 cup (2 sticks) unsalted butter, softened
- 6 cloves garlic, minced
- 1 cup shredded cheddar cheese
- 1/2 cup grated Parmesan cheese
- 1/4 cup chopped fresh parsley
- 1 tablespoon lemon juice
- 1 teaspoon garlic powder
- 1/2 teaspoon onion powder
- 1/4 teaspoon red pepper flakes (optional)
- Salt and freshly ground black pepper to taste
Instructions
- Cream the Butter: In a medium-sized bowl, add your softened butter. Using a fork or a hand mixer, cream the butter until it’s light and fluffy.
- Add the Garlic: Toss in your minced garlic. Mix the garlic into the butter until it’s evenly distributed.
- Incorporate the Cheeses: Add the shredded cheddar cheese and grated Parmesan cheese to the bowl. Mix everything together until the cheeses are well combined with the butter and garlic.
- Add the Parsley and Lemon Juice: Stir in the chopped fresh parsley and lemon juice. Mix well.
- Season with Spices: Add the garlic powder, onion powder, and red pepper flakes (if using) to the bowl. Season with salt and freshly ground black pepper to taste. Mix everything together thoroughly until all the spices are evenly distributed.
- Taste and Adjust: Give your cheesy garlic butter a taste. Adjust the flavors to your liking.
- Preheat your grill to medium heat. Make sure the grates are clean and lightly oiled.
- Place the corn directly on the grill grates. Grill for about 10-15 minutes, turning occasionally, until the kernels are tender and slightly charred.
- Remove from the grill and let it cool slightly before handling.
- Fill a large pot with water and bring it to a rolling boil.
- Carefully add the corn to the boiling water. Cook for about 5-7 minutes, or until the kernels are tender.
- Use tongs to remove the corn from the boiling water and place it on a plate to cool slightly.
- Fill a pot with about an inch of water and bring it to a boil. Place a steamer basket inside the pot, making sure the water doesn’t touch the bottom of the basket.
- Place the corn in the steamer basket. Cover the pot and steam for about 8-10 minutes, or until the kernels are tender.
- Carefully remove the corn from the steamer basket and let it cool slightly.
- While the corn is still warm (but cool enough to handle), generously spread the cheesy garlic butter all over each ear of corn.
- Serve immediately while it’s still warm and the butter is melted and gooey. You can sprinkle a little extra chopped parsley on top for garnish, if desired.
Notes
- Add Some Heat: Add a pinch of cayenne pepper or a dash of hot sauce to the cheesy garlic butter.
- Use Different Cheeses: Experiment with different types of cheeses like Monterey Jack, pepper jack, or blue cheese.
- Add Herbs: Try adding other fresh herbs like chives, cilantro, or basil to the cheesy garlic butter.
- Make it Vegan: Use vegan butter and vegan cheese to make this recipe vegan-friendly.
- Grill in the Husk: For extra smoky flavor, grill the corn in the husk. Soak the corn in water for about 30 minutes before grilling to prevent the husks from burning.
- Make it Ahead: You can prepare the cheesy garlic butter ahead of time and store it in the refrigerator for up to a week. Just bring it to room temperature before using.
- Leftovers: Leftover cheesy garlic butter corn can be stored in the refrigerator for up to 3 days. Reheat in the microwave or oven.