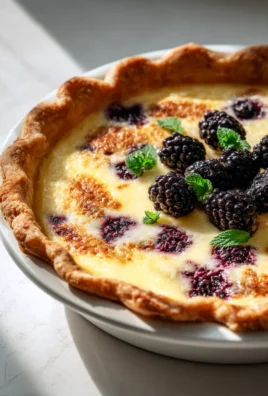
Mango Gelato Homemade: Prepare to be transported to a tropical paradise with every spoonful of this vibrant and refreshing dessert! Imagine the creamy, smooth texture melting in your mouth, bursting with the sweet, tangy flavor of ripe mangoes. Forget store-bought imitations; this homemade version is unbelievably easy to make and tastes a million times better.
Gelato, unlike its American cousin ice cream, boasts a denser, richer flavor profile thanks to its lower fat content and slower churning process. While its exact origins are debated, many believe gelato emerged in Renaissance Italy, becoming a symbol of culinary artistry and indulgence. The beauty of Mango Gelato Homemade lies not only in its exquisite taste but also in its simplicity. You don’t need fancy equipment or complicated techniques to create this frozen masterpiece.
People adore mango gelato for its invigorating flavor, especially on a hot day. The natural sweetness of mangoes, combined with the creamy texture of gelato, creates a truly irresistible treat. It’s the perfect dessert to impress your guests, cool down after a summer barbecue, or simply enjoy as a delightful personal indulgence. So, ditch the artificial flavors and embrace the real deal. Let’s embark on this delicious journey and create the most amazing mango gelato you’ve ever tasted!

Ingredients:
- Ripe Mangoes: 1.5 kg (approximately 3-4 large, ripe mangoes, preferably Alphonso or Ataulfo for their sweetness and creamy texture)
- Heavy Cream: 500 ml (full-fat, at least 35% milk fat for a rich and smooth gelato)
- Whole Milk: 250 ml (full-fat milk contributes to the creamy texture)
- Granulated Sugar: 150 grams (adjust to taste depending on the sweetness of your mangoes)
- Dextrose: 50 grams (Dextrose helps to prevent ice crystal formation, resulting in a smoother gelato. If unavailable, you can substitute with an additional 25 grams of granulated sugar and a tablespoon of corn syrup)
- Skim Milk Powder: 20 grams (Skim milk powder also helps to prevent ice crystal formation and adds body to the gelato. It’s optional but recommended for a better texture)
- Lemon Juice: 1 tablespoon (freshly squeezed, to enhance the mango flavor and balance the sweetness)
- Pinch of Salt: (a tiny pinch, to enhance the flavors)
- Optional: 1-2 tablespoons of Mango Liqueur (for an extra boost of mango flavor, especially if your mangoes aren’t intensely flavorful)
Preparing the Mango Puree:
- Prepare the Mangoes: First, wash the mangoes thoroughly. Then, carefully peel them using a vegetable peeler or a sharp knife. The goal is to remove all the skin without wasting too much of the fruit.
- Cut the Mango Flesh: Cut the mango flesh away from the pit. Try to get as much of the flesh as possible. Discard the pits.
- Blend the Mango: Place the mango pieces into a blender or food processor. Blend until you achieve a completely smooth puree. There should be no lumps or chunks remaining. If your blender struggles, you can add a tablespoon or two of water or milk to help it along, but try to avoid adding too much liquid.
- Strain the Puree (Optional but Recommended): For an extra smooth gelato, strain the mango puree through a fine-mesh sieve. This will remove any remaining fibers and ensure a silky-smooth texture. Use a spatula to press the puree through the sieve, discarding any solids that remain.
- Add Lemon Juice: Stir in the lemon juice into the mango puree. This will brighten the flavor and prevent oxidation.
- Taste and Adjust: Taste the mango puree. If it’s not sweet enough, you can add a little more sugar, but remember that you’ll be adding more sugar later in the recipe.
Preparing the Gelato Base:
- Combine Milk and Cream: In a medium saucepan, combine the heavy cream and whole milk.
- Add Dry Ingredients: Add the granulated sugar, dextrose (or the sugar/corn syrup substitute), skim milk powder (if using), and a pinch of salt to the saucepan.
- Heat the Mixture: Place the saucepan over medium heat. Stir constantly with a whisk until the sugar and other dry ingredients are completely dissolved. Be careful not to let the mixture boil. You want to heat it gently to help the ingredients meld together. Aim for a temperature of around 170-175°F (77-80°C). If you don’t have a thermometer, heat until the mixture is steaming and the edges are just beginning to simmer.
- Pasteurize the Base (Optional but Recommended): For a smoother and safer gelato, you can pasteurize the base. To do this, heat the mixture to 185°F (85°C), stirring constantly. Hold it at this temperature for 2-3 minutes. This will kill any harmful bacteria and improve the texture of the gelato. Be very careful not to let the mixture scorch.
- Cool the Base: Remove the saucepan from the heat and immediately transfer the mixture to a clean bowl. Place the bowl in an ice bath (a larger bowl filled with ice and water). Stir the mixture frequently to help it cool down quickly.
- Chill the Base: Once the base is cool, cover the bowl with plastic wrap, pressing the plastic wrap directly onto the surface of the mixture to prevent a skin from forming. Refrigerate the base for at least 4 hours, or preferably overnight. This allows the flavors to meld together and the base to thicken slightly.
Churning and Freezing the Gelato:
- Combine Base and Mango Puree: Remove the chilled gelato base from the refrigerator. Pour the mango puree into the chilled base and whisk until well combined. If you’re using mango liqueur, add it now and stir to incorporate.
- Churn the Gelato: Pour the mixture into your ice cream maker. Follow the manufacturer’s instructions for churning. The churning process typically takes about 20-30 minutes, or until the gelato reaches a soft-serve consistency.
- Transfer to a Container: Once the gelato is churned, transfer it to an airtight container. A metal loaf pan or a freezer-safe container works well.
- Harden the Gelato: Place the container in the freezer and freeze for at least 2-3 hours, or until the gelato is firm enough to scoop. This hardening process is crucial for achieving the right texture.
Serving and Storing:
- Soften Before Serving: Before serving, let the gelato sit at room temperature for 5-10 minutes to soften slightly. This will make it easier to scoop and will enhance the flavor.
- Scoop and Serve: Use an ice cream scoop to serve the mango gelato into bowls or cones.
- Garnish (Optional): Garnish with fresh mango slices, chopped nuts, or a drizzle of honey for an extra touch.
- Store Properly: Store any leftover gelato in an airtight container in the freezer. For best results, consume within 1-2 weeks. After that, the texture may start to deteriorate. To prevent ice crystals from forming, press a piece of plastic wrap directly onto the surface of the gelato before sealing the container.
Tips for Success:
- Use Ripe Mangoes: The key to great mango gelato is using ripe, flavorful mangoes. Look for mangoes that are slightly soft to the touch and have a fragrant aroma.
- Don’t Overchurn: Overchurning can result in a grainy texture. Churn the gelato until it reaches a soft-serve consistency, then transfer it to the freezer to harden.
- Chill Everything: Make sure your gelato base is thoroughly chilled before churning. This will help the gelato freeze faster and prevent ice crystal formation. Also, chilling the bowl of your ice cream maker beforehand can help.
- Adjust Sweetness: Taste the mango puree and the gelato base before churning and adjust the sweetness to your liking. Remember that the gelato will taste less sweet when it’s frozen.
- Experiment with Flavors: Feel free to experiment with other flavors. A little bit of lime zest or a pinch of cardamom can add a unique twist to your mango gelato.
- Consider an Emulsifier: For an even smoother texture, consider adding a small amount of an emulsifier like lecithin. This helps to bind the fat and water molecules together, preventing separation and ice crystal formation. Follow the manufacturer’s instructions for usage.
- Clean Your Ice Cream Maker Properly: Always clean your ice cream maker thoroughly after each use to prevent bacteria growth and ensure optimal performance.
- Invest in a Good Ice Cream Scoop: A good ice cream scoop can make all the difference in serving your gelato. Look for a scoop with a comfortable handle and a sharp edge for easy scooping.
- Record Your Results: Keep track of your ingredients and techniques each time you make gelato. This will help you refine your recipe and achieve consistent results.
Troubleshooting:
- Gelato is Icy: This is usually caused by ice crystal formation. Make sure your gelato base is properly chilled before churning, and consider adding dextrose or skim milk powder to help prevent ice crystals.
- Gelato is Too Hard: This can be caused by overfreezing. Let the gelato sit at room temperature for a few minutes before serving to soften it slightly.
- Gelato is Too Soft: This can be caused by not freezing it long enough. Make sure to freeze the gelato for at least 2-3 hours after churning.
- Gelato is Grainy: This can be caused by overchurning or using low-quality ingredients. Use ripe mangoes and full-fat dairy products

Conclusion:
So there you have it! This Mango Gelato Homemade recipe is more than just a dessert; it’s a taste of sunshine, a burst of tropical flavor, and a surprisingly simple way to impress your friends and family. I truly believe this is a must-try recipe for anyone who loves the vibrant taste of mango and the creamy texture of gelato. Forget the store-bought stuff loaded with artificial flavors and preservatives – this homemade version is bursting with fresh, natural goodness that you can feel good about serving.
Why is it a must-try? Well, first and foremost, the flavor is simply incredible. The sweetness of the mango is perfectly balanced by the slight tanginess, creating a refreshing and addictive treat. Secondly, the texture is unbelievably smooth and creamy, rivaling even the best gelato shops. And finally, it’s surprisingly easy to make! With just a few simple ingredients and a little bit of patience, you can create a dessert that will have everyone begging for more.
But the best part? You can customize it to your liking! Feel free to experiment with different types of mangoes to find your favorite flavor profile. Alphonso mangoes will give you an intensely sweet and aromatic gelato, while Ataulfo mangoes offer a slightly tangier and more floral flavor. You can also add a touch of lime juice for extra zing, or a pinch of cardamom for a warm and exotic twist.
Serving Suggestions and Variations:
* Classic Scoop: Serve it in a classic waffle cone or a pretty dessert bowl. A simple and elegant presentation always works!
* Affogato: Pour a shot of hot espresso over a scoop of the gelato for a delightful affogato. The contrast between the cold gelato and the hot coffee is heavenly.
* Mango Float Upgrade: Use this gelato instead of regular ice cream in your favorite mango float recipe. It will elevate the dessert to a whole new level.
* Tropical Sundae: Create a tropical sundae with the gelato, topped with toasted coconut flakes, chopped macadamia nuts, and a drizzle of passion fruit syrup.
* Gelato Sandwiches: Sandwich the gelato between two homemade cookies or graham crackers for a fun and portable treat.
* Vegan Variation: For a vegan version, substitute the milk and cream with coconut milk and coconut cream. The result will be equally creamy and delicious! Just be sure to use full-fat coconut milk and cream for the best texture.
* Spice it Up: Add a pinch of chili flakes for a surprising kick. The heat complements the sweetness of the mango beautifully.
* Add Some Crunch: Sprinkle some chopped pistachios or almonds on top for added texture and nutty flavor.I’m so excited for you to try this recipe! I know you’ll love it as much as I do. It’s the perfect treat for a hot summer day, a special occasion, or simply when you’re craving something sweet and refreshing.
So, what are you waiting for? Gather your ingredients, dust off your ice cream maker (or use the no-churn method!), and get ready to experience the magic of homemade mango gelato. I promise you won’t regret it!
And most importantly, don’t forget to share your experience! I’d love to hear how your Mango Gelato Homemade turned out. Did you try any variations? What were your favorite toppings? Share your photos and comments on social media using [Your Hashtag Here] so I can see your creations. Happy gelato making! I can’t wait to see what you come up with!
Mango Gelato Homemade: The Ultimate Guide to Making It
Creamy, refreshing homemade Mango Gelato bursting with the sweet, tropical flavor of ripe mangoes. A perfect frozen treat for hot days!
Ingredients
- 1.5 kg (approximately 3-4 large) ripe mangoes (Alphonso or Ataulfo preferred)
- 500 ml heavy cream (at least 35% milk fat)
- 250 ml whole milk (full-fat)
- 150 grams granulated sugar (adjust to taste)
- 50 grams dextrose (or 25g granulated sugar + 1 tbsp corn syrup)
- 20 grams skim milk powder (optional, but recommended)
- 1 tablespoon lemon juice (freshly squeezed)
- Pinch of salt
- Optional: 1-2 tablespoons mango liqueur
Instructions
- Wash, peel, and cut the mango flesh away from the pit.
- Blend the mango pieces in a blender or food processor until completely smooth. Add a tablespoon or two of water or milk if needed.
- (Optional) Strain the puree through a fine-mesh sieve for an extra smooth texture.
- Stir in the lemon juice.
- Taste and adjust sweetness if needed.
- In a medium saucepan, combine heavy cream and whole milk.
- Add granulated sugar, dextrose (or sugar/corn syrup substitute), skim milk powder (if using), and a pinch of salt.
- Heat over medium heat, stirring constantly until sugar and dry ingredients are dissolved. Do not boil. Aim for 170-175°F (77-80°C).
- (Optional) Pasteurize the base: Heat to 185°F (85°C), stirring constantly, and hold for 2-3 minutes. Be careful not to scorch.
- Remove from heat and transfer to a clean bowl. Place the bowl in an ice bath and stir frequently to cool down quickly.
- Cover the bowl with plastic wrap, pressing it directly onto the surface. Refrigerate for at least 4 hours, or preferably overnight.
- Remove the chilled gelato base from the refrigerator. Pour the mango puree into the chilled base and whisk until well combined. If you’re using mango liqueur, add it now and stir to incorporate.
- Pour the mixture into your ice cream maker. Follow the manufacturer’s instructions for churning. The churning process typically takes about 20-30 minutes, or until the gelato reaches a soft-serve consistency.
- Transfer to an airtight container.
- Freeze for at least 2-3 hours, or until firm enough to scoop.
- Soften at room temperature for 5-10 minutes before serving.
- Scoop and serve into bowls or cones.
- (Optional) Garnish with fresh mango slices, chopped nuts, or a drizzle of honey.
- Store leftover gelato in an airtight container in the freezer. Consume within 1-2 weeks for best results. Press plastic wrap onto the surface before sealing.
Notes
- Use ripe, flavorful mangoes for the best results.
- Chilling the base thoroughly is crucial for preventing ice crystals.
- Adjust the sweetness to your liking.
- Dextrose and skim milk powder help prevent ice crystal formation.
- Pasteurizing the base is optional but recommended for a smoother texture and safety.
- Don’t overchurn the gelato.
- If the gelato is too hard, let it sit at room temperature for a few minutes before serving.
- If the gelato is icy, ensure the base is properly chilled and consider using dextrose or skim milk powder.