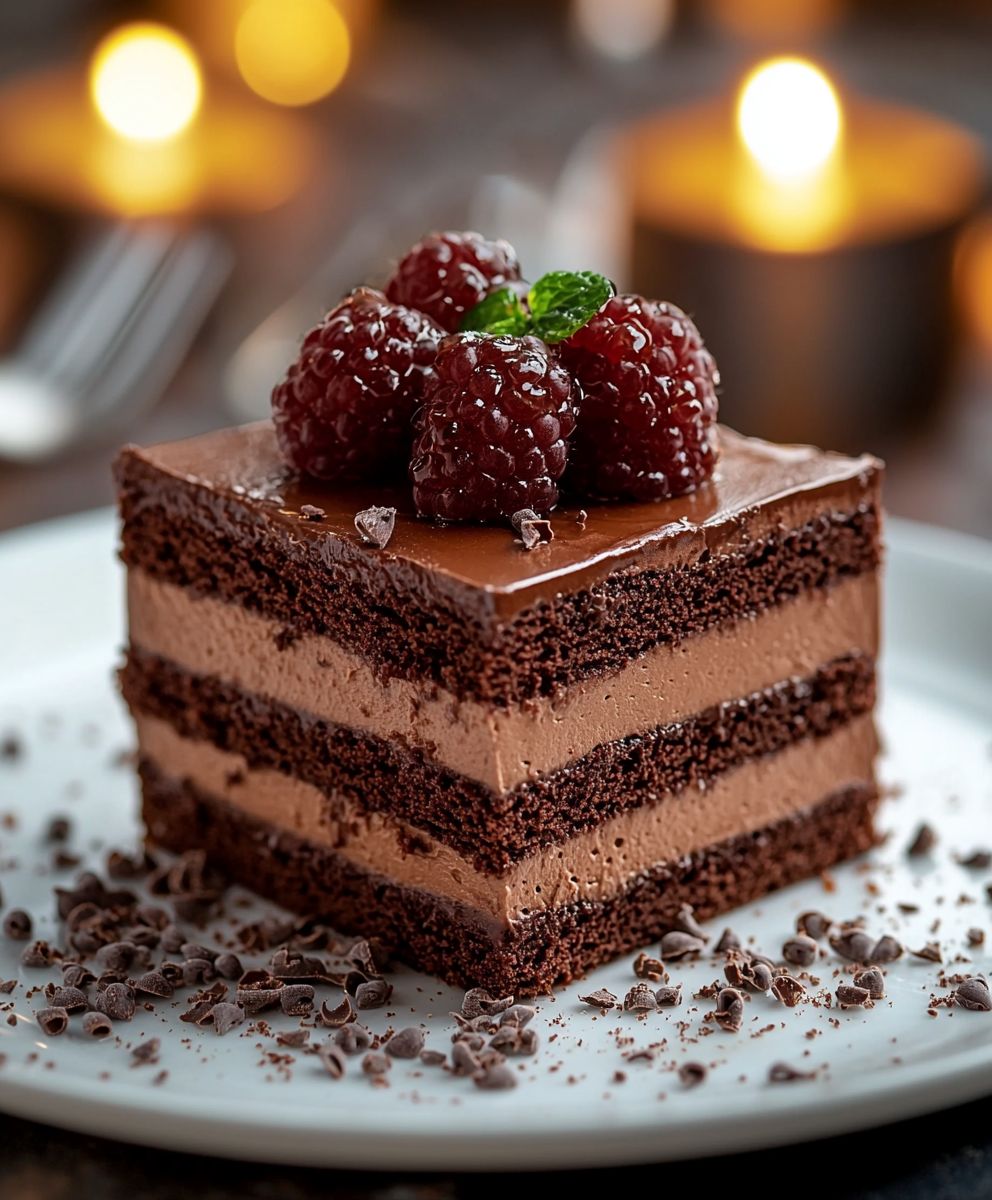
Chocolate Mousse Cake: just the name alone conjures images of decadent indulgence, doesn’t it? Prepare to have your dessert dreams realized because this recipe isn’t just about cake; it’s about creating an experience. Imagine sinking your fork into layers of rich, moist chocolate cake, followed by a cloud of airy, intensely chocolatey mousse that melts in your mouth. It’s a symphony of textures and flavors that will leave you craving more.
While the exact origins of chocolate mousse cake are debated, its lineage traces back to the classic French chocolate mousse, a dessert perfected over centuries. The French have long understood the art of balancing richness and lightness, and this cake is a testament to that expertise. It takes the traditional mousse and elevates it by pairing it with a complementary cake base, creating a more substantial and satisfying treat.
People adore this dessert for several reasons. First, the taste is simply divine – a deep, dark chocolate flavor that isn’t overly sweet. Second, the contrasting textures are incredibly appealing. The cake provides a comforting foundation, while the mousse offers a light and airy counterpoint. Finally, while it looks impressive, this recipe is surprisingly manageable. With a little patience and attention to detail, you can create a show-stopping dessert that will impress your friends and family. So, let’s get baking and create a truly unforgettable chocolate mousse cake!

Ingredients:
- For the Chocolate Cake:
- 2 cups all-purpose flour
- 2 cups granulated sugar
- ¾ cup unsweetened cocoa powder
- 1 ½ teaspoons baking powder
- 1 ½ teaspoons baking soda
- 1 teaspoon salt
- 1 cup buttermilk
- ½ cup vegetable oil
- 2 large eggs
- 2 teaspoons vanilla extract
- 1 cup boiling water
- For the Chocolate Mousse:
- 12 ounces semi-sweet chocolate, chopped
- 6 large eggs, separated
- ¼ cup granulated sugar
- 1 ½ cups heavy cream
- 1 teaspoon vanilla extract
- Pinch of salt
- For the Chocolate Ganache:
- 8 ounces semi-sweet chocolate, chopped
- 1 cup heavy cream
- 2 tablespoons unsalted butter, softened
- Optional Garnish:
- Chocolate shavings
- Fresh berries (raspberries, strawberries)
- Cocoa powder
Preparing the Chocolate Cake:
- Preheat and Prepare: First things first, preheat your oven to 350°F (175°C). Grease and flour two 9-inch round cake pans. This ensures the cakes release easily after baking. I like to use baking spray with flour already mixed in – it’s a real time-saver!
- Combine Dry Ingredients: In a large bowl, whisk together the flour, sugar, cocoa powder, baking powder, baking soda, and salt. Make sure everything is evenly distributed. This step is crucial for a consistent cake texture.
- Combine Wet Ingredients: In a separate bowl, whisk together the buttermilk, oil, eggs, and vanilla extract. Whisk until well combined and the mixture is smooth.
- Combine Wet and Dry: Gradually add the wet ingredients to the dry ingredients, mixing on low speed until just combined. Be careful not to overmix! Overmixing can lead to a tough cake.
- Add Boiling Water: Slowly pour in the boiling water while mixing on low speed. The batter will be thin – don’t worry, that’s normal! The hot water helps to bloom the cocoa powder and create a moist cake.
- Divide and Bake: Divide the batter evenly between the prepared cake pans. Bake for 30-35 minutes, or until a toothpick inserted into the center comes out clean. Keep a close eye on them; oven times can vary.
- Cool the Cakes: Let the cakes cool in the pans for 10 minutes before inverting them onto a wire rack to cool completely. This prevents them from sticking and allows them to cool evenly. Make sure they are completely cool before assembling the cake.
Making the Chocolate Mousse:
- Melt the Chocolate: Place the chopped chocolate in a heatproof bowl set over a saucepan of simmering water (double boiler). Make sure the bottom of the bowl doesn’t touch the water. Stir occasionally until the chocolate is completely melted and smooth. Remove from heat and let it cool slightly.
- Separate the Eggs: Carefully separate the egg yolks from the egg whites. Place the yolks in a medium bowl and the whites in a large, clean bowl. It’s important that there’s no trace of yolk in the whites, as this will prevent them from whipping properly.
- Whisk the Yolks and Sugar: In the bowl with the egg yolks, add the sugar and whisk until the mixture is pale yellow and slightly thickened. This incorporates air and creates a light and airy base for the mousse.
- Temper the Chocolate: Slowly drizzle the melted chocolate into the yolk mixture, whisking constantly to combine. This is called tempering, and it prevents the eggs from scrambling when they come into contact with the hot chocolate.
- Whip the Egg Whites: In the bowl with the egg whites, add a pinch of salt. Beat the egg whites with an electric mixer on medium speed until stiff peaks form. Stiff peaks mean the whites hold their shape when you lift the beaters. Be careful not to overwhip!
- Whip the Cream: In a separate bowl, whip the heavy cream with an electric mixer until soft peaks form. Soft peaks mean the cream holds its shape but the tips curl over slightly.
- Fold in the Whites: Gently fold one-third of the whipped egg whites into the chocolate mixture to lighten it. Then, gently fold in the remaining egg whites in two additions, being careful not to deflate the mixture. This is the key to a light and airy mousse.
- Fold in the Cream: Gently fold in the whipped cream until just combined. Again, be careful not to overmix.
- Chill the Mousse: Cover the bowl with plastic wrap and refrigerate for at least 2 hours, or preferably overnight, to allow the mousse to set. This step is crucial for the mousse to achieve its signature texture.
Preparing the Chocolate Ganache:
- Heat the Cream: Place the heavy cream in a saucepan and heat over medium heat until it just begins to simmer. Do not boil!
- Pour over Chocolate: Pour the hot cream over the chopped chocolate in a heatproof bowl. Let it sit for 1 minute to allow the heat to melt the chocolate.
- Stir Until Smooth: Gently stir the mixture until the chocolate is completely melted and the ganache is smooth and glossy.
- Add Butter: Stir in the softened butter until it is fully incorporated. The butter adds richness and shine to the ganache.
- Cool Slightly: Let the ganache cool slightly at room temperature for about 15-20 minutes, or until it thickens to a spreadable consistency. This will make it easier to apply to the cake.
Assembling the Chocolate Mousse Cake:
- Level the Cakes: If the cakes have a dome on top, use a serrated knife to carefully level them. This will ensure that the cake is even and stable.
- Place First Layer: Place one cake layer on a serving plate or cake stand.
- Spread Mousse: Spread half of the chilled chocolate mousse evenly over the first cake layer.
- Add Second Layer: Carefully place the second cake layer on top of the mousse.
- Spread Remaining Mousse: Spread the remaining chocolate mousse evenly over the second cake layer.
- Chill the Cake: Refrigerate the cake for at least 30 minutes to allow the mousse to set further before adding the ganache. This will prevent the ganache from melting the mousse.
- Pour Ganache: Pour the slightly cooled chocolate ganache over the top of the cake, allowing it to drip down the sides. You can use an offset spatula to spread the ganache evenly.
- Garnish (Optional): Decorate the cake with chocolate shavings, fresh berries, or a dusting of cocoa powder. Get creative!
- Chill Again: Refrigerate the cake for at least 1 hour before serving to allow the ganache to set completely.
- Serve and Enjoy: Slice and serve the Chocolate Mousse Cake. Enjoy the rich, decadent flavors! This cake is best served chilled.
Conclusion:
And there you have it! This Chocolate Mousse Cake recipe isn’t just another dessert; it’s an experience. From the rich, decadent chocolate cake base to the light-as-air mousse topping, every bite is a symphony of textures and flavors that will leave you wanting more. I truly believe this cake is a must-try for any chocolate lover, and here’s why: it’s surprisingly simple to make, even though it looks incredibly impressive. You don’t need to be a professional baker to achieve a show-stopping dessert that will wow your friends and family. The combination of the moist cake and the airy mousse is simply divine, creating a perfect balance that isn’t overly sweet or heavy.
But the best part? It’s incredibly versatile! Feel free to get creative with your serving suggestions and variations. For a classic presentation, dust the top with cocoa powder and garnish with fresh raspberries or strawberries. The bright acidity of the berries cuts through the richness of the chocolate beautifully. Or, if you’re feeling adventurous, try adding a layer of salted caramel between the cake and the mousse for an extra touch of indulgence. A drizzle of chocolate ganache over the top is never a bad idea either!
For a more sophisticated twist, consider infusing the mousse with a hint of espresso or orange zest. The coffee will enhance the chocolate flavor, while the orange zest will add a bright, citrusy note. You could even add a splash of your favorite liqueur, like Grand Marnier or Kahlua, to the mousse for an extra kick.
Serving this Chocolate Mousse Cake is just as important as making it. A simple dollop of whipped cream or a scoop of vanilla ice cream is always a welcome addition. For a more elegant presentation, try serving individual slices with a sprig of mint and a dusting of powdered sugar. And don’t forget the coffee or tea! A warm beverage is the perfect complement to this decadent dessert.
I’ve poured my heart into perfecting this recipe, and I’m confident that you’ll love it as much as I do. It’s the perfect dessert for any occasion, from a casual weeknight treat to a special celebration. Imagine the look on your guests’ faces when you present this stunning cake! It’s guaranteed to be a crowd-pleaser.
So, what are you waiting for? Gather your ingredients, preheat your oven, and get ready to embark on a chocolatey adventure. I promise you won’t regret it. And most importantly, don’t be afraid to experiment and make it your own. Baking is all about having fun and creating something delicious that you can share with the people you love.
I’m so excited for you to try this recipe! Once you’ve made it, please come back and share your experience in the comments below. I’d love to hear about your variations, your serving suggestions, and any tips or tricks you discovered along the way. Did you add a secret ingredient? Did you try a different type of chocolate? I’m all ears! Your feedback is invaluable, and it helps me to continue creating recipes that you’ll love. Happy baking!
Chocolate Mousse Cake: The Ultimate Decadent Dessert Recipe
Moist chocolate cake layered with light chocolate mousse and rich chocolate ganache.
Ingredients
- 2 cups all-purpose flour
- 2 cups granulated sugar
- ¾ cup unsweetened cocoa powder
- 1 ½ teaspoons baking powder
- 1 ½ teaspoons baking soda
- 1 teaspoon salt
- 1 cup buttermilk
- ½ cup vegetable oil
- 2 large eggs
- 2 teaspoons vanilla extract
- 1 cup boiling water
- 12 ounces semi-sweet chocolate, chopped
- 6 large eggs, separated
- ¼ cup granulated sugar
- 1 ½ cups heavy cream
- 1 teaspoon vanilla extract
- Pinch of salt
- 8 ounces semi-sweet chocolate, chopped
- 1 cup heavy cream
- 2 tablespoons unsalted butter, softened
- Chocolate shavings
- Fresh berries (raspberries, strawberries)
- Cocoa powder
Instructions
- Preheat your oven to 350°F (175°C). Grease and flour two 9-inch round cake pans.
- In a large bowl, whisk together the flour, sugar, cocoa powder, baking powder, baking soda, and salt.
- In a separate bowl, whisk together the buttermilk, oil, eggs, and vanilla extract.
- Gradually add the wet ingredients to the dry ingredients, mixing on low speed until just combined.
- Slowly pour in the boiling water while mixing on low speed. The batter will be thin.
- Divide the batter evenly between the prepared cake pans. Bake for 30-35 minutes, or until a toothpick inserted into the center comes out clean.
- Let the cakes cool in the pans for 10 minutes before inverting them onto a wire rack to cool completely.
- Place the chopped chocolate in a heatproof bowl set over a saucepan of simmering water (double boiler). Stir occasionally until the chocolate is completely melted and smooth. Remove from heat and let it cool slightly.
- Carefully separate the egg yolks from the egg whites. Place the yolks in a medium bowl and the whites in a large, clean bowl.
- In the bowl with the egg yolks, add the sugar and whisk until the mixture is pale yellow and slightly thickened.
- Slowly drizzle the melted chocolate into the yolk mixture, whisking constantly to combine.
- In the bowl with the egg whites, add a pinch of salt. Beat the egg whites with an electric mixer on medium speed until stiff peaks form.
- In a separate bowl, whip the heavy cream with an electric mixer until soft peaks form.
- Gently fold one-third of the whipped egg whites into the chocolate mixture to lighten it. Then, gently fold in the remaining egg whites in two additions, being careful not to deflate the mixture.
- Gently fold in the whipped cream until just combined.
- Cover the bowl with plastic wrap and refrigerate for at least 2 hours, or preferably overnight, to allow the mousse to set.
- Place the heavy cream in a saucepan and heat over medium heat until it just begins to simmer. Do not boil!
- Pour the hot cream over the chopped chocolate in a heatproof bowl. Let it sit for 1 minute to allow the heat to melt the chocolate.
- Gently stir the mixture until the chocolate is completely melted and the ganache is smooth and glossy.
- Stir in the softened butter until it is fully incorporated.
- Let the ganache cool slightly at room temperature for about 15-20 minutes, or until it thickens to a spreadable consistency.
- If the cakes have a dome on top, use a serrated knife to carefully level them.
- Place one cake layer on a serving plate or cake stand.
- Spread half of the chilled chocolate mousse evenly over the first cake layer.
- Carefully place the second cake layer on top of the mousse.
- Spread the remaining chocolate mousse evenly over the second cake layer.
- Refrigerate the cake for at least 30 minutes to allow the mousse to set further before adding the ganache.
- Pour the slightly cooled chocolate ganache over the top of the cake, allowing it to drip down the sides. You can use an offset spatula to spread the ganache evenly.
- Decorate the cake with chocolate shavings, fresh berries, or a dusting of cocoa powder.
- Refrigerate the cake for at least 1 hour before serving to allow the ganache to set completely.
- Slice and serve the Chocolate Mousse Cake.
Notes
- For best results, use high-quality chocolate.
- Make sure all ingredients are at room temperature unless otherwise specified.
- Don’t overmix the cake batter, as this can result in a tough cake.
- Be patient when folding in the egg whites and whipped cream into the mousse. Gentle folding is key to a light and airy texture.
- Chilling the mousse and cake is essential for the best texture and flavor.
- The cake can be stored in the refrigerator for up to 3 days.