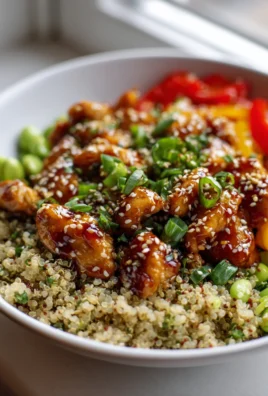
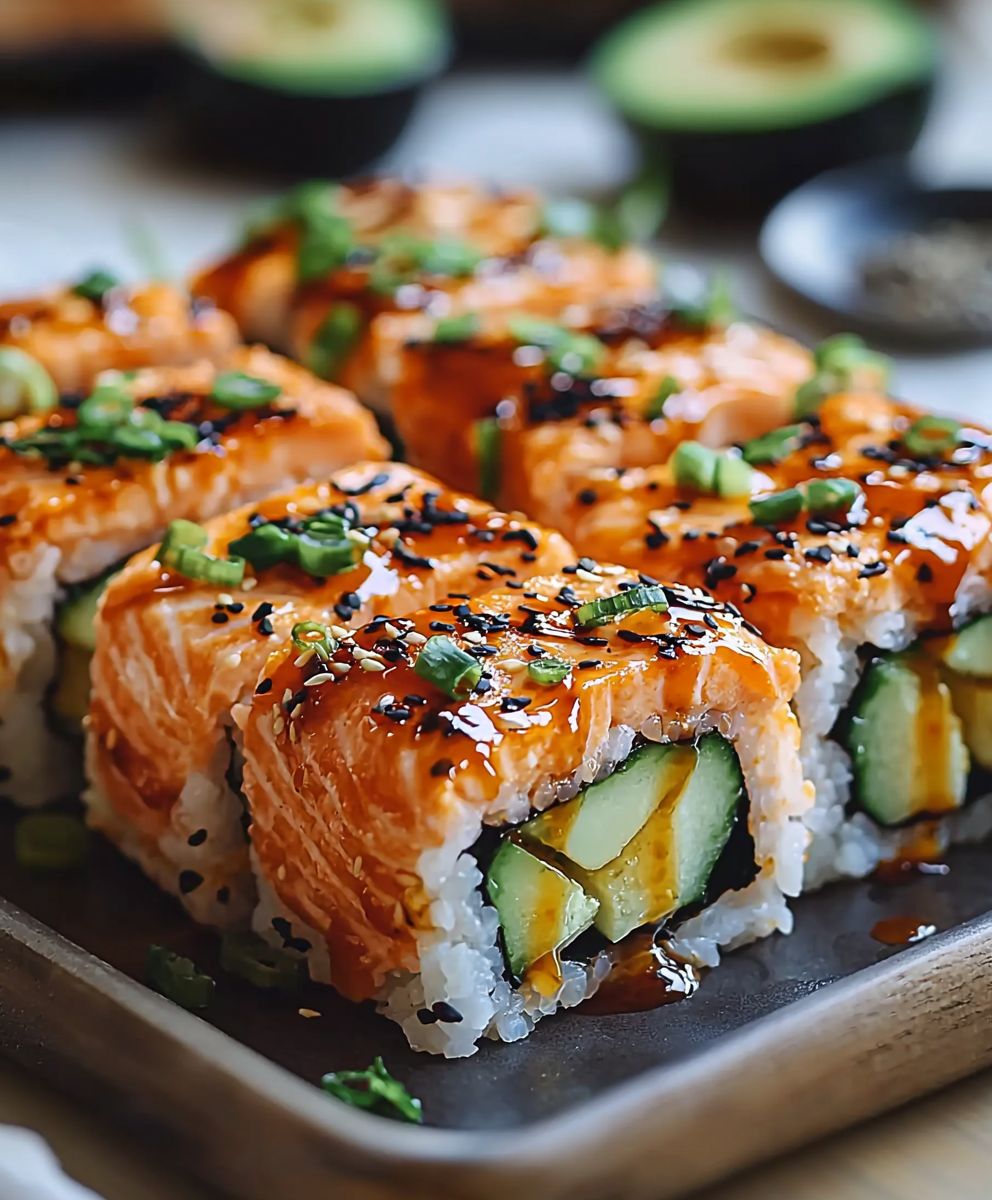
Spicy Salmon Sushi Bake: Prepare to ditch the sushi restaurant and embrace the easiest, most satisfying sushi experience you’ll ever have! Forget meticulously rolling individual pieces; this deconstructed delight delivers all the familiar flavors of your favorite spicy salmon roll in a fraction of the time and with minimal effort.
Sushi, traditionally a Japanese delicacy, has evolved into a global phenomenon, with countless variations and adaptations emerging across different cultures. The sushi bake, a relatively recent innovation, cleverly captures the essence of sushi in a convenient and shareable format. It’s a testament to the enduring appeal of Japanese cuisine and its ability to adapt to modern lifestyles.
What makes this Spicy Salmon Sushi Bake so irresistible? It’s the perfect harmony of textures and tastes. Imagine fluffy, seasoned sushi rice layered with a creamy, spicy salmon mixture, topped with crunchy nori seaweed and a drizzle of savory sauces. The combination of the warm rice, the cool salmon, and the fiery kick of spice is simply divine. Plus, it’s incredibly versatile! Perfect for a weeknight dinner, a potluck gathering, or even a fun date night in. It’s quick, easy, and guaranteed to impress. So, are you ready to experience sushi in a whole new way? Let’s get baking!

Ingredients:
- For the Sushi Rice:
- 2 cups sushi rice
- 2 1/4 cups water
- 1/4 cup rice vinegar
- 2 tablespoons sugar
- 1 teaspoon salt
- For the Spicy Salmon Mixture:
- 1 pound sushi-grade salmon, skin removed and finely diced
- 1/4 cup mayonnaise (Japanese mayo, like Kewpie, is preferred)
- 2-3 tablespoons sriracha (adjust to your spice preference)
- 1 tablespoon soy sauce
- 1 teaspoon sesame oil
- 1 tablespoon masago or tobiko (optional, for extra flavor and texture)
- 1 green onion, thinly sliced
- For the Toppings:
- 2 sheets nori seaweed, cut into small strips or squares
- 1 avocado, thinly sliced
- Sesame seeds (black and white)
- Spicy mayo (extra for drizzling, optional)
- Eel sauce (optional)
- Green onions, thinly sliced (for garnish)
- Crispy fried onions (optional)
- Equipment:
- 9×13 inch baking dish
- Large pot with lid
- Mixing bowls
- Spatula
Preparing the Sushi Rice:
- Rinse the Rice: This is a crucial step! Place the sushi rice in a fine-mesh sieve and rinse it under cold running water until the water runs clear. This usually takes about 3-5 minutes. Swirling the rice gently with your hand helps remove excess starch.
- Cook the Rice: In a large pot, combine the rinsed rice and 2 1/4 cups of water. Bring the mixture to a boil over high heat. Once boiling, reduce the heat to low, cover the pot tightly, and simmer for 18 minutes. It’s important not to lift the lid during this time, as the steam is essential for cooking the rice properly.
- Rest the Rice: After 18 minutes, remove the pot from the heat and let it sit, covered, for another 10 minutes. This allows the rice to fully absorb the remaining moisture and become perfectly fluffy.
- Prepare the Sushi Vinegar: While the rice is resting, prepare the sushi vinegar. In a small saucepan or microwave-safe bowl, combine the rice vinegar, sugar, and salt. Heat gently over low heat or in the microwave for about 30 seconds, stirring until the sugar and salt are completely dissolved. Be careful not to boil the mixture.
- Season the Rice: Gently transfer the cooked rice to a large, non-metallic bowl (wood or glass is best). Pour the sushi vinegar mixture over the rice. Using a rice paddle or a wooden spoon, gently cut and fold the vinegar into the rice. Avoid mashing the rice. You want to separate the grains, not create a paste. Fan the rice with a hand fan or a piece of cardboard while mixing to help it cool down quickly. This will give the rice a nice sheen and prevent it from becoming too sticky. Continue mixing and fanning until the rice is cooled to room temperature.
Preparing the Spicy Salmon Mixture:
- Dice the Salmon: Ensure your salmon is sushi-grade and very fresh. Remove any skin or bones. Finely dice the salmon into small, even pieces. The smaller the pieces, the better it will mix with the other ingredients.
- Combine the Ingredients: In a medium-sized mixing bowl, combine the diced salmon, mayonnaise (Kewpie is highly recommended for its richer flavor), sriracha, soy sauce, and sesame oil.
- Adjust the Spice Level: Taste the mixture and adjust the amount of sriracha to your liking. Remember that the spice level will mellow out slightly when baked, so don’t be afraid to add a little extra if you like it hot!
- Add Optional Ingredients: If you’re using masago or tobiko, gently fold it into the salmon mixture. This will add a nice pop of flavor and texture. Finally, stir in the thinly sliced green onion.
- Refrigerate (Optional): If you’re not ready to assemble the sushi bake immediately, you can cover the spicy salmon mixture and refrigerate it for up to an hour. This will allow the flavors to meld together.
Assembling and Baking the Sushi Bake:
- Preheat the Oven: Preheat your oven to 350°F (175°C).
- Prepare the Baking Dish: Lightly grease a 9×13 inch baking dish. This will prevent the rice from sticking to the bottom.
- Layer the Rice: Spread the prepared sushi rice evenly over the bottom of the baking dish. Gently press down on the rice to create a compact layer. You want it to be firm enough to hold its shape when you cut into the bake.
- Layer the Spicy Salmon: Carefully spread the spicy salmon mixture evenly over the layer of rice. Make sure to distribute it evenly so that every bite is packed with flavor.
- Bake: Place the baking dish in the preheated oven and bake for 15-20 minutes, or until the salmon is cooked through and the top is lightly browned. Keep a close eye on it to prevent the salmon from drying out.
- Cool Slightly: Remove the sushi bake from the oven and let it cool for a few minutes before adding the toppings. This will prevent the avocado from wilting.
Adding the Toppings and Serving:
- Add the Nori: Sprinkle the nori strips or squares evenly over the top of the baked salmon. The nori will add a salty, umami flavor that complements the other ingredients.
- Arrange the Avocado: Arrange the thinly sliced avocado over the nori. You can create a decorative pattern or simply scatter the slices evenly.
- Garnish: Sprinkle sesame seeds (both black and white) over the avocado. Drizzle with spicy mayo and eel sauce (if using). Garnish with thinly sliced green onions and crispy fried onions (if using).
- Cut and Serve: Using a sharp knife, cut the sushi bake into squares or rectangles. Serve immediately. You can also serve it with extra soy sauce or wasabi on the side, if desired.
- Enjoy!: This Spicy Salmon Sushi Bake is best enjoyed fresh. The combination of the warm rice, spicy salmon, creamy avocado, and crispy nori is simply irresistible!
Conclusion:
This Spicy Salmon Sushi Bake is truly a game-changer, and I wholeheartedly believe it deserves a permanent spot in your recipe rotation. Why? Because it delivers all the satisfying flavors of sushi – the creamy avocado, the tangy rice vinegar, the savory salmon – without the fuss of rolling or the expense of ordering takeout. It’s a weeknight-friendly meal that’s impressive enough for company, and honestly, it’s just plain delicious.
Think of it: flaky, perfectly cooked salmon, infused with a fiery sriracha mayo, nestled atop a bed of seasoned sushi rice and all the fixings. It’s a textural masterpiece, a flavor explosion, and a guaranteed crowd-pleaser. The best part? It’s incredibly customizable.
Serving Suggestions and Variations:
Don’t be afraid to get creative! While I’ve outlined my favorite way to prepare this Spicy Salmon Sushi Bake, there are endless possibilities to tailor it to your own tastes.
* Spice Level: If you’re sensitive to spice, start with a smaller amount of sriracha in the mayo. You can always add more later! For those who like it extra hot, consider adding a pinch of cayenne pepper or a drizzle of chili oil.
* Vegetable Power: Feel free to add other vegetables to the mix. Thinly sliced cucumbers, shredded carrots, or even edamame would be fantastic additions.
* Protein Swap: While salmon is my go-to, you could easily substitute it with tuna, shrimp, or even imitation crab meat. Just adjust the cooking time accordingly.
* Rice Alternatives: While sushi rice is traditional, you could experiment with other types of rice, such as brown rice or jasmine rice. Just be sure to adjust the seasoning to complement the flavor of the rice.
* Toppings Galore: The toppings are where you can really let your personality shine. Consider adding sesame seeds, furikake seasoning, chopped green onions, or even a sprinkle of crispy fried onions.
* Individual Servings: For a fun twist, bake the sushi bake in individual ramekins. This is perfect for portion control or for serving at a party.
* Make it Ahead: You can assemble the sushi bake ahead of time and bake it just before serving. This is a great option for busy weeknights. Just be sure to cover it tightly and store it in the refrigerator.
I truly believe that this recipe is a winner. It’s easy to make, incredibly versatile, and absolutely delicious. It’s the perfect way to satisfy your sushi cravings without breaking the bank or spending hours in the kitchen.
So, what are you waiting for? Gather your ingredients, preheat your oven, and get ready to experience the magic of this Spicy Salmon Sushi Bake. I’m confident that you’ll love it as much as I do.
And now, the most important part: I want to hear from you! Once you’ve tried this recipe, please come back and share your experience in the comments below. Let me know what variations you tried, what toppings you added, and how much you enjoyed it. Your feedback is invaluable, and it helps me to create even better recipes for you in the future. Happy baking (or should I say, baking-sushi-ing)! I can’t wait to hear all about your culinary adventures with this delightful dish. Don’t forget to snap a picture and tag me on social media – I’d love to see your creations!
Spicy Salmon Sushi Bake: The Ultimate Recipe & Guide
Deconstructed spicy salmon sushi in an easy-to-make bake! Layers of seasoned sushi rice, spicy salmon, creamy avocado, and crispy nori make this a crowd-pleasing dish.
Ingredients
- 2 cups sushi rice
- 2 1/4 cups water
- 1/4 cup rice vinegar
- 2 tablespoons sugar
- 1 teaspoon salt
- 1 pound sushi-grade salmon, skin removed and finely diced
- 1/4 cup mayonnaise (Japanese mayo, like Kewpie, is preferred)
- 2-3 tablespoons sriracha (adjust to your spice preference)
- 1 tablespoon soy sauce
- 1 teaspoon sesame oil
- 1 tablespoon masago or tobiko (optional, for extra flavor and texture)
- 1 green onion, thinly sliced
- 2 sheets nori seaweed, cut into small strips or squares
- 1 avocado, thinly sliced
- Sesame seeds (black and white)
- Spicy mayo (extra for drizzling, optional)
- Eel sauce (optional)
- Green onions, thinly sliced (for garnish)
- Crispy fried onions (optional)
Instructions
- Rinse the Rice: Place the sushi rice in a fine-mesh sieve and rinse it under cold running water until the water runs clear (3-5 minutes). Swirl gently to remove excess starch.
- Cook the Rice: In a large pot, combine the rinsed rice and 2 1/4 cups of water. Bring to a boil over high heat. Reduce heat to low, cover tightly, and simmer for 18 minutes. Do not lift the lid.
- Rest the Rice: Remove from heat and let sit, covered, for 10 minutes.
- Prepare the Sushi Vinegar: In a small saucepan or microwave-safe bowl, combine rice vinegar, sugar, and salt. Heat gently until dissolved (about 30 seconds). Do not boil.
- Season the Rice: Gently transfer the cooked rice to a large, non-metallic bowl. Pour the sushi vinegar mixture over the rice. Using a rice paddle or wooden spoon, gently cut and fold the vinegar into the rice. Avoid mashing. Fan the rice while mixing to cool it quickly. Continue until cooled to room temperature.
- Dice the Salmon: Ensure salmon is sushi-grade and very fresh. Remove any skin or bones. Finely dice the salmon into small, even pieces.
- Combine the Ingredients: In a medium bowl, combine diced salmon, mayonnaise (Kewpie recommended), sriracha, soy sauce, and sesame oil.
- Adjust the Spice Level: Taste and adjust sriracha to your liking.
- Add Optional Ingredients: If using, gently fold in masago or tobiko. Stir in thinly sliced green onion.
- Refrigerate (Optional): Cover and refrigerate for up to an hour to allow flavors to meld.
- Preheat the Oven: Preheat oven to 350°F (175°C).
- Prepare the Baking Dish: Lightly grease a 9×13 inch baking dish.
- Layer the Rice: Spread the prepared sushi rice evenly over the bottom of the baking dish. Gently press down to create a compact layer.
- Layer the Spicy Salmon: Carefully spread the spicy salmon mixture evenly over the layer of rice.
- Bake: Bake for 15-20 minutes, or until the salmon is cooked through and the top is lightly browned.
- Cool Slightly: Remove from the oven and let cool for a few minutes before adding toppings.
- Add the Nori: Sprinkle nori strips or squares evenly over the top of the baked salmon.
- Arrange the Avocado: Arrange the thinly sliced avocado over the nori.
- Garnish: Sprinkle sesame seeds over the avocado. Drizzle with spicy mayo and eel sauce (if using). Garnish with thinly sliced green onions and crispy fried onions (if using).
- Cut and Serve: Cut into squares or rectangles. Serve immediately. Serve with extra soy sauce or wasabi on the side, if desired.
Notes
- Using sushi-grade salmon is crucial for safety.
- Kewpie mayonnaise adds a richer flavor, but regular mayonnaise can be substituted.
- Adjust the amount of sriracha to your spice preference.
- Fanning the rice helps it cool quickly and gives it a nice sheen.
- Be careful not to overbake the salmon, as it can dry out.
- This dish is best enjoyed fresh.