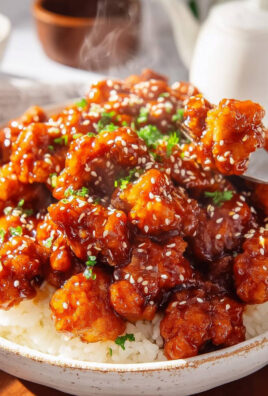
Japanese Katsu Bowls are a delightful fusion of flavors and textures that transport you straight to the heart of Japan with every bite. This dish, featuring crispy breaded meat served over a bed of fluffy rice, has become a beloved staple not just in Japanese cuisine but around the world. The origins of katsu can be traced back to the late 19th century, when Western-style breaded cutlets were introduced to Japan, evolving into the delicious katsu we know today.
What I love most about Japanese Katsu Bowls is their incredible versatility and convenience. Whether you choose chicken, pork, or even tofu, the satisfying crunch of the katsu paired with the savory sauce and tender rice creates a comforting meal that is both hearty and fulfilling. It’s no wonder that people adore this dish; the combination of flavors and textures makes it a favorite for family dinners or a quick weeknight meal. Join me as we explore how to create your very own Japanese Katsu Bowl at home!

Ingredients:
- For the Katsu:
- 2 boneless chicken breasts (or pork loin, if preferred)
- Salt and pepper, to taste
- 1/2 cup all-purpose flour
- 2 large eggs
- 1 cup panko breadcrumbs
- Vegetable oil, for frying
- For the Rice:
- 2 cups Japanese short-grain rice
- 2 1/2 cups water
- 1 tablespoon rice vinegar
- 1 tablespoon sugar
- 1 teaspoon salt
- For the Sauce:
- 1/4 cup tonkatsu sauce (or store-bought if you prefer)
- 1 tablespoon soy sauce
- 1 teaspoon sesame oil
- For Garnish:
- Chopped green onions
- Shredded cabbage
- Sesame seeds
Preparing the Rice
1. Start by rinsing the rice. Place the 2 cups of Japanese short-grain rice in a fine-mesh strainer and rinse it under cold water. Swirl the rice with your hand to remove excess starch until the water runs clear. This step is crucial for achieving that perfect sticky texture. 2. Once rinsed, transfer the rice to a medium-sized pot and add 2 1/2 cups of water. Let the rice soak for about 30 minutes. This soaking time helps the rice grains absorb water and cook evenly. 3. After soaking, cover the pot with a lid and bring the water to a boil over medium-high heat. Once it starts boiling, reduce the heat to low and let it simmer for about 15 minutes. Do not lift the lid during this time, as it will release steam. 4. After 15 minutes, turn off the heat and let the rice sit, covered, for another 10 minutes. This resting period allows the rice to finish cooking and become fluffy. 5. In a small bowl, mix together the rice vinegar, sugar, and salt until dissolved. Once the rice has rested, transfer it to a large bowl and gently fold in the vinegar mixture. Be careful not to mash the rice; you want to keep it fluffy. Set aside while you prepare the katsu.Preparing the Katsu
6. While the rice is cooking, let’s prepare the katsu. Start by placing the chicken breasts between two sheets of plastic wrap. Using a meat mallet or rolling pin, pound the chicken to an even thickness of about 1/2 inch. This ensures that the chicken cooks evenly and stays juicy. 7. Season both sides of the chicken with salt and pepper. This step is essential for flavoring the meat. 8. Set up a breading station. In one shallow dish, place the flour. In a second dish, beat the 2 large eggs. In a third dish, add the panko breadcrumbs. 9. Dredge each piece of chicken in the flour, shaking off any excess. Then dip it into the beaten eggs, allowing any excess to drip off. Finally, coat the chicken in the panko breadcrumbs, pressing gently to ensure the breadcrumbs adhere well. Repeat this process for both chicken breasts. 10. In a large skillet, heat about 1/2 inch of vegetable oil over medium heat. To test if the oil is hot enough, drop a small piece of bread into the oil; if it sizzles and bubbles, it’s ready. 11. Carefully place the breaded chicken into the hot oil. Fry for about 4-5 minutes on each side, or until golden brown and cooked through. The internal temperature should reach 165°F (75°C). If you’re cooking pork, the internal temperature should reach 145°F (63°C). 12. Once cooked, transfer the katsu to a paper towel-lined plate to drain any excess oil. Let it rest for a few minutes before slicing it into strips.Preparing the Sauce
13. While the katsu is resting, let’s whip up the sauce. In a small bowl, combine the tonkatsu sauce, soy sauce, and sesame oil. Mix well until combined. This sauce adds a delicious umami flavor to the dish.Assembling

Conclusion:
In summary, Japanese Katsu Bowls are an absolute must-try for anyone looking to indulge in a delicious and satisfying meal. The combination of crispy, golden-brown katsu, fluffy rice, and savory sauce creates a flavor explosion that is sure to please your taste buds. Plus, the versatility of this dish means you can easily customize it to suit your preferences. Whether you prefer chicken, pork, or even a vegetarian option with eggplant or tofu, there’s a katsu for everyone! For serving suggestions, consider adding a side of pickled vegetables or a fresh salad to balance out the richness of the katsu. You can also experiment with different sauces, like a tangy ponzu or a spicy mayo, to give your bowl a unique twist. If you’re feeling adventurous, try topping your katsu bowl with a soft-boiled egg or some fresh avocado for an extra layer of flavor and texture. I encourage you to give this Japanese Katsu Bowl recipe a try and make it your own! Don’t forget to share your experience with friends and family, and let them know how much you enjoyed this delightful dish. Whether you’re cooking for yourself or hosting a dinner party, I promise that this recipe will impress and satisfy. So roll up your sleeves, gather your ingredients, and dive into the wonderful world of Japanese Katsu Bowls—you won’t regret it! PrintJapanese Katsu Bowls: A Delicious Guide to Making Authentic Katsu at Home

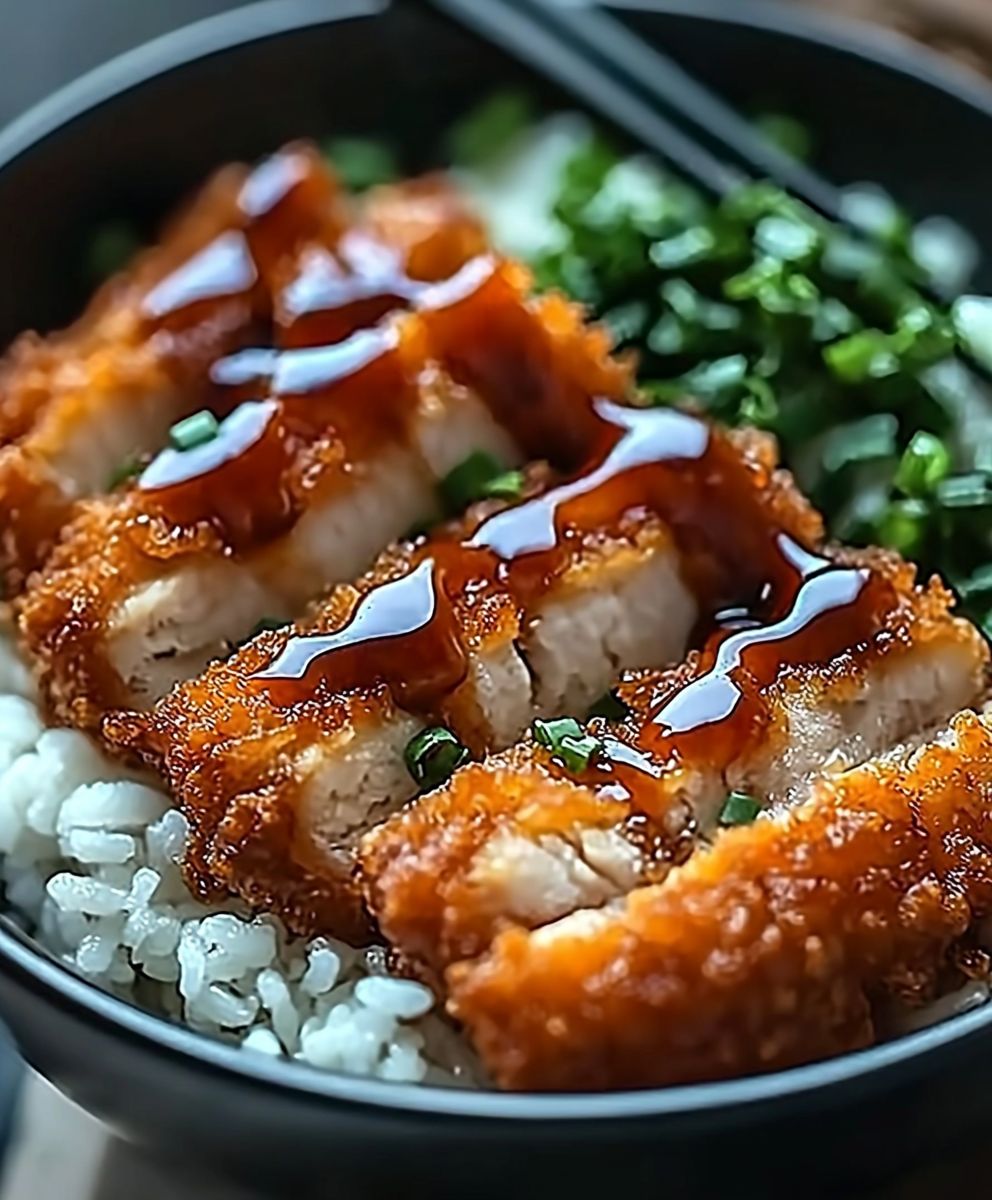
Savor the flavors of homemade Chicken Katsu, featuring crispy, golden-brown chicken served over fluffy Japanese rice and drizzled with a savory sauce. This comforting dish is perfect for any day of the week!
- Prep Time: 30 minutes
- Cook Time: 30 minutes
- Total Time: 60 minutes
- Yield: 4 servings 1x
Ingredients
- 2 boneless chicken breasts (or pork loin, if preferred)
- Salt and pepper, to taste
- 1/2 cup all-purpose flour
- 2 large eggs
- 1 cup panko breadcrumbs
- Vegetable oil, for frying
- 2 cups Japanese short-grain rice
- 2 1/2 cups water
- 1 tablespoon rice vinegar
- 1 tablespoon sugar
- 1 teaspoon salt
- 1/4 cup tonkatsu sauce (or store-bought if you prefer)
- 1 tablespoon soy sauce
- 1 teaspoon sesame oil
- Chopped green onions
- Shredded cabbage
- Sesame seeds
Instructions
- Rinse the rice in a fine-mesh strainer under cold water until the water runs clear.
- Transfer the rinsed rice to a medium pot and add 2 1/2 cups of water. Soak for 30 minutes.
- Cover the pot and bring to a boil over medium-high heat. Once boiling, reduce heat to low and simmer for 15 minutes without lifting the lid.
- Turn off the heat and let the rice sit, covered, for another 10 minutes.
- In a small bowl, mix rice vinegar, sugar, and salt until dissolved. Gently fold this mixture into the rice and set aside.
- Pound the chicken breasts between plastic wrap to an even thickness of about 1/2 inch.
- Season both sides with salt and pepper.
- Set up a breading station with flour, beaten eggs, and panko breadcrumbs in separate shallow dishes.
- Dredge each chicken piece in flour, dip in eggs, and coat with panko, pressing gently to adhere.
- Heat 1/2 inch of vegetable oil in a large skillet over medium heat. Test the oil with a small piece of bread; it should sizzle.
- Fry the breaded chicken for 4-5 minutes on each side until golden brown and cooked through (internal temperature should reach 165°F for chicken, 145°F for pork).
- Transfer cooked katsu to a paper towel-lined plate to drain excess oil and let rest before slicing.
- In a small bowl, combine tonkatsu sauce, soy sauce, and sesame oil. Mix well.
- Serve the sliced katsu over the rice, drizzle with sauce, and garnish with chopped green onions, shredded cabbage, and sesame seeds.
Notes
- For a gluten-free option, substitute the flour and panko breadcrumbs with gluten-free alternatives.
- You can also add a side of pickled vegetables for extra flavor and crunch.